by Tracy | Apr 19, 2024 | Card Sampler, Designer Series Paper, Die-Cutting, Embossing Folders
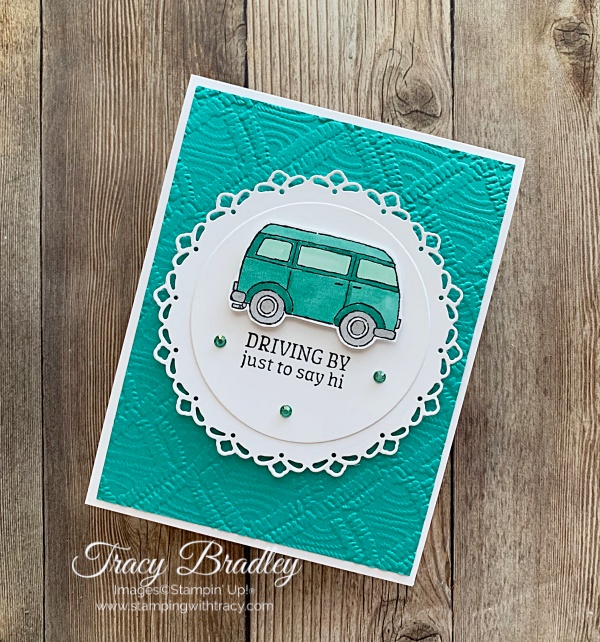
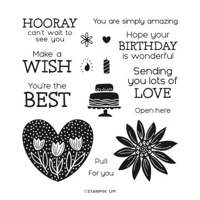
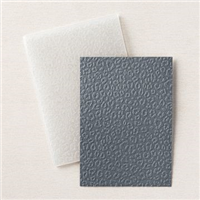
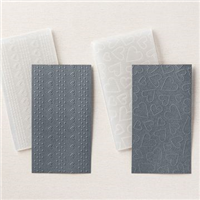
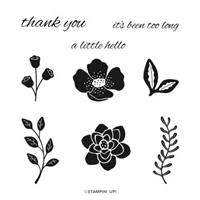
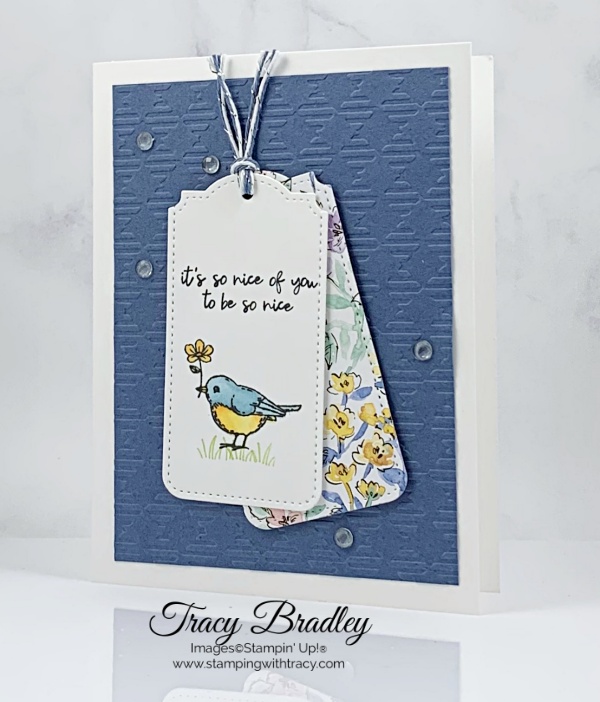
Today’s cards feature the stamp set, Hooray for Surprises, Countryside Inn Designer Series Paper, Something Fancy Dies and one new product that will be available May 1st, the Eyelet 3D Embossing Folder. The Countryside Inn Designer Series Paper is on the Low Inventory list right now and could go out of stock soon but it is NOT retiring, in fact, none of the products on today’s card will be retiring.


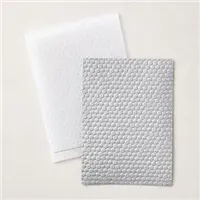
I started with a piece of Boho Blue cardstock for the base of my card and then embossed a piece of Basic White cardstock using the Eyelet 3D Embossing Folder (available May 1st). I adhered the embossed piece to the front of the card.


Next, I layered another piece of Basic White cardstock that I embossed onto a piece of Boho Blue cardstock and then adhered it to the front of the card. Then, I layered a piece of Countryside Inn Designer Series Paper to a another piece of Boho Blue cardstock and adhered it to the front of the card.


I stamped the sentiment in Night of Navy ink onto Basic White cardstock using the stamp set, Hooray for Surprises. I cut the sentiment out using the Something Fancy Dies and then cut the next larger size die out of Boho Blue cardstock. I layered the sentiment to the Boho Blue cardstock, added Stampin’ Dimensionals to the back and adhered it to the front of the card. To complete my card, I added a piece of Basic White cardstock to the inside.
Here’s another version using Balmy Blue cardstock and all the same products as the other card.

For this card I used Night of Navy cardstock and all the same products as the other two cards.

Bundle Alert: The Hooray for Surprises Bundle includes the Hooray for Surprises stamp set and Hooray for Surprises Dies.

Supply List
Below you’ll find all the Stampin’ Up! supplies I used for today’s card. If you need any stamping supplies, I’d love to be your demonstrator! You can place an order by clicking any of the images below to go to my Stampin’ Up! online store. The Specialty Plate is used with 3D Embossing Folders.
I also used the Eyelet 3D Embossing Folder #163414 which will be available on May 1st when the new Annual Catalog goes live.
Measurements
- Boho Blue, Night of Navy or Balmy Blue cardstock: 11″ x 4-1/4″ scored at 5-1/2″ OR 8-1/2″ x 5-1/2″ scored at 4-1/4″
- Boho Blue, Night of Navy or Balmy Blue cardstock: 3-3/4″ x 3-1/2″ (the 3-3/4″ side goes at the top)
- Boho Blue, Night of Navy or Balmy Blue cardstock: 4-3/4″ x 2-1/2″
- Boho Blue, Night of Navy or Balmy Blue cardstock (under sentiment): approx. 3″ x 2″
- Basic White cardstock:(2) 5-1/4″ x 4″
- Basic White cardstock: 3-1/2″ x 3-1/4″
- Basic White cardstock (sentiment):approx. 2-3/4″ x 1-3/4″
- Countryside Inn Designer Series Paper: 4-1/2″ x 2-1/4″
Last Chance Products
The Last Chance Products sale is still going on and many items are selling out. All products (whether they are on sale or not) are while supplies last! Click here to see what’s available.

Kindest Expressions Card Sampler

My Kindest Expressions Card Sampler is now available but only until this Sunday, April 21, 2024.
Two of these cards are fun folds!
To create this Card Sampler I used Perennial Lavender Designer Series Paper and the Kindest Expressions stamp set.
Two of these cards are fun folds! Place a minimum $35 or $50 order (before shipping/tax) using my special host code 9QFWAZZY and my gift to you will be my Kindest Expressions Card Sampler.
- Place a minimum $35 order (up to $49.99) and you’ll receive one each of three different cards for a total of three cards.
- Place a minimum $50 order and you’ll receive two each of three different cards for a total of six cards.
Here’s how you can earn it FREE!
- Place a minimum $35 or $50 order (before tax/shipping) at my Stampin’ Up! online store.
- Use my special Kindest Expressions Card Sampler Host Code when placing your order (see below) BUT if your order reaches $150 or more, please DO NOT use the host code so you can receive Stampin’ Rewards (free product directly from Stampin’ Up!). Once you place your order, simply drop me an email (only necessary if your order is over $150) letting me know that you’d like the Kindest Expressions Card Sampler.
- Place your order on or before April 21, 2024.
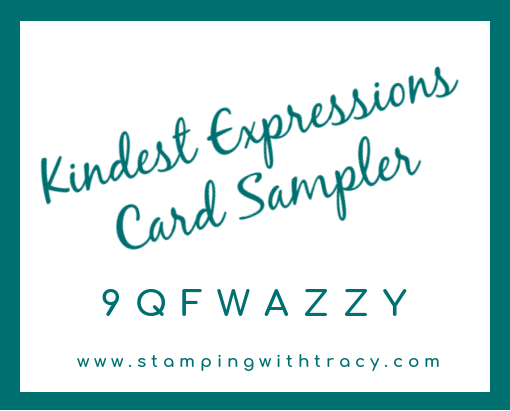
Click here for more information about my Kindest Expressions Card Sampler and what supplies you’ll need to complete it.
Mystery Boxes Are Still Available

What’s a Mystery Box?
I offered Mystery Boxes last year but I still have SO MUCH retired Stampin’ Up! product in my home and I’d like to give it all to a new home. I’ve been a demonstrator for almost 15 years so you can just imagine how much I have! I have Medium Rate Flat Rate USPS shipping boxes stuffed with retired Stampin’ Up! product.The boxes contain Designer Series Paper, stamps, dies, ribbon, embellishments and more! The boxes are already sealed and every box will be different and a mystery as to what’s inside! The value of each box is well over $200.
All of the products in the Mystery Boxes have retired but some have never been used, some are used and all are “as is”. Some of the stamp sets are wood mount.

There are two ways to get a Mystery Box
- Place a $125 or more order (before shipping/tax) at my Stampin’ Up! online store using the host code HS2RTGAS. I will send a Mystery Box to you as a free gift and I’ll even pay the postage! Using the host code will alert me that you want a Mystery Box. If your order is $150 or more, please DO NOT use the host code so you can receive Stampin’ Rewards (free product) directly from Stampin’ Up!. After you’ve placed your order (only if your order is $150 or more), please email me that you’d like a Mystery Box (click “Email Me” on the sidebar).
- If you don’t want to place an order, you can purchase a Mystery Box for $80 plus $15.00 postage. Email me that you want a box and I’ll send you a PayPal invoice (click “Email Me” on the sidebar).
More Information
- You must use the host code HS2RTGAS when placing your order (if your order is over $150, do not use the host code – see above)
- $125 order must be before tax/shipping amount
- One box per order
- Using the host code will let me know you want a Mystery Box
- You’ll receive at least TWO Bradley Points with your order
- No refunds or exchanges.
- All boxes have two Designer Series Paper packages, at least three die bundles, an additional four stamp sets and other goodies added in.
- Each box will be different and a mystery! The boxes are already sealed up and I’m unable to take requests for the contents of the boxes.
- Once all the boxes are gone, I’ll update this page.
- Feel free to email me before placing an order to see if I have boxes available.
- Only available while supplies last.

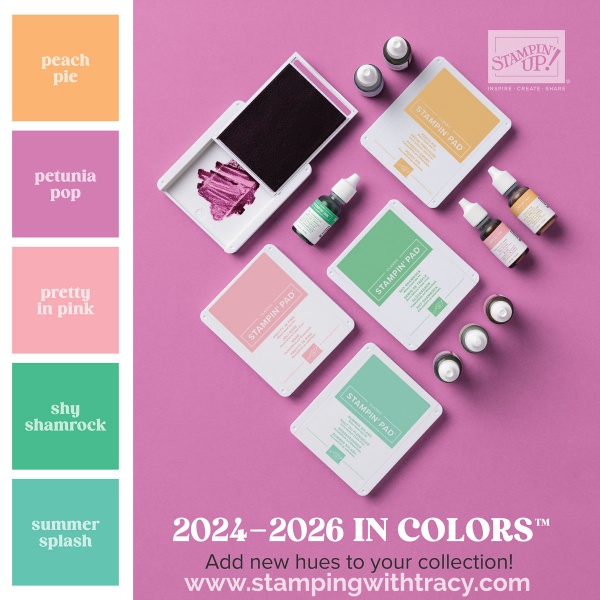
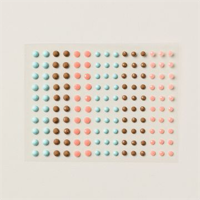
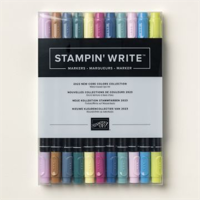
New Stampin’ Up! In Colors!
Here’s a look at the new upcoming In Colors! These new colors will be available on May 1, 2024, when the new Annual Catalog goes live!
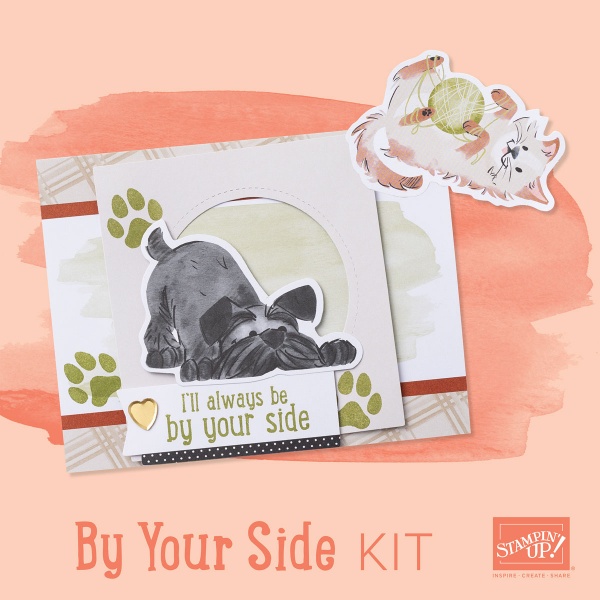
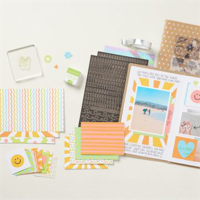
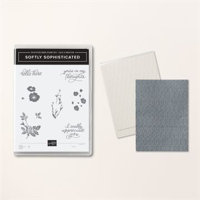
Stampin’ Up! Has Released Two New Papercrafting Kits
For more information about these kits, click on the images below
.

Price Increase
Stampin’ Up! will be raising prices in the new Annual Catalog. Prices will go up on May 1st but some products may become unavailable before that. Here’s a few of the products that will see a price increase:
- Solid Color cardstock (price will increase $1.50)
- Basic White & Very Vanilla cardstock (price will increase $2.50)
- Basic White Thick Cardstock (will increase $2.25)
- Basic White Medium Envelopes (will increase $2.50)
- Ink Refills (will increase .50)
- Mini Glue Dots (will increase $1.50)
- Stampin’ Blends (will increase $1.00)
- Multipurpose Liquid Glue (will increase .50)
- Glue Dots (will increase $1.50)
- Stampin’ Cut & Emboss Machine Standard Size (will increase $2.00)
- Stampin’ Cut & Emboss Plates Standard Size (will increase $1.00)
- Punches (will increase $1.00)
- Watercolor Pencils #1 (will increase $2.00)
- Watercolor Pencils #2 (will increase $1.50)
- Blender Pens (will increase $1.00)
- Embossing Paste (will increase $1.00)
- Heat Tool (will increase $1.00)
- Paper Snips Scissors (will increase $1.00)
- Paper Trimmer (will increase $2.00)
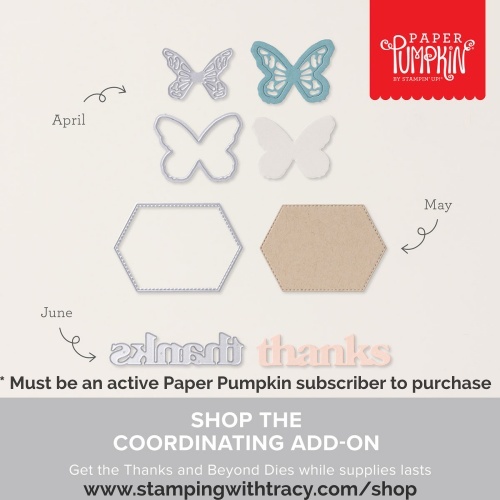
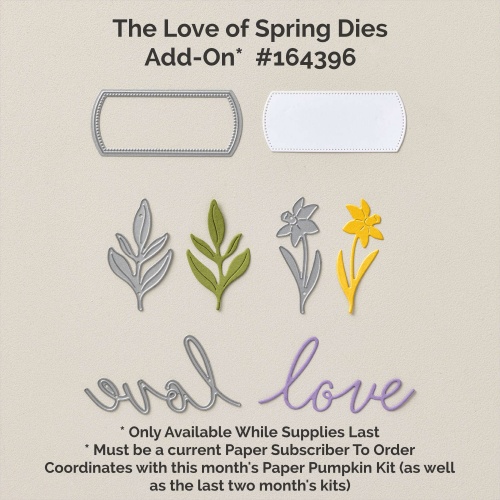
The Best There Is Paper Pumpkin Kit
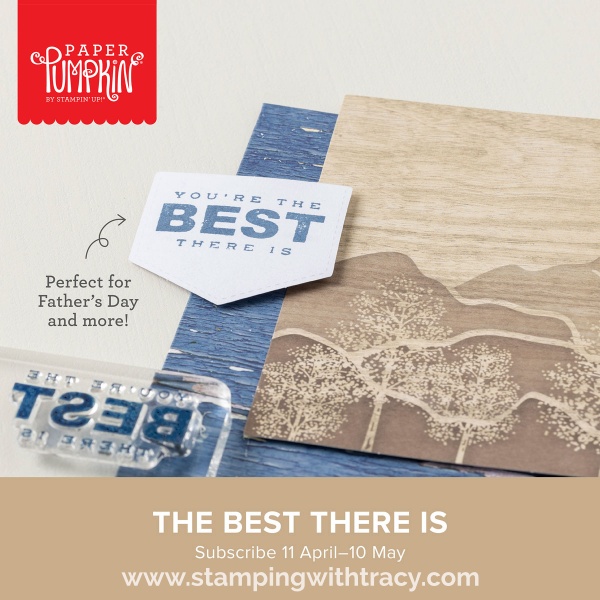
Click here to purchase The Best There Is Paper Pumpkin Kit!
Purchase the coordinating Thanks & Beyond Dies (only available to active Paper Pumpkin subscribers).
Thanks for stopping by today!
by Tracy | Feb 14, 2024 | Blending Brushes, Designer Series Paper, Embossing Folders, Thankful for You
Happy Valentine’s Day!
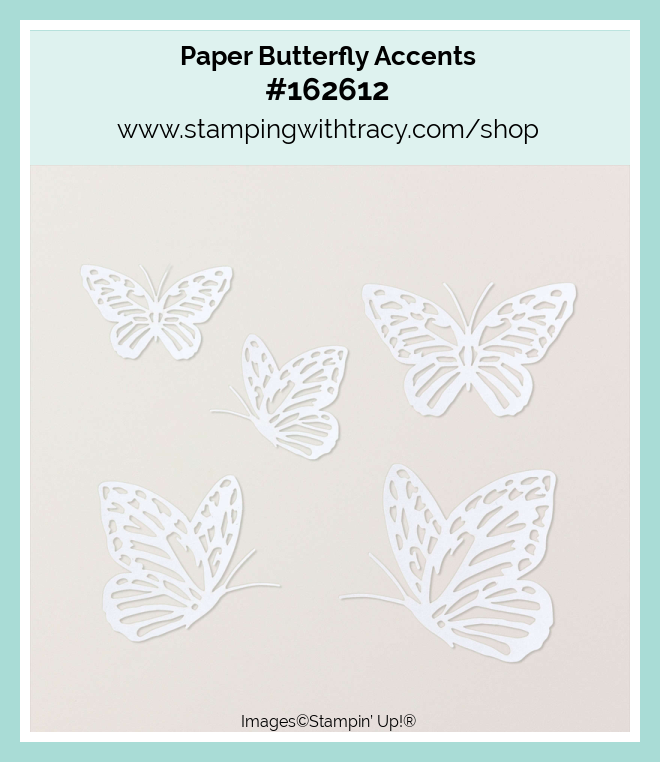
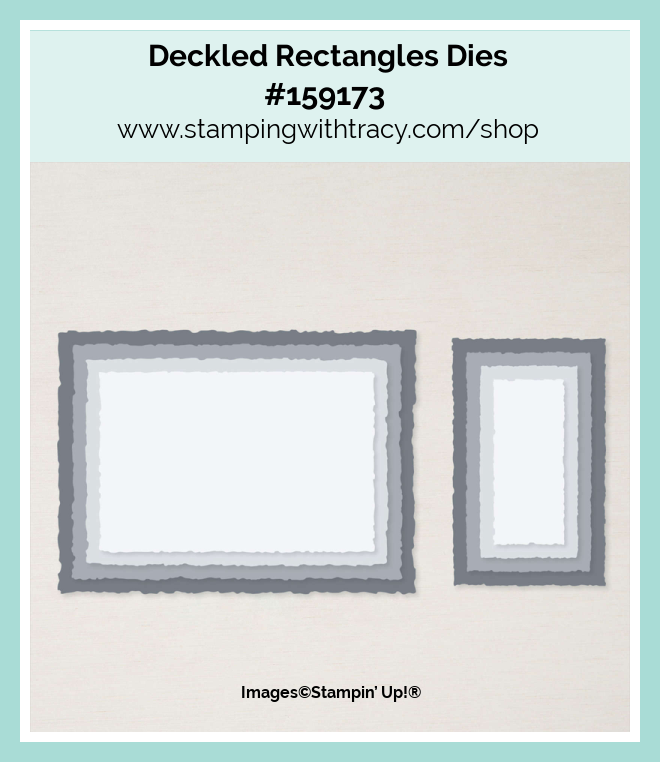
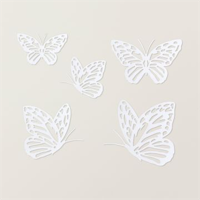
Today’s card was created using Perennial Lavender Designer Series Paper, the So Sincere stamp set, Paper Butterfly Accents, Deckled Rectangles Dies and one of the Basics 3D Embossing Folders.
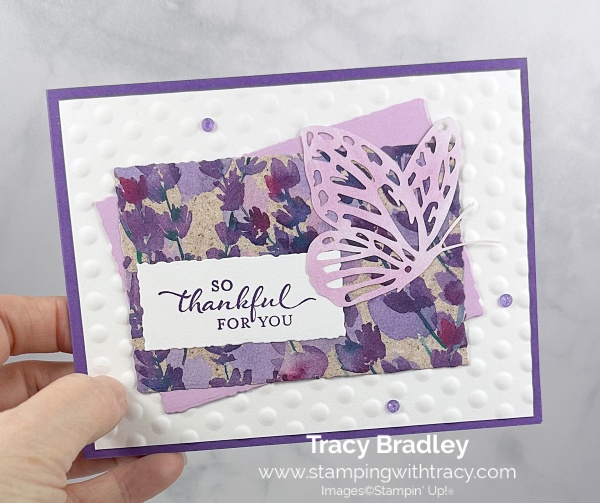
I started with Gorgeous Grape cardstock for the base of my card. Then, I embossed a piece of Basic White cardstock using one of the Basics 3D Embossing Folders and my Stampin’ Cut & Emboss Machine and then I adhered it to the front of the card.
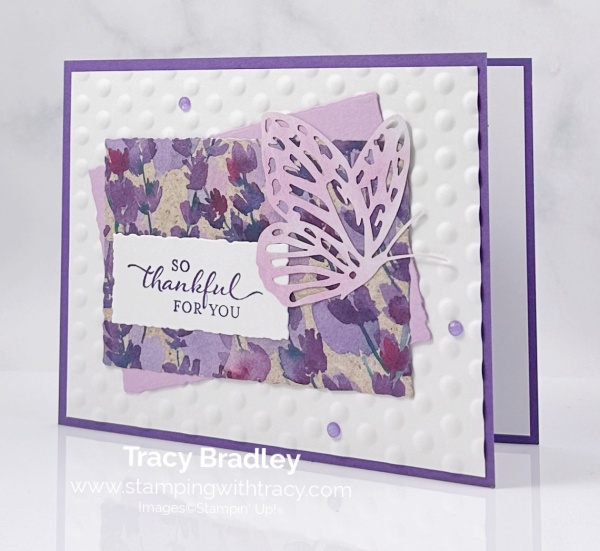

Next I cut a piece of Fresh Freesia cardstock and Perennial Lavender Designer Series Paper with the Deckled Rectangles Dies. I adhered the Fresh Freesia rectangle at an angle and then adhered the DSP rectangle.
I stamped my sentiment on Basic White cardstock using Gorgeous Grape ink and the stamp set, So Sincere. I cut it out using the Deckled Rectangles Dies. I didn’t use Stampin’ Dimensionals for this card (shock!!!) and adhered it to the Designer Series Paper. You can’t add Stampin’ Dimensionals to the back of the butterfly, which is why I didn’t pop up the sentiment with Dimensionals.
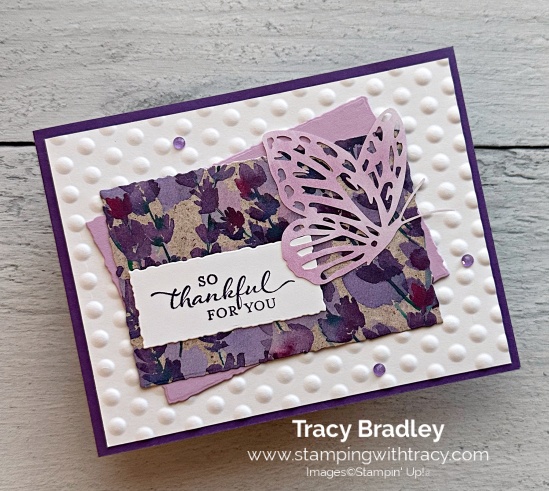

I used a Blending Brush to add color to my butterfly (there are 40 butterflies in one package of Paper Butterfly Accents) with Fresh Freesia ink. Then, I added Multipurpose Glue to the back and placed it on my card. To finish my card, I added three Purple Fine Glimmer Gems and added a piece of Basic White cardstock to the inside.
Supply List
Below you’ll find all the Stampin’ Up! supplies I used for today’s card. If you need any stamping supplies, I’d love to be your demonstrator! You can place an order by clicking any of the images below to go to my Stampin’ Up! online store.
The Specialty Plate is used with 3D Embossing Folders.
Measurements
- Gorgeous Grape cardstock: 11″ x 4-1/4″ score at 5-1/2″ or 8-1/2″ x 5-1/2″ score at 4-1/4″
- Basic White cardstock (inside the card and embossed): (2) 5-1/4″ x 4″
- Basic White cardstock (sentiment): approx. 2-3/4″ x 1-1/2″
- Fresh Freesia cardstock: 4-1/2″ x 3″ (edited)
- Perennial Lavender Designer Series Paper: approx. 4-1/2″ x 3″
Sale-a-Bration!!

Sale-a- Bration is the best time of year! For every $50 in product you purchase (before shipping/tax), you can choose from free stamps, free paper and more. If your order total is $50, you can choose one of the items listed below. If your order total is $100, you can choose (2) products from the $50 category or choose one item from the $100 category and so on and so on. There’s no limit to the amount of free gifts you can earn!
Very Important: The products (below) from the Annual Catalog have special item numbers, just for Sale-a-Bration. Be sure to add them to your order during checkout where you can select the Sale-a-Bration items of your choice (don’t manually add them in with their regular item numbers).
Here are the products you can choose from with a $50 purchase (click the images for more information about each product).
Here are the products you can choose from with a $100 purchase.
Two Weeks Left to Purchase the Starter Kit with Two Options!
The best time to purchase the Starter Kit is during Sale-A-Bration!! The Starter Kit is $99 and you’ll receive $125 in Stampin’ Up! product (shipping is always free when you purchase the Starter Kit)! The Starter Kit is truly for anyone! It’s for the person who wants to receive a 20% (to start) discount when they buy their Stampin’ Up! products. It’s also for the business minded person. There’s no risk in purchasing the Starter Kit, only perks and you get to choose what you want to add to your Starter Kit. But wait, there’s more!
When I purchased the Starter Kit in 2009, I bought it just so I could get the discount. In 2009 you didn’t have the freedom to choose the products you wanted, it came with set products. I love that Stampin’ Up! gives you the chance to now customize your kit so that you pick the products you love and know you will use. For more information about the Starter Kit, you can take a look here for some frequently asked questions. You are also welcome to email me with any questions (click EMAIL ME on the sidebar).
You have two options during Sale-a-Bration:
Option 1: Choose the Stampin’ Glass Mat Studio (Retail Value $60). If you choose this option, Stampin’ Up! will send this to you, absolutely FREE!
The heavy-duty glass mat comes printed with a ruler and grid lines for easy measuring, while the large surface space gives ample room for spreading out while paper crafting. The safety-tempered glass has a heat and scratch resistant surface that wipes clean with the included cloth and water—no chemicals needed. The reusable cloth also cleans ink off your stamps! The nonslip, heat resistant, waterproof silicone mat features four palette squares for mixing custom ink colors or for holding small ink spots in place while crafting. Each component can be used separately or you can use all three items together for a multipurpose paper crafting studio that’s both functional and elegant.
Option 2: Your choice of an additional $30 in FREE products to add to your Starter Kit!
March Paper Pumpkin Kit – Subscribe by March 10th
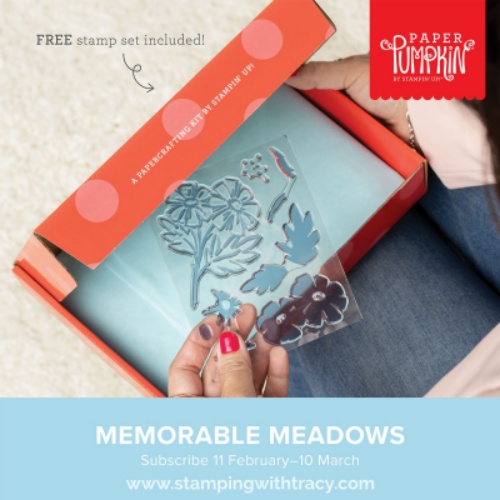
Share nature’s beauty with lovely all-occasion cards!
• Makes 9 cards: 3 each of 3 designs with 9 coordinating envelopes
• Precut vellum pieces & wood embellishments
• Coordinates with the Meandering Meadows Suite Collection (item 162745)
• Coordinating colors: Granny Apple Green, Garden Green (Classic Stampin’ Spot), Balmy Blue, Night of Navy, Gorgeous Grape, Fresh Freesia

Two New Stampin’ Up! Kits are Now Available!
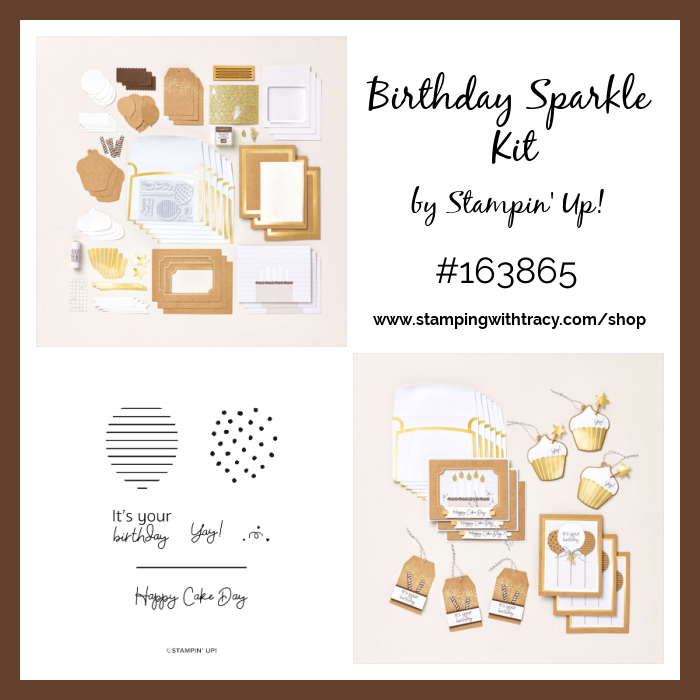
For more information or to purchase the Birthday Sparkle Kit click here.
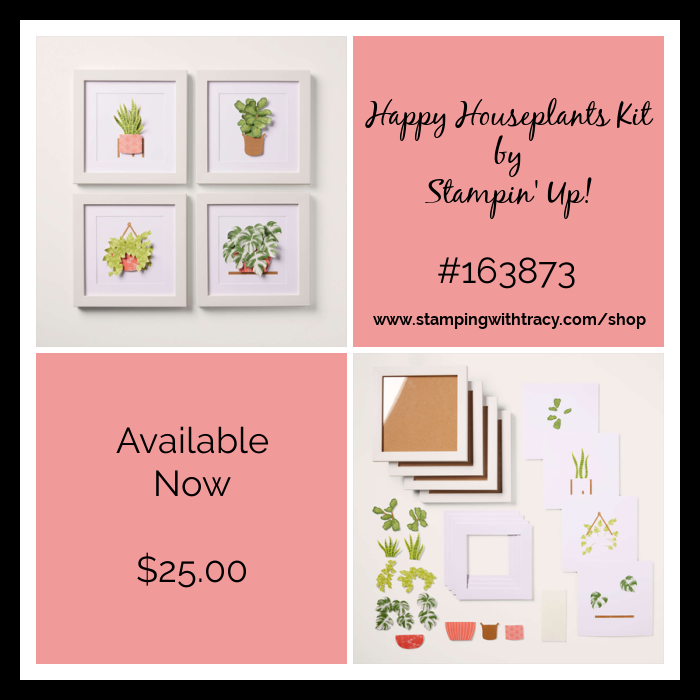
For more information or to purchase the Happy Houseplants Kits click here.
Host Code
Use the host code PGSZWAYV with your $50 or more Stampin’ Up! order and you’ll receive a package of Rainbow Adhesive-Backed Dots after the promotion has ended.To make sure you’re shopping with me, if you’re on a phone, click the three lines at the top of the page and you should see my name. If you’re on a computer, my name will be in the upper left-hand corner. Please read all the details below.
Please note: If your order is $150 or more, do NOT use the host code so you can receive the Stampin’ Rewards directly from Stampin’ Up! If you put my host code in, you will forfiet your rewards. If you’d like the Rainbow Dots, just send me an email (only if your order is $150 or more) letting me know you’d like the Rainbow Dots.


Thanks for stopping by today!
by Tracy | Mar 29, 2023 | Embossing, Embossing Folders
Demonstrators will be able to take a peek at the new Annual Catalog today at noon, Mountain Time. This catalog will go live on May 2, 2023. Later today, I will post again and let you know which colors are retiring. If you have subscribed to my blog, you will NOT get a notice that I’ve written a post. Notifications go out at 8:00 am Pacific each morning so any post I write after eight in the morning, goes out the following day to my post notification subscribers. You’ll have to come back here later today to check my blog post.
I am currently at my mom’s as she’s having surgery this Friday. My blog posts may be sporadic for the next week or so. I’m trying to schedule my posts ahead of time but it may not happen. Thanks for your understanding.
UPDATE: All the Mystery Boxes are Gone! I will have more in the near future! Update on Mystery Boxes: I have one box left. PLEASE contact me if you’d like one before placing your order so you aren’t disappointed that I don’t have one for you. Please see THIS POST for the all the information about my Mystery Boxes, including the host code.
Today’s card was made using an Online Exclusive Specialty Designer Series Paper called Naturally Gilded. I also used the Painted Labels Dies, Stylish Shapes Dies, Cup of Tea stamp set and one of the Stripes & Splatters Embossing Folders.


I started with a piece of Thick Very Vanilla cardstock for the base of my card. Then I cut a piece of Gold Foil and adhered it to the base of the card. I took a piece of Very Vanilla cardstock and ran it through the Stampin’ Cut & Emboss Machine using one of the Stripes & Splatters Embossing Folders. Because this is a smaller embossing folder, I had to run it through the machine twice.


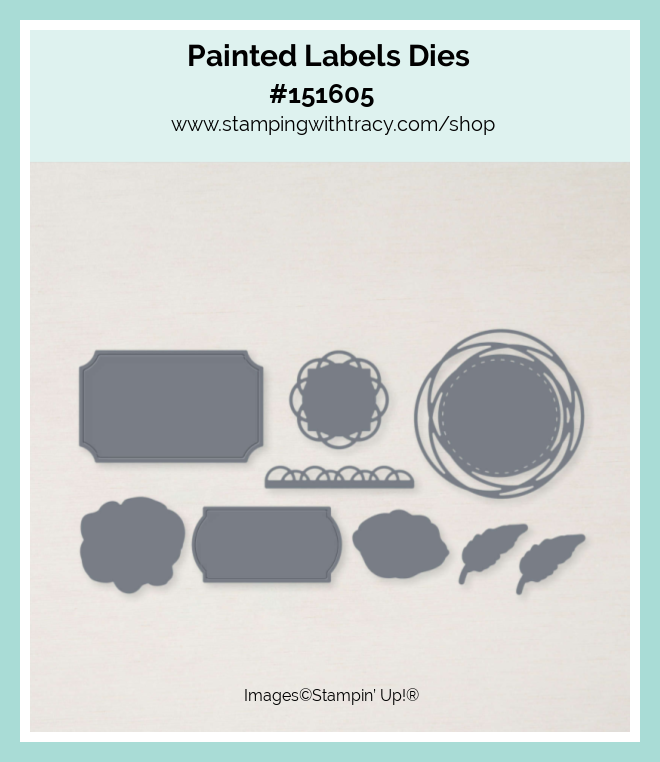
I cut a piece of Naturally Gilded Designer Series Paper and adhered it to the embossed Very Vanilla and then adhered that piece to the Gold Foil. I then embossed the sentiment using the stamp set, Cup of Tea, Versamark and Gold Embossing Powder (if you haven’t embossed before, I’ve included directions below). Embossing anything on a card always adds a bit of elegance to it, don’t you think? I used the Stylish Shapes Dies to cut the sentiment out. Next, I used the Painted Labels Dies to cut the decorative circle out of Gold Foil and then adhered the sentiment to it. I added Stampin’ Dimensionals to the back and adhered it to the front of the card.
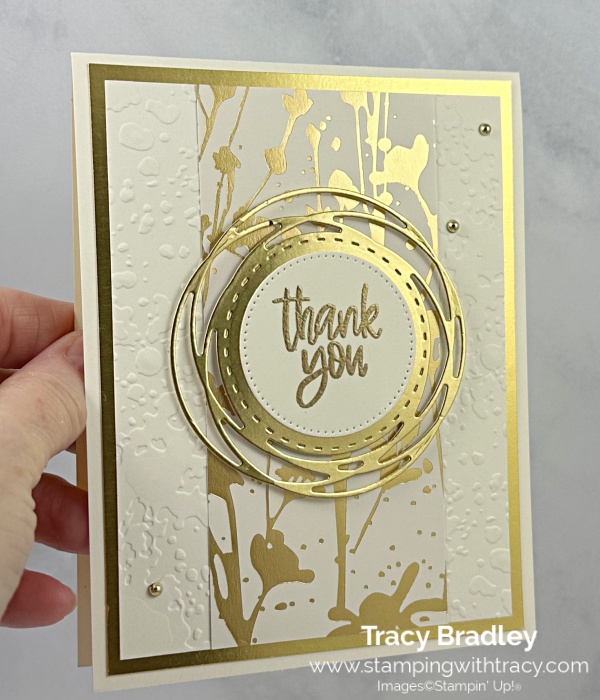
To complete my card, I added three gold Festive Pearls to the front of the card.
Here’s another version of the card using Hello, Irresistible Designer Series Paper. I didn’t want to cover up the design on the paper so I moved the panel of Designer Series Paper over to the left. I used Flirty Flamingo cardstock, Flirty Flamingo ink and Iridescent Rhinestone Basic Jewels.
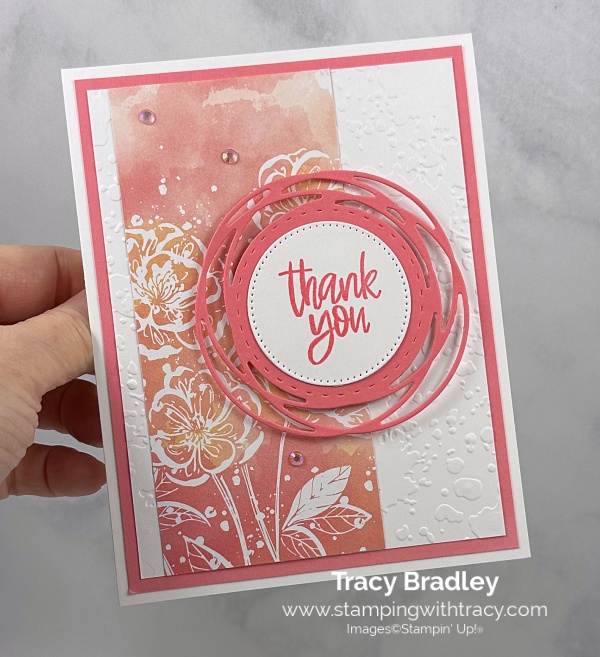

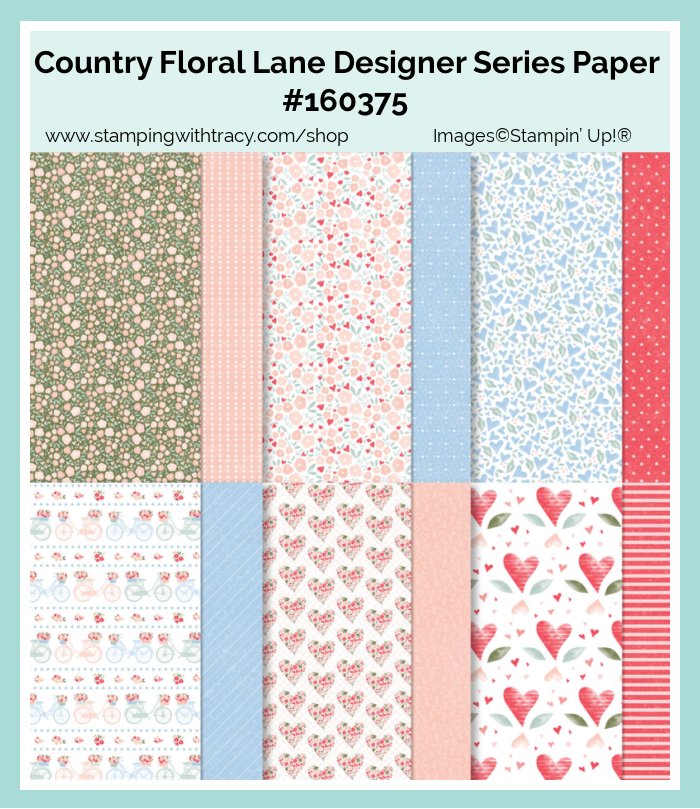
Here’s another version using Country Floral Lane Designer Series Paper, Petal Pink cardstock, Sweet Sorbet ink and Brushed Brass Butterflies.

How to Heat Emboss
Prepare your cardstock by rubbing the Embossing Buddy (an anti-static pouch that can be found in the Embossing Additions Tool Kit) over the surface of the paper as it helps keep away stray particles of embossing powder. Stamp your sentiment or image using a Versamark pad. This is very sticky ink and your embossing powder will stick right to it. Sprinkle embossing powder over the stamped image and then shake off any excess. Before applying heat to your paper, heat the Heat Tool first so your paper won’t warp (about 10 seconds). Direct the heat over your image and watch as your image becomes shiny and beautiful!
Supply List
Measurements
These measurements and colors pertain to the first card. All the measurements are the same for all three cards.
- Thick Very Vanilla cardstock: 11″ x 4-1/4″
- Very Vanilla cardstock (embossed): 5″ x 3-3/4″
- Very Vanilla cardstock (sentiment): approx. 2-1/4″ x 2-1/4″
- Gold Foil Sheet: 5-1/4″ x 4″
- Gold Foil Sheet (decorative circle): approx. 3-1/4″ x 3-1/4″
- Naturally Gilded Designer Series Paper: 5″ x 2-1/4″
Request an Annual Catalog

If you aren’t a current customer of mine, place an order at my Stampin’ Up! online store and then fill out the 2023-2024 Annual Catalog Request Form here.
If you don’t want to place an order but would like a catalog, I can send you a PayPal invoice. Simply send me an email (click the “Email Me” button on the sidebar) with your name and address. The PayPal invoice will be sent in early April when I know the cost of the catalog and postage.
I’ve had a few forms filled out by people who are not current customers of mine. Unfortunately, I will not be able to honor those requests. Complimentary copies of the catalog are a perk for those that order from me. Thanks for your understanding!
Host Code

Not sure how to use a host code? Click here!
Stampin’ Up! Colorful Kaleidoscope Kit

All the Little Things Paper Pumpkin Kit

When you subscribe to this month’s kit, you’ll get a FREE box organizer! The organizer can be customized to different sizes of compartments, depending on what you want to store. It’s a great way to keep track of products from past kits. Subscribe today to get the April kit and the free box organizer!
This kit includes:
- 9 cards, 3 each of 3 designs, and 9 coordinating envelopes.
- 1 photopolymer stamp set with celebratory sentiments.
- 1 Shaded Spruce Stampin’ Spot.
- Precut cherry blossom paper pieces with iridescent foil.
- Unique embellishments and twine.
- Adhesives to complete the projects.
- Final card size: 5-1/2” x 4-1/4”
- Coordinating Stampin’ Up! colors: Balmy Blue, Basic Black, Calypso Coral, Granny Apple Green, Petal Pink, Poppy Parade, Shaded Spruce.
- FREE box organizer
Order must be placed by April, 10, 2023
You can cancel at any time or even skip a month
Click here to order this month’s Paper Pumpkin kit!
Online Exclusives

Click here for a flyer of all the New Online Exclusives
Click here to shop the Online Exclusives
Enjoy your day!
by Tracy | Mar 30, 2022 | Embossing Folders, Uncategorized
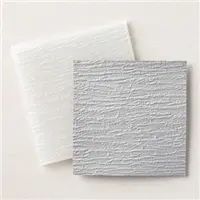
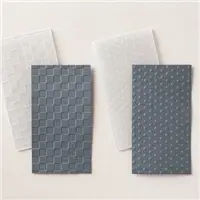
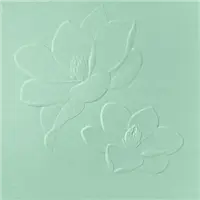
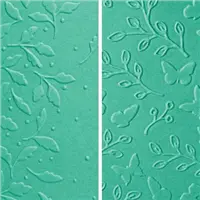
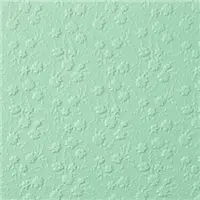
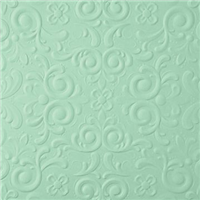
Embossing Folders!! I love them, I really do! Using an embossing folder adds so much dimension to a piece of plain cardstock and adding embossed cardstock to a card, elevates it to a whole new level. Fourteen embossing folders in the Annual Catalog are on the Last Chance List and all but two are on sale! Below I’ve listed all of the retiring embossing folders and each one is available while supplies last! If you continue to scroll down, I’m sharing cards I’ve previously shared with some of the folders on this list.
Retiring Embossing Folders
Sale: $6.00
Price: $10.00
Sale: $8.00
Price: $10.00
Sale: $6.00
Price: $10.00
Sale: $6.00
Price: $10.00
Please note that some of the products on the cards below were made with product no longer available or they are currently on the Last Chance List. If a card was made with a current, retiring product, I’ve noted it above the card and it’s included in the Supply List at the end of the post. If you have any questions, don’t hesitate to contact me.
If you click each card, you’ll be taken to the original post.
Macrame 3D Embossing Folder
Retiring: Encircled in Beauty Dies
Stamp set no longer available


Also retiring: Stitched So Sweetly Dies, Pansy Petals Designer Series Paper

Also retiring: Bloom Where You’re Planted Designer Series Paper, Genial Gems
Love of Leaves stamp set – sold out

Hammered Metal 3D Embossing Folder
Also retiring: Flowers For Every Season Ribbon Combo Pack

Tasteful Textile 3D Embossing Folder
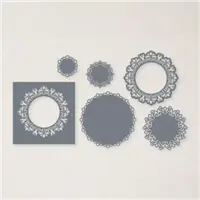
Also retiring: Ornate Frames Dies, Ornate Layers Dies


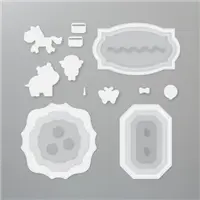
Also retiring: Hippo & Friends Dies
Designer Series Paper no longer available


Also retiring: Genial Gems, Positive Thoughts stamp set, Nature’s Thoughts Dies

Designer Series Paper no longer available

Also retiring: Expressions in Ink Designer Series Paper

Also retiring: Pansy Petals Designer Series Paper, Hippo & Friends Dies, Free as a Bird Stamp Set
Meadow Moments Embossing Folders
Also retiring: Stitched So Sweetly Dies
Designer Series Paper no longer available
Also retiring: Beauty of the Earth Designer Series Paper

Also retiring: Hand-Penned Designer Series Paper, Stitched So Sweetly Dies, Genial Gems

Bark 3D Embossing Folder

Also retiring: Pierced Blooms Dies
Ornate Floral 3D Embossing Folder
Also retiring: Gorgeous Grape 3/8″ Sheer Ribbon
Designer Series Paper no longer available, stamp set no longer available

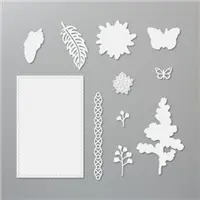
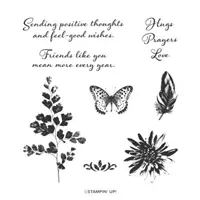
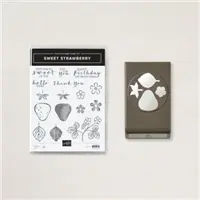
Also retiring: Stitched So Sweetly Dies, Sweet Strawberry Bundle, Sweet Strawberry stamp set, Strawberry Builder Punch
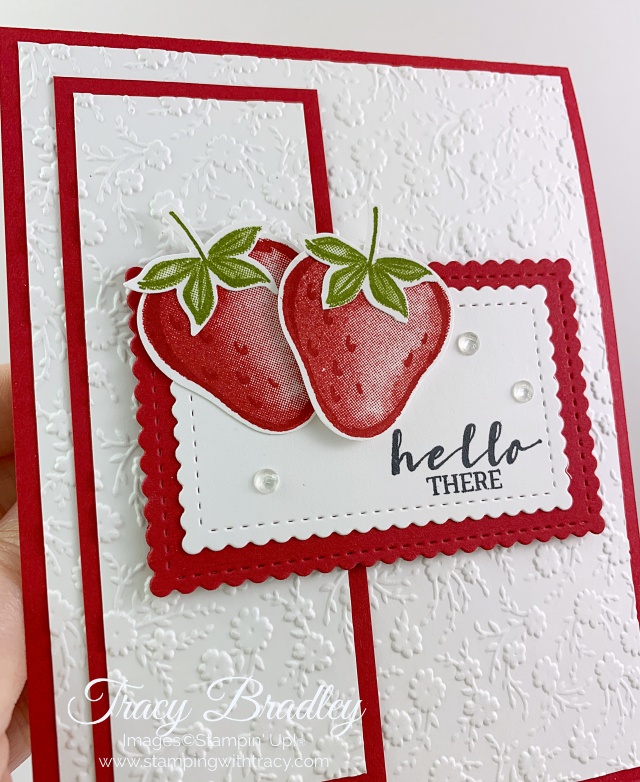
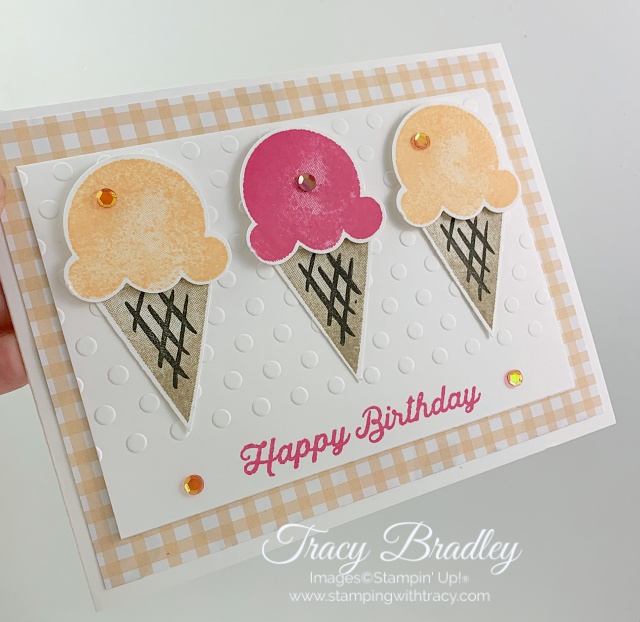
Checks & Dots Embossing Folders

Also retiring: Artistry Blooms Adhesive Backed Sequins, Ice Cream Cone Builder Punch, Sweet Ice Cream stamp set, Pansy Petals Designer Series Paper
Animal Print Embossing Folder
Also retiring: Artistry Blooms Adhesive Backed Sequins,


Retiring Products Mentioned Above
Sale: $28.80
Price: $36.00
Sale: $18.50
Price: $37.00
Sale: $27.20
Price: $34.00
Sale: $29.60
Price: $37.00
Sale: $14.50
Price: $29.00
Sale: $9.20
Price: $11.50
Sale: $9.00
Price: $18.00
Sale: $13.60
Price: $17.00
Sale: $9.00
Price: $18.00
Sale: $8.00
Price: $10.00

To see all the retiring products from the Annual Catalog, click HERE.
Thanks for stopping by today!
by Tracy | Mar 15, 2022 | Die-Cutting, Embossing Folders
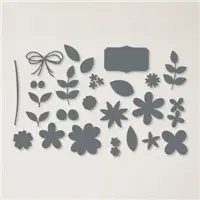
The card I’m sharing with you today was made using the Sunflowers Dies and Pansy Petals Designer Series Paper.
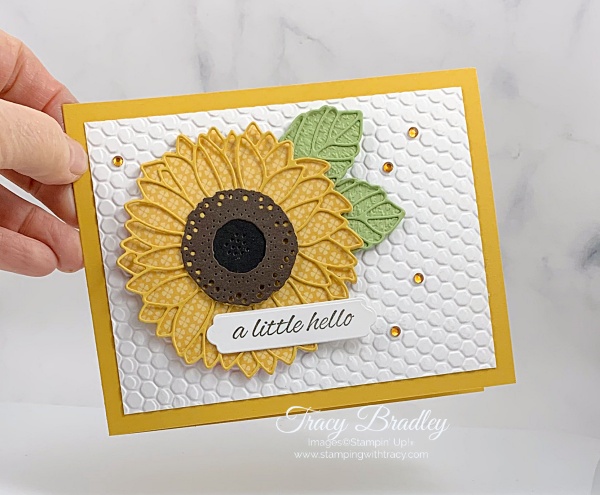
I started with a piece of Bumblebee cardstock for the card base. Then I added a layer of Basic White cardstock that I ran through the Stampin’ Cut & Emboss Machine using the Hive 3D Embossing Folder. I used the Sunflowers Dies to cut the sunflower out of Pansy Petals Designer Series Paper and the detailed part out of Bumblebee cardstock. I cut another detailed part out of Early Espresso cardstock and cut everything off so that just the middle remained. The center was cut using Basic Black cardstock. I cut the leaves out of Pear Pizzazz cardstock and ran them through the Stampin’ Cut & Emboss Machine using the Tasteful Textile 3D Embossing Folder. I also cut the detailed part of the leaves using Pear Pizzazz cardstock.
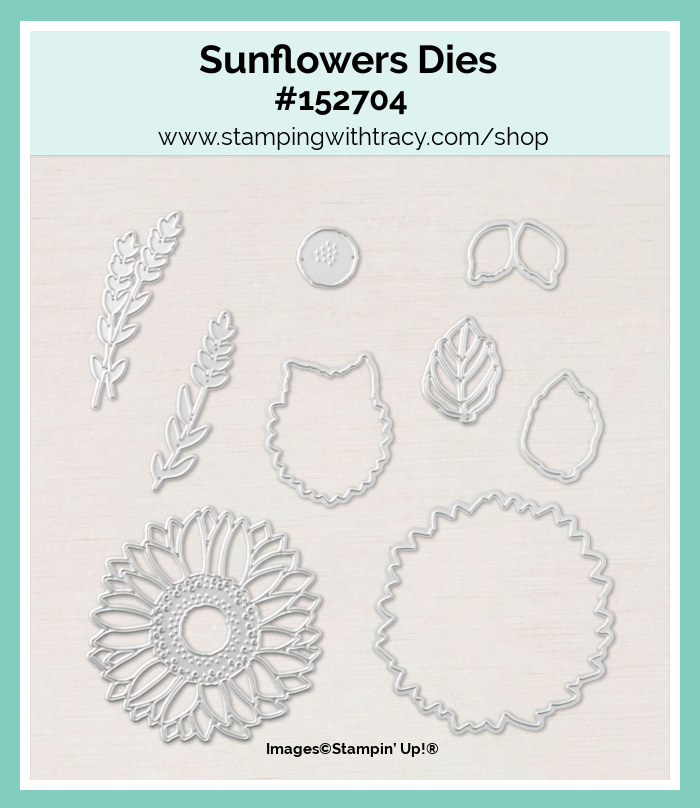

Bundle Alert Sale: Although I didn’t use the sentiment in the Celebrate Sunflowers Bundle, this bundle is on sale for this month only. It includes the Sunflowers Dies and Celebrate Sunflowers stamp set. This set of dies and stamp set were brought back just for this sale so on April 1st, you will no longer be able to purchase the two together with a discount.
To adhere the two bumblebee sunflower pieces together, I added Multipurpose Glue to the center of the detailed sunflower. Then I glued the Basic Black center to the sunflower and then glued the Early Espresso center to the top. I used Multipurpose glue (very small dots of glue) to add the detailed leaf to the embossed leaf. I added Mini Glue Dots to adhere the leaves to the sunflower. I added Stampin’ Dimensionals to the back of the sunflower and adhered it to the front of the card.

The sentiment was stamped in Early Espresso ink using the stamp set Boughs & Blossoms and then cut out using the Seasonal Labels Dies. I used Multipurpose Glue to adhere it to the sunflower. To complete the card, I added a piece of Basic White cardstock to the inside and then placed five Holiday Rhinestones on the front of the card.

Supply List
Below you’ll find all the Stampin’ Up! supplies I used for today’s card. If you need any stamping supplies, I’d love to be your demonstrator! You can place an order by clicking any of the images below to go to my Stampin’ Up! online store.
The Specialty Plate is used with 3D Embossing Folders.
Measurements
- Bumblebee cardstock: 11″ x 4-1/4″ score at 5-1/2″
- Bumblebee cardstock: approx. 4″ x 4″
- Pansy Petals Designer Series Paper: approx. 4″ x 4″
- Early Espresso cardstock: approx. 4″ x 4″
- Pear Pizzazz cardstock (leaves): scraps
- Basic White cardstock: 5″ x 3-3/4″
- Basic White cardstock (sentiment): scrap
- Basic White cardstock (inside): 5-1/4″ x 4″
- Basic Black cardstock: scrap for middle of sunflower
Thanks for stopping by today!
by Tracy | Mar 9, 2022 | Card Sampler, Die-Cutting, Embossing Folders, Uncategorized
Today’s card features the All Squared Away Bundle which is on sale this month! This bundle includes the All Squared Away stamp set and the Floral Squares Dies.

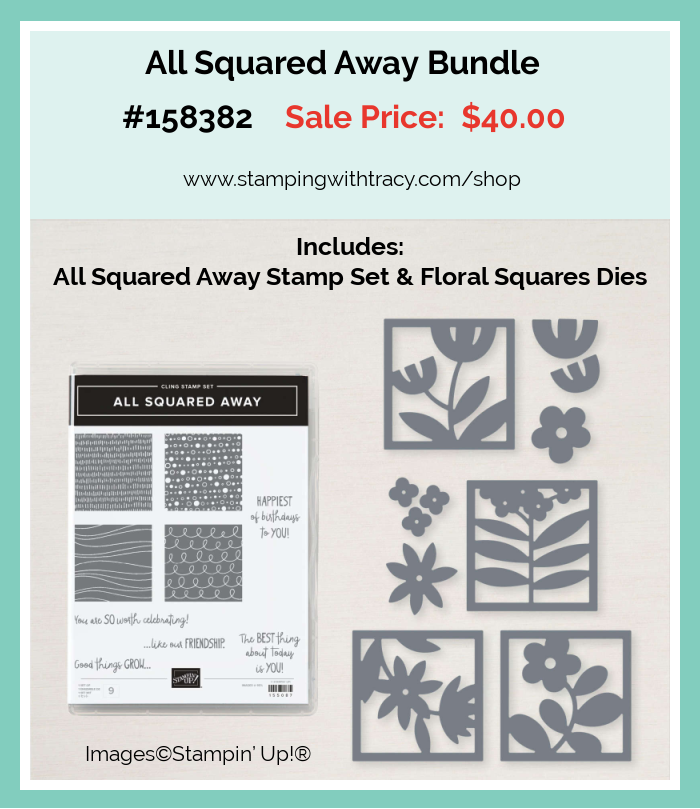
I started with a piece of Thick Basic White cardstock for my card base. I layered a piece of Just Jade cardstock with a piece of Basic White cardstock that I embossed using the Macrame 3D Embossing Folder. Before adhering it to the card base, I wrapped Just Jade ribbon (included in the Flowers for Every Season Ribbon Combo Pack) around the two pieces and tied a knot. On a side note, I LOVE the White ribbon in the Flowers for Every Season Ribbon Combo Pack. It’s wider than the other white ribbon in the catalog and it’s easy to tie in a knot and looks so pretty on a card. The Just Jade ribbon is also easy to tie (if it isn’t easy to tie, then I usually don’t use it).


On a piece of Basic White cardstock, I stamped the piece behind the flower (“bubbles”) using the All Squared Away stamp set in Just Jade ink and then trimmed it leaving a border around the edges. I used the Floral Squares Dies to cut a piece of Basic White cardstock and then adhered it to the piece I just trimmed. Then both of those pieces were layered onto a piece of Just Jade cardstock. I added Stampin’ Dimensionals to the back and adhered it to the front of the card.

I stamped the sentiment in Just Jade ink using the stamp set Boughs & Blossoms and then cut it out using a die from the Meadows Dies. I added Stampin’ Dimensionals to the back and placed it on the card. If you would like to make today’s card, you can find all the measurements I used below the Supply List.
Just Jade is one of five colors that will be retiring this year (sigh). If you need cardstock, ink refills, Stampin’ Blends, or an ink pad for any of these colors, I’d recommend purchasing them now. Once the retiring list is out (later this month) the products in all the retiring colors usually sell out quickly. To see the products for each color, click on each color below.
Supply List
Below you’ll find all the Stampin’ Up! supplies I used for today’s card. If you need any stamping supplies, I’d love to be your demonstrator! You can place an order by clicking any of the images below to go to my Stampin’ Up! online store.
The Specialty Plate is used with 3D Embossing Folders.
Sale: $40.00
Price: $45.00
Measurements
- Thick Basic White cardstock: 11″ x 4-1/4″
- Just Jade cardstock: 4-3/4″ x 3-1/2″
- Just Jade cardstock: 2″ x 2″
- Basic White cardstock (embossed): 4-1/2″ x 3-1/4″
- Basic White cardstock (sentiment): approx. 3-1/4″ x 1-1/4″
- Basic White cardstock (flower square): approx. 2-1/4″ x 2-1/4″
- Basic White cardstock: scrap
Bundle Alert: The Quiet Meadow Bundle is on sale for $47.00. It includes the Meadow Dies (used for today’s card) and the Quiet Meadow stamp set.
Expressions in Ink Card Sampler

Place a minimum $50 order (before tax/shipping) at my Stampin’ Up! Online Store using this special host code 29RQDSBB and I’ll send you my Expressions in Ink Card Sampler. It’s very important that the host code is used when placing your order EXCEPT if your order is $150 or more. Do not use the host code for an order $150 or more so you can receive Stampin’ Rewards from Stampin’ Up!. Contact me after you’ve placed the order to let me know that you’d like the Sampler – you only need to contact me if your order is $150 or more.
Orders must be placed by March 14, 2022 and the Card Samplers will be mailed approximately March 24, 2022. Please click HERE for all the details.

Stampin’ Up! Promotions


Thanks for stopping by today!


