by Tracy | Aug 19, 2025 | Halloween Card, Stampin' Blends
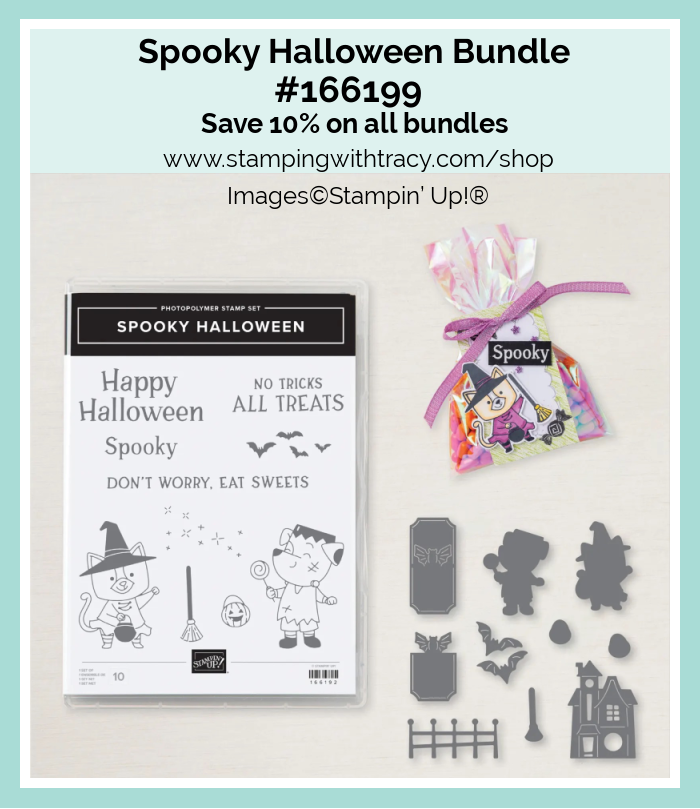
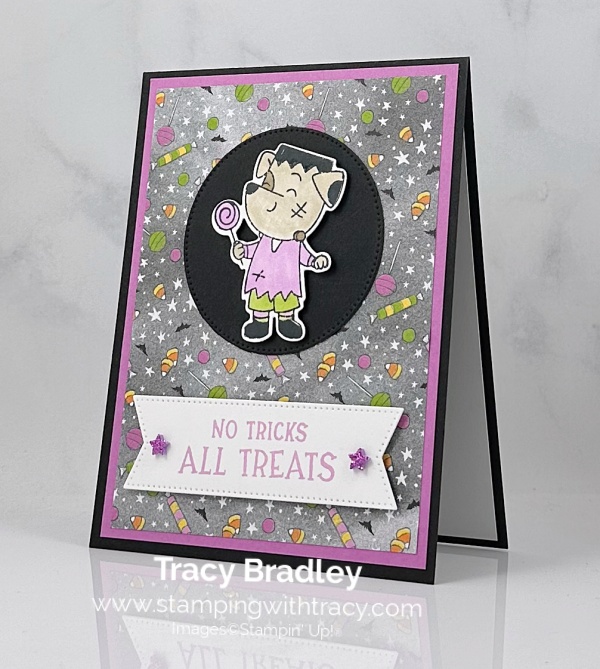
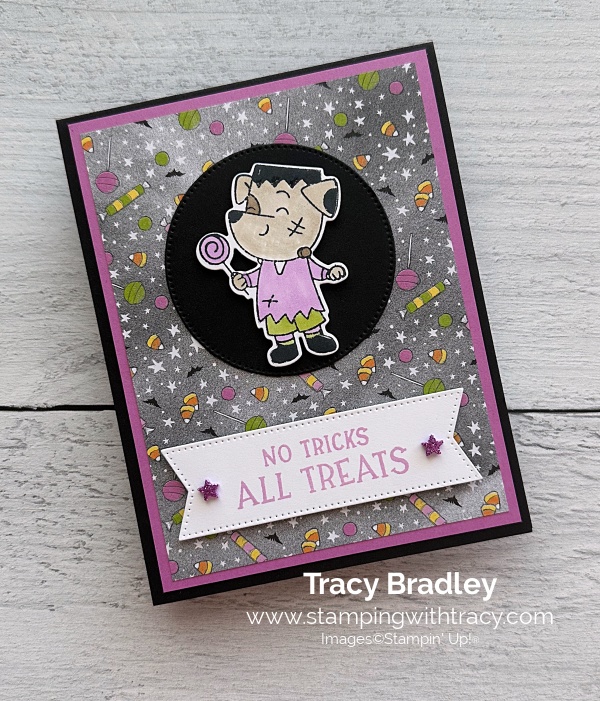
The card I’m sharing with you today was made using the Spooky Halloween Bundle, Spooky Sweet Specialty Designer Series Paper, Stylish Shapes Dies and Shimmer Star Foam Stickers. I also used Stampin’ Blends to color in the cute dog!
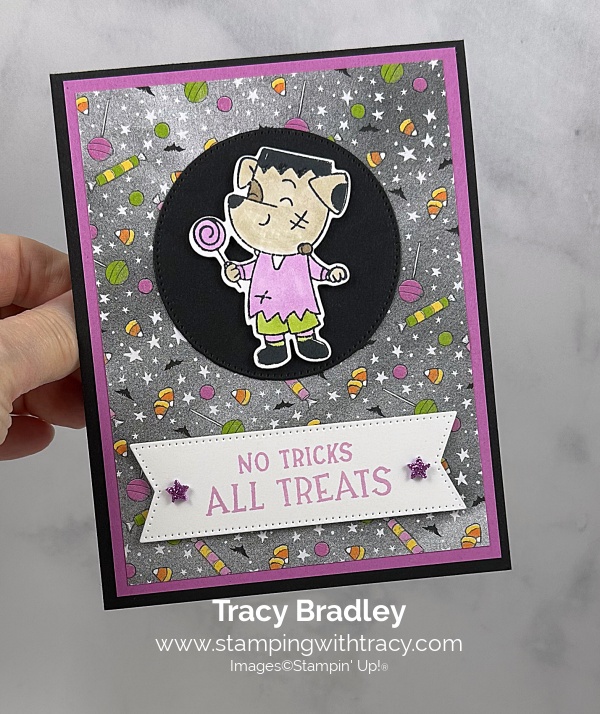
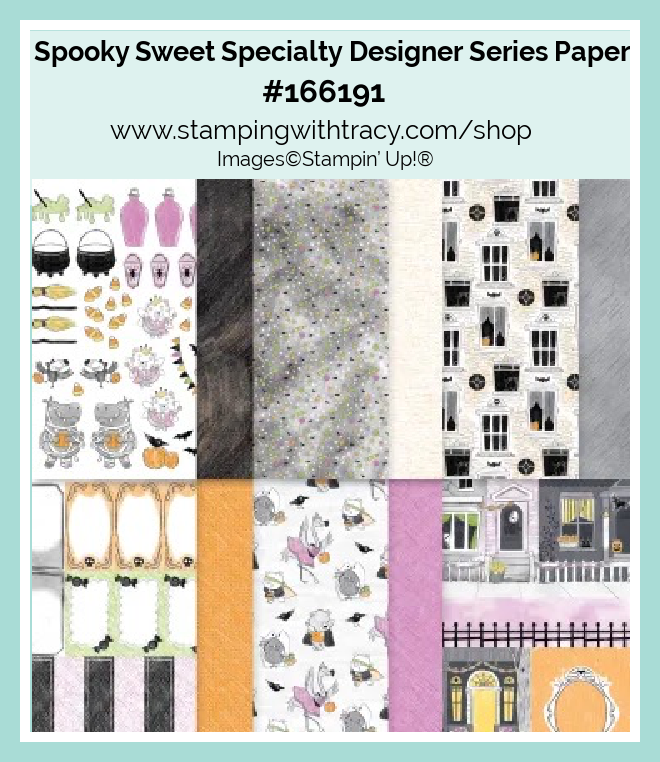
I started with Basic Black cardstock for the base of my card. I layered a piece of Spooky Sweet Specialty Designer Series Paper onto a piece of Petunia Pop cardstock and then adhered it to the card front.
I stamped the dog onto a piece of Basic White cardstock using Memento ink and the Spooky Halloween stamp set. I colored the dog using these Stampin’ Blends: Light & Dark Crumb Cake, Light Petunia Pop and Light Granny Apple Green. I cut the dog out using the Spooky Halloween Dies. Then, I added Stampin’ Dimensionals to the back of the dog.
I used the Stylish Shapes Dies to cut a circle out of Basic Black cardstock (2nd largest circle die). I added the dog to the front of the circle.
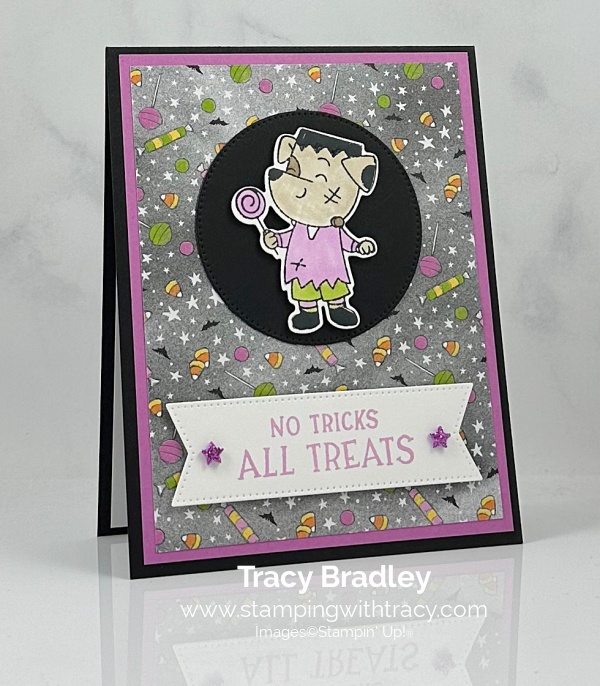

I stamped the sentiment onto Basic White cardstock using the Spooky Halloween stamp set in Fresh Freesia ink. I cut it out using the Stylish Shapes Dies. Then, I added Stampin’ Dimensionals to the back and adhered it to the card front.
To finish my card, I added two Shimmer Star Foam Stickers to each end of the sentiment and I added a piece of Basic White cardstock to the inside of the card.

Supply List
Below you’ll find all the Stampin’ Up! supplies I used for today’s card. If you need any stamping supplies, I’d love to be your demonstrator! You can place an order by clicking any of the images below to go to my Stampin’ Up! online store.
Measurements
- Basic Black cardstock: 4-1/4″ x 11″ scored at 5-1/2″
- Basic Black cardstock (circle): approximately 3″ x 3″
- Petunia Pop cardstock: 4″ x 5-1/4″
- Basic White cardstock (inside card): 4″ x 5-1/4″
- Basic White cardstock (sentiment): approximately 1-1/2″ x 4″
- Basic White cardstock (dog): approximately 2-1/4″ x 2-3/4″
- Spooky Sweet Specialty Designer Series Paper: 3-3/4″ x 5″
In Color Sale

Promotion Details:
- Sale includes 2025-2027 select inks, cardstock, Designer Series Paper, embellishments, and other products that include these new In Colors. The select products will be 15% off!
- Some products are excluded from the sale, including the Month by Month Album Retreat 2025 kit (167338).
- Products are only available while supplies last!
- This sale will end on August 31, 2025.
- Shop the sale here!
Sale-a-Bration To End
We bid a fond farewell to Sale-a-Bration but something is in the works to replace it!
Stampin’ Up! will be offering some of the 2025 Sale-A-Bration items as Last Chance Products!!
- Available Sale-A-Bration items will be sold in the Last Chance Products category and will show a discounted price of the retail value of the item.
- As with all Last Chance products, once the inventory is gone the product will be removed from the online store.
- This sale ends when supplies run out or by September 4, 2025.

Click here to go straight to the Last Chance Products page on the Stampin’ Up! site! Some products are discounted! Many items were added the to the Last Chance Products last week!
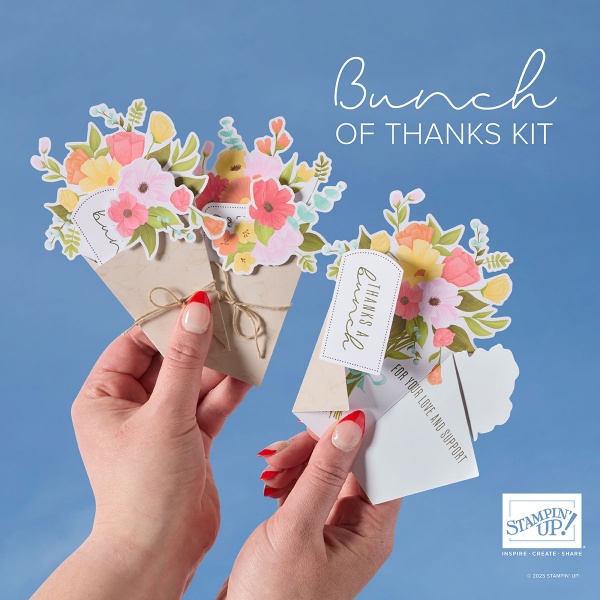
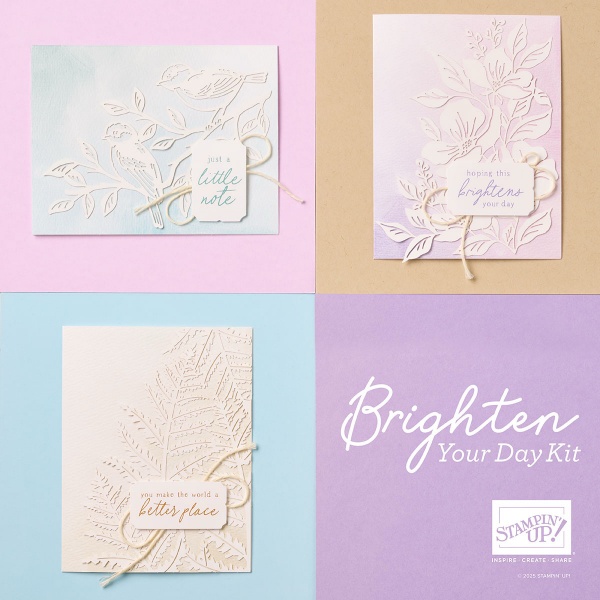
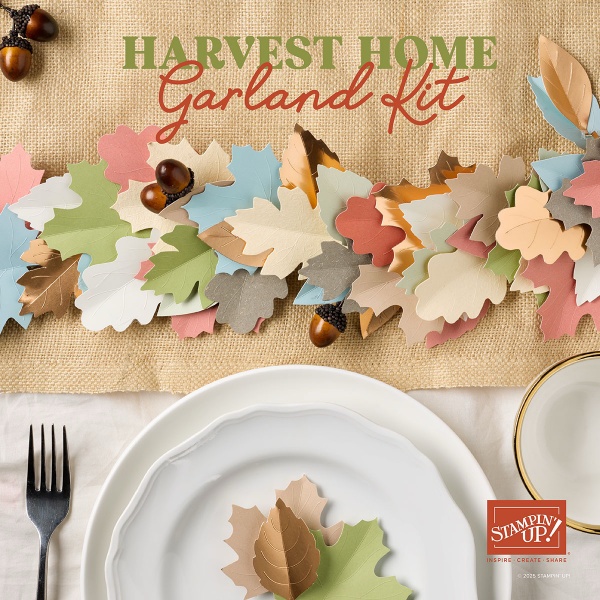
Three New Stampin’ Up! Kits
Click each graphic below for more information about the kit. These kits can be found in the Online Exclusives part of the Stampin’ Up! website. The Bunch of Thanks Kit is on sale the month of August!
Fall For Toile Paper Pumpkin Kit – Last Day to Order: September 10th
You can now order subscriptions and manage your Paper Pumpkin subscription on the Stampin’ Up! website! You can cancel your Paper Pumpkin subscription at any time. If you want to skip the next kit, you can do that! You also receive Stampin’ Rewards when you order a single kit or purchase a 3-month, 6-month or 12-month subscription to Paper Pumpkin. If you’d like to subscribe, please click the graphic below.

An additional coordinating add-on is available but only for Paper Pumpkin subscribers. Click the image below for more information.

Thanks for stopping by today!
by Tracy | Mar 12, 2025 | Stampin' Blends
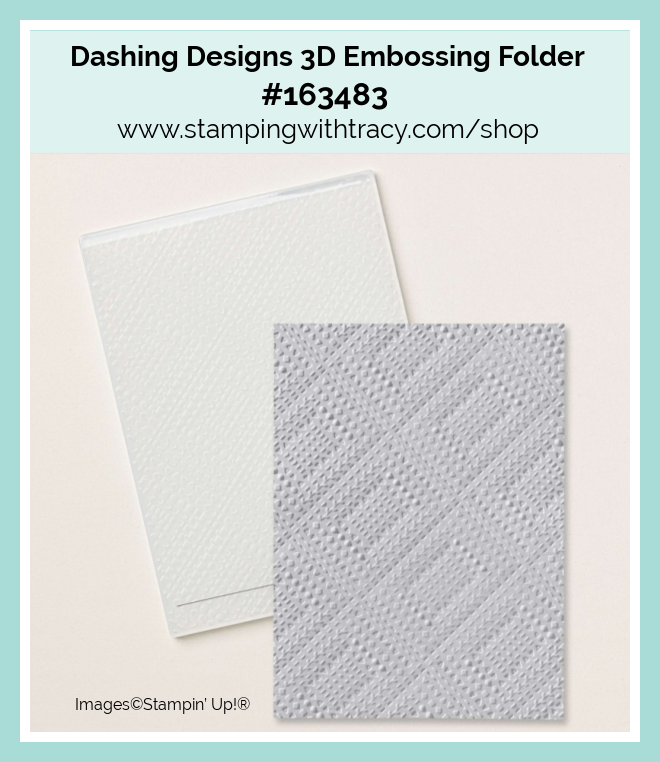
The card I’m sharing with you today was made using the Memorable Blooms Bundle, Perennial Postage Dies, Dashing Designs 3D Embossing Folder and Low Profile Dots.


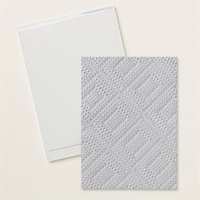
I started with a piece of Thick Basic White cardstock for the base of my card (you can find all the measurements I used below the Supply List). Then, I cut two pieces of Poppy Parade cardstock and ran them both through the Dashing Designs 3D Embossing Folder. Next, I adhered the bigger one to the front of the card and the smaller piece to the “inside” of the card.

I stamped the flowers onto a piece of Basic White cardstock using the Memorable Blooms stamp set in Memento Ink. I colored the flowers and leaves using Poppy Parade & Granny Apple Green Stampin’ Blends. Then, I cut the flowers out using the Memorable Blooms Dies, added Stampin’ Dimensionals to the back and set it aside.


I used Basic White cardstock to cut one of the Perennial Postage Dies (the second largest one). Next, I added the sentiment down towards the bottom of the rectangle in Memento Ink using the Memorable Blooms Stamp Set. Then, I added Tear & Tape (or a strong adhesive) to the back (not the part that will hang over) and adhered it to the right side of the card. Next, I added the flowers to the front and then added three Low Profile Dots.


Supply List
Below you’ll find all the Stampin’ Up! supplies I used for today’s card. If you need any stamping supplies, I’d love to be your demonstrator! You can place an order by clicking any of the images below to go to my Stampin’ Up! online store. The Specialty Plate is used with 3D Embossing Folders and Hybrid Embossing Folders.
Measurements
- Thick Basic White cardstock: 7-1/2″ x 5-1/2″ score at 3-1/4″
- Basic White cardstock (Perennial Postage die cut): approximately 5″ x 3-3/4″
- Basic White cardstock (flowers): approximately 4″ x 3″
- Poppy Parade cardstock (left side): 5-1/4″ x 3″
- Poppy Parade cardstock (right side): 5-1/4″ x 3/4″
Last Chance Products
Click here to go straight to the Last Chance Products page on the Stampin’ Up! site!
Two New Stampin’ Up! Kits
Click each graphic below for more information about the kit.


Inked Occasions Paper Pumpkin Kit
Did you know that Paper Pumpkin has moved to the Stampin’ Up! website? You can now order subscriptions and manage your subscription on the Stampin’ Up! website! If you’d like to subscribe, please click the graphic below.
If you have a current subscription to Paper Pumpkin, you will need to claim your subscription. You can follow written directions, here or you can watch a video, here.

An additional coordinating add-on is available but only for Paper Pumpkin subscribers. Click the image below for more information.

Thanks for stopping by today!
by Tracy | Mar 10, 2025 | Stampin' Blends, You Are Awesome!
Before sharing my card with you today, I wanted to let you know that the Paper Pumpkin site will shut down today and tomorrow it will back up on the Stampin’ Up! website where you can access your subscription!
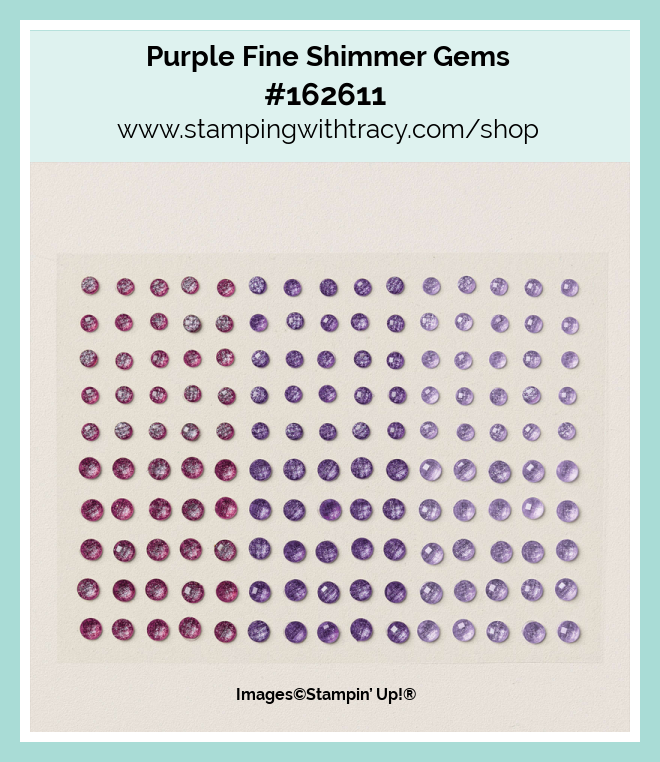
The card I’m sharing with you today was created using the Everyday Arches Dies, Memorable Blooms Bundle, the Soft Waves 3D Embossing Folder and Purple Fine Shimmer Gems.


I started with a piece of Granny Apple Green cardstock for the base of my card. Then, I embossed a piece of Basic White cardstock using the Soft Waves 3D Embossing Folder and my Stampin’ Cut & Emboss Machine. Next, I adhered it to the front of the card.

I cut out an arch using the Everyday Arches Dies out of Basic White cardstock and then adhered it to the front of the card. I stamped the flowers onto a piece of Basic White cardstock using Tuxedo Memento ink and the Memorable Blooms stamp set. I then cut it out using the Memorable Blooms Dies ( I usually cut it out last but I hate when I’ve colored the flowers and I mess up the cutting). I colored the flowers using Highland Heather and Granny Apple Green Stampin’ Blends. I added Stampin’ Dimensionals to the back and adhered it to the arch.


I stamped the sentiment onto Basic White cardstock using Highland Heather ink and the stamp set, Memorable Blooms. I then cut it out using the smallest die in the Everyday Arches Dies. I added Stampin’ Dimensionals to the back and adhered it down near the stem.
To complete my card, I added a piece of Basic White cardstock to the inside and added three larger Purple Fine Shimmer Gems to the arch.

Supply List
Below you’ll find all the Stampin’ Up! supplies I used for today’s card. If you need any stamping supplies, I’d love to be your demonstrator! You can place an order by clicking any of the images below to go to my Stampin’ Up! online store. The Specialty Plate is used with 3D Embossing Folders and Hybrid Embossing Folders.
Measurements
- Granny Apple Green cardstock: 11” x 4-1/4” scored at 5-1/2” OR 8-1/2” x 5-1/2” scored at 4-1/4” the only difference is how the card opens
- Basic White cardstock (embossed & inside): (2) 5-1/4″ x 4″
- Basic White cardstock (flowers): approximately 4″ x 3″
- Basic White cardstock (large arch): approximately 5-1/4″ x 3-1/2″
- Basic White cardstock (sentiment): approximately 2-3/4″ x 1-1/2″
Lovely Garden Card Sampler – the Last Day is Tomorrow!

My Lovely Garden Card Sampler is now available! When you use the special host code GUCCBTSX and your order is a minimum of $60 (before shipping/tax), I’ll send you two each of three cards. To create this card sampler, I used Lovely Garden Designer Series Paper and the stamp set, Pattern of Friendship.
Here’s What You’ll Receive:
- All the paper and embellishments needed to make six cards. Envelopes will also be provided. For this sampler you only need to provide a stamp set, ink and adhesive (see below for what you’ll need).
- A PDF Tutorial with instructions, pictures, cutting measurements and a complete supply list of all the products used.
- Earn at least one Bradley Point (earn ten Bradley Points and redeem them for free product) when your order is $50 or more.
- If your order is over $150, please do not use the host code or you won’t receive your Stampin’ Rewards. After you place your order, simply email me and let me know that you’d like the Lovely Garden Card Sampler (you only need to do this if your order is over $150). You can send me an email on the sidebar.
All the Other Important Information:
- Your Lovely Garden Card Sampler will be shipped first-class mail approximately March 21, 2025 and will be mailed to the address used on your online order.
- You’ll receive an email when I mail your Card Sampler and the PDF Tutorial will be included in that email.
- When using the Lovely Garden Card Sampler host code to place your order, you will not qualify for other current host code rewards.
- Per Stampin’ Up! policy, card samplers can only be mailed within the United States.
You’ll receive all the materials to make six cards. You’ll quickly have beautiful cards ready to be mailed out to someone special. If you can’t make the cards once they arrive, no worries, each card is labeled in its own clear envelope which makes it easy to come back to later. Once you’ve made all the cards in the Sampler, you’ll be able to easily replicate each card by following the easy to follow directions in the PDF (pictures are included as well).
The special Lovely Garden Card Sampler HOST CODE will close at the end of the day on March 11, 2025 and after that date, the Card Sampler will no longer be available.
Approximate ship date of the Card Sampler is March 21, 2025.

Click here to place an order
Supplies Needed To Create the Card Sampler
Listed below are the supplies you’ll need to complete the cards exactly as shown (or you can use what you already own). Simply click any of the products and you’ll be taken to my Stampin’ Up! online store. When placing your order, don’t forget to use the special Card Sampler Host Code (please do not use host code if your order is over $150 – see above).

Last Chance Products
Click here to go straight to the Last Chance Products page on the Stampin’ Up! site!
Two New Stampin’ Up! Kits
Click each graphic below for more information about the kit.
Paper Pumpkin Kit – Daisy Daydream
Today is the last day this kit will be available!

An additional coordinating add-on is available but only for Paper Pumpkin subscribers. Click the image below for more information.

Thanks for stopping by today!
by Tracy | Mar 17, 2023 | Stampin' Blends
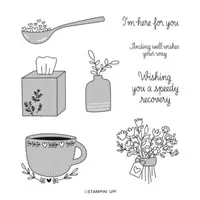
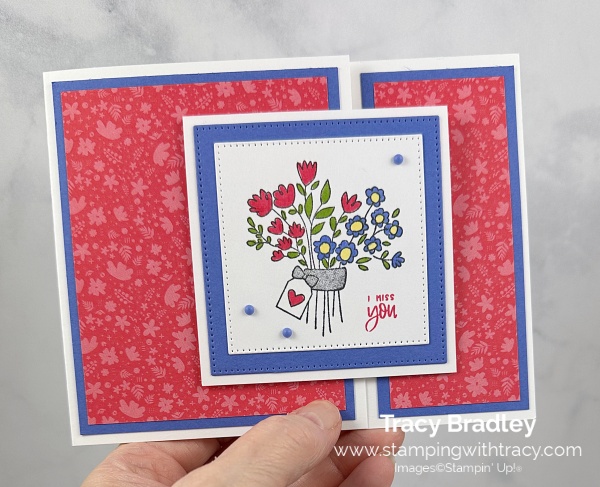
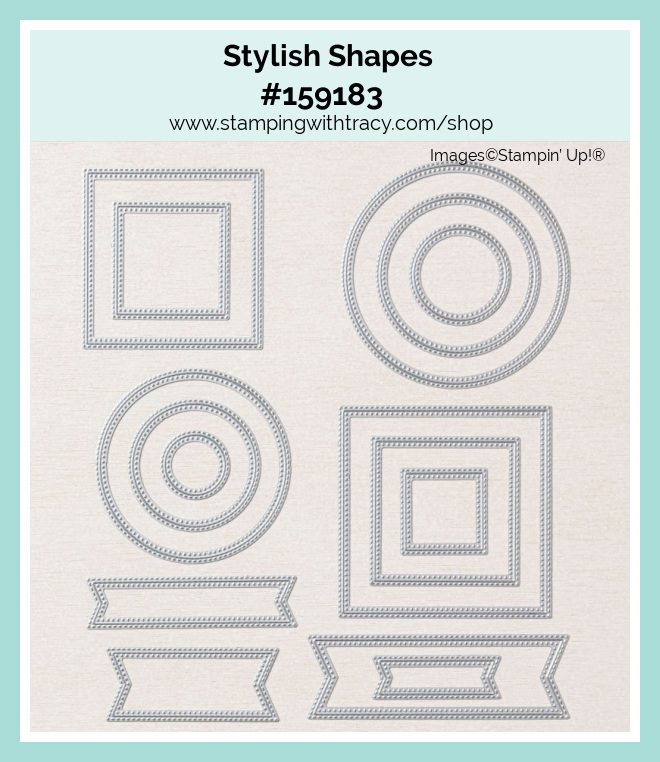
Today’s card was created using the Stampin’ Up! stamp set Speedy Recovery. I needed a small sentiment to put in the corner and I found “I miss you” from the stamp set, Cup of Tea worked perfectly! I also used the Stylish Shapes Dies and 2022-2024 In Color 6″ x 6″ Designer Series Paper.


I started with a piece of Thick Basic White cardstock for the base of my card (you can find the measurements I used below the Supply List). Then, I layered a piece of Orchid Oasis cardstock with a piece of In Color Designer Series Paper in Sweet Sorbet on both sides of the card. I also added a piece of Basic White cardstock to the inside of the card.

I used the two largest square dies in the Stylish Shapes Dies to cut a piece of Orchid Oasis cardstock and Basic White cardstock (the two smallest squares on my card). Then, I cut a piece of Basic White cardstock and adhered the Orchid Oasis square to it. I stamped the flowers onto the small Basic White square using Memento Ink and the stamp set, Speedy Recovery. I colored it using these Stampin’ Blends:
- Sweet Sorbet
- Orchid Oasis
- Granny Apple Green
- Daffodil Delight
When I finished coloring, I stamped “I Miss You” in Sweet Sorbet ink, in the corner, using the stamp set, Cup of Tea.
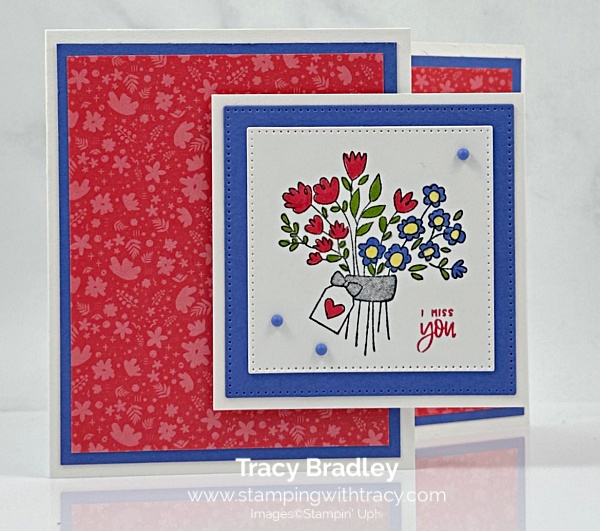
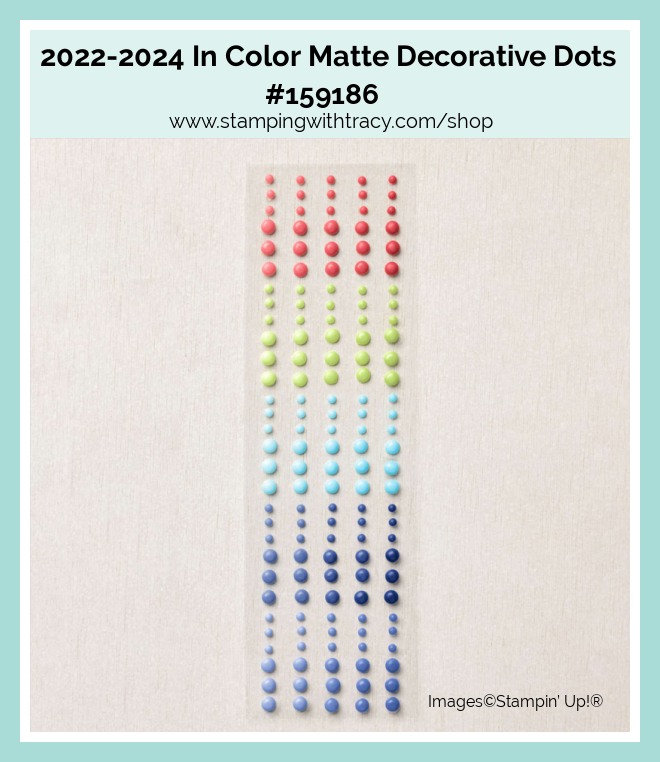
To complete my card, I added three 2022-2024 In Color Matte Decorative Dots in Orchid Oasis around the flowers.

Supply List
Below you’ll find all the Stampin’ Up! supplies I used for today’s card. If you need any stamping supplies, I’d love to be your demonstrator! You can place an order by clicking any of the images below to go to my Stampin’ Up! online store.
Measurements
- Thick Basic White: 9″ x 4-1/4″ score at 3-1/2″
- Basic White cardstock (inside): 4″ x 3-1/4″
- Basic White cardstock (square): 3″ x 3′
- Basic White cardstock (flowers and sentiment): approx. 2-3/4″ x 2-3/4″
- Orchid Oasis cardstock (right side): 4″ x 1-3/4″
- Orchid Oasis cardstock (left side): 4″ x 3-1/4″
- Orchid Oasis cardstock (square): approx. 3-1/4″ x 3-1/4″
- In Color Designer Series Paper (right): 3-3/4″ x 1-1/2″
- In Color Designer Series Paper (left): 3-3/4″ x 3″
Bundle Alert: The Cup of Tea Bundle includes the Cup of Tea Stamp Set and Teacup Dies. You save 10% when you purchase a bundle.
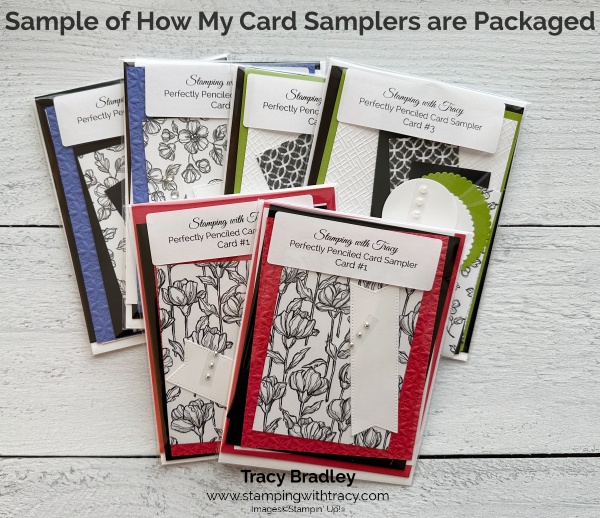
Flowers & More Card Sampler
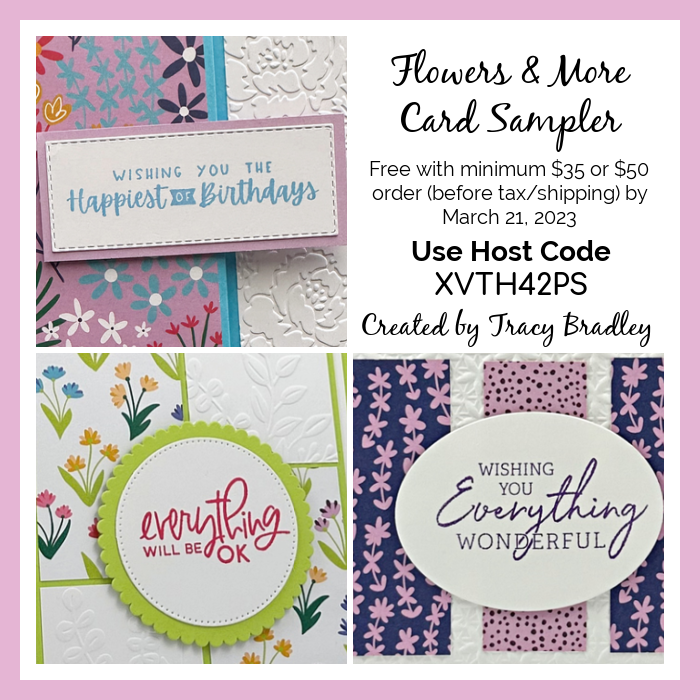
My Flowers & More Card Sampler is now available but only for a limited time!
I created this Card Sampler using Flowers & More Designer Series Paper and the stamp set, Charming Sentiments.
Place a minimum $35 or $50 order using my special host code XVTH42PS and my gift to you will be my Flowers & More Card Sampler.
You now have a choice:
- Place a minimum $35 order and you’ll receive one each of three different cards for a total of three cards.
- Place a minimum $50 order and you’ll receive two each of three different cards for a total of six cards.
Here’s how you can earn it FREE!
- Place a minimum $35 or $50 order (before tax/shipping) at my Stampin’ Up! online store.
- Use my special Flowers & More Card Sampler Host Code when placing your order (see below) BUT if your order reaches $150 or more, please DO NOT use the host code so you can receive Stampin’ Rewards (free product directly from Stampin’ Up!). Once you place your order, simply drop me an email (only necessary if your order is over $150) letting me know that you’d like the Flowers & More Card Sampler.
- Orders must be placed by March 21, 2023.
- Card Samplers will be mailed approximately March 31, 2023
You’ll need to supply your own stamp set, adhesive and ink. For more details and the supplies you’ll need, please click HERE.
Request an Annual Catalog

If you aren’t a current customer of mine, place an order at my Stampin’ Up! online store and then fill out the 2023-2024 Annual Catalog Request Form here.
If you don’t want to place an order but would like a catalog, I can send you a PayPal invoice. Simply send me an email (click the “Email Me” button on the sidebar) with your name and address. The PayPal invoice will be sent in early April when I know the cost of the catalog and postage.
I’ve had a few forms filled out by people who are not current customers of mine. Unfortunately, I will not be able to honor those requests. Complimentary copies of the catalog are a perk for those that order from me. Thanks for your understanding!
Host Code
I have two active host codes right now. If the Card Sampler doesn’t appeal to you, you can use the host code below with your minimum $50 order to receive a package of 2022-2024 In Color Matte Decorative Dots.

Not sure how to use a host code? It’s easy!

All the Little Things Paper Pumpkin Kit

When you subscribe to this month’s kit, you’ll get a FREE box organizer! The organizer can be customized to different sizes of compartments, depending on what you want to store. It’s a great way to keep track of products from past kits. Subscribe today to get the April kit and the free box organizer!
This kit includes:
- 9 cards, 3 each of 3 designs, and 9 coordinating envelopes.
- 1 photopolymer stamp set with celebratory sentiments.
- 1 Shaded Spruce Stampin’ Spot.
- Precut cherry blossom paper pieces with iridescent foil.
- Unique embellishments and twine.
- Adhesives to complete the projects.
- Final card size: 5-1/2” x 4-1/4”
- Coordinating Stampin’ Up! colors: Balmy Blue, Basic Black, Calypso Coral, Granny Apple Green, Petal Pink, Poppy Parade, Shaded Spruce.
- FREE box organizer
Order must be placed by April, 10, 2023
You can cancel at any time or even skip a month
Click here to order this month’s Paper Pumpkin kit!
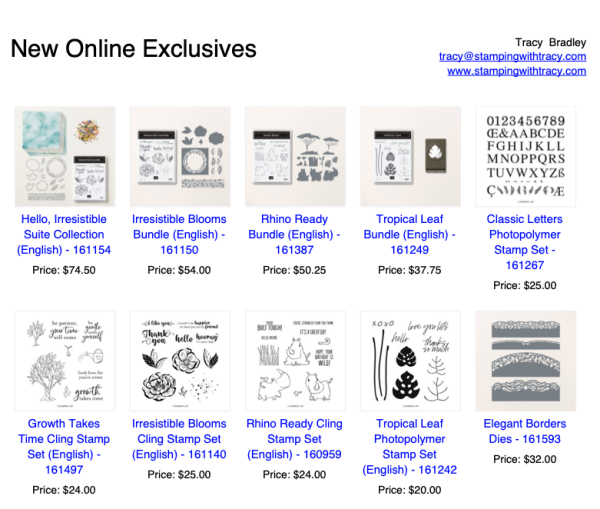
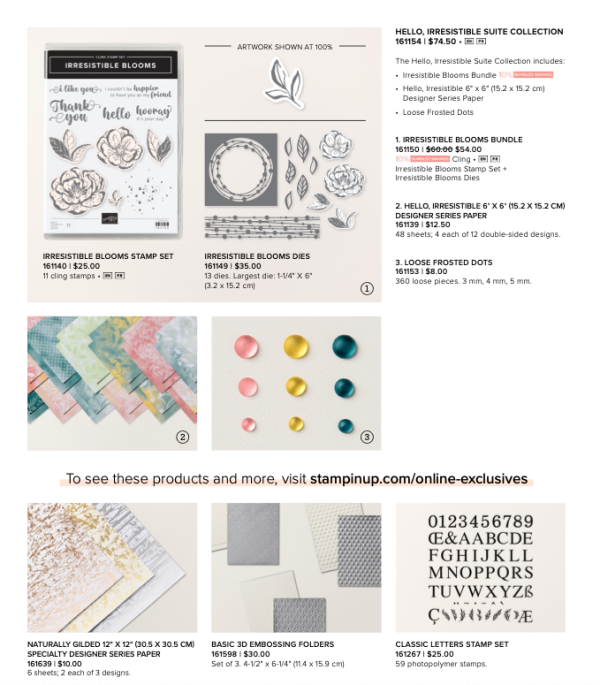
Online Exclusives

Click here for a flyer of all the New Online Exclusives
Click here to shop the Online Exclusives
Thank you for stopping by today! Have a wonderful weekend!
by Tracy | Mar 9, 2023 | Stampin' Blends
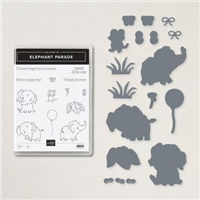
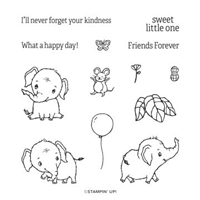
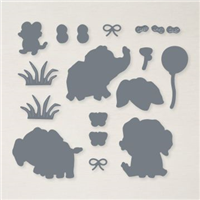
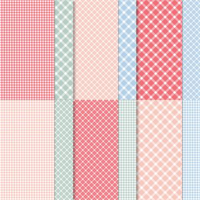
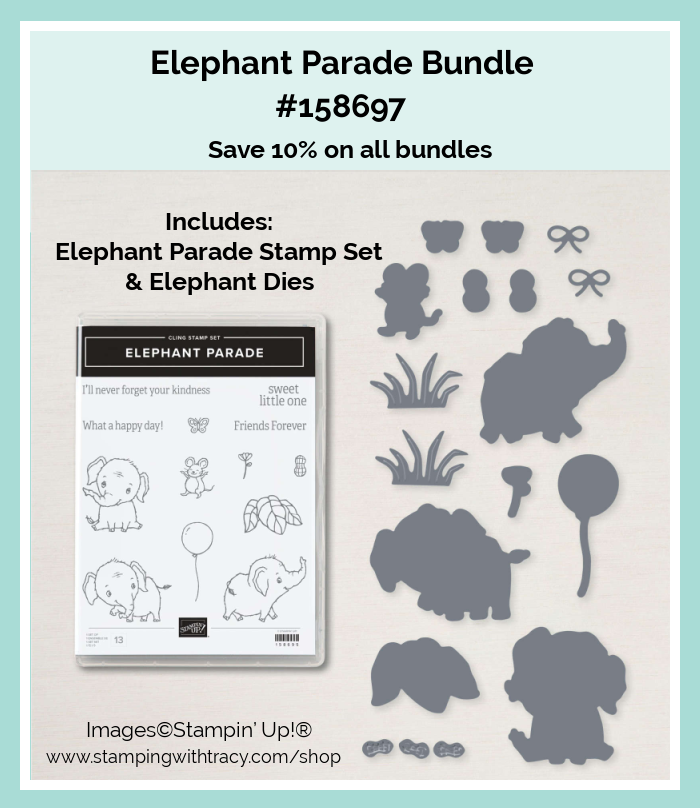
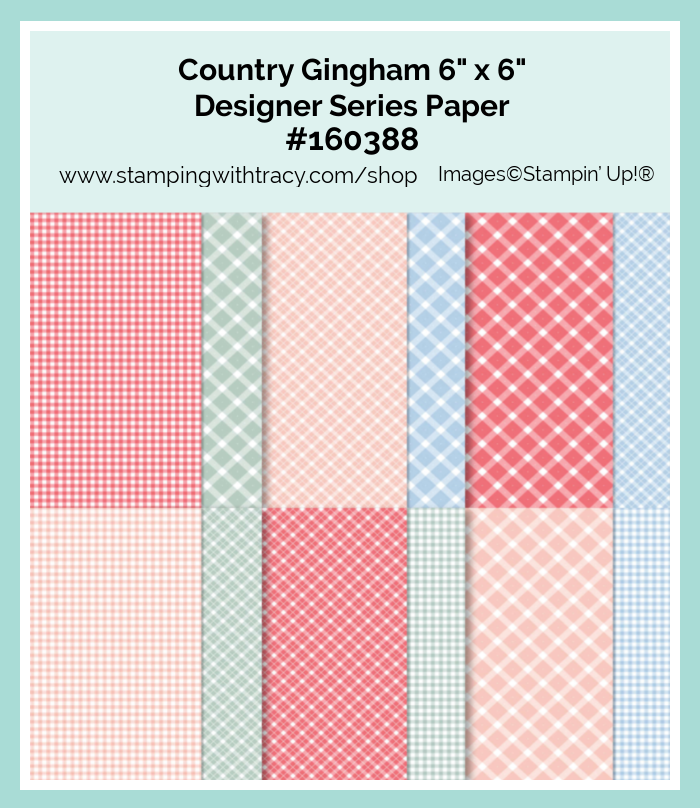
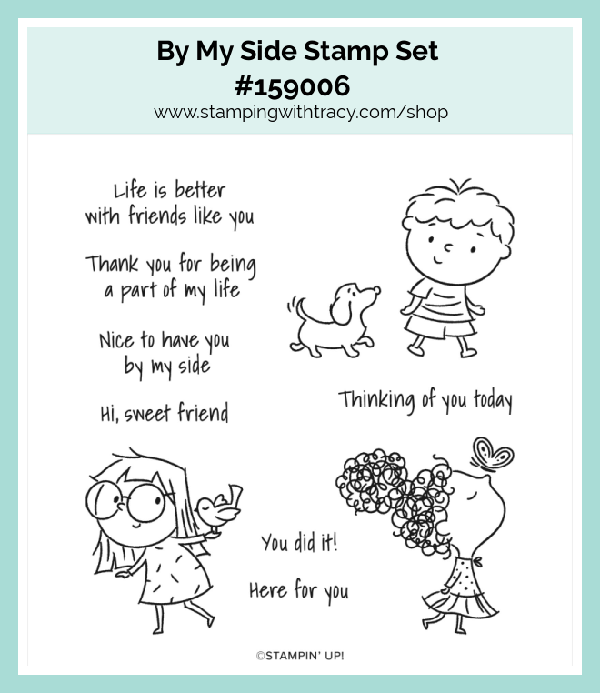
Today’s card was created using the Elephant Parade Bundle which includes the Elephant Parade stamp set and the Elephant Dies. I also used the stamp set, By My Side, Country Gingham Designer Series Paper and one of the Basics 3D Embossing Folders.

I started with a piece of Thick Basic White cardstock for the base of my card. Then, I layered a piece of Mint Macaron cardstock with a piece of Basic White cardstock and adhered the layer to the base of the card. I cut a piece of Country Gingham Designer Series Paper and adhered it to the front of the card.
I cut a piece of Mint Macaron cardstock and placed it in inside one of the Basics 3D Embossing Folders and ran it through the Cut & Emboss Machine. I adhered this piece to the front of the card.
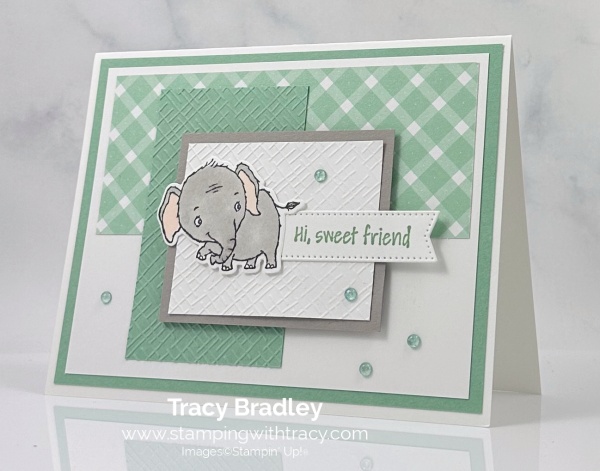
Next, I layered a piece of Gray Granite cardstock with a piece of Basic White cardstock that I embossed using the same embossing folder that I used for the Mint Macaron. I added Stampin’ Dimensionals to the back and adhered it to the front of the card.

I stamped the sentiment in Memento ink onto a piece of Basic White cardstock and then colored the elephant using these Stampin’ Blends:
- Gray Granite (Light and Dark)
- Petal Pink (Light)
I cut the elephant out using the Elephant Dies and then set it aside. I stamped the sentiment onto Basic White cardstock using the stamp set, By My Side, and Mint Macaron ink and cut it out using the Stylish Shapes Dies. The die I used was longer than I would need so when I cut it out, I made sure the sentiment was over to the right. I glued the sentiment to the elephant and then added adhesive to the back of the elephant and sentiment (except for the part that hangs over the Gray Granite layer) and adhered the elephant to the front of the card.


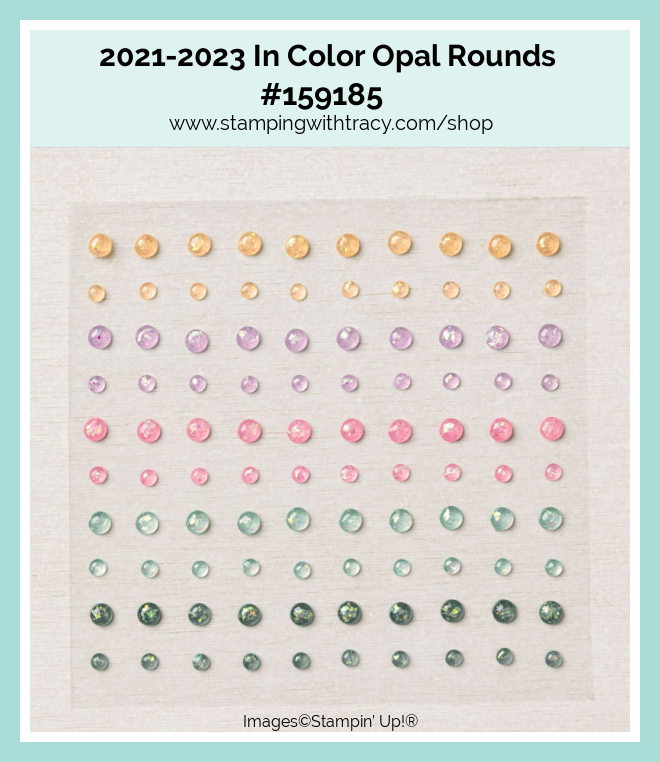
To complete my card I added five 2021-2023 In Color Opal Rounds to the front of the card. These gems are in Soft Succulent but I think they match really well with the Mint Macaron Designer Series Paper.
Supply List
Below you’ll find all the Stampin’ Up! supplies I used for today’s card. If you need any stamping supplies, I’d love to be your demonstrator! You can place an order by clicking any of the images below to go to my Stampin’ Up! online store.
Measurements
- Thick Basic White cardstock: 8-1/2″ x 5-1/2″ score at 4-1/4″
- Mint Macaron cardstock: 5-1/4″ x 4″
- Mint Macaron cardstock (embossed): 3-1/4″ x 2″
- Basic White cardstock: 5″ x 3-3/4″
- Basic White cardstock (embossed): 2-1/2″ x 2″
- Basic White cardstock (sentiment): scrap
- Gray Granite cardstock: 2-3/4″ x 2-1/4″
- Country Gingham 6″ x 6″ Designer Series Paper: 4-3/4″ x 2″

Request a Stampin’ Up! 2023-2024 Annual Catalog

It’s almost time for the new 2023-2024 Annual Catalog! This year I’m implementing something new. I’m requesting that my customers fill out a form to have a new catalog sent to their home. I’m always happy to send complimentary copies of our catalogs to my customers but due to the rising cost of postage, I’m asking that you request one (it will still be complimentary). Normally I’d send a new catalog to anyone who has ordered from me in the past six months but I know that many of my customers shop with several different demonstrators and again due to the rising costs of mailing, I’d rather have you request a catalog so that you don’t have several catalogs from several different demonstrators. Thanks so much for your understanding!!
If you are a customer of mine and would like to have the Annual Catalog mailed to you and you’ve ordered from me in the last six months, please click HERE.
Online Exclusives
Last week many new products went live. These products will not be in a catalog but can be ordered online. When they aren’t in a catalog, it’s hard to know what’s available so I created a two page flyer with all the NEW products that were released last week. You’ll find all the item numbers, an image of the products and prices. You can access the flyer here or click the image below. For more information about each product, click on the images on the flyer.
Milky Dots Thank You Gift
Use the host code 2S2PJQRC to receive a package of Milky Dots with your $50 or more online order. Milky Dots have been discontinued and are no longer available but I purchased several packages when they went on the Low Inventory List and I have a few packages left. Once they’re gone, they’re gone!

Ten Years of Growth Paper Pumpkin Kit

This kit includes:
-
- All the supplies you need to create 9 cards: 3 each of 3 designs; and coordinating envelopes.
- An all-occasion stamp set to recognize the people in your life who help you grow with greetings and beautiful botanical images.
- 1 Polished Pink Classic Stampin’ Spot
- Paper pieces and embellishments with digitally-painted designs and images.
- Mini Stampin’ Dimensionals.
- 1 FREE additional stamp set, which includes a plant and pot builder to make plant-astic projects!
Completed card size: 5-1/2″ x 4-1/4″
Coordinating Stampin’ Up! colors: Shaded Spruce, Garden Green, Coastal Cabana, Orchid Oasis, Fresh Freesia, Polished Pink, Crumb Cake
Order must be placed by March 10, 2023
You can cancel at any time or even skip a month
Click here to order!
Thanks for stopping by today!
by Tracy | Feb 28, 2023 | Stampin' Blends
Today’s the last day of Sale-a-Bration! For those of you who have been shopping with Stampin’ Up! the last several years, this is just a reminder that Stampin’ Up! is now only offering one Sale-a-Bration this year.
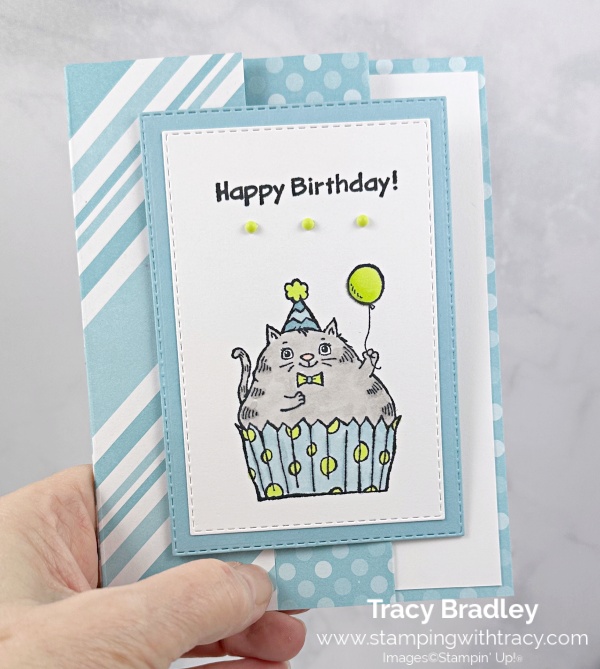
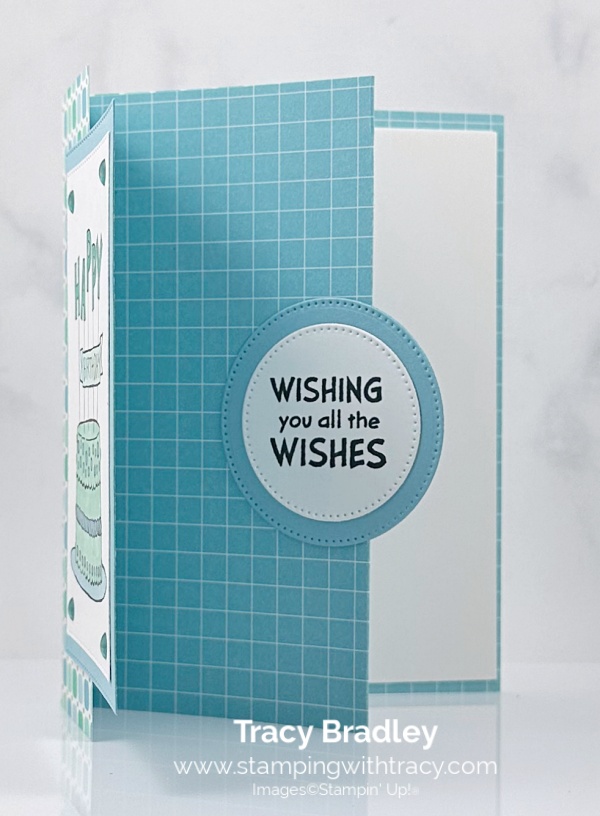
I have one last Sale-a-Bration post and it’s for a fun fold using Dandy Designs Designer Series Paper plus I have two cards to share with you. I also used the Best Day stamp set, Stitched Rectangle Dies and Stylish Shapes Dies. The Stylish Shapes Dies are back in stock but are showing low inventory.
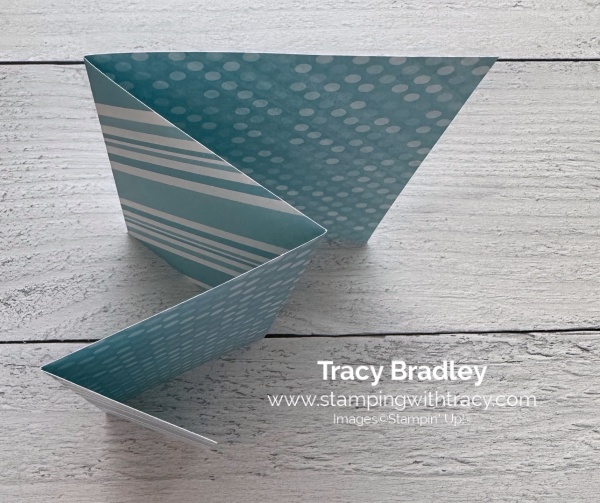
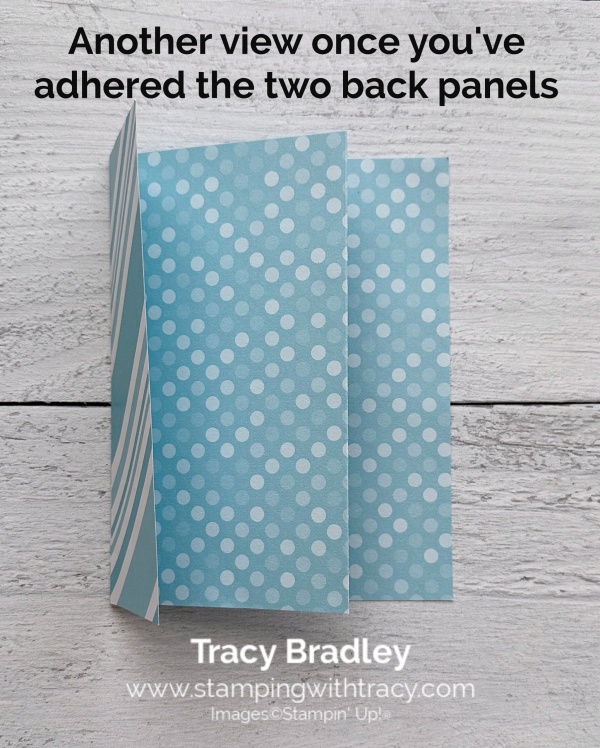
The fold I’ve used on this card is really easy and the base of the card is Designer Series Paper. Since both sides of the paper will show, you’ll need to find a sheet where both sides compliment each other. You can find all the measurements I used below the Supply List. Here’s the first card:


After you’ve scored your paper, you’ll need to fold it like this:
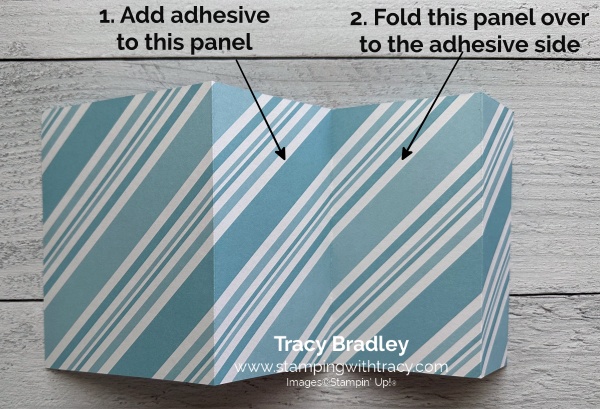
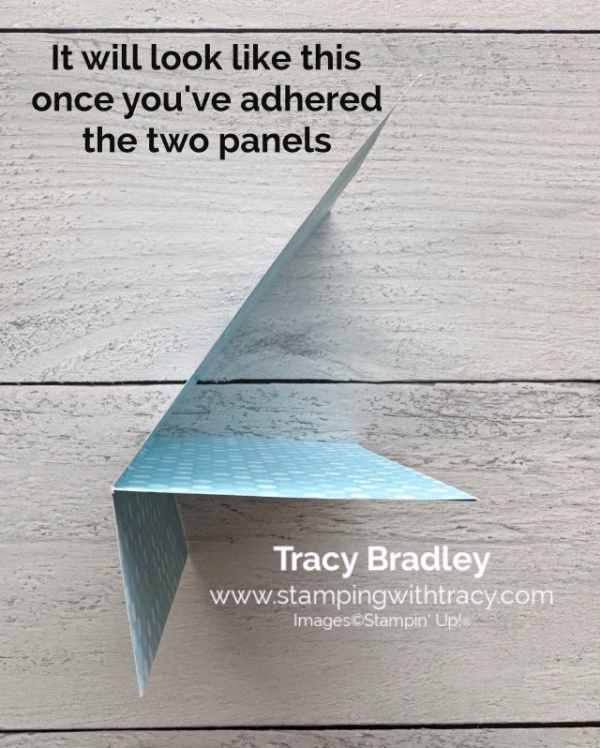
Then, you’ll turn your paper over to the back side and add adhesive on one of the panels and adhere them together.
Once the card was assembled, I used my Stitched Rectangle Dies to cut a rectangle out of Balmy Blue cardstock and a small one out of Basic White cardstock. I stamped Happy Birthday at the top in Memento Ink onto the Basic White rectangle using the Best Day stamp set. Then I stamped the the cat. I colored the cat using these Stampin’ Blends:
- Gray Granite
- Parakeet Party
- Petal Pink
I then adhered the cat panel to the Balmy Blue rectangle. On the back, I added Stampin’ Dimensionals to the right side only and then set it aside.
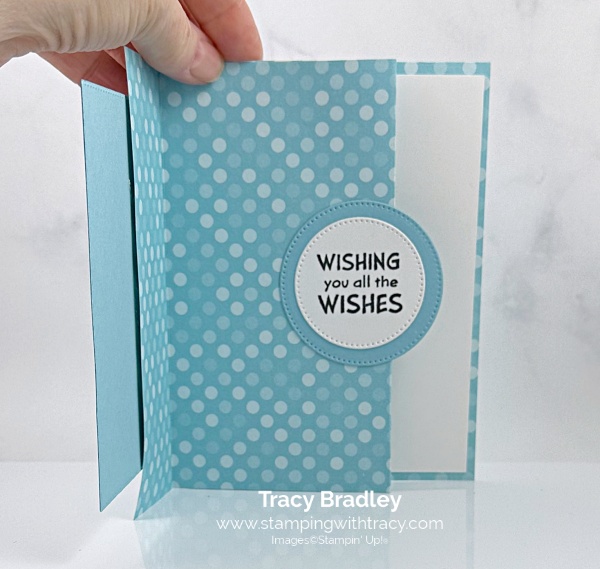
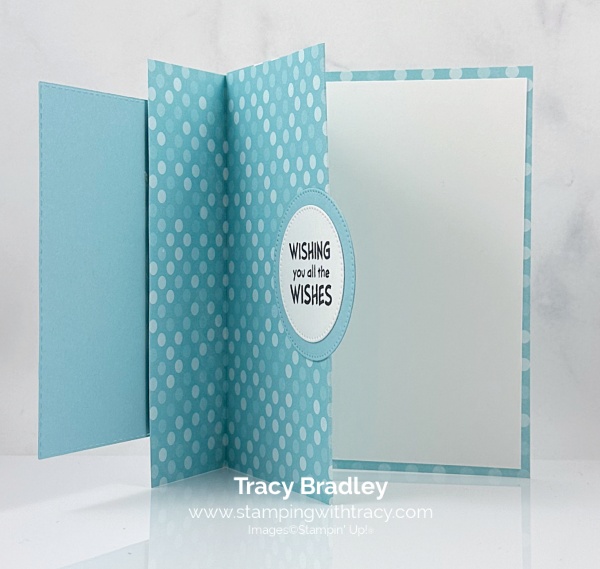
I stamped the inside sentiment, also from the Best Day stamp set, in Memento ink and then used the Stylish Shapes Dies to cut it out. I cut another circle, a little bit larger, out of Balmy Blue cardstock, and adhered the two circles together. You don’t want to see the inside sentiment when the card is closed so I figured out how far over I needed to add the cat rectangle to the front panel so that it wouldn’t be seen (the inside sentiment). Once I knew the placement would be okay, I adhered the front panel and the inside sentiment. Of course, you can just adhere the sentiment to the middle of the inside panel.
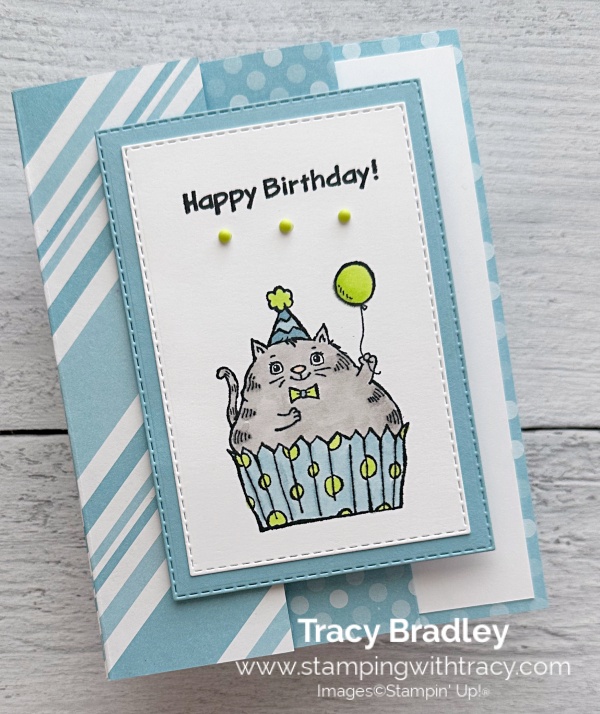
To complete my card, I added a piece of Basic White cardstock to the last panel and added three 2022-2024 In Color Matte Decorative Dots to the front of the card.
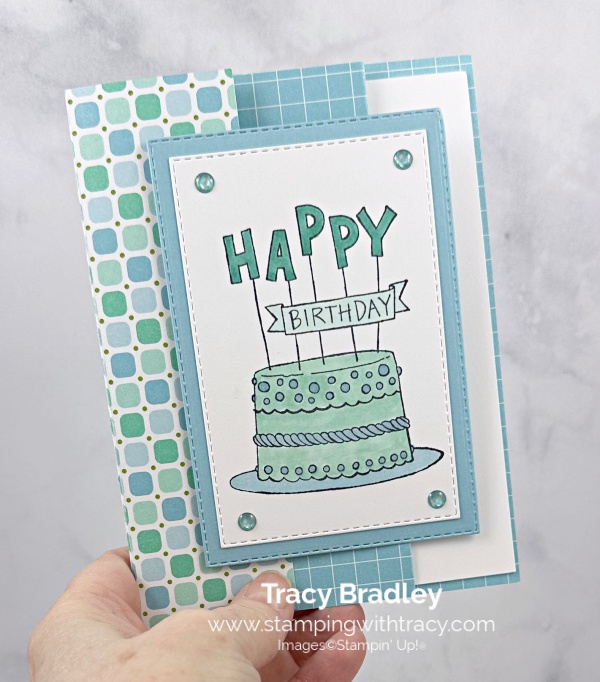
Now onto the second card. The construction is the same and I again used the Best Day stamp set for the front panel and inside sentiment. To the front, I added four Glossy Dots. I used these Stampin’ Blends to color the cake:
- Pool Party
- Bermuda Bay
- Balmy Blue

Supply List
Below you’ll find all the Stampin’ Up! supplies I used for today’s card. If you need any stamping supplies, I’d love to be your demonstrator! You can place an order by clicking any of the images below to go to my Stampin’ Up! online store.
Measurements
- Dandy Designs Designer Series Paper: 12″ x 5-1/2″ score at 1-3/4″, 4-3/4″ and 7-3/4″
- Balmy Blue cardstock (rectangle): approx. 5″ x 3-1/2″
- Balmy Blue cardstock (circle): approx. 2-1/2″ x 2-1/2″
- Basic White cardstock (rectangle): approx. 4-1/2″ x 3″
- Basic White cardstock (inside panel): 5-1/4″ x 4″
- Basic White cardstock (sentiment): approx. 2-1/4″ x 2-1/4″
TODAY is the last day of Sale-a-Bration!!!
Shop and earn FREE products during Sale-a-Bration!

Click here to see the FREE gifts you can earn with a $50 purchase
Click here to see the FREE gifts you can earn with a $100 purchase
Starter Kit Special
Today is the last day to snag the best deal of all with Stampin’ Up! which is the Starter Kit. It’s okay to purchase the Starter Kit if you just want a discount on all your future Stampin’ Up! products! It’s just like having a discount card at your favorite store because once you purchase the Starter Kit, you’ll receive a discount on all your crafting supplies!
There are three different Starter Kit options but only until the end of today!
Starter Kit Option #1 for $129:
- Boho Blue Mini Stampin’ Cut & Emboss Machine ($63 value)
- Choose $175 in Stampin’ Up! product. Pick exactly what you want!
- Business supplies included FREE
- FREE Shipping on your kit
- Enjoy the 20% discount on your future purchases
- Receive Stampin’ Rewards just like a customer for orders $150 or more
- See the catalogs early and order products early
Starter Kit Option #2 for $129
- White Mini Stampin’ Cut & Emboss Machine ($63 value)
- Choose $175 in Stampin’ Up! product. Pick exactly what you want!
- Business supplies included FREE
- FREE Shipping on your kit
- Enjoy the 20% discount on your future purchases
- Receive Stampin’ Rewards just like a customer for orders $150 or more
- See the catalogs early and order products early
Starter Kit Option #3 for $99
- Choose $175 in Stampin’ Up! product. Pick exactly what you want!
- Business supplies included FREE
- FREE Shipping on your kit
- Enjoy the 20% discount on your future purchases
- Receive Stampin’ Rewards just like a customer for orders $150 or more
- See the catalogs early and order products early
You never have to sell to anyone, teach classes or hold workshops (unless you want to).
This promotion ends, today, February 28, 2023! Don’t miss out on this great deal!
Click here for more information about the Starter Kit
Online Exclusives Premiering Tomorrow
Click here or the graphic below to download the flyer for the Online Exclusives.
Stampin’ Up! is hinting that there may be more products available than what’s on the flyer, so we’ll have to wait and see!
Please note: The QR code and any links will not be active until March 1st when these products are available.
Ten Years of Growth Paper Pumpkin Kit
This kit includes:
-
- All the supplies you need to create 9 cards: 3 each of 3 designs; and coordinating envelopes.
- An all-occasion stamp set to recognize the people in your life who help you grow with greetings and beautiful botanical images.
- 1 Polished Pink Classic Stampin’ Spot
- Paper pieces and embellishments with digitally-painted designs and images.
- Mini Stampin’ Dimensionals.
- 1 FREE additional stamp set, which includes a plant and pot builder to make plant-astic projects!
Completed card size: 5-1/2″ x 4-1/4″
Coordinating Stampin’ Up! colors: Shaded Spruce, Garden Green, Coastal Cabana, Orchid Oasis, Fresh Freesia, Polished Pink, Crumb Cake
Order must be placed by March 10, 2023
You can cancel at any time or even skip a month
Click here to order!
Thanks for stopping by today!