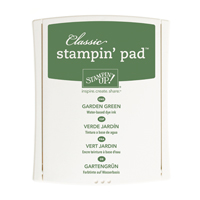
Today I have some cards that fit into the quick and easy category. I was in need of some thank you cards and was able to quickly make several of these. Since I plan to send them, I decided not to bling them up. I was just dying to place a small pearl in the center of each flower but controlled myself and colored each one in with my Daffodil Delight marker. These two cards are very similar. I used the same colors – Pacific Point, Blackberry Bliss and Daffodil Delight but varied how I used them.
Are you wondering how I was able to line up the flowers? Easy! I used one of our stencils in the Dots & Stripes pack. It made achieving evenly spaced flowers so simple. I used washi tape to keep my Whisper White piece in place as well as the stencil itself. If you do this, be sure to rinse the stencil under water when you are finished so you can avoided transferring ink where you don’t want it.
With the card below, I decided to be daring (I’m so adventurous) and not use the mask. Some are too close to each other, which bugs me, but I am sure others wouldn’t even notice. I definitely like all of the color though!
The stamps I used come from two different sets. The sentiment is from Rose Wonder and the flower came from Bloomin’ Love. Sometimes the teeny tiny stamps get neglected and unused. Check out the stamp sets you currently own to see what you can create!
Product List- Click on any product below for more information or to place an order!
Yesterday I shared a card using the Sale-a-bration stamp set What I Love. I used one of the sentiments but there’s so much more to love about this set of stamps. Check out the video below from Stampin’ Up! for more ideas.
The best time to buy Stampin’ Up! products is during Sale-a-bration which is going on right now! For every $50 you spend, before shipping and tax, you can choose a FREE item from the Sale-a-bration catalog.
Click HERE to look inside the Sale-a-bration catalog!
If you’d like to place an order, click HERE to be taken to my Stampin’ Up! online store!
Here are the Weekly Deals for this week! These prices are good until Monday, February 8th or while supplies last! If you would like to place an order, click any of the products below and you’ll be taken to my Stampin’ Up! online store.
This week I played in my craft room and it was so nice to get ink all over my fingers. It felt good to create!!! I pulled out the Rose Garden Thinlits Dies and stamp pads and got to work.
I had an idea as to what I wanted to create but neither of these cards are what I intended. I wanted to have blended color in the middle of the card and then place my Whisper White Rose die cut on top.
I started blending Rose Red and Garden Green onto Whisper White cardstock but wasn’t happy with the results so I decided to cut out the Rose Garden Thinlit using my blended background. The card I created with the cut out is below.
Then I tried to accomplish what I had in my mind but again wasn’t happy with the results so I tried blending the colors out to the edge of the paper instead and that result is my first card.
To adhere the Thinlits, I used two different products. One of them is glued down with Tombow Liquid Multipurpose Glue and the other (a non Stampin’ Up! product) is a spray adhesive from Elmer’s. Both worked equally well.
I’ve included my supplies below but here are a few extra details:
The sentiment on the first card is from the Card Kit called Watercolor Wishes. This is a card kit with the stamp set included.
The sentiment on the second card is from a FREE Sale-a-bration set called What I Love. Place a $50 order (before tax and shipping) and you can choose this stamp set, FREE! If you are reading this on my blog, the Sale-a-bration catalog can be found on the right hand side. Click on the cover of the catalog to see what other choices there are.
Three of the items in the Sale-a-bration catalog are only available until February 15th at which time they will go away and there will be three new items. The three sets that will no longer be available after the 15th are below.
Thanks so much for stopping by today!
Product List – To purchase any of these products or for more information, just click on the product you are interested in.
2016! Remember when the year 2000 sounded so strange? It is hard to believe that 16 years have gone by!
First, I want to say thank you to those of you who have continued to visit my blog even though I haven’t posted in quite some time. Life has thrown me some curveballs recently and my crafting has been put on hold. I haven’t created a project in so long and I really miss it. It hasn’t stopped me from BUYING crafting products though! Oh my.
As many of you were with family on Thanksgiving, my husband and I were at my mom’s. When I went back home, I found that our house had been burglarized and we know that it occurred on Thanksgiving Day. It just amazes me that some people feel that it’s okay to break into someone’s home and take anything they want. I’ve tried to be positive but it’s hard. Things were taken that had precious memories attached to them, things that can’t be replaced. And yes, I keep reminding myself that they are just things. I have so much to be thankful for and that is what I’m trying to focus on.
My mom is doing really well. Her knee replacement surgery (and two more hospital stays) took much longer to bounce back from that we originally thought. But she’s getting stronger every day and loves that she can walk without pain!
I hope to start creating soon. The Occasions Catalog goes live on January 5th and as a demonstrator I was able to place a pre-order. I’m excited to pull out some of the new goodies that I purchased and create very soon.
Here are some Stampin’ Up! updates:
The Stampin’ Up! Year End Sale will end on January 4th. You’ll find clearance items, closeouts and discounted CURRENT retiring holiday products. There’s quite an assortment of items so be sure to check it out HERE.
Here are the Weekly Deals for this week. These prices are good until Monday, January 4th or while supplies last. If you’d like to place an order, click hereand you’ll be taken to my online store or click on an item below for more information.