by Tracy | Apr 1, 2013 | Uncategorized
It’s the first day of April! We had plenty of rain here yesterday so hopefully those May flowers are on the way!
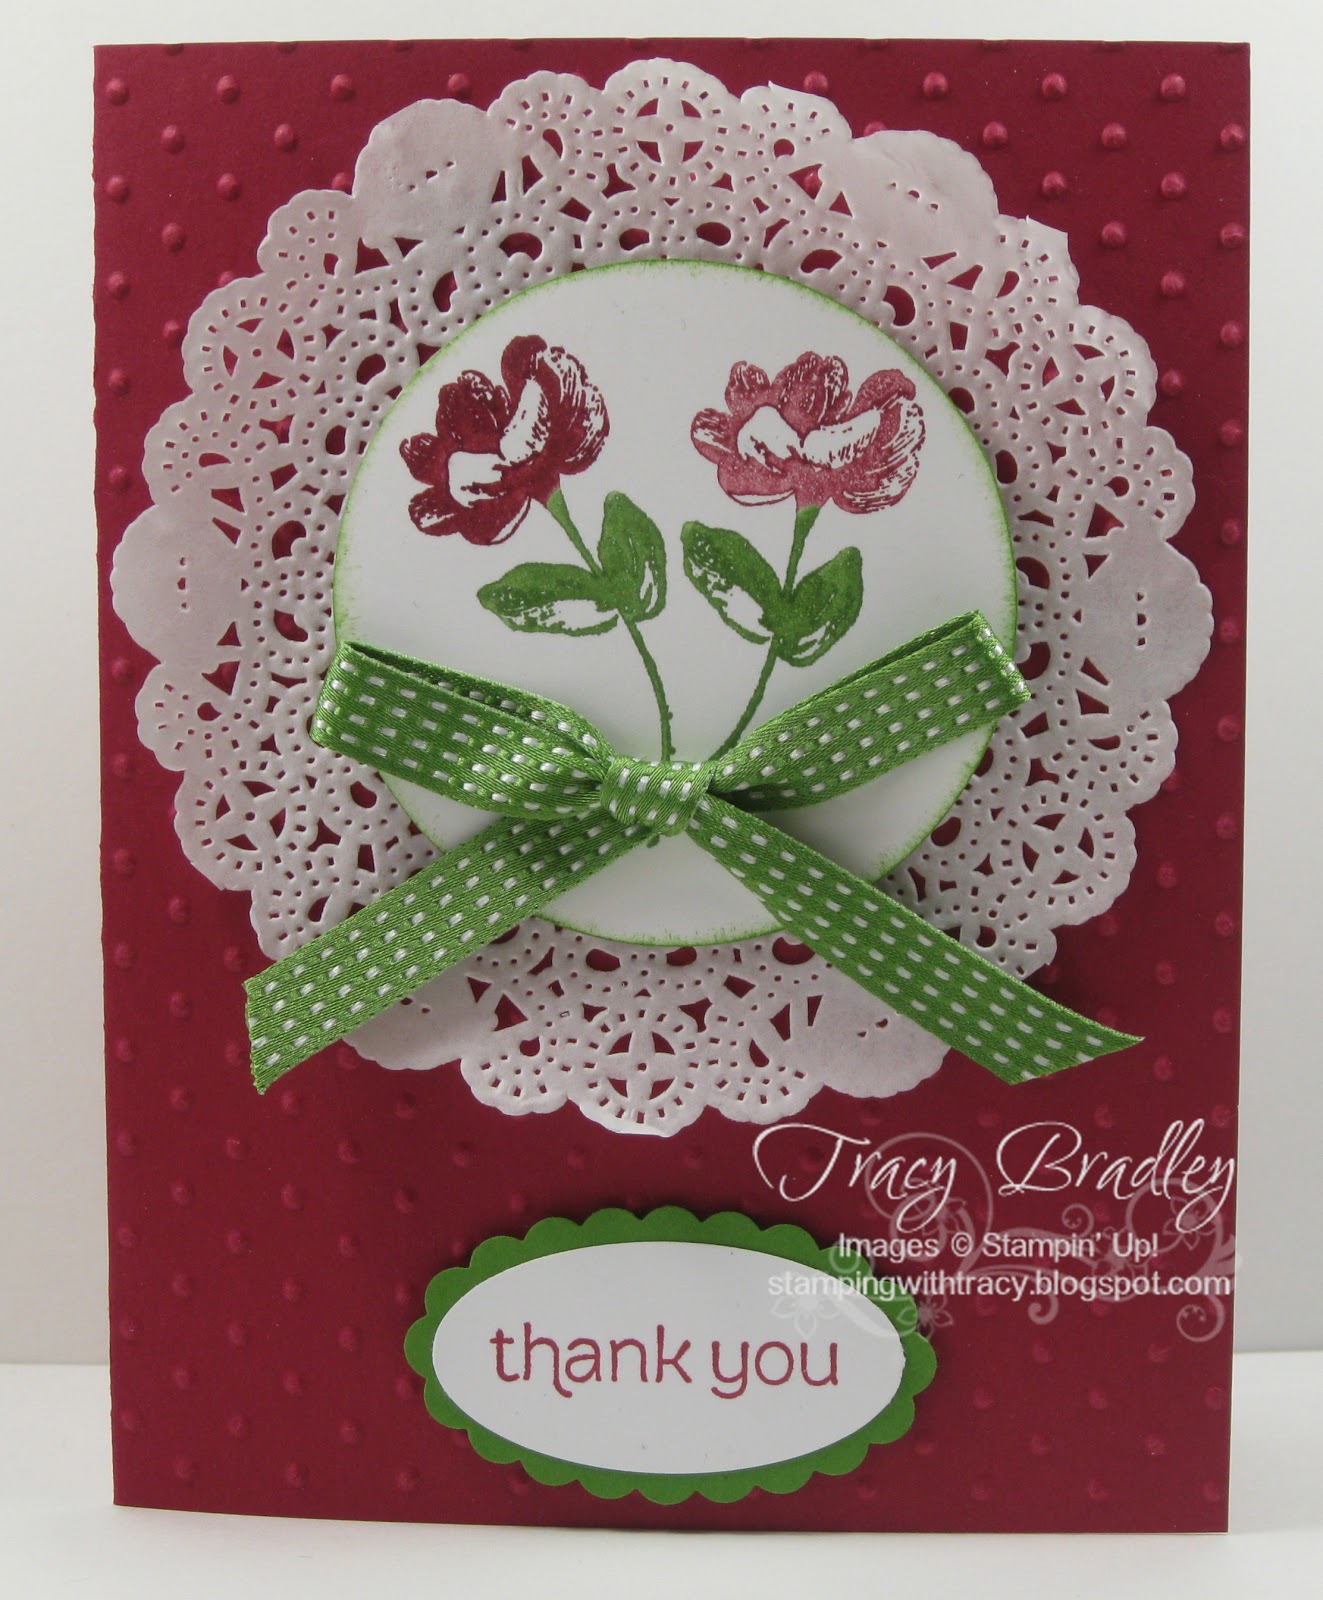
I’ve seen so many cute cards using our new White Tea Lace Paper Doilies (129399) so I decided to purchase some and this is the card I made. The base of my card is Raspberry Ripple which took me quite a while to warm up to and I am not sure why. It is so pretty. My flowers are from the set Oh, Hello (in the Spring Catalog). I colored my flowers using my Raspberry Ripple and Gumball Green markers. If you look closely, you’ll see that they aren’t the same shade. After stamping the first flower I ONLY re-inked the stem, huffed on it and stamped it again. I punched them out with my 2 1/2 Circle punch, sponged around the edges with Gumball Green and used dimensionals to adhere it to the doily.
Thank you for stopping by today. If you would like to purchase any of the products I’ve used to make my card, you can visit my Stampin’ Up! website HERE.
Tracy
Supplies
Stamps: Made For You, Oh, Hello
Ink: Gumball Green, Raspberry Ripple
Paper: Raspberry Ripple, Whisper White
Accessories: Perfect Polka Dots embossing folder, White Tea Lace Paper Doilies, 2 1/2″ Circle Punch, Scallop Oval punch, 3/8″ Gumball Green Stitched Satin Ribbon, Glue Dots, Dimensionals
by Tracy | Mar 31, 2013 | Uncategorized
Happy Easter/Passover! Enjoy time spent with your family!
Tracy
by Tracy | Mar 29, 2013 | Uncategorized
I showed this card in my embossing folders video (you can see it here) but I realized that I never showed the card in a post. The center of my flower was made using a flattened Soda Pop Top (#129388 $3.95 for 8 of each size) in the Spring Catalog! I simply placed one in my Big Shot and it quickly and beautifully flattened it! It gives my card such a pretty sparkle. I really wasn’t drawn to these when I first saw them but I just love them now! Isn’t that the way it always is?
My paper, Print Poetry Designer Series Paper Pack, is also from the Spring Catalog. My flower and the strip of paper under the DSP is Raspberry Ripple, one of our In Colors.

Thanks so much for stopping by! If you would like to order any of these products, you can visit my
Stampin’ Up! online store!
Tracy
by Tracy | Mar 28, 2013 | Uncategorized
I had some requests to show the directions for the treat bag that I posted HERE so I decided to make a video.
Thanks for stopping by!
Tracy
Supplies
Everybunny W-122705 $27.95 C-122707 $19.95
Delightful Dozen W-1222650 $32.95 C-122652 $24.95
Daffodil Delight cardstock #119683 $6.95
Tempting Turquoise cardstock #102067 $6.95
Whisper White cardstock #100730 $8.50
Blender Pens #102845 $9.95
Watercolor Pencils #101879 $19.95
Watercolor Crayons Each (four different sets): $16.95 page 157
2 3/8 Scallop Circle Punch #118874 $16.95
1 ¾ Scallop Circle Punch #119854 $16.95
Ovals Collection Framelits #129381 $26.95
Paper Piercing Tool #126189 $3.95
Paper Piercing Mat #126199 $4.95
Polka Dot Parade Designer Series Paper #126902 $10.95 Size on project: 4 x 1 ¼
StazOn Opaque (White pad and refill) #106960 $11.95
StazOn Black ink pad #101406 $7.95
4×6 Cello Bags #102757 $4.50 trimmed to 5 ½”
Sticky Strip #104294 $6.95
Perfect Polka Dots embossing folder #117335 $7.95
Velcro dots (non Stampin’ Up!
by Tracy | Mar 27, 2013 | Uncategorized
Welcome to the fourth installment of my series, “Spotlight on Tools.” This week I am focusing on Stampin’ Up! Clear Mount Stamp Cases (#119105 $5.95 for a package of 4). These are great for storing stamps that you’ve converted from wood to clear. I also store my single stamps from the recent promotions in these as well since they do not come in a case.
The Stamp Cases are also perfect for storing Framelits. I used a different designer series paper for each one and slipped it between the “cover” and the actual case. Because the case is clear, I can see the other side of the paper on the inside. I bought some magnet sheets from a home improvement store (they are covers for heater registers), cut them down to the size I wanted and placed the magnet on one side of the case using Sticky Strip. In the last picture you can see that I put the packaging on the left hand side but I only included that with a few of my sets. I have an electronic label maker and put a label on the end of the case so that I can quickly see the set names. I am so much happier with this system and it has definitely saved time!
If you’ve struggled with a way to organize your Framelits, I hope this will work for you!!
Tracy
Please visit my Stampin’ Up! online store HERE!