One of the products on sale this week is the Designer Tin of Cards Project Kit (item #141651). It normally sells for $27.00 but only until tomorrow, October 5, 2016, the price is $20.25.
The kit includes a blue tin and enough card bases, accents, and envelopes for 16 cards, 4 each of 4 designs. You supply the stamps, ink, and adhesive which are sold separately. The stamp set, Designer Tin of Cards Stamp Set (item 141739) coordinates with the kit but you can use whatever stamp sets you have at home.
Designer Tin of Cards Stamp Set #141739 $26.00
This is what is included in the kit:
Watch the video for more information about this cute kit!
If you have a catalog, some of the information about the additional supplies you will need is incorrect. Here is the corrected info (click to enlarge):
In addition to the Designer Tin of Cards Kit, seven other products are also on sale but only until tomorrow!
To see these discounted products at my Stampin’ Up! online store, click any of the pictures below (you’ll see the sale price there too).
Yesterday I showed two videos using the Envelope Punch Board (25% off until October 5th) to make envelopes and boxes. You can also make a popper! I shared this idea back in May and you can visit that post again and see a picture tutorial by clicking HERE.
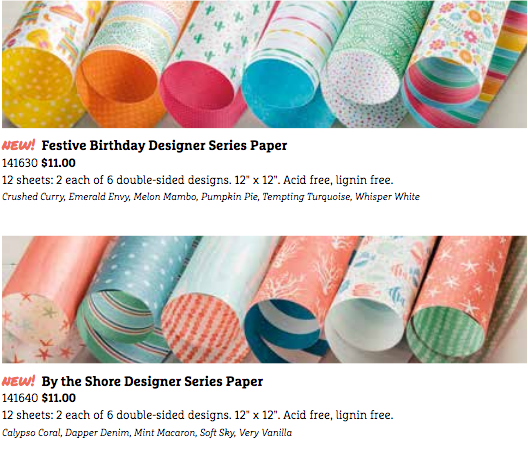
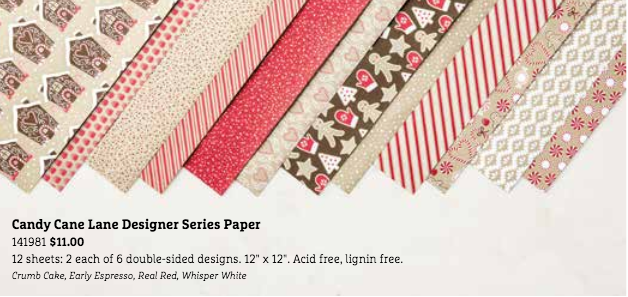
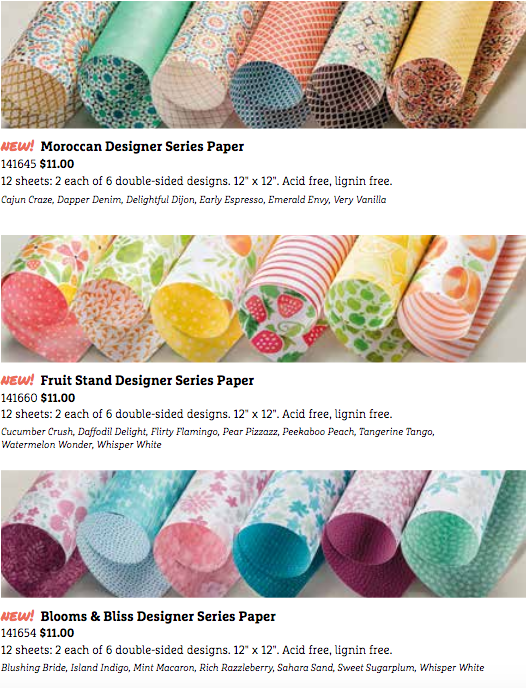
The paper I use in the tutorial is no longer available but we also have a paper sale going on all month! Buy 3 packages and receive 1 free (see the papers below that are included in the sale)!
Product List – All of the products below are currently on sale. The first 7 items are up to 25% off and the sale price can be seen at my Stampin’ Up Online store (click any of the products to see the sale price). The paper special is: Buy 3, Get 1 Free.
The Envelope Punch Board is currently 25% off, but only until October 5th! You can get this great tool that not only makes over sixty different sized envelopes but can also make boxes! It normally sells for $20.00 but for the next few days you can purchase it for $15.00! See the chart below for more great products on sale (click to enlarge).
Today I have two videos for you. The first one is from Stampin’ Up! and it shows in detail how to create an envelope. The second video was created by me several years ago (using paper/products that have since retired) and I’ll show you how to make a box.
Product List : All of the products below are on sale. To place an order, click on any of them and you’ll be taken to my Stampin’ Up! online store (you’ll see the sale price there). If you have any questions, please don’t hesitate to contact me.
Oops, this post was supposed to go out several days ago explaining the Designer Series Paper Sale. Sorry if there was any confusion about the sale! If you have any questions, please let me know!
There’s a great offer on the way, beginning on Saturday, October 1st! Buy 3 packages of our Designer Series Paper and receive 1 package free! Buy as much paper as you will need for your projects over the next months! There are 8 packages of paper on sale – two from the Holiday Catalog and five from the Annual Catalog.
Today is World Card Making Day! What a great excuse to sit down and make a card! In honor of this day, Stampin’ Up! is having a sale on select cardmaking products from October 1 – 5. You’ll find the ON SALE products and their sale prices in the list below (click on the chart to enlarge it).
Please note that to receive the free Fast Fuse refill, you’ll be ordering the refill for $7.50 and receiving a Fast Fuse Adhesive. The refill will snap on to the Adhesive holder when it is empty. (hope that makes sense).
If you have a catalog, please note that the information on page 160 about the Designer Tin of Cards Project Kit is incorrect. Here is the correct info:
Product List- Below are the products on sale until October 5, 2016. The sale prices are not reflected in this chart but you can see them at the beginning of this post. To place an order or for more information, click on any of the products below.
Your order can be a combination of Annual& Holiday catalog products as well as items on the Clearance Rack. Your order must be a minimum of $50 before tax/shipping. Be sure that you can see my name (Tracy Bradley) in the upper right hand corner of the ordering page. Remember to use the HOST CODE BZ6JNCNX Here’s an example where you will be prompted to enter the host code.
Below, I will list all of the stamp sets that are available. Immediately after you place your order, email me your top three stamp set choices. In order to be fair to everyone, please do not email me before you place your order. I will try to honor your first choice whenever possible but please understand that certain stamp sets may go more quickly. I’ll let you know via email which stamp set(s) you’ll be receiving. Once a stamp set has been spoken for, I will remove it from the list.I do have several of some stamp sets so you might notice that a set is still on the list even though I contacted you that you will be getting that particular one.
The stamps sets will either be clear mount or photopolymer (no requests please).
If you choose NO CONTACT when placing your order, I will be unable to send your free stamp set as Stampin’ Up! will not release your name and address to me.
Sorry, but this offer is only open to U.S. customers and only available through Tracy Bradley
If you are having trouble ordering online, I am happy to do it for you. I will need your credit card information.
If you have any questions, please don’t hesitate to ask!
All of the stamp sets are a combination of catalog, Sale-a-bration and Host sets. Most are brand new but several are gently used. Scroll below to see what’s available! (Update: All of the stamp sets have been removed).
Only two more days left to receive a free stamp set with a $50 order (before shipping and tax)! I still have a good selection of stamp sets, most of which have never been used. This offer is only available through me, Tracy Bradley.
Your order can be a combination of Annual& Holiday catalog products as well as items on the Clearance Rack. Your order must be a minimum of $50 before tax/shipping. Be sure that you can see my name (Tracy Bradley) in the upper right hand corner of the ordering page. Remember to use the HOST CODE BZ6JNCNX Here’s an example where you will be prompted to enter the host code.
Below, I will list all of the stamp sets that are available. Immediately after you place your order, email me your top three stamp set choices. In order to be fair to everyone, please do not email me before you place your order. I will try to honor your first choice whenever possible but please understand that certain stamp sets may go more quickly. I’ll let you know via email which stamp set(s) you’ll be receiving. Once a stamp set has been spoken for, I will remove it from the list.I do have several of some stamp sets so you might notice that a set is still on the list even though I contacted you that you will be getting that particular one.
The stamps sets will either be clear mount or photopolymer (no requests please).
If you choose NO CONTACT when placing your order, I will be unable to send your free stamp set as Stampin’ Up! will not release your name and address to me.
Sorry, but this offer is only open to U.S. customers and only available through Tracy Bradley
If you are having trouble ordering online, I am happy to do it for you. I will need your credit card information.
If you have any questions, please don’t hesitate to ask!
Take a look at the Paper Pumpkin Kit for September!
If you’d like to join Paper Pumpkin, click here for my special link. You can cancel at any time if you decide you don’t want to continue. If you use the special code BOGO, you’ll pay regular price for October ($19.95) and receive the November kit FREE. This BOGO offer is good until October 10th!
This month Paper Pumpkin (Stampin’ Up’s monthly crafting subscription) is AWESOME!! Cute treat tubes to decorate and fill with treats! I was pretty excited when I opened my box this month!
Did you know that each month you will receive at least one Stampin’ Spot (ink pad) and an exclusive stamp set? Did you also know that a Paper Pumpkin promotion is going on right now? Buy your first month at the $19.95 price and get the second one absolutely free! This is a great way to give it a try and see if it’s something you might like!
Every month, Stampin’ Up! will share a video to quickly demonstrate how to assemble each kit.
Every subscriber has exclusive access to past kits. So, when a kit runs out, you can buy more—either as a full kit or a refill (without stamp set and ink). Click here (and scroll down) to see the current selection of past kits, available while supplies last and only for current subscribers.
If you’d like to sign up, here’s my special linkto join Paper Pumpkin! Be sure to use the code BOGO! This offer is good until October 10th!
Welcome to Day 7 and the last day of my Treat Packaging Series!
Today I have a little Pumpkin Jar box! I photographed it in my hand so that you could really see how small it is. I have to give credit to BJ Peters, a fellow Stampin’ Up! demonstrator, for this cute idea! I just love it!
I used two stamp sets that coordinate together in that you can use the Everyday Jars Framelits with both of them! The jar is from the stamp set Jar of Love and the pumpkin face uses Jar of Haunts. The jar was cut out of Pumpkin Pie cardstock using the Framelits. The Hardwood stamp set will need to be inked up with Pumpkin Pie to get the image of wood on the pumpkins. The lids were cut out of Basic Gray cardstock and stamped with Basic Gray ink. The sparkle on the lids is achieved by using Wink of Stella. The lid is then glued to the pumpkin.
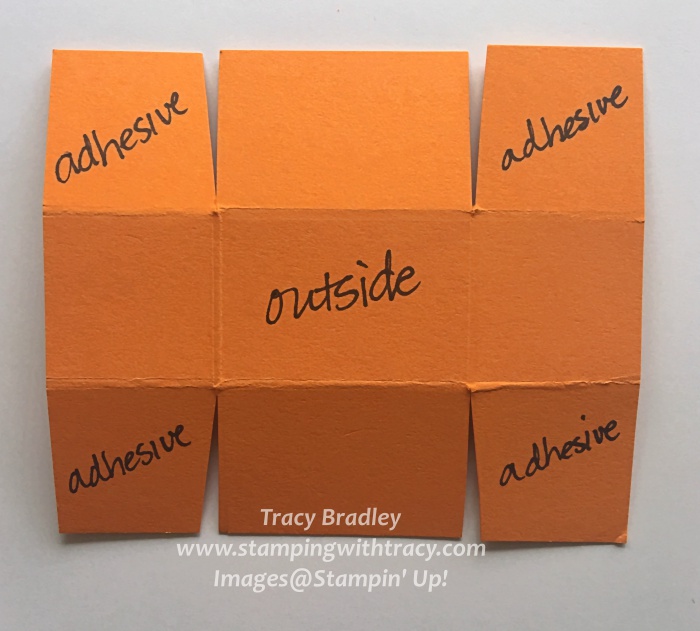
The little box to hold the treats was made out of Pumpkin Pie cardstock. The paper measures 3-1/2″ x 3″. On the 3-1/2″ side, score it at 1″ & 2-1/2″. On the 3″ side, score it at 1″ & 2″. Fold all the score lines and then cut up to the score lines along the 3-1/2″ side. I also snipped a small amount from the ends to help the box go together more easily. This is how your paper will look.
Next, you’ll add adhesive on the flaps and bring up the sides to form the box.
Glue the pumpkins to the finished box. Pinch the tops together (I added a glue dot) and tie it up with Baker’s Twine!
I was able to add two Hershey’s Nuggets inside! All of the products I used to make this cute little guy are listed below. If you have any questions, don’t hesitate to ask! Thanks for stopping by!
Product List – Click any of the products below to place an order or for more information.
Welcome to Day 6 of my Treat Packaging Series! I’ve shown many designs in the Halloween Night Speciality Paper Pack and my project today shows one more. There’s so much versatility in this one package of paper!
I used the Gift Bag Punch Board to make my bag! I personally think that it can be somewhat confusing when you first use the board, but once you get the hang of it, it’s so quick and easy to make a bag. Honest!
Below you’ll find the Stampin’ Up! video showing how to use it, which I watched the other day to refresh my memory. You can make boxes of many different sizes but for my project I used a 6″ x 12″ piece of paper (you’ll use the “L” on the punch board). The sides of the bag are each 2″ and it’s 4-3/4″ tall. If you’ll notice in the picture above, you can add holes to the stop of the bag and then insert ribbon through them to tie it together. I chose not to add the holes. You can see one where I did add ribbon HERE.
If the video seems confusing, it helps to know that you are creating two sides, the front and back. The sides have the same directions as well as the front and back. You are just repeating the directions. Once you get the hang of it, within a few minutes, you’ll wonder why it seemed confusing. Trust me.
Once you finish using the Gift Bag Punch Board, your paper will look like this. There’s a horizontal score line right below the indentations. When you fold on that score line, it will create the bottom of the box.
The next step will be to cut away the flap shown below.
Here are the last cuts before you start to put your box together. The purpose of these cuts is so that your box will fold up easily.
You’ll find a list of all the supplies I used down below. I’ve included the bundle for the Spooky Fun stamp set and the Halloween Edgelits because you’ll save 10% if you purchase them together.
Product List – To place an order or for more information, click any of the products below.