I will always be very straightforward and honest with you. I ordered Paper Pumpkin when it first came out and I didn’t care for it. I subscribed and unsubscribed several times. BUT, I have been a loyal subscriber now for over a year and a half. Why? Because the projects are so cute AND I get a Stampin’ Spot and stamp set every month.
Stampin’ Up! sent out their millionth kit in March and they want to thank their Paper Pumpkin subscribers in April with an extra free stamp set! If you’d like to give it a try for a month and see if you like it, this is the month to do it. It is very simple to sign up but you need to do it by April 10th (this Sunday)! Click here to sign up!
Here are a few stamp sets that I’ve received in my PP past kits and my supply of Stampin’ Spots!
If after a month you decide that you don’t like it, simply unsubscribe before the 10th of the next month. It’s that easy!
Here’s a video from Stampin’ Up! that shows the contents of the kit that came out in March.
If you have any questions, PLEASE don’t hesitate to contact me: tracy@stampingwithtracy.com
I love making cute AND easy projects and today’s project definitely fits under both of those categories. Since its Throwback Thursday I am recreating a treat bag I originally made last spring. You can see that original post HERE.
I’ll show you how easy it is to make this treat bag but first, as I mentioned yesterday, I’m celebrating my 7th Stampiversary with Stampin’ Up! this week! In honor of that, I am going to send out three of these Treat Bag kits to one lucky winner. You’ll receive a fun package in the mail with all the supplies you’ll need. I will cut, score and add the adhesive and you’ll just need to fold the flaps in (you’ll need to supply your own stamped image per Stampin’ Up!).
To enter to win, just leave a comment telling me which of the soon to be retiring In Colors (get them while you can) is your favorite! I’ll add an extra entry for you if you tell me which one is my favorite! I’ll announce the winner on Sunday, April 10th. I’m sorry but this is only open to U.S. residents.
Let me show you how easy it is to make the treat bag! You’ll need a piece of cardstock or DSP (I used Birthday Bouquet Designer Series Paper).
Card stock or DSP measurement: 5-1/2″ x 8-1/2″
Score on the portrait side at 1-1/2″
Turn it around to the landscape side and score it at 1-1/2″, 4″, 5-1/2″, and 8″
Now you will do some cutting and folding on the score lines (there’s some funky line above my score line, please just ignore that). When you lay your paper down to replicate my cutting, be sure the design you want on the outside is facing towards you and that the 1-1/2″ score line is down towards the bottom. Cut on the score lines indicated below. You’ll remove the piece on the right side, trim one of the flaps (this helps the bag fold up with less bulk), and take off a hair on the sides of the other pieces (again, less bulk).
Next, add Tear and Tape or Fast Fuse in the two areas shown below. The flap on the right hand side with the adhesive will attach to the opposite side to form the box. The flap with the adhesive will hold the bottom of the box together. I’ve put the adhesive on that particular flap so that it will face towards the back of the box (that will make more sense when you assemble your box).
You could pierce a hole at the top and attach ribbon but I decided to add a clothespin with some ribbon and my sentiment. Easy!! I’ll list all of the supplies that I used below. To place an order, just click on any of the products and you’ll be directed to my online store. Any questions, don’t hesitate to ask!
Don’t forget to leave a comment about your favorite retiring In Color! Product List
It’s my 7th Stampin’ Up! Anniversary today and I’d like to celebrate with you!
Place a $25 or more order at my online store, starting today and continuing until Sunday, April 10th, and receive a free gift of our glassine Sketched Dots Tag a Bag Gift Bags (there are 10 bags in each package). Your gift will be sent to you after the end of the month so that I can place my order for the bags. Continue reading below to see what else will be included with your gift this month.
Here are several ideas using these bags:
During the month of April, in addition to the thank you card that I send with all orders, I’m also sending out a small handmade gift using Stampin’ Up! products. Remember, if you place your order by Sunday, you’ll also receive your package of the Sketched Dots Tag a Bag Gift Bags too!
Click hereto place your order! Please make sure that you see my name in the upper right hand corner.
Be sure to check back later this week for a few more surprises!
Stampin’ Up! has just announced that the Weekly Deals program will discontinue on April 18th. Instead, every few months they will have a promotion called Special Offers with even better discounts!
There are 15 discounted items this week, including dies for the Big Shot! Be sure to check them out! Click on any item for more information or to place an order.
Use this code and you’ll receive a special thank you from me in the mail! If your order is over $150, please do not use the host code and you will still receive your thank you from me!
Today it’s all about Washi Tape but on a personal note, I want to wish my grandson a very Happy 1st Birthday! From the moment he arrived one year ago today, he has brought nothing but sunshine and joy into our lives. You can’t help but smile when he smiles back at you which is ALL. THE. TIME. Such a happy little boy. I feel so blessed!!
Now it is time for Washi Tape!
First, I thought I would share how I store it. Stampin’ Up! sells Washi Tape in sets so I like to keep them all together and it is so easy with a metal ring! Whether you have hooks to hang them onto or you store them in a drawer, it so much easier to choose the one you want when they’re all together.
Another trick is to use a bread “clip” at the end so that you aren’t wasting valuable crafting time trying to find the end. (Tell your family that you’re collecting them and you’ll have a big stash of them in no time)! I have found that both of these ideas work for me and I have Patty Bennett to thank for both tips!
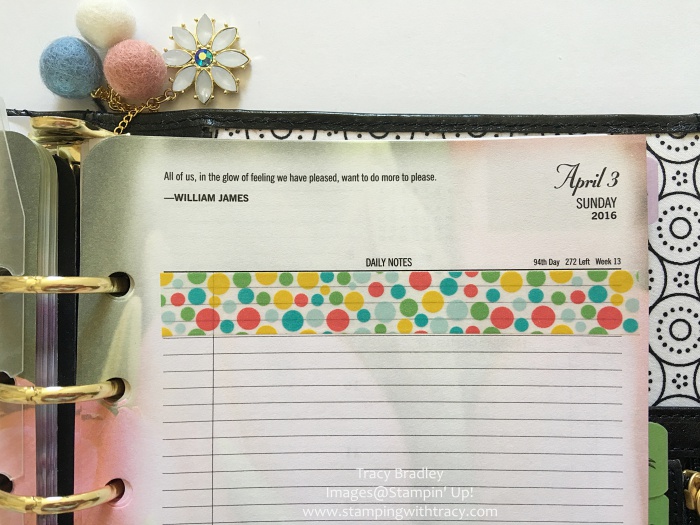
The big craze these days is decorating your planner with stickers and Washi Tape. I’ve gone back and forth with different planners in the last six months but ended up going back to my Franklin Planner. When I retired from teaching I didn’t think I would need all the space that this type of planner provides but I do! The Blooms pages are so pretty but I thought a little bit of Washi Tape would jazz the pages up a bit.
This set of washi tape is called Cherry on Top and you can find it HERE in my Online Store.
Place an order this month using the host code and besides sending you a thank you card, you’ll receive a small gift as well!
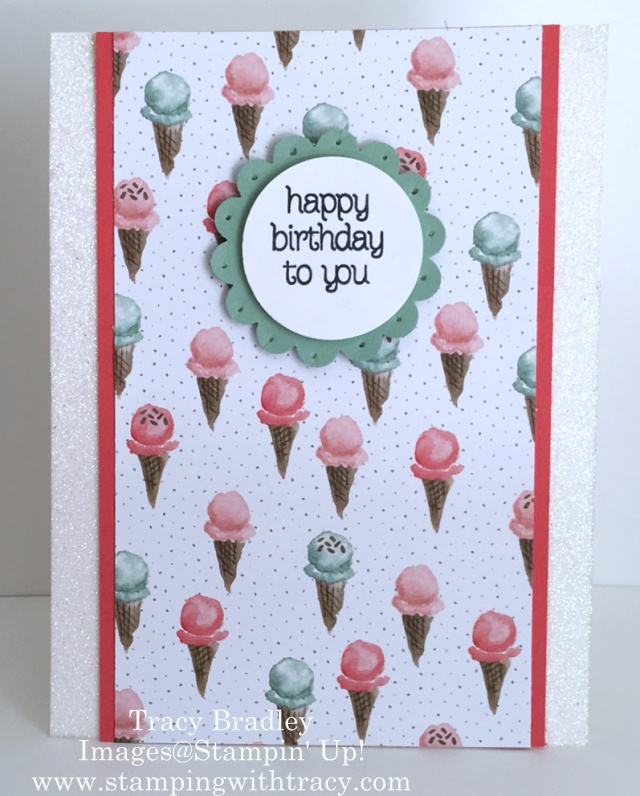
I made this card last week with the intention of showing one way to use the glitter tape that was available during Sale-a-bration but it sold out before I could write my post. Another product that could be substituted is our Glimmer Paper. A small strip on both sides of the card would give it just the perfect amount of sparkle!
The real star of the show though is the Birthday Bouquet Designer Series Paper! It’s so pretty that you really don’t need much else to make this card. After adding the sparkle tape, I cut a 3-1/4″ x 5-1/2″ piece of DSP and adhered it to a piece of Watermelon Wonder that measured 3-1/2″ x 5-1/2″. My sentiment is stamped with Memento Ink using one of the Circle of Spring stamps. I used the 1-3/8″ Circle punch and adhered it to a Mint Macaron 1-3/4″ Scallop Circle. My paper piercer was used to poke holes around each scallop. (Edited: Earlier I stated the incorrect size Scallop Circle punch – it has been corrected).
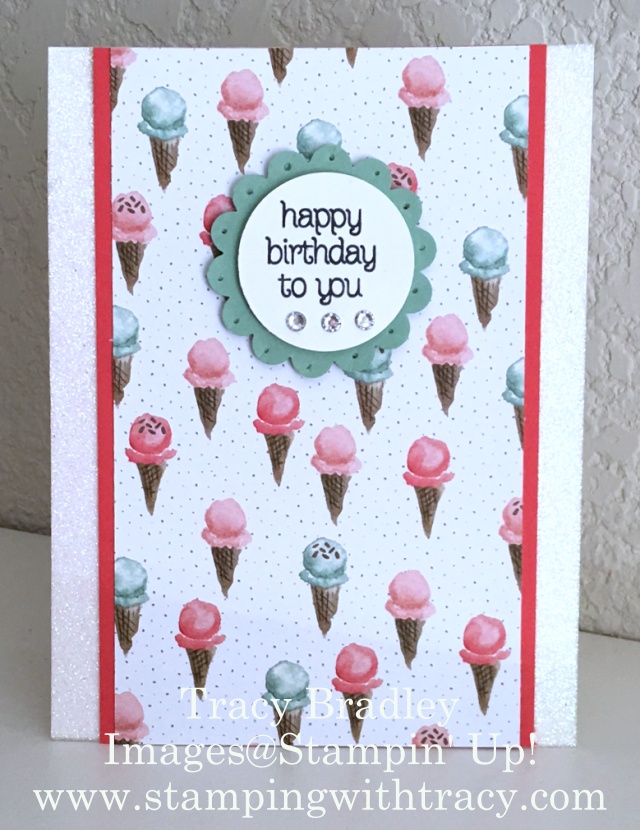
After I photographed the card I thought it could use a little bling and that version can be seen below. What do you think? Which version do you prefer?
If you would like to purchase any of the crafting goodies used to make this card, click on any product below and you’ll be taken to my Stampin’ Up! online store. Use the host code for this month and receive a small gift from me as a thank you. If your order exceeds $150, don’t use the code as you’ll be able to receive host benefits. The host code for this month is:
Today I’ll share the last of the goodies inside my stationary boxes. The boxes wouldn’t have been complete without something to write in and with! The coordinating notepads are 3″ x 5″ and I purchased them on Amazon. Just as I did with the gum holders, I used the same paper that coordinated with the paper that was used to slip inside the sleeve of the full size stamp case.
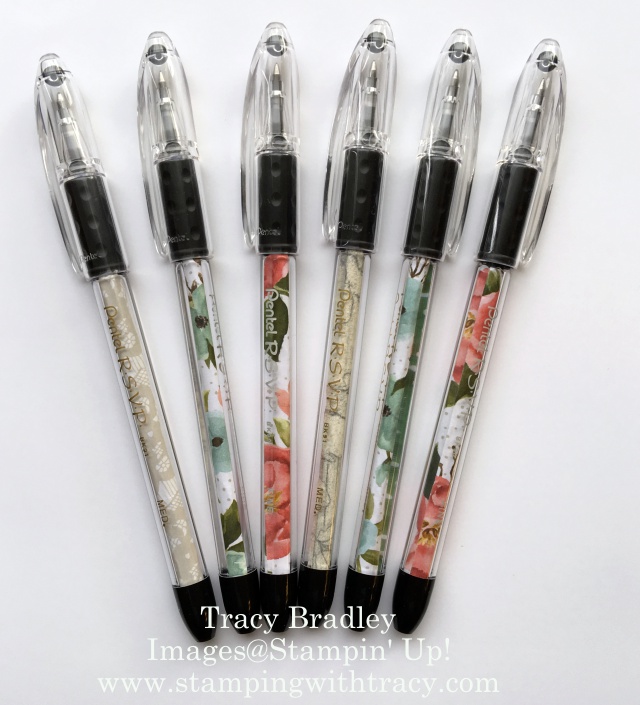
I used the stamp set that comes with the Watercolor Wishes Card Kit (the stamp set cannot be purchased separately). I used Pentel RSVP pens and unscrewed the black part which can be seen at the bottom of the picture, rolled up the paper and inserted it inside the barrel. In a previous post I did a short video on how to do this, so click here if you’d like to see it.
Product List – Click on any product below for more information or to place an order! If you have any questions, don’t hesitate to ask!
Last week I shared a Stationary Kit and promised that I would reveal the other items inside!
Each box also had a gum holder using the same paper that coordinated with the paper I used on the box. Using my Big Shot and the Little Letters Thinlits, I was able to easily cut out a letter for the front of each box. I used the 2 Way Glue Pen to attach each of the letters.
The pack of gum fits very snugly inside.
If you’d like the directions for the gum holder, you can visit a previous post of mine here.
I put a few more goodies inside each box and I’ll share them later this week! Have a fantastic day!
Product List – Click on the products below for more information or to place an order. If you have any questions, don’t hesitate to ask!
Recently I sent some gifts out to five special ladies and I thought I’d share them with you. I began with our storage cases and slipped some of our gorgeous Designer Series Paper (DSP) inside. I used Timeless Elegance DSP from the big catalog and Birthday Bouquet from the Occasions catalog. I wrapped each one up with coordinating ribbon.
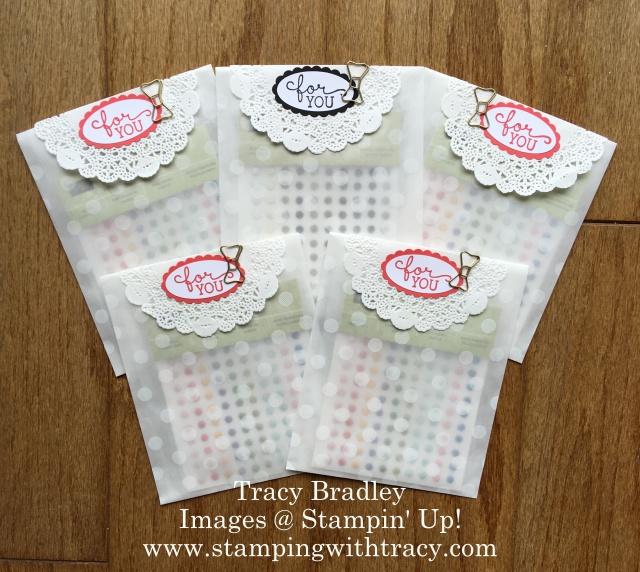
One goodie inside was a package of candy dots. I placed them inside a Sketched Dots Tag a Bag Gift Bag. I closed the bag shut with a Tea Lace Doily and a bow paper clip (from the Occasions catalog). The sentiment comes from the stamp set Birthday Blooms which can also be found in the Occasions catalog. You’ll find a list of my supplies at the end of the post.
Over the next few days I’ll share the rest of what I put inside!
Product List – Click on any product below for more information or to place an order.
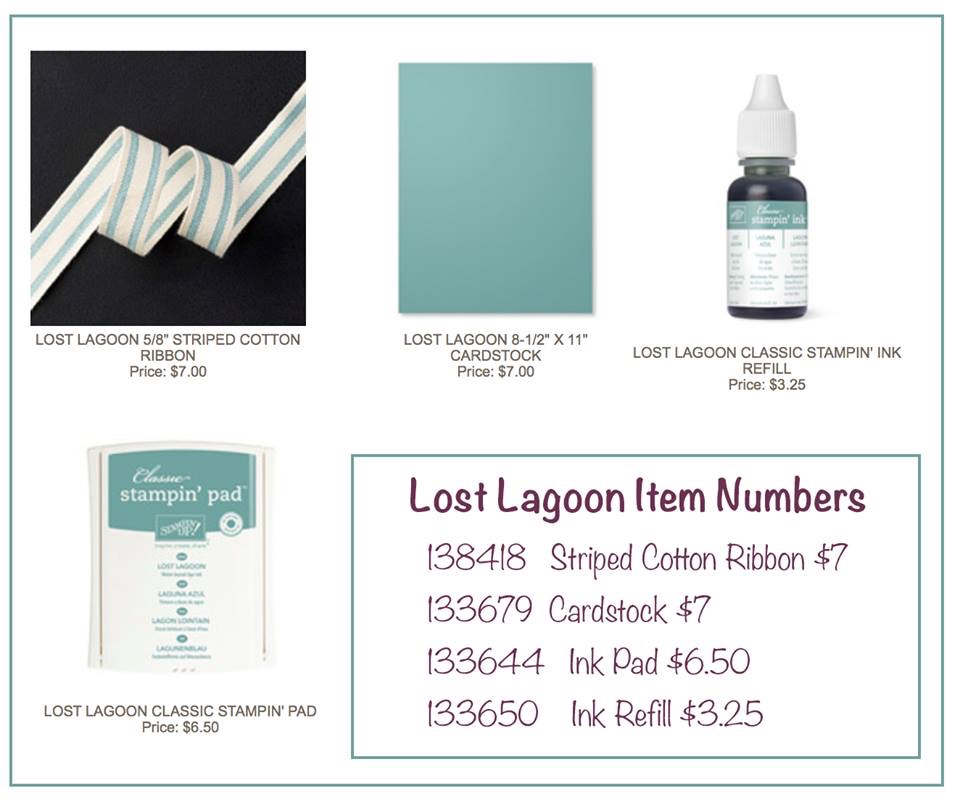
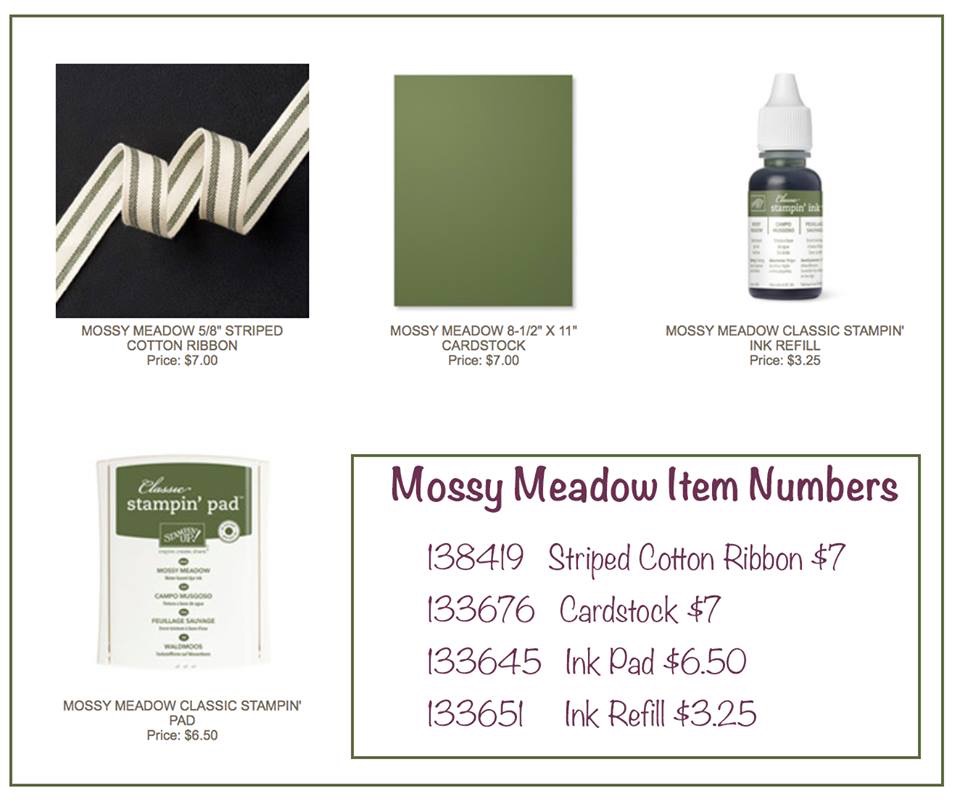
Did you know that five Stampin’ Up! colors are going away very soon? Each year, with the launch of a new catalog, five new In Colors are introduced and five retire. There always seems to be at least one color that I absolutely LOVE. This year is no different and saying goodbye to Blackberry Bliss will be difficult! The five colors retiring this year are: Blackberry Bliss, Hello Honey, Lost Lagoon, Mossy Meadow and Tangelo Twist.
The retirement list will be out soon and those items will be while supplies last. BUT, historically, the In Colors sell out immediately. If you have any favorites, I recommend purchasing them now and this includes the reinkers for stamp pads that you own!
I posted this card last year using Blackberry Bliss (sadly the paper has retired). If you’d like to see the original post, click here.
Below you’ll find all the information on the retiring colors. I’ll list the Weekly Deals at the end of the post!
If you’d like to place an order at my Stampin’ Up! online store, click here. For more information about the Weekly Deals, click on any of the products.
The Host Code for this month is:
Z J Y X W X X Z
Use this code when you place an online order and I will send you a small gift as a thank you. If your order is over $150, please do not use the host code but I’ll still send the gift to you! When entering the code, do not use the spaces as I’ve done above. I’ve spaced it to make it easier to read.
It’s Tuesday so that means that it’s time for new Weekly Deals! My favorite on the list? The Rhinestones! I will definitely be putting in my order for several packs of these sparkly little gems!
Don’t forget that Sale-a-bration is still going on! With every $50 that you spend (before tax and shipping), you can choose a free product from the Sale-a-bration catalog.
Please note that three items in the catalog (Sky is the Limit, Perfectly Artistic DSP and Hello) were only available for a limited time and while supplies last. It is possible that you can still get them but I can’t guarantee it. When you place your order online, be sure to have a back up choice, just in case.
Good news, three NEW items were added to the Sale-a-bration catalog! Click hereto download a copy of the Sale-a-bration catalog andHEREfor the flyer of the three new items (I’ve also included the new products below).
If you would like to place an order, click here and you’ll be directed to my Stampin’ Up! online store. The Host Code for this month is: ZJYXWXXZ
As always, if you have any questions, please don’t hesitate to contact me!