I’m posting late in the day, but welcome to Day 5 of my Treat Packaging series!
I love making little boxes for treats or a small gift of jewelry, candles, etc. This box is easy to make. You’ll need cardstock for the bottom of the box and Designer Series Paper for the top. Or you could make the entire box using cardstock and cut pieces of DSP to place on the top and sides.
I have a video below that I made last year (it uses retired product) but it will walk you through the construction of the box. All of the supplies I used to make my box can be found in the Product List below. If you have any questions, don’t hesitate to ask!
Product List – To place an order or for more information, click any of the products below
Today I’m using the Clear Tiny Treat Boxes. They measure 2″ x 2″ x 2″ and are the perfect size for a tiny treat.
I added a strip of paper inside but you definitely could skip this part and just add your treats. I used a strip of paper measuring 1-7/8″ x 6″. You can put your paper inside and just crease it at the sides. I chose to actually score my paper. I scored it at a little less than 2″ and a little less than 4″. I did find that with some of the boxes, my paper was a little too high where the box closes so I trimmed it down.
I used the Pumpkin Pie Glimmer Paper, and yes, it is beautiful!! Love all that sparkle! All of the supplies that I used are listed below in the Product List.
I hope you’ll join me tomorrow for Day 5!
Product List – To place an order, click on any of the products below.
I just wanted to pop in and let you know that you may not be able to access my blog on Saturday for a short period of time. There will be work done on the server throughout the weekend and it should work fine. But it will definitely be down around 4:00 (Pacific time), possibly for a few hours. During that time my email (tracy@stampingwithtracy.com) will be down too.
It’s Day 3 of my Treat Packaging series and I have a very quick and easy project for a lollipop!
When my husband and I moved to Florida from California for 7 years, I really, really missed See’s candy. I grew up with this candy store and it was always THE place to get candy. My dad, who really didn’t care for candy, loved their Rocky Road. It is so delicious. He didn’t really care for cake either (crazy, huh?) so one year we gave him a huge block of Rocky Road and stuck a candle in it. That was fun! Their lollipops are so good too and I’m especially partial to the Butterscotch flavor. If someone receives a See’s lollipop, they know they’re getting a special treat!
I have a video from a year ago that shows you how to make the lollipop holder. I’m using retired products but you’ll be able to see how to make one. In the video I turn down the paper up at the top. One of my samples is made this way and the other one is not.
If you are going to make it as I do in the video, your measurements will be 2″ x 8-1/2″ scored @ 1/2″, 4″ & 5″. If the top part is NOT turned over, your measurements will be 2″ x 8″ scored @ 3-1/2″ & 4-1/2″.
Below you’ll find the Product List for all the supplies I used.
Product List – Click any of the pictures below to be taken to my Stampin’ Up! online store.
It’s Day 2 of my Week of Treat Packaging! Today I’ve wrapped up some Ghirardelli chocolates in our Gusseted Cellophane Bags. I have 6 inside each bag but you could definitely add more! The bags can be found in the Annual catalog and are new this year. They are food safe so you can also use candy that isn’t wrapped up. If you’d like to give a non-food treat, a gift card would fit nicely inside as well.
I used a piece of Halloween Night DSP that measures 2-7/8″ x 8-3/4″ scored @ 1″ and 3″ The paper slips into the gusseted bag and the weight of the candy will make it stand up. I didn’t score the top part of the paper, but the extra gets folded over the top. I stapled the bag shut with our handheld stapler which comes with mini staples that are just 3/8″ long. Since the staple is holding the bag shut, it isn’t necessary to use the clip but I thought it was cute. Plus, once the recipient opens the bag, it can then be closed using the clip.
Aren’t the scarecrows adorable??? They are from the set Cookie Cutter Halloween and the bats on my project yesterday also came from this set. I had fun coloring them in with colored pencils. If you are considering purchasing this stamp set and the matching punch, please be aware that the punch is part of a bundle that includes the stamp set Cookie Cutter Christmas AND this punch also works with the stamp set I’ve used today, Cookie Cutter Halloween (I hope that isn’t too confusing).
Both of my sentiments come from the stamp set Spooky Fun. This stamp set can also be purchased as a bundle which includes the stamp set and the Halloween Scenes Edgelits Dies. All of items in our bundles CAN be purchased separately but I wanted you to be aware of the options!
All of the products I used for my projects today are listed in the product list below. By clicking any of the pictures, you’ll be taken to my Stampin’ Up! online store.
Below the project list, you will find the bundles that I’ve mentioned above.
Product List- Click on any of the items below to be taken to my Stampin’ Up! online store.
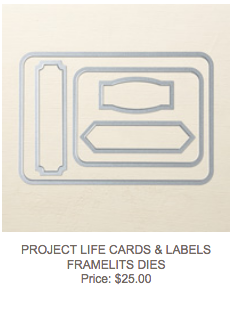
Please note: I forgot to include that I also used the Project Life Cards and Labels Framlelits. You can find a picture of this product below.