Last week I participated in the Glitter Queens Blog Hop. On the first Friday of each month we have a new theme and this month it’s Sale-a-bration, that time of year when you get free product with each $50 purchase. I love Sale-a-bration because I love Stampin’ Up! products and I love free!
If you missed my March Glitter Queens Blog Hop project, click here. In that post I also have a video where I do some heat embossing so if you’ve wanted to give it a try, take a look! For today’s project I thought I would continue the theme of Sale-a-bration and Mini Pizza Boxes.
The top of the box features the stunning Sale-a-bration gift, Springtime Foils Designer Series Paper. It mixes gold and silver together for a beautiful look. To add some color, I used my Pool Party Stampin’ Blends and wrapped the box up with 3/8″ Pool Party Shimmer Ribbon. To continue with the silver/gold theme, I punched a 1-3/8″ Silver Foil scallop, punched a 1-1/8″ scallop embossed with “Thank You” in gold and finished it off with a gold Metallic Enamel Shape. Definitely lots of shiny on the box!
All of the supplies I used to create my Springtime Foils Mini Pizza Box are listed below. Click any of the images to shop with me! My current host code is: FQG73CUA
It’s time for the Glitter Queens Blog Hop and this month it’s all about Sale-A-Bration, the most fun time of the Stampin’ Up! year! For every $50 you spend on Stampin’ Up! product, you can choose a FREE gift and there are 16 different choices this year (three of those items are at the $100 level). Click here to see all of your choices!
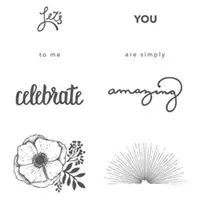
My project today uses two different Sale-A-Bration choices: Tutti-Frutti Cards & Envelopes and the Amazing You stamp set. Although I didn’t use it for my project, Amazing You coordinates with the Celebrate You Thinlits Dies, another Sale-A-Bration choice, free with a $100 purchase – and these dies will be in the 2018-2019 Annual Catalog. Why not get them free !!!!???
The actual box of my project was super easy because I used our Mini Pizza Boxes. They were first offered in the Holiday Catalog and are not in a current catalog but you can still purchase them! (#144645) They’re the perfect size for a gift card or a cookie, or jewelry . . . . . !
My video below will show how to make my project but here’s the measurements:
Tutti-Frutti Card Base: 3-1/8″ x 3-1/8″
Gold Foil: 3-3/8″ x 3-3/8″
Soft Sky Cardstock: scrap for scalloped oval
Whisper White: scrap for sentiment
Vellum: scrap for “rays”
I hope you’ll continue all around the hop! Next up is Dee!
If you get lost along the way, here’s everyone in the hop today!
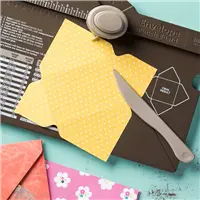
Last week I shared a project each day using the Envelope Punch Board. I had a comment from Gina asking if I knew the measurements for a Lindt Truffle Bar and I actually had several in my pantry. So I got to work with my Envelope Punch Board and this is the box I created! I should have taken a picture of the candy beside the box but you can see it in the video below.
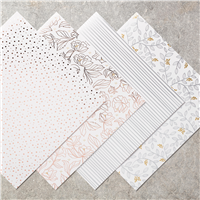
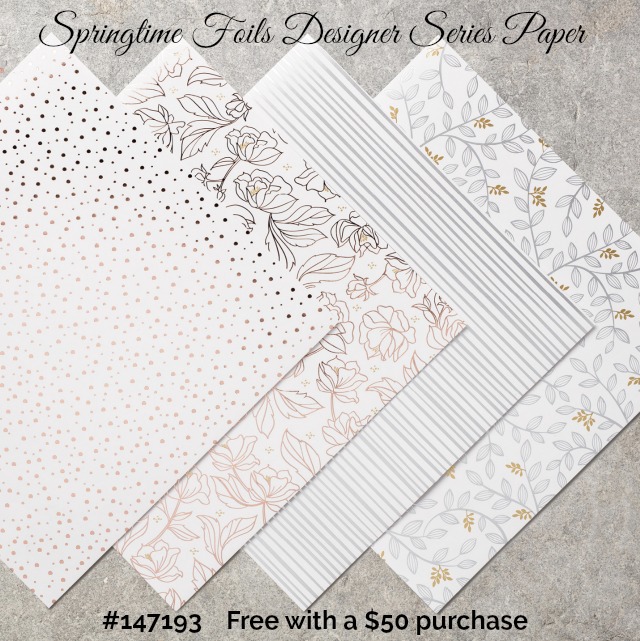
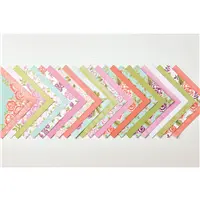
I used the gorgeous Springtime Foils Speciality Designer Series Paper, a Sale-a-bration FREE gift with a $50 purchase. It’s 12″ x 12″ paper and includes 12 sheets, 3 each of 4 designs. Each sheet is one sided and has beautiful foil designs in Gold, Rose Gold and Silver. Truly beautiful and FREE!
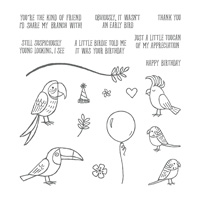
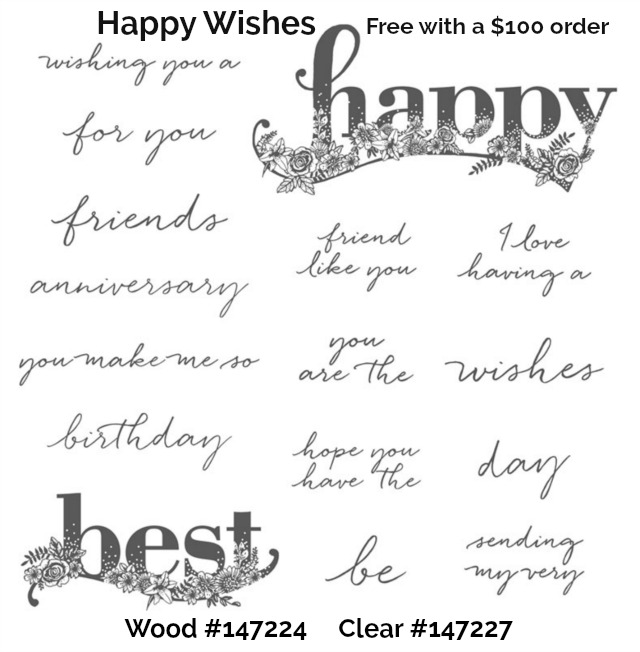
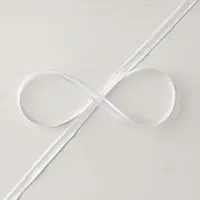
The sentiment is from another Sale-a-bration freebie called Happy Wishes, FREE with a $100 purchase. It includes 16 different stamps and is available in wood or clear. Because this paper is so pretty, I wanted the sentiment to match so I embossed it using Copper embossing powder. The Powder Pink scallop and sentiment oval were cut out using the Layering Ovals Framelits. The box is wrapped up with Whisper White 1/4″ Organza Ribbon, available in the Occasions Catalog.
You’ll find a complete supply list after the video and for more information or to place an order, simply click any of the images. If you have questions, let me know!
Sale-A-Bration will be over in a little over a month and there are over sixteen different FREE gifts to choose from! You can earn FREE product with every $50 you spend (before shipping and tax) and this year, spend $100 and you can pick two $50 items (Level 1) or choose one $100 item (Level 2). There are three Level 2 gifts: Blossoming Basket Bundle(stamp set & embossing folder), Celebrate You Thinlits Diesand Happy Wishesstamp set featuring 16 stamps. To see everything available, click here!
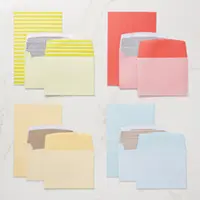
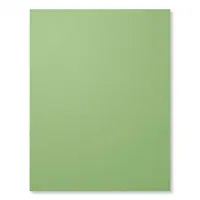
I used the Tutti Frutti Cards & Envelopeson my card today which are a Level 1 free gift (spend $50). The Lemon Lime Twist card worked perfectly as the base of my card and it was already scored so it was easy to fold in half. In the picture below, the top left color is Lemon Lime Twist although it looks yellow.
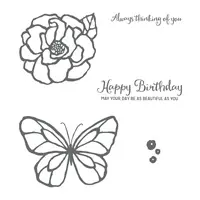
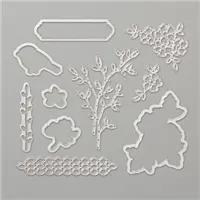
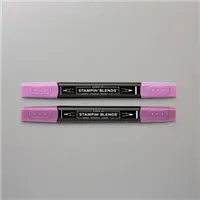
I stamped the flower from the stamp set Beautiful Dayonto Thick Whisper White using Memento Ink and colored it in with Stampin’ Blends: Rich Razzleberry, Old Olive and Daffodil Delight. The sentiment is also from Beautiful Day and was also stamped with Memento ink. I used a die from the Petals & More Thinlits to cut it out. I’m finding that I’m reaching for this particular die a lot and it fit today’s sentiment perfectly! I attached Stampin’ Dimensionals to the left side of the sentiment and in the middle. On the right hand side, the part that extends off of the black paper, I used Mini Stampin’ Dimensionals. I originally used two regular dimensionals and it made the sentiment too high. Using two mini dimensionals did the trick.
I attached the piece of Whisper White with the flower to Basic Black, attached Stampin’ Dimensionals to the back and attached it to my Tutti Frutti base.
All of the supplies I used are listed below and if you’d like to purchase any of them, simply click on any of the images. If you have any questions, don’t hesitate to ask! Enjoy your day!
Today’s boxes were made using the Envelope Punch Board and the Petal Garden Designer Series Paper Stack, both in the Annual Catalog. I used my favorite scallop punches (1-1/8″ & 1-3/8″) from the Occasions Catalog and the stamp set Fruit Basket.
These boxes are really easy to make and two Ghirardelli Chocolates will fit inside for someone special. Watch the video below to see how I made them!
Welcome to Day 6 of my Punch Board Series! Today we’re making an easy-to-make Treat Pouch. It’s really just an envelope but when you add something inside with a little height, it creates a completely different look. The video below will show you how to make it!
To make today’s project, I used Naturally Eclectic Designer Series Paper and the stamp set, You’re So Sweet, both from the Annual Catalog. Watch in the video how I only used part of the stamp, You’re So Sweet Enjoy a Treat.
Naturally Eclectic Designer Series Paper: 6″ x 6″
Punch and Score at 3″ on all sides
Whisper White (inside for stability): 3-1/2″ x 3-1/2″
If you have any questions, please don’t hesitate to ask! All of the supplies I used are listed below. Have a great day!