by Tracy | Apr 18, 2017 | Uncategorized
It’s April and you probably aren’t thinking about December right now but I wanted to let you know about two products on sale!

The stamp set, Embellished Ornaments, comes in Wood and Clear mount but the WOOD mount is on sale for 25% off. The Delicate Ornament Thinlits which coordinate with the set are 20% off! The stamp set can be ordered as late as May 22nd and then after that time, what’s left will be while supplies last. The Thinlits are NOW while supplies last!!
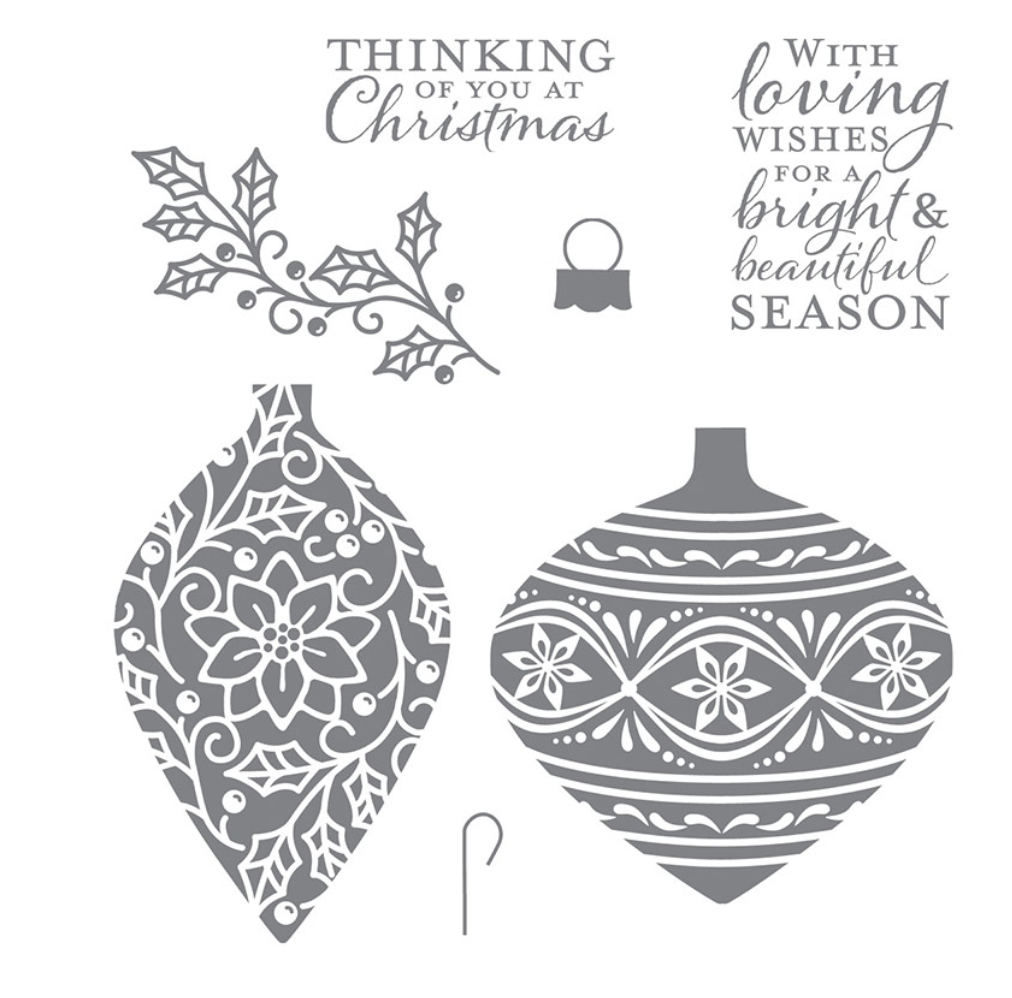
Embellished Ornaments
Wood #139756 $28.00 on sale $21.00
Clear#139759 $20.00

Both the stamp set and Thinlits are just beautiful. In the card below, I used just the Thinlits. I love all of the detail!


If you’d like to see everything on the retirement list, click here!
If you’d like to place an order, click HERE!
Enjoy the rest of your day!
by Tracy | Apr 17, 2017 | Uncategorized
I hope your week has started off well! Today I am sharing cards I made over the weekend to send out to customers who placed orders in the last few days.

I don’t like sharing product that you can’t purchase so while I would normally add some pearls or rhinestones to my card, I didn’t as they’ve sold out.
The paper I used to cut out the butterflies, Floral Boutique, is on the retired list but as of right now, it’s available and not showing up as being low inventory. I used the Petal Burst embossing folder for the Whisper White layer. You could definitely make the card without the embossing but I think it adds a nice touch.
Tip: I used glue dots down the center of the butterfly. You could also use Stampin’ Dimensionals.
You’ll find a list of all the products I used to make this card below as well as the measurements for the layers.

Measurements for Layers
Thick Whisper White: 8-1/2″ x 5-1/2″ scored at 4-1/4″
Night of Navy cardstock: 4″ x 5-1/4″
Whisper White: 3-3/4″ x 5″
Stamping Supplies – Click on any product and you’ll be directed to my Stampin’ Up! online store! Once there, it’s easy to add items to your cart!
Click HERE to see all the products on the Retiring List!
by Tracy | Apr 16, 2017 | Uncategorized

I wanted to pop in today to wish you a very Happy Easter!
These beautiful eggs were decorated by my granddaughter, Audrey! What child doesn’t love decorating eggs??
I hope you have a wonderful day!
by Tracy | Apr 14, 2017 | Uncategorized

When I’m crafting, it looks like a tornado went over my table. An idea will pop into my head and I immediately put down what’s in my hand and grab something else. Are you the same way? Unfortunately when it’s time to clean up, I end up with a few stray pieces, and I have no idea where they go. I’ve had this problem with Big Shot Framelits and Thinlits, especially the small pieces! I can’t tell you how many times I’ve asked myself, “Oh no, what set does this belong to???”
No more!! The other day as I was cleaning up, I realized that the number of the set is on each piece!!!!! How did I never realize this? It would have saved me so much time. Definitely a tip I wanted to pass on to you. I’d like to think I’m not the only one who wasn’t aware of this!!
The Retirement sale is in full swing and many products are already gone. Products from the Annual and Occasions catalog are included in this sale and everything is while supplies last, except for stamps which are guaranteed until May 22nd and then they go on while supplies last status. The Occasions catalog is available until May 31st but if a product is on the list, it still follows the same rules as above. Order early so you aren’t disappointed.
I’ve had a few questions about the Basic Pearls and Basic Rhinestones. They have sold out but they will be returning in the new catalog in new sizes! Yay!!!
There are two ways to check out the retiring products:
- Click here to see pictures and prices at my Stampin’ Up! online store.
- Click here for a PDF which includes a list of the products and the page numbers where they can be located in the catalogs.
If you have any questions, don’t hesitate to ask! Click here to place an order!
by Tracy | Apr 13, 2017 | Uncategorized
Today I thought I’d share projects that I’ve shown on my blog in the last year that feature retiring products!
Please note: All retiring stamps can be ordered up until until May 22nd and then, while supplies last. Everything else on the retirement list is WHILE SUPPLIES LAST (ribbon, Big Shot accessories, punches, etc.). See what’s retiring here!
Delicate Ornament Thinlits 20% off! $29.00 $23.20

Fruit Stand Designer Series Paper 20% off! $11.00 $8.80
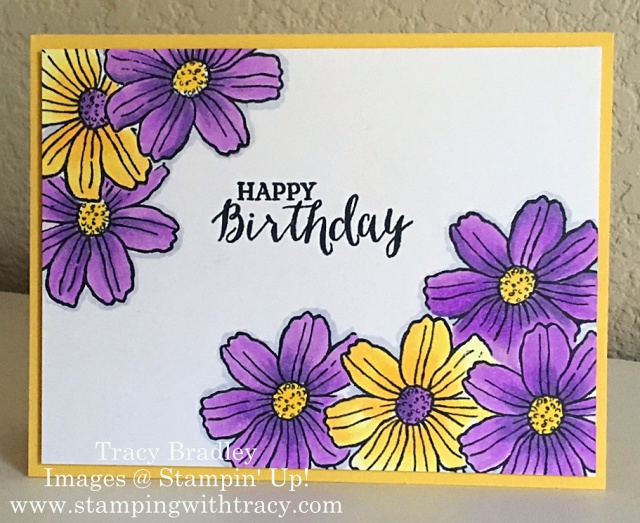
Helping Me Grow Photopolymer Stamp Set

You’re Sublime Stamp Set
This set is available in WOOD and CLEAR


Stylish Stems Framelits Dies 40% off $31.00 $18.60
Special Reason Stamp Set Clear -Mount 25% off $20.00 $15.00 (Wood mount also available but not on sale)

Basket Bunch Photopolymer Stamp Set 20% off $21.00 $16.80
Basket Builder Framelits Dies 50% off $31.00 $15.50
Sweet Sugarplum Ruched Ribbon 30% off $8.00 $5.60
Whisper White Organza Ribbon (on the LOW inventory list)
Elegant Dots Embossing Folder
If you have any questions about any of the products I’ve shown, don’t hesitate to contact me: tracy@stampingwithtracy.com
Click HERE to place an order!
April Host Code: F3Q6X72X
Use the April Host Code when placing your online order and receive a free gift from me!
by Tracy | Apr 12, 2017 | Uncategorized
The Retirement List came out on Monday and some items are already flying off the shelves! The Basic Pearls and Rhinestones are gone as well as two embossing folders – Lovely Lace and Woodgrain.

As of last night, several items were in low inventory status and I’ve listed them below. I’ve also included pictures so be sure to scroll down to see those!
Stylish Stems Framelits: 40% off $31.00 $18.60 (This sale price is not reflected in the picture below but you will see it if you click it)
Special Reason Bundle Wood & Clear
Melon Mambo 1/8″ Striped Ribbon
Whisper White 5/8″ Organza Ribbon – MY FAVORITE RIBBON
Regals Designer Series Paper Stack
2015-2017 Collection of Stamp Pads
Cucumber Crush Stamp Pad
Watermelon Wonder Stamp Pad
Delightful Dijon Stamp Pad
Low Inventory Items! Click on any of these products below to see them in my Stampin’ Up! online store.

This card features the Stylish Stems Framelits, one of the products listed above AND on sale! I also used the embossing folder, Elegant Dots, which is also retiring. The inspiration for this card came from Mary Fish.
It can be hard to decipher the Retirement List so if you have a question as to whether a product is retiring, send me an email and I’d be happy to let you know! tracy@stampingwithtracy.com
by Tracy | Apr 11, 2017 | Uncategorized

Today’s card is one that I made back in June when the stamp set, Sitting Here, was just released. Doesn’t the kitty look so relaxed sitting on the swing?
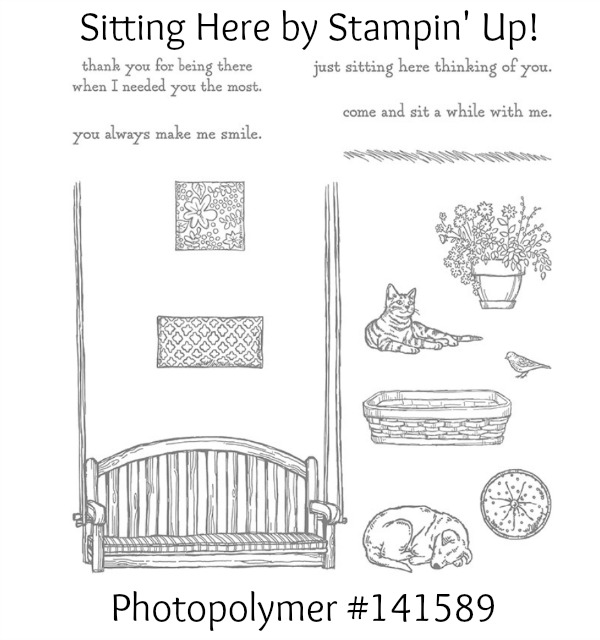
I stamped the kitty and the pillows onto Whisper White cardstock and fussy cut them out. It gives a nice dimensional look to the card. The oval was cut out with the Layering Ovals Framelits and popped up with our Foam Adhesive Strips . The sentiment is in the stamp set Rose Wonder.
Because I made the card so long ago, I cannot remember what I used to color the stamped images. I believe I used my Copic Markers (non Stampin’ Up! supply) but our Stampin’ Write markers are also another option.
Stamping Supplies – Click on any product below and you’ll see that item in my Stampin’ Up! online store. From there it’s easy to add it to your cart!
by Tracy | Apr 10, 2017 | Uncategorized
The list is out with all of the products retiring in the Annual and Occasions Catalogs and these products will only be available until May 31st. Stamps can be ordered up until May 22nd and then they will be while supplies last. Accessories and Tools are only available while supplies last!
The Occasions Catalog is good until May 31st BUT if a product from this catalog is on the Retirement List, the same rules apply as above.
There are two ways to see what’s retiring!
- You can click here and head over to my Stampin’ Up! online store. The products are broken up into three categories: Stamps, Retiring Bundles and Everything Else. You’ll see a picture for each product.
- Click here to download the PDF with all of the products in list form.
Many items are on sale and you can easily see this on the PDF!
When you’re ready to place an order, you can click here!
If you have any questions, don’t hesitate to ask!
by Tracy | Apr 10, 2017 | Uncategorized

Later today the Retirement List will be released. All of the items in the 2016-2017 catalog that won’t be returning when the new catalog is released on June 1st, will be on this list. Historically anything in the retiring In Color Collection will go quickly, especially reinkers and stamp pads. If you want any of these items, please don’t hesitate in purchasing them.

Click HERE to see the entire 2015-2017 In Color Collection
I’ll be back later today with another post once I’ve seen the Retirement List!
by Tracy | Apr 7, 2017 | Uncategorized
Welcome to the first ever, First Fridays Blog Hop! Several stampers have come together to host a fun blog hop on the first Friday of each month! We hope our projects will inspire you to create!
Our first, First Fridays Blog Hop theme is Easter. At the end of my post, you find a list of all the stampers in the hop and I hope you’ll visit each one! My project for the hop is a matchbook! You can add a yummy treat inside, a gift card or both!
You’ll start with a piece of cardstock that measure 4-1/4″ x 11″. Score it @ 1-1/2″, 6-1/2″ and 7″. Fold on all the score lines and you’ll have your matchbook! You’ll want to add a staple to the bottom flap and place it towards the bottom so your top flap can tuck in. (PLEASE NOTE: Before stapling, add your cellophane bag and then staple. My picture below does not show the bag). I used our Gusseted Cellophane Bags that measure 3″ x 6″.
I added two pieces of Whisper White to the front and those measure 3″ x 4″ and 1-1/4″ x 4″. I used the Basket Bunch Bundle which includes the Basket Bunch stamp set & Basket Builder Framelits Dies to decorate the matchbook (the stamp set and framelits can be purchased separately but as a bundle, you save 10%). All of the pieces that were used to decorate the front (grass, bunny, eggs), as well as the sentiment, are included in this bundle.
The grass was cut out with Garden Green card stock. I cut two of them and placed them side by side. The basket covers up where they come together so it really does look like its one continuous piece.
The basket was stamped with Chocolate Chip ink onto Chocolate Chip card stock and cut out with the framelits (the handle and basket are separate dies). I popped it up with our Foam Adhesive strips (I’ll have a list of all the supplies I used at the bottom of the post). The eggs in the basket and underneath the ribbon were colored with Stampin’ Write Markers (Daffodil Delight, Tempting Turquoise and Real Red). I colored the bunny with Tempting Turquoise and Pink Pirouette and popped her up with a Stampin’ Dimensional.
I wrapped a piece of Organza Ribbon around the bottom flap and tied it in a bow. You can find a list of all the supplies I used at the very bottom of the post.
I hope you’ll hop around to all of the stampers. You can click below to head over to Heather North’s blog and see her cute project! You can also scroll down and see a list of everyone in the hop! Thanks so much for stopping by today!
Stamping Supplies – Below you’ll find all the products I used to make my matchbook. Clicking any of the supplies will take you to my Stampin’ Up! online store.
by Tracy | Apr 6, 2017 | Uncategorized

I am really going to miss the Moroccan Designer Series Paper when it retires. Isn’t it funny how you think you don’t like something and then end up loving it??? That’s me with this paper. It’s just in the last few months that I’ve realized just how beautiful it is!
I made today’s card for my daughter, Jenny! I used the Brushwork Alphabet stamp set to write out her name with Early Espresso ink on Very Vanilla cardstock and then cut it out with the Layering Circles Framelits. I then stacked it onto two more scalloped circles using these same Framelits. I added an enamel heart from the 2016-2018 In Color Enamel Shapes.

Card Measurements
Emerald Envy Card Base: 11″ x 4-1/4″ Scored @ 5-1/2″
Early Espresso: 4″ x 5-1/4″
Moroccan Designer Series Paper: 3-3/4″ x 5″
Stamping Supplies – Below you’ll find all the supplies I used to make my card! Click on any of the pictures and you’ll be taken to my Stampin’ Up! online store.
I hope you’ll join me tomorrow as I take part in a blog hop!
by Tracy | Apr 5, 2017 | Uncategorized

Yesterday I shared several cards and today I have four more which use the same set of measurements and the same supplies with the exception of the stamp sets I used for the sentiments. You can see that post HERE.
The card above uses a sentiment from the Oh Happy Day Card Kit, a kit that includes materials to make 20 cards as well as a photopolymer stamp set. (See the supply list below).

The sentiment I used for the two cards above comes from the stamp set, Tin of Cards.

The stamp set I used for this thank you card is called Thankful Thoughts.
Again, you can check out all of the measurements used by looking at yesterday’s post HERE.
Stamping Supplies: Click on any product below to head over to my Stampin’ Up! online store!
|
|
|
|
|
|
|
|
|
|

Tempting Turquoise Classic Stampin’ Pad*
[100814]
$5.95
|
|
|
|
|
|
|
|
My hope is that my cards will inspire you to create!


