Happy Holidays!

Merry Christmas!
Happy Hanukkah!
Enjoy your day with family and friends!


Merry Christmas!
Happy Hanukkah!
Enjoy your day with family and friends!
Stampin’ Up! has excess inventory of the Detailed Floral Thinlits Dies so they’ve put them on sale! Normally they are $29.00 but you can get them this month for $14.50
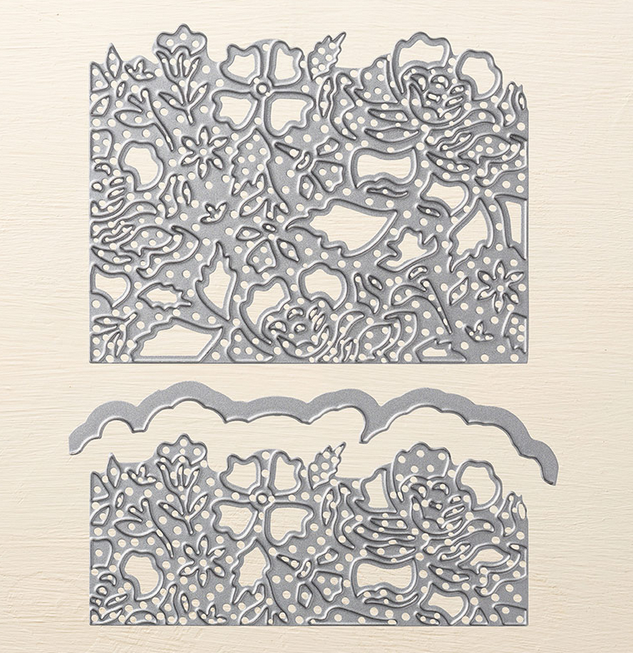
Detailed Floral Thinlits Dies
#141482
Because of the intricate designs, it is recommended that you use the Precision Base Plate as it really does help release all of the small pieces of paper. I like to use the Die Brush too. This die really creates beautiful projects!


To purchase the Detailed Floral Thinlits dies, click here to head on over to my Stampin’ Up! online store!

It’s no secret that I love my Big Shot. I’m so happy when there are new products to use with it! The Hexagons Dynamic Textured Impressions Embossing Folder is debuting in the Occasions catalog.

It’s different from a regular embossing folder in that it creates deep, dimensional embossed impressions. Your paper is lightly spritzed with water to help achieve that deep impression and then you run it through the Big Shot!


The Hexagons Dynamic embossing folder is part of a new suite called Urban Underground!
This same type of folder was first introduced in the Holiday Catalog with the Cable Knit Dynamic Embossing Folder (it isn’t retiring and is still available for purchase). Below you’ll find a video showcasing the Cable Knit folder but it’s the same process for the Hexagons Dynamic Textured folder. Enjoy!
The Year-End Closeout Sale is still going on! Click here to head on over to my online store!
Are you ready for a sneak peek into the Occasions catalog? As a demo, I was able to purchase from the catalog at the beginning of the month. I’ve been playing with all of my fun new products and I’ve even been creating a class that I’ll offer soon!
If you know me, you know that I LOVE flowers. I immediately hone in on anything that has to do with flowers when a new catalog comes out. There’s a new bundle called Special Reason. It comes with the stamp set Special Reason and the Stylish Stems Framelits Dies. Aren’t the projects from Stampin’ Up! (below) just gorgeous?

Yes, I bought this bundle and played around with it the other day. I was trying to make the Calypso Coral flower that’s shown on the bag and I could not figure it out UNTIL I watched the Stampin’ Up! video this morning. You have to use both of the Framelits that are shown in front of the bag. I can’t wait to get to my Big Shot and give it a try.
Check out the video below and you’ll see what I mean! But first, if you’ve ordered from me this year, I had Stampin’ Up! send your catalogs to you. They should be arriving any day! If you don’t already have a demonstrator and would like these catalogs, email me (tracy@stampingwithtracy.com) your address and I’ll send them out!

Enjoy the video!
Who wouldn’t want to earn a free stamp set???
When you place an order at my Stampin’ Up! online store, you earn Bradley Points! With each $25 order (excluding shipping/tax) you’ll earn a point. Collect 16 points and you’ll be able to redeem them for a free stamp set valued at $39.00 or less!

Here’s How It Works:
If you have any questions, please don’t hesitate to ask!

The Year End Closeout Sale is still going on! Click here to see which items in the Holiday Catalog are retiring! Several items have sold out and they are marked with an “x” in the far right column on the document.
Retiring stamp sets are guaranteed available until December 21, after which they will be only available while supplies last.
Retiring accessories will only be available while supplies last.
Retiring items will only be available while supplies last. All retiring items will be discontinued after January 3, 2017.

Yesterday I shared these little treats and today I want to show you how easy they are to make! You’ll need a 4 x 4 sheet of Designer Series Paper and the Envelope Punch Board.
Step 1: Just as the first photo shows, line up the edge of your paper with the 2″ line.

Step 2: Score, beginning where I show in the photo. There’s a groove in the Envelope Punch Board, so you’ll just continue to score down. Be sure to punch.

Step 3: See the directions below.

Step 4: Score just as you did in step 2 and punch.

Step 5: Repeat the same process on the remaining sides.

That’s it!

Fold on the score lines and pop your treat inside. I used a glue dot to close it shut. Decorate and you’re done!
These would look cute at your holiday table with the initial of each person sitting at the table with you. I’m not home, otherwise I would make one to show you as a sample. If you make one, I’d love to see it!
Below you’ll find the products I used to make my treat holders. Unfortunately the paper with the peppermints has sold out so I haven’t listed it.
The stamp set I used for my sentiment is on the retirement list and on sale! (Retiring stamp sets are guaranteed available until December 21, after which they will be only available while supplies last.)

If you have any questions, don’t hesitate to ask!
Product List – Click on any product below to be taken to my Stampin’ Up! online store.
|
|
|
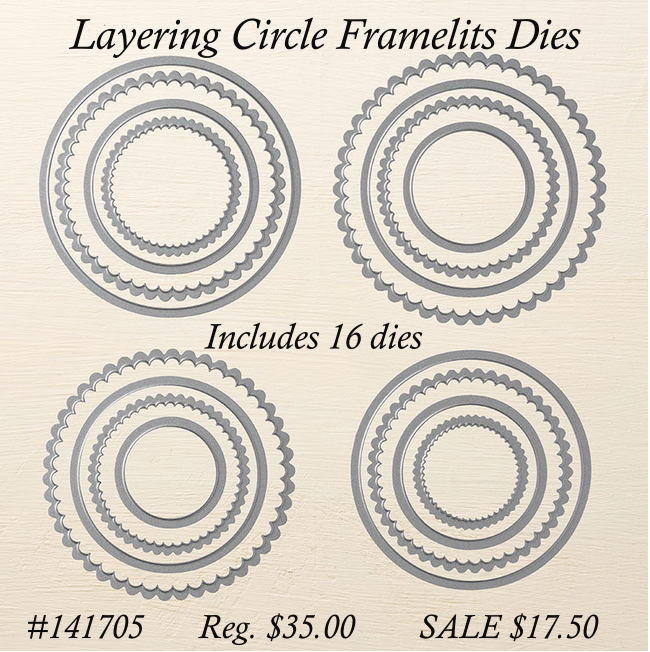
Circles Collection Framelits Die
[130911]
$27.00
|
|
|
|
Happy Monday! Quick post today as I’m heading out to do some Christmas shopping. I’m an online shopping type of girl but today I’m braving the crowds. Although I must say, I’m sure all of the Christmas decorations will put a smile on my face. Which do you prefer, shopping online or getting out to the mall?
These are some treats I sent out last week to customers who shopped with me! They were so easy to make with the Envelope Punch Board. Tomorrow I’ll post a tutorial in case you want to make some yourself!
Have a wonderful day!
I get very excited when a new catalog comes out and the Occasions catalog is no different!

If you don’t already have a demonstrator and would like a catalog, email me (tracy@stampingwithtracy.com) your address and I’d be happy to send one off to you! If you have ordered from me within the last six months, I’m having Stampin’ Up! mail your catalogs (Sale-a-bration too). They should be arriving soon! You can begin to order from this catalog on January 4th!
I wanted to let you know that several days ago I noticed that my blog posts were not showing up properly on my blog. The top post looks correct but the remaining posts only show the titles and not the graphics. If you click on each individual post, they will show up correctly. I’ve contacted someone who will be able to help me to rectify the problem but it will take several weeks.
Until then, I will continue to post and keep my fingers crossed that a new problem won’t crop up.
One of the things I love about Stampin’ Up! is that they help me figure out color coordination. Trying to decide which colors go together is not one of my strengths. Luckily Stampin’ Up! lists the colors that go with their designer series paper. On the paper stacks, you can find the list on the front.

On the 12″ x 12″ packages, you can find it on the back.

You can also find help in the catalog as they are listed there too! Cardstock packages are also available that match each pack of paper. 
If you haven’t purchased our paper packs before, I recommend choosing a few of the colors (or all of them) that coordinate. Whisper White or Very Vanilla are also a must (you’ll need it to stamp your sentiment)!
Be sure to check out what’s on sale during the Year End Close-out Sale! Click here to take a look!
I’m almost a bit embarrased to include this as a tip but it works for me so I should share, right?
I really am a fan of photopolymer stamps. Why? Because I want stamping to be stress free and I love that I can see right through the stamp to my paper, ESPECIALLY when I’m stamping a sentiment.
When I use clear or wood stamps, I always use Stampin’ Mist with my Stampin’ Scrub to get them nice and clean. But when I use photopolymer, the Stampin’ Scrub seems to add more ink to the stamps and I prefer to use a baby wipe.
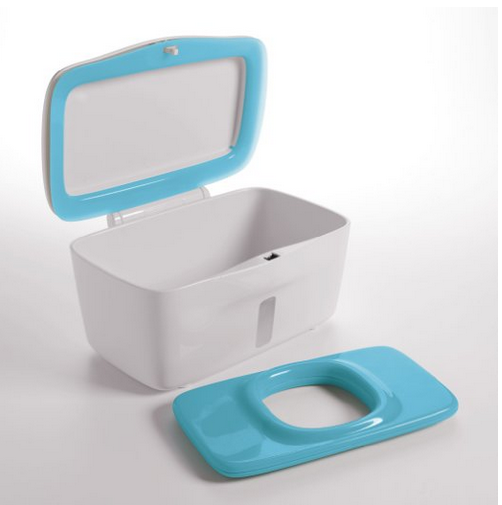
While I’m busy creating on my craft table, I’m always looking for somewhere to set the used wipe down because I can continue to use it during a craft session multiple times. I was rummaging through one of my drawers and found the container below. I smacked myself on the forehead and thought, of course, why didn’t I think to just put it into some sort of bowl??? So simple.

While I’m at it, I’ll share the container that I got on Amazon for the wipes. It is GREAT! If you don’t open it for weeks, the wipes do not dry out. The weighted plate makes it easy to grab one wipe at a time. I have another one that I use when I change my grandson’s diapers. If you’d like more information about this wonderful wipes dispenser, I’ll put a link at the end of the post.
As I mentioned, Stampin’ Mist and Stampin’ Scrub are both great for cleaning your clear and wood mount stamps!
Product List
|
|
|
|
Click here for the link to the Wipes Container on Amazon!
Any questions, don’t hesitate to ask!

Do you need a little bag for a gift card or a sugary treat? The Mini Treat Bag Thinlits Dies will help you to quickly make one in a matter of minutes!

Three of the items I used to make my project are currently on sale right now!

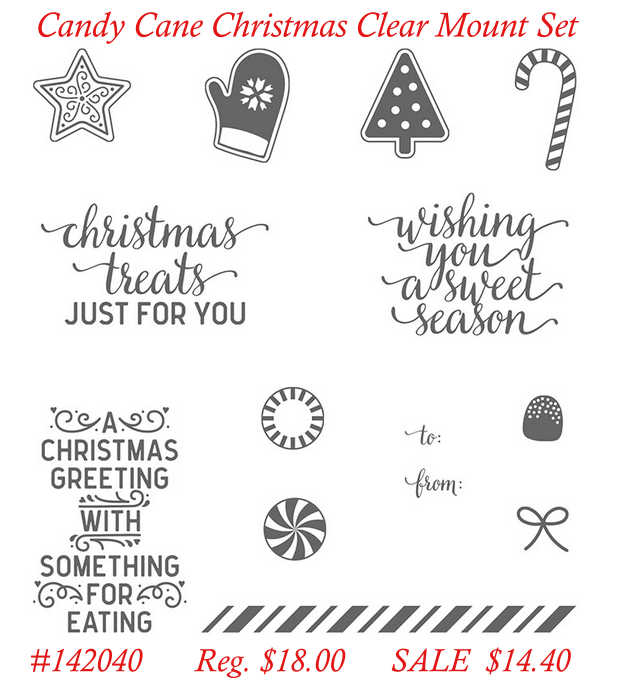
Please note: Candy Cane Christmas also comes in wood but the clear set is the only one that’s on sale.
My Card Details
Product List- All of the items I used to make my bag are listed below. For the items on sale, the sale price will show up when you click on it and go to my online store.
|
|
|||
|
|
|
||
|
|
If you have any questions, don’t hesitate to ask!
Today I wanted to let you know about another great product on sale during the Stampin’ Up! Year-End Closeout Sale – the Detailed Floral Thinlits Dies! They normally sell for $29.00 but you can purchase them for $14.50! That’s 50% off! I own these dies and you can really make gorgeous cards with them. Be sure to watch the video below to find out all about them! (If you’re reading this in your email program, be sure to click on over to my blog to watch the video).
Detailed Floral Thinlits Dies
#141482
Here are two cards I made using this die!
Click here to check out this product at my Stampin’ Up! online store!


