All stamp sets are eligible during this sale except Bundles and host sets. Bundle are not eligible for this promotional discount, but they will retain their current 15 percent Bundle & Save discount. The stamp set from the bundle may still be purchased ala carte with the 15 percent promotional discount.
There’s no limit to the amount of discounted sets that you can purchase.
Place a minimum $25 order in the month of October at my Stampin’ Up! online store using the host code this month (October Host Code: GU6J472B) and I’ll send you all the materials you’ll need to make the three projects below. You’ll just need to supply ink, adhesive and stamps (per Stampin’ Up!, stamped images cannot be included). For more details, click here.
Today is the day!! ALL stamp sets (except Bundles, Host Sets and Clearance Rack stamps) are 15% off! The sale will continue until Friday. Now is the time to get those stamp sets you’ve had your eye on.
My card today uses a single stamp that I think often gets overlooked in the Annual Catalog, Sweetbriar Rose. It’s a single stamp and is wood mounted.
I enjoy the look of a watercolored image but I have a really difficult time with an aqua painter and reinkers. I bought some Zig Clean Color Real Brush pens (these are not carried by Stampin’ Up!) some time ago and finally had a chance to give them a try with this stamp. Using watercolor paper, I stamped with Versamark and then used white embossing powder. The pens were very easy to work with and I’m looking forward to coloring with them again!
The base of my card is Whisper White and my watercolored flower is mounted on Melon Mambo. My sentiment is from the set One Big Meaning. I used Stampin’ Dimensionals to pop my flower up.
My mom is having knee replacement surgery this morning. We will be spending the day at the hospital and when she can come home in a few days, I’ll be taking care of her. If I get a little behind in my posts this week, that’s why.
Thanks so much for stopping by!
Product List – Click on any of the products for more informtion or to place an order.
Yesterday I announced that Stampin’ Up! would be having a 15% sale on stamps beginning on Monday, October 19th. At the time I didn’t know specifically which stamps BUT now I know that it’s ALL STAMP SETS except bundles, Clearance Rack stamp sets or Host sets. Get that wish list started!! The sale will end on Friday, October 23rd.
Place a minimum $25 order in the month of October at my Stampin’ Up! online store using the host code this month (October Host Code: GU6J472B) and I’ll send you all the materials you’ll need to make the three projects below. You’ll just need to supply ink, adhesive and stamps (per Stampin’ Up!, stamped images cannot be included). For more details, click here
“Starting October 19, stamps will be discounted 15 percent off retail. This sale will only be around for a few days before it ends on October 23, so don’t miss out!”
I honestly don’t know if it will be all stamps or featured ones but be sure to check back on Monday when I’ll have more details!!!
Have you seen the Clearance Rack lately? Click here to see what’s being offered!
Happy Friday! Normally I post on Saturdays but I’ve decided to make the change to Friday.
Today I have a treat holder and a video. You’ll see how easy it is to make! This was one of my special monthly projects several months ago but no one qualified for it so I’m releasing it today.
Place a minimum $25 order in the month of October at my Stampin’ Up! online store using the host code this month (October Host Code: GU6J472B) and I’ll send you all the materials you’ll need to make the three projects below. You’ll just need to supply ink, adhesive and stamps (per Stampin’ Up!, stamped images cannot be included). For more details, click here!
October Projects
Product List for Today’s Project
Please note that if you purchase the Howl-o-Ween Bundle which includes the stamp set Howl-o-Ween and the Boo Framelits, there’s a 15% discount. Click any picture below to go to my Stampin’ Up! online store.
Isn’t it fun when you can find a different way to use a product? Well this card is it! Using my Leaflets Framelits, I made a stencil!
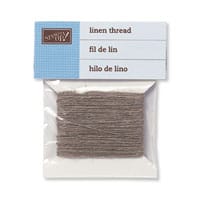
Using a piece of Thick Whisper White, I created my stencil. I felt that the thicker cardstock would hold up better once I started sponging. Using my Stamping Sponges, I sponged Cajun Craze and Crushed Curry inside the stencil. The sponge left some streaks on the leaf but I really like that effect. I also sponged around the edges with Cajun Craze but I used a sponge dauber. I added a bow near the stem using two pieces of Linen Thread. My sentiment was stamped with Early Espresso using the stamp set One Big Meaning.
This card was really fun to make! Pull out your Framelits and give it a try!
Click here for the PDF of this card which includes all of the products used, the cutting measurements and a photo: Stenciled Leaf
Product List – Click on any item below for more information or to make a purchase at my Stampin’ Up! online store
Many thanks to Ronda Wade for this idea over at Creative Corner!
October Host Code: GU6J472B
Make a minimum $25 order in the month of October at my Stampin’ Up! online store using the host code above and I’ll send you all the materials you’ll need to make the three projects below. You’ll just need to supply ink, adhesive and stamps (per Stampin’ Up!, stamped images cannot be included). For more details, click here!
Stampin’ Up! has just released a new video called Rainbow Stamping! There are several ways to ink up a stamp so that you have more than one color and here’s one of those ways! Be sure to also scroll down to see the Weekly Deals!
Weekly Deals – These products are available until October 19th or while supplies last!
It’s the start of a new week! I hope you had an enjoyable weekend! Today I have another treat holder but this one is teeny tiny. A “fun size” piece of candy would fit inside or some other small treat. The pictures below will give you an idea of the size.
They are quite easy to make and oh so cute. You’ll need a little bit of adhesive on the side and for the bottom flap. Here you’ll find a Recipe Card PDF for the project (I like to keep them in a binder for future reference) with the supplies and measurements: For You Treat Bag
Many thanks to Erica Cerwin for this cute idea!
Product List – Click on any item below for more information or to make a purchase at my Stampin’ Up! online store.
Today’s project is another one of my monthly ordering specials for this month. With a minimum $25 order at my Stampin’ Up! online store, you’ll receive all the materials needed to make my Halloween Gum Holder along with two more projects. You’ll just need to supply your own adhesive, ink and stamps (I cannot send stamped images per Stampin’ Up! policy). For more details on the Monthly Ordering Specials, click here!
Here’s a video showing you how I made my Gum Holder!
If you would like the Recipe Card for this project which includes a picture, the supplies and cutting measurements, click this link: Halloween Gum Holder
I don’t usually give cards on Halloween but I do like to give treats that are packaged in a cute way. I wanted a box that would fit a mini package of Rolos and this is the box I created.
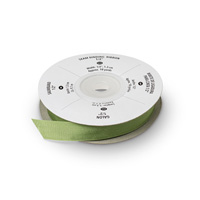
The base of the box is made with Basic Black and the cover that wraps around is Happy Haunting DSP. I just purchased the Subtle Stripes Satin Ribbon – what was I waiting for??? It is absolutely gorgeous. It’s a little hard to tell in the photo but my sentiment sits on top of our Black Glimmer paper.
Watch the video to see how to create this box!
If you place a minimum $25 order this month using the host code – GU6J472B– at my Stampin’ Up! online store, I’ll send you the materials to make this kit along with two other projects. You’ll just need to provide your own ink, adhesive and stamps. Click here for more details!
Purchasing Framelits or Thinlits for your Big Shot can be a big investment and it’s nice when you discover multiple ways to use them. The new Mini Treat Bag Thinlits in the Annual Catalog make a cute treat bag. Today’s video from Stampin’ Up! shows you another sized bag that you can make with them!
Product List – To purchase the Mini Treat Bag Thinlit Dies, click the picture below.