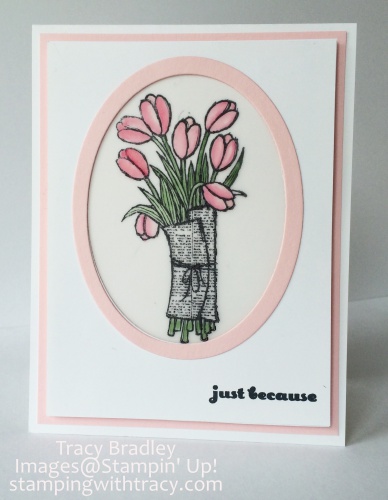
Figuring It All Out

If you’ve followed my blog for some time you know that I am not always consistent with my blog posts. When I retired almost three years ago from being a full time elementary school teacher, I thought that I would have oodles of time to do EVERYTHING, including posting to my blog seven days a week!  What was I thinking???!!!!  If anything, life has become even busier!! Three months after retiring, my first grandchild, Audrey, was born.  And in a few short weeks, my grandson will be born!!!! As with any major life changes (in my case, retiring and grandchildren), you have to figure out your new direction in life.  You have to find balance and decide what’s most important to you.

I love being a Stampin’ Up! demonstrator.  I love seeing the excitement when my stamping friends come over and we create.   I love when those same friends text or email me cards/projects that they’ve made with their SU! products.  I love sharing on my blog and especially love when my blog followers reach out and tell me that they love something they’ve seen on my blog or that they’ve recreated one of my projects.

I also LOVE spending time with my family.  Being retired has allowed me the freedom to spend more time with family and that has been absolutely wonderful! Trying to find the balance between spending time with my loved ones and my Stampin’ Up! business has been tricky.  Both are important to me but as I am sure you would agree, family is always at the top of the list.

I would love to be in my craft room daily but at this point in my life, it doesn’t always happen.  When I babysit my two year old granddaughter, I am bone tired at the end of the day.  Now I know why you have children when you are young!  Ha ha!  I wouldn’t give up spending time with Audrey for anything.

I recently heard a successful blogger mention how important it is to post to your blog consistently.  Okay, this isn’t new information to me. But, then she said, it can be as often as you want, as long as it IS consistent.  The light bulb went off.  I thought about it and tried to think what I could do consistently and the schedule below was born!  I am sure there will be weeks when I can share more, but I will consistently post on the days noted below.  This will give me the flexibility I need to juggle my crazy life these days!!

Monday – post a card/project

Tuesday – post the Weekly Deals any other important info

Thursday – post a card/project

Saturday – post a card/project

For several years now I’ve also had some ideas for offering an online stamp club. I’ll be able to work on this idea with my new schedule in place!

Thanks so much for reading this far!   Since I’ve spoken so much about my family, I’d like to end this post with pictures of my loved ones.  I’ll be back later with the Weekly Deals!


Audrey

Audrey

Jenny

My oldest daughter, Jenny


My youngest daughter, Erin, and my grandson (she is also Audrey's mom)

My youngest daughter, Erin, and my grandson (she is also Audrey’s mom)

My husband, Mark - our 35th anniversary is coming up in August!

My husband, Mark – our 35th anniversary is coming up in August!

 My sister, Lisa, Mom and I

My sister, Lisa, Mom and I

My son-in-law, Tyler, and Audrey

My son-in-law, Tyler, and Audrey

Jenny and my mother-in-law, Pat

Jenny and my mother-in-law, Pat

Lisa and my brother-in-law, Dan

Lisa and my brother-in-law, Dan

Wedding Invitation

Wedding Invitation Dan & Lisa

On Saturday I attended my sister’s wedding! Lisa is now Mrs. Nelson which is funny because Nelson is our maiden name!  Both my mom and my sister are Mrs. Nelson!  That doesn’t happen often!  It was a lovely ceremony and my sister looked beautiful. We are very happy to have Dan in our family!

My dad passed away six years ago and he was greatly missed at this family gathering.  My mom did a wonderful job walking my sister down the aisle. My daughter, son-in-law and granddaughter (Erin, Tyler and Audrey) were unable to attend the wedding as they live out of town and Erin is pregnant, due next month.  They were very missed!!

When Lisa and Dad became engaged, she asked me if I would make their wedding invitations.  It took many months to decide what design we wanted and which colors to use.  Dan always gives Lisa beautiful flowers so we tried to make a photograph of a rose he had given her as the focal point of the invitation but we just couldn’t make it work.

We then went in a different direction and Lisa decided that she would like to use gold paper. So, I checked the Stampin’ Up! catalog and found beautiful gold satin ribbon and gold paper.  This was a shock to me as I have gone through our catalog from cover to cover (more times than I can tell you) and had no idea we had these two products!  The Brushed Gold Cardstock is tucked away in the catalog on page 193 in the far bottom right corner, if you want to take a look (along with several other specialty papers)!

I made several prototypes for Lisa and she chose the one you see above.  It is much prettier in person as you can see the flecks of color in the gold paper and the shiny ribbon.   The finished card measures 5″ x 7″.  I printed their names for the front on my printer using Whisper White cardstock.  I did this on the inside as well with the invitation information.

My Whisper White embossed piece measures 4-1/4″ x  6-1/4″.  The one “problem” that I had to figure out with the card was how I was going to emboss this piece since our embossing folders are much smaller.  Here’s a picture tutorial to show you how I did it.  I’m using a piece of Hello Honey so that it’s easier to see.

1.  First I placed a pencil mark where I knew my ribbon would be (you can see it in the far right corner at the bottom of the embossing folder).  I then placed my paper inside the folder with the last row of dots aligning with my mark.

Embossing Large Piece

2.  I turned the paper around and inserted it back into the embossing folder with the piece already embossed sticking out.  If you look closely, you can see my pencil mark (it is still on the right hand side).

2nd Half of Embossing

3. The next step is to run it through the Big Shot with the end not yet embossed, going through the  Big Shot.  The part already embossed WILL NOT be run through again or else it will be flattened!  Roll it through and once you see that you’ve embossed the new part, run it backwards and out again.

Going Through Big Shot

4.  Here’s the finished piece.  You can still see my pencil mark.   It is flattened a bit in this area but this is where the ribbon will go and it will be completely hidden.  I did this 40 times on Whisper White and after doing it so many times, I was able to do it in such a way that I couldn’t even detect a line.  I made the invitations in January so I am out of practice.

finished piece

If you give this a try, let me know how it goes!

Product List – Click on each item to view at my Stampin’ Up! online store

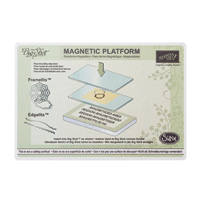
Big Shot

$99.95

Baby Sprinkle Door Sign

baby sprinkle sign for door

Happy Friday!!  Do you have fun plans for the weekend?  My sister is getting married tomorrow!

My last Baby Sprinkle post is the sign I had to welcome our guests.  I used My Digital Studio, the same program that I used to make my water bottle labels.  I was again able to match the paper I used on the favors but I could print it out on my computer.  The Brights Paper Pack that I used for the favors comes with two sheets of 12×12 paper in each pattern.  The fact that I could recreate this paper on my computer was a definite plus!

I purchased the digital download, Something For Baby Brush Set, which includes the baby onesie and tie.  Everything that comes in the actual stamp set can be purchased in the download.  I used Pacific Point, within MDS,  to color the onesie and Daffodil Delight for the tie.  I love that I was able to use all of the same colors throughout my projects! I printed it on Whisper White cardstock.  Once it was printed, I attached it to a piece of 12 x 12 cardstock.  So easy!
Have a terrific weekend! I’ll be back on Monday!  If you have any questions, please don’t hesitate to ask!

Product List – Click on a product below to be taken to my Stampin’ Up! online store

Baby Sprinkle Banner

Sprinkle Banner

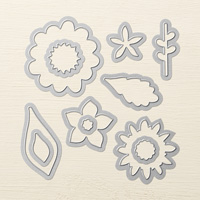
For the past several days I’ve been sharing some of the projects I made for my daughter’s Baby Sprinkle and today I’m sharing a banner.  (You can see a close up below).  I had originally planned to use the Squares Framelits but instead cut two squares, one out of Pacific Point cardstock and for the smaller one, I used the Brights Designer Series Paper Pack.  I did use the Circles Framelits for the white circle.  The letters were also cut out with my Big Shot using the Serif Essentials Alphabet.  This particular alphabet has retired but in the current Stampin’ Up! catalog, we have  the Perfect Print Alphabet Bigz dies which would also work nicely.

BOY banner

I used our 1/8th” Silver Ribbon to string up the banner. If I had to do it again, I probably wouldn’t use ribbon as the letters kept twisting on me.  I think something thicker, such as our Thick Baker’s Twine, would work better.

On Friday I’ll share one last project from the Baby Sprinkle.  See you then!

Product List

Lots of News

I’ve have several things to tell you about today!  First, here are the Weekly Deals!  These prices are good until Monday, April 16th or while supplies last.


 Blendabilities

BlendabilitiesI was very disappointed to wake up this morning to find out that the Blendabilities product line has been discontinued.  Last week  Stampin’ Up! made the decision to make them temporarily unavailable so that they could address quality issues with the markers. It was recently discovered that when the tip is welded to the barrel, the welding process can leave microscopic holes in the marker tip.  This leads to accelerated evaporation of the alcohol in the ink. It doesn’t affect all of the pens but some have been drying up way too quickly.  I personally had several pens with that problem but all of the rest are fine.
Stampin’ Up! takes great pride in offering high quality products and once they realized that the manufacturer was unable to correct the problem in a manner that would meet the high quality standards that Stampin’ Up demands, they made the difficult decision to discontinue them.

Due to the unavailability of the Blendabilities in the Sale-a-bration catalog, it is possible that the demand for other products will be higher than SU! anticipated.  For that reason, all Sale-a-bration items, with the exception of stamps, will now be available while supplies last.  If you’ve had your eye on something, now is the time to place your order!  Click here to head over to my Stampin’ Up! online store.

New Stamp Set

The new stamp set, Just Kidding, is available today!  Stampin’ Up!’s monthly photopolymer stamp set program was originally intended as a test to determine whether or not there was a market for this product.  They’ve been very happy with the results so they’re transitioning photopolymer stamps to all of their catalogs. I am very happy about this news!!! The last monthly photopolymer stamp set will be offered today, March 10, and is guaranteed to be available for six months.

Click here to purchase this new stamp set online!

Just Kidding

Upcoming Dates:  Sale-a-bration ends on March 31st!

If you have any questions, please don’t hesitate to email me!

Baby Sprinkle Water Bottles

Sprinkle Water Bottles

Yesterday I mentioned that my project today would use My Digital Studio (MDS) from Stampin’ Up!  When I decided to make water bottle labels for my daughter’s Baby Sprinkle, I went searching on the internet to find out how to even get started.  I did find a website where it was explained and a Power Point template was included.  When I tried to make changes to the file, I will admit, I was just lost. I couldn’t figure out how to make changes to make the label my own.

Then I remembered that if I used MDS, I would probably be able to purchase the paper I had been using for the favors in a digital download.  Sure enough, the paper was available and I was able to make my water bottle label, in Stampin’ Up! style!  Once I completed the labels, I printed them off on my home printer!

I took the labels off of the water that I bought, wrapped my Baby Sprinkle label around the bottle and then applied a long strip of shipping tape around it.  I wanted to be able to put the water in the refrigerator overnight and still have the label intact.  It worked beautifully!

If you would like to try My Digital Software, you can “purchase” a FREE 30 day trial.  You can find it in the product list below.  The software and design tools in this program allow you to create cards, photo books, calendars and much more.  It can be purchased as a digital download or with a disc.

My daughter’s mother-in-law, Mary, makes a delicious punch.  I asked if she would make it for the sprinkle and she graciously said that she would.  Erin requested that it be blue.  Don’t you think Mary did a great job?  It was delicious, especially with the ice cream floating on the top!

punch bowl

I’ll have another project for you tomorrow!  Thanks for stopping by today!


Product List

Baby Sprinkle

Duck decoration

It was a busy weekend for me! As I mentioned last week, I threw a Baby Sprinkle for my daughter, Erin, on Saturday.  She is expecting her second child, a little boy in April!  I can hardly wait to meet my grandson! I haven’t had a chance to post to my blog recently as I’ve been busy preparing for the Sprinkle! Over the next few days I would like to share some of the items I made!

My first picture (above) has nothing to do with Stampin’ Up! but I thought it turned out so cute!  I placed ducks in small containers that I filled with blue pebbles.  I found this idea on Pinterest.

Here are the favors that I made!  We gave each guest hand lotion, hand sanitizer and a chocolate cigar wrapped up in one of our Tag a Bag Gift Boxes.  It all fit inside perfectly!  I used paper from the Brights Designer Series Paper Pack in Pacific Point around each side of the box. The box comes with an acetate sleeve that slides right on so it isn’t necessary to use ribbon but I wrapped it up with a bow (non Stampin’ Up!).  Using the same paper that I used on the sides, I cut out a 2″ circle and used that as my base for the sentiment which comes from the set Painted Petals.

favor side view

favor for sprinkle

favors in a row

I also used My Digital Studio (MDS), digital software, for the Sprinkle.  I’ll share one of those projects tomorrow! Have a great day!

Product List  Click on any of the products below to purchase them in my Stampin’ Up! online store.

Weekly Deals

There are some terrific packaging items on sale this week!  These prices are good until Monday, March 9th or while supplies last.

Sorry I don’t have a project to share.  As I mentioned before, I’m throwing a baby shower for my daughter on Saturday so I’ve been busy making making things for it.  I promise to share next week what I’ve been creating.

Have a wonderful day!

Click on any item below and you’ll be taken to my Stampin’ Up! online store.

Hello There

Happy Monday!  Hope you had a nice weekend!  I’m throwing a Baby Sprinkle (fun name for a shower for a second baby) for my daughter this weekend.  I spent this past weekend making some things for it.  I will share those projects with you after the shower!

Last week my friend, Cheryl, who also happens to be on my Stampin’ Up! team, came over to my house.  She had commented on the notepads I made during the blog hop (click here to see them) so I pulled out a notepad for her and this is what she created! Isn’t it pretty!?!!

Cheryl's Notebook

Cheryl used the Designer Series Paper, Best Year Ever, which you can earn FREE with a $50 order.  It pairs nicely with Coastal Cabana and Calypso Coral cardstock.  The sentiment is from the stamp set, Hello There, which is a hostess set.  There are two ways to earn this set:

1.  Place your own personal order of $150 and you’ll receive $25 in Hostess Dollars.  This set can be purchased with those free dollars!  You would also earn  THREE Sale-a-bration items!  Sale-a-bration is over on March 31st, so if you have a long wishlist, you can receive many freebies with your $150 order.

2.  Host a party and once the sales hit $150, you as the hostess will earn Hostess Dollars.

If you have any questions about Cheryl’s notepad cover, don’t hesitate to ask!

Have a great day!

Product List – Click on the items below to be taken to my Stampin’ Up! online store.  Please note that the prices for the Hello There stamp set, are Hostess Dollars prices and can only be purchased as noted above.

Big Shot

$99.95

Wild Wasabi Butterfly

Wild Wasabi Butterfly

I made a card very similar to this one the other day.  My card today is all about a beautiful shade of green – Wild Wasabi!  I paired it up with a sheet of paper from the Painted Blooms Designer Series Paper pack.   This card was given to a customer who placed an order this month!

My sentiment comes from the set And Many More.  If you are looking for a versatile stamp set, this is it!

And Many More Wood #134273 Clear #134276

And Many More
Wood #134273
Clear #134276


Tip: When making this card, make several at a time.  When you cut out your butterfly, you will use that same piece you cut it out of, for the front of the card.  Your butterflies and card fronts will be ready when you are to create a card.

Thanks for stopping by!  Go create!

Product List- Click any item below to be taken to my Stampin’ Up! online store.

Big Shot

$99.95

Ghirardelli Candy Box

As I was walking through the grocery store the other day, I saw a new product, Ghirardelli Milk Chocolate Eggs.  I quickly knew I had to make a project with them!  I am from the San Francisco Bay Area where they make Ghirardelli chocolate so I have an immense fondness for their candy.  I’m a an expert on chocolate and it is delicious!  🙂

candy 2


Ghirardelli box

side view Ghirardelli Box

I thought that Daffodil Delight would look nice next to the blue foil eggs  so I used the Brights Designer Series Paper Pack which includes Daffodil Delight.   Here are the box dimensions that I came up with:

Bottom of the box:  5″ x 7″    Score each side at 1-1/2″

Top of the box:  4-1/8″ x 6- 1/8″  Score each side at 1″

Once your paper has been scored, there’s some cutting and trimming to be done.  It is hard to see the score lines in my picture below, but I have cut on a score line, up to a score line.  If you are making this while reading, you will understand what I mean.   Then cut about half of each tab off (it does not need to be exact) and cut a very small notch. These two steps will help as you assemble the box.

box bottom

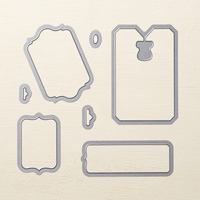
I decided to add a window to the top of my box, so I used the smallest oval in the Oval Framelits and then covered it with a small piece of a Window Sheet.  I used glue dots to attach it to the box.

The next step is to add Sticky Strip to each of the places I’ve shown.  Be sure it is right next to the score line.  If you have Fast Fuse, that will work too!

lid with ss bottom of box ghirardelli ss

The last step is to peel the Sticky Strip off and assemble your box.  I finished it off by adding a cute little chick from the set For Peeps’ Sake.  I masked off the chicks legs as I stamped him in Daffodil Delight.  I took the tape off and colored his legs with a Pumpkin Pie Stampin’ Write marker, huffed on the stamp to reactivate the Daffodil Delight and stamped him onto Whisper White cardstock.  My sentiment comes from the set From the Garden which I just stamped across the chick with Memento Ink.  I colored his eyes and beak with Stampin’ Write markers.  Not all of the Stampin’ Write Markers can be purchased individually, but the Basic Black and Pumpkin Pie are available this way.

As I mentioned, I used Designer Series Paper.  The eggs are a bit heavy so I added a 2″ x 4″ piece of Daffodil Delight cardstock to place at the bottom of the box for a little more stability.  Next time, I think I would make the bottom of the box using cardstock and DSP for the top.

This really is a pretty easy box to make.  Give it a try and you’ll see what I mean!

Thanks for stopping by!


Product List- Click any item to be taken to my Stampin’ Up! online store

Big Shot

$99.95
Glue Dots

$4.95

New Products and Weekly Deals

Starting on March 1st, there will be FOUR new Sale-a-bration items to choose from! This is the first time that Stampin’ Up! has introduced new products once Sale-a-bration has begun.  As always, with each $50 purchase (before shipping/tax), you can pick a Sale-a-bration item.  Spend $100, choose 2 items.  There’s no limit!

For Being You

Sheer Perfection Vellum Stack

Nature's Perfection Stamp SetIn Color Accessory Pack

Here are some cute projects with these new products.

new productnew product

I think my favorite is the big THANKS in the set For Being You!  Can’t wait to color it in with my Blendabilities!

It’s Tuesday and that means new Weekly Deals! Click on any item and you’ll be taken to my online store!

Weekly Deals logo