Welcome to the first ever, First Fridays Blog Hop! Several stampers have come together to host a fun blog hop on the first Friday of each month! We hope our projects will inspire you to create!
Our first, First Fridays Blog Hop theme is Easter. At the end of my post, you find a list of all the stampers in the hop and I hope you’ll visit each one! My project for the hop is a matchbook! You can add a yummy treat inside, a gift card or both!
You’ll start with a piece of cardstock that measure 4-1/4″ x 11″. Score it @ 1-1/2″, 6-1/2″ and 7″. Fold on all the score lines and you’ll have your matchbook! You’ll want to add a staple to the bottom flap and place it towards the bottom so your top flap can tuck in. (PLEASE NOTE: Before stapling, add your cellophane bag and then staple. My picture below does not show the bag). I used our Gusseted Cellophane Bags that measure 3″ x 6″.
I added two pieces of Whisper White to the front and those measure 3″ x 4″ and 1-1/4″ x 4″. I used the Basket Bunch Bundle which includes the Basket Bunch stamp set & Basket Builder Framelits Dies to decorate the matchbook (the stamp set and framelits can be purchased separately but as a bundle, you save 10%). All of the pieces that were used to decorate the front (grass, bunny, eggs), as well as the sentiment, are included in this bundle.
The grass was cut out with Garden Green card stock. I cut two of them and placed them side by side. The basket covers up where they come together so it really does look like its one continuous piece.
The basket was stamped with Chocolate Chip ink onto Chocolate Chip card stock and cut out with the framelits (the handle and basket are separate dies). I popped it up with our Foam Adhesive strips (I’ll have a list of all the supplies I used at the bottom of the post). The eggs in the basket and underneath the ribbon were colored with Stampin’ Write Markers (Daffodil Delight, Tempting Turquoise and Real Red). I colored the bunny with Tempting Turquoise and Pink Pirouette and popped her up with a Stampin’ Dimensional.
I wrapped a piece of Organza Ribbon around the bottom flap and tied it in a bow. You can find a list of all the supplies I used at the very bottom of the post.
I hope you’ll hop around to all of the stampers. You can click below to head over to Heather North’s blog and see her cute project! You can also scroll down and see a list of everyone in the hop! Thanks so much for stopping by today!
Stamping Supplies – Below you’ll find all the products I used to make my matchbook.Clicking any of the supplies will take you to my Stampin’ Up! online store.
It’s Day 2 of my Week of Treat Packaging! Today I’ve wrapped up some Ghirardelli chocolates in our Gusseted Cellophane Bags. I have 6 inside each bag but you could definitely add more! The bags can be found in the Annual catalog and are new this year. They are food safe so you can also use candy that isn’t wrapped up. If you’d like to give a non-food treat, a gift card would fit nicely inside as well.
I used a piece of Halloween Night DSP that measures 2-7/8″ x 8-3/4″ scored @ 1″ and 3″ The paper slips into the gusseted bag and the weight of the candy will make it stand up. I didn’t score the top part of the paper, but the extra gets folded over the top. I stapled the bag shut with our handheld stapler which comes with mini staples that are just 3/8″ long. Since the staple is holding the bag shut, it isn’t necessary to use the clip but I thought it was cute. Plus, once the recipient opens the bag, it can then be closed using the clip.
Aren’t the scarecrows adorable??? They are from the set Cookie Cutter Halloween and the bats on my project yesterday also came from this set. I had fun coloring them in with colored pencils. If you are considering purchasing this stamp set and the matching punch, please be aware that the punch is part of a bundle that includes the stamp set Cookie Cutter Christmas AND this punch also works with the stamp set I’ve used today, Cookie Cutter Halloween (I hope that isn’t too confusing).
Both of my sentiments come from the stamp set Spooky Fun. This stamp set can also be purchased as a bundle which includes the stamp set and the Halloween Scenes Edgelits Dies. All of items in our bundles CAN be purchased separately but I wanted you to be aware of the options!
All of the products I used for my projects today are listed in the product list below. By clicking any of the pictures, you’ll be taken to my Stampin’ Up! online store.
Below the project list, you will find the bundles that I’ve mentioned above.
Product List- Click on any of the items below to be taken to my Stampin’ Up! online store.
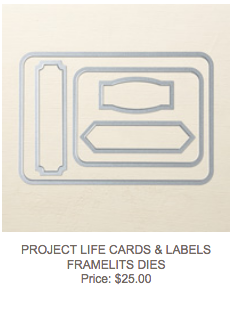
Please note: I forgot to include that I also used the Project Life Cards and Labels Framlelits. You can find a picture of this product below.
Yesterday I posted this treat bag and today I have a video showing you how I made it. At the end of the post you’ll find all of the supplies listed as well as the measurements you’ll need.
There’s one part in the video that I don’t think is clear. When cutting your 12″ x 12″ paper, be careful if you have a pattern where it matters if it is right-side up. For instance, I wanted my ghosts to be going “up and down”. Next, before you start to score at the 1″ mark, make sure again that your paper is with the top of the pattern up at the top. I hope that makes sense!!
Happy Haunting DSP
3-3/4″ x 10″ Score at 1″, 6″, and 8-1/2″
1″ x 3″ for Hershey Nuggets
Product List – Click on any product below for more information or to place an order.
Last week I shared a treat bag using Into the Woods DSP and today I have another one with a Halloween theme. You can see the one from last week HERE.
Today’s bag uses Happy Haunting DSP and our Gusseted Cellophane bags. Come back tomorrow and I’ll have a video showing you how to create this cute AND easy bag!
Product List – Click on any item below for more information!
I’m a little late on my post today! My husband and I took a 7 hour road trip which had us on the road at 3:30 am this morning. He’s likes driving very early so that we miss a lot of the traffic in the first hours of the trip. It makes sense but I definitely needed a nap when we arrived!
I was unable to attend Convention this year but they had several sessions that were streamed so I was able to watch some of it at home. This was one of the projects presented using a Halloween theme. I decided to change it up and use one of our new papers in the Holiday Catalog, Into the Woods. It is definitely a quick and easy project to whip up.
I used one of our Gusseted Cellophane bags and a piece of DSP that measures 3 3/4″ x 10″ which is scored at 1″, 6″ & 8 1/2″. Slip the DSP inside the cellophane bag, add your treats and a topper and you’re done!
I also covered Hershey Nuggets in the same DSP and added a few using Rich Razzleberry cardstock that I ran through the Decorative Dots embossing folder. I shredded some Whisper White cardstock and placed it in the bottom of the bag.
I’ll try and make a video next week for this project!
Product List- Click on any product below for more information or to place an order.
Place a minimum $35.00 order using the host code RU3PBN2Yand I will send the projects below to you! You’ll also receive a PDF for each project and the link to two videos showing you how to recreate them at home. Click here for more details!
Keep in Touch!
Sign up to receive notifications of my new blog posts by email. You may unsubscribe at any time.