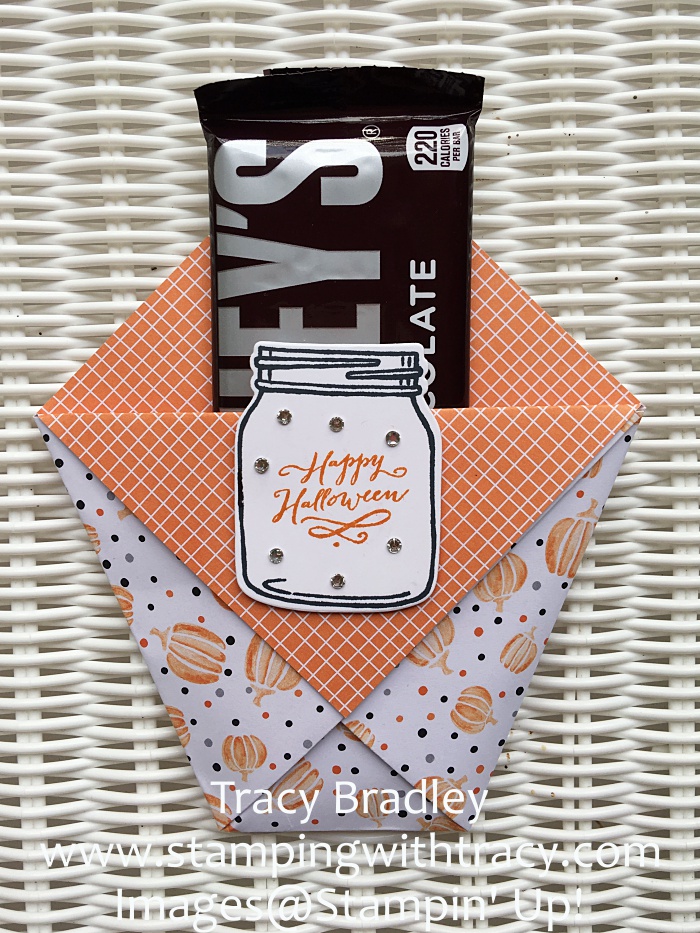
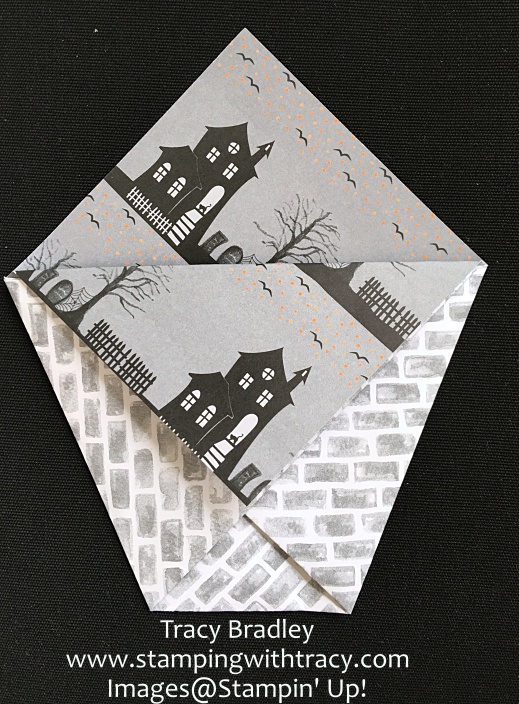
Thank you for visiting today! This is my last Halloween treat project and it’s another quick and easy one to make! I first saw this project on the Facebook page of Sara Douglass, the Stampin’ Up! CEO, this summer. She made several projects out of one sheet of Designer Series Paper and my holder today was one of them, but she used it as a utensil holder for a picnic.
I have some pictures below that will show how I created it but if you would like to see a video of Sara making it, click here to go to her Facebook page.
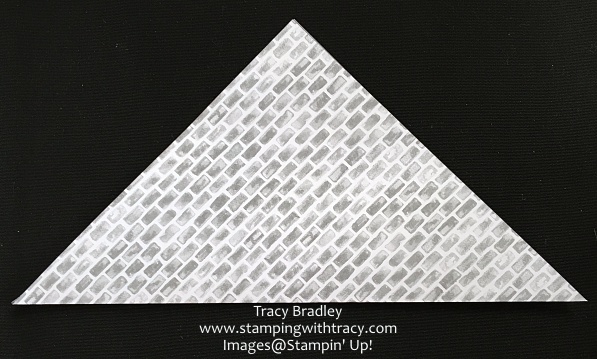
Step 1: You’ll start with a piece of DSP that measures 9″ x 9″ Fold it in half. (I am sorry if it’s difficult to see with this paper).
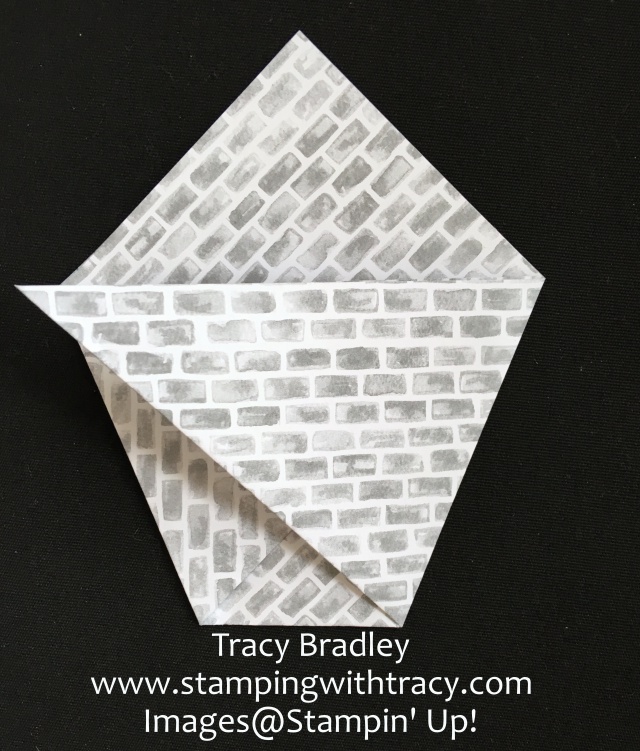
Step 2: Bring the left side over to the other side. Be sure that the top is parallel to the bottom.
This is what it will look like.
Step 3: Bring the other side over. In the picture it looks like it will extend past the edge of the paper but it shouldn’t.
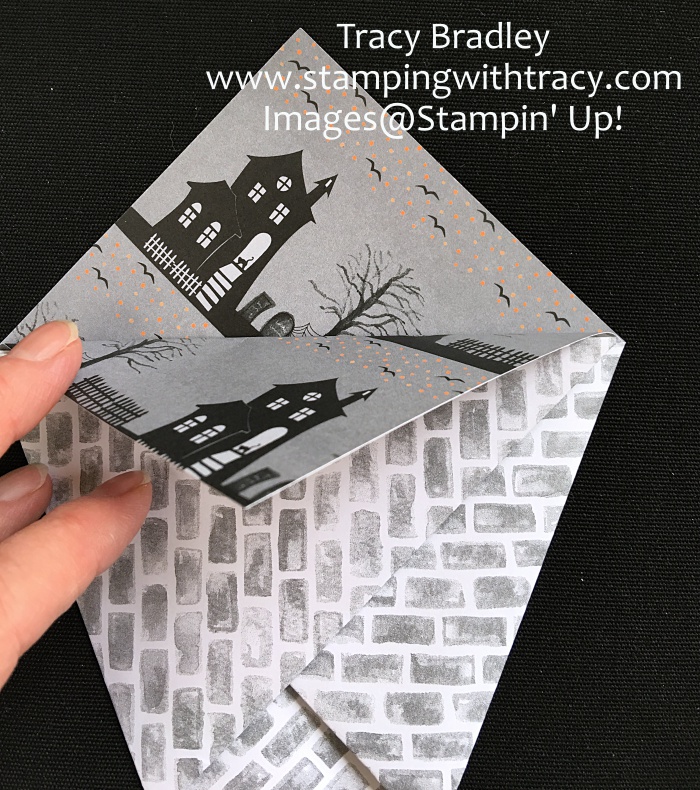
Step 4: Now you’ll take one of the top pieces and bring it down.
Step 5: Fold it down and crease it well. No glue is needed! Just a note: When I folded this part down, I didn’t like how it looked so I switched the two pieces that I folded in Step 2 & 3. You’ll understand this step when you make it.
If you have any questions, don’t hesitate to ask!
Product List- To make a purchase, click on any of the products below and you’ll be taken to my Stampin’ Up! online store.
Welcome to Day 7 and the last day of my Treat Packaging Series!
Today I have a little Pumpkin Jar box! I photographed it in my hand so that you could really see how small it is. I have to give credit to BJ Peters, a fellow Stampin’ Up! demonstrator, for this cute idea! I just love it!
I used two stamp sets that coordinate together in that you can use the Everyday Jars Framelits with both of them! The jar is from the stamp set Jar of Love and the pumpkin face uses Jar of Haunts. The jar was cut out of Pumpkin Pie cardstock using the Framelits. The Hardwood stamp set will need to be inked up with Pumpkin Pie to get the image of wood on the pumpkins. The lids were cut out of Basic Gray cardstock and stamped with Basic Gray ink. The sparkle on the lids is achieved by using Wink of Stella. The lid is then glued to the pumpkin.
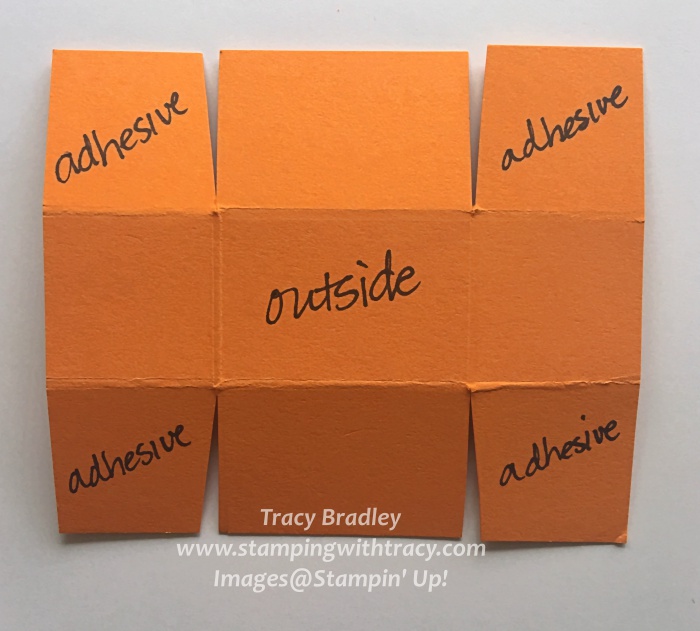
The little box to hold the treats was made out of Pumpkin Pie cardstock. The paper measures 3-1/2″ x 3″. On the 3-1/2″ side, score it at 1″ & 2-1/2″. On the 3″ side, score it at 1″ & 2″. Fold all the score lines and then cut up to the score lines along the 3-1/2″ side. I also snipped a small amount from the ends to help the box go together more easily. This is how your paper will look.
Next, you’ll add adhesive on the flaps and bring up the sides to form the box.
Glue the pumpkins to the finished box. Pinch the tops together (I added a glue dot) and tie it up with Baker’s Twine!
I was able to add two Hershey’s Nuggets inside! All of the products I used to make this cute little guy are listed below. If you have any questions, don’t hesitate to ask! Thanks for stopping by!
Product List – Click any of the products below to place an order or for more information.
I’m posting late in the day, but welcome to Day 5 of my Treat Packaging series!
I love making little boxes for treats or a small gift of jewelry, candles, etc. This box is easy to make. You’ll need cardstock for the bottom of the box and Designer Series Paper for the top. Or you could make the entire box using cardstock and cut pieces of DSP to place on the top and sides.
I have a video below that I made last year (it uses retired product) but it will walk you through the construction of the box. All of the supplies I used to make my box can be found in the Product List below. If you have any questions, don’t hesitate to ask!
Product List – To place an order or for more information, click any of the products below
It’s Day 3 of my Treat Packaging series and I have a very quick and easy project for a lollipop!
When my husband and I moved to Florida from California for 7 years, I really, really missed See’s candy. I grew up with this candy store and it was always THE place to get candy. My dad, who really didn’t care for candy, loved their Rocky Road. It is so delicious. He didn’t really care for cake either (crazy, huh?) so one year we gave him a huge block of Rocky Road and stuck a candle in it. That was fun! Their lollipops are so good too and I’m especially partial to the Butterscotch flavor. If someone receives a See’s lollipop, they know they’re getting a special treat!
I have a video from a year ago that shows you how to make the lollipop holder. I’m using retired products but you’ll be able to see how to make one. In the video I turn down the paper up at the top. One of my samples is made this way and the other one is not.
If you are going to make it as I do in the video, your measurements will be 2″ x 8-1/2″ scored @ 1/2″, 4″ & 5″. If the top part is NOT turned over, your measurements will be 2″ x 8″ scored @ 3-1/2″ & 4-1/2″.
Below you’ll find the Product List for all the supplies I used.
Product List – Click any of the pictures below to be taken to my Stampin’ Up! online store.