by Tracy | Mar 6, 2026 | Just a Note card
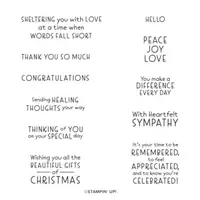
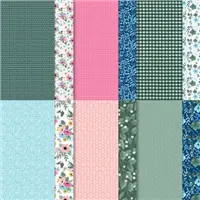
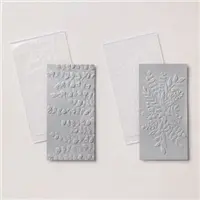
I’m sharing a card today. I made it using the Fragrant Layers Stamp Set (an Online Exclusive), Cute as a Bug Designer Series Paper, the Three Banner Punch (an Online Exclusive), and the Lazy Daisy 3D Embossing Folder (an Online Exclusive).


I started off with Old Olive cardstock for the base of my card. Then, I embossed a piece of Very Vanilla cardstock using the Lazy Daisy 3D Embossing Folder and my Stampin’ Cut & Emboss Machine. Next, I adhered the embossed Very Vanilla cardstock to the front of the card.


I cut Old Olive cardstock and layered it with Cute as a Bug Designer Series Paper and then, I cut a smaller piece of Old Olive cardstock and layered it with another piece of Cute as a Bug Designer Series Paper. I adhered the larger piece with Multipurpose Glue to the front of the card. For the smaller piece I added Stampin’ Dimensionals to the back and adhered it to the front of the card.


I stamped the sentiment directly on the banner that I punched out of Very Vanilla cardstock, using the Three Banner Punch. I stamped the sentiment in Old Olive ink using the Fragrant Layers Stamp Set. I added Stampin’ Dimensionals to the back and added it to the front of the card.
To complete my card, I added a piece of Very Vanilla cardstock to the inside of the card.

Supply List
Below you’ll find all the Stampin’ Up! supplies I used for today’s card. If you need any stamping supplies, I’d love to be your demonstrator! You can place an order by clicking any of the images below to go to my Stampin’ Up! online store. The Specialty Plate is used with 3D Embossing Folders and Hybrid Embossing Folders.
Bundle Alert: The Fragrant Layers Bundle is available with a 10% discount rather than buying the products separately. You can get more information above or clicking the graphic below.

Measurements
- Old Olive cardstock: 4-1/4″ x 11″ score at 5-1/2″
- Old Olive cardstock: 2″ x 5″
- Old Olive cardstock: 2-1/2″ x 3-1/4″
- Cute as a Bug Designer Series Paper: 1-3/4″ x 4-3/4″
- Cute as a Bug Designer Series Paper: 2-1/4″ x 3
- Very Vanilla cardstock (embossed and inside card): (2) 4-1/4″ x 5-1/4″
- Very Vanilla cardstock (sentiment): cut the banner out & stamp directly onto the banner.
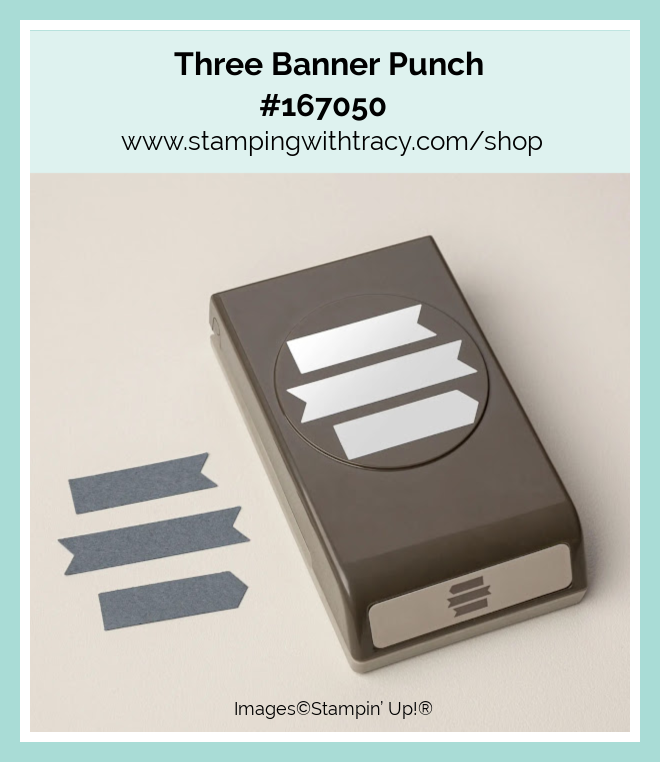
Retiring In Colors 2024-2026
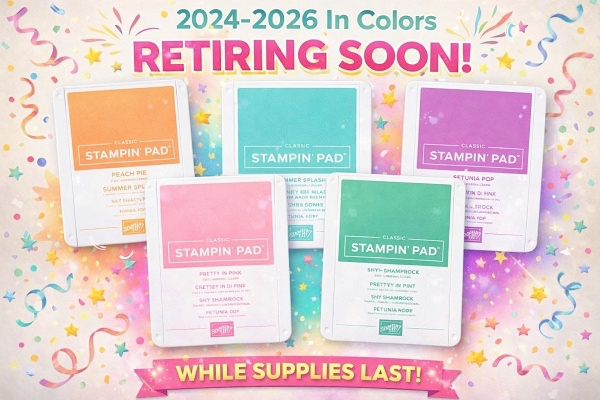
The colors that are retiring are: Pretty in Pink, Petunia Pop, Peach Pie, Shy Shamrock, and Summer Splash (I’m going to miss these colors). Some stamp pads and cardstock are in low inventory! Click here to see what’s still around. The link is only for the first page.
March Product of the Month

Each month, a single product of the month will be released. These items won’t be in any catalog or on the Online Exclusives page on the Stampin’ Up! website. Stock is limited, so once a Product of the Month sells out, it’s gone for good. Make sure if you like the Product of the Month, to snag your Product of the Month early!
Product of the Month Details
- You must have a Stampin’ Up online account to participate.
- Add the Product of the Month after your cart reaches $75. You can purchase the Product of the Month for just $5! The cart must be $75 (after Stampin’ Rewards).
- Limit 1 per Stampin’ Up! account.
- You must add the The Product of the Month to your cart after you reach $75
The Product of the Month for March
For more information about the Product of the Month, click here, or the graphic below.

Online Exclusives – March 2026
Click the graphic below to access the March Online Exclusives Product List! Stampin’ Up! has made a printable flyer and they’ve made it much easier to shop the new products! You won’t find Online Exclusives in any catalog, they’ll be listed in the Online Store. Click here to shop Online Exclusives. Click here to download the March 2026 Online Exclusive Product List.

Last Chance Products
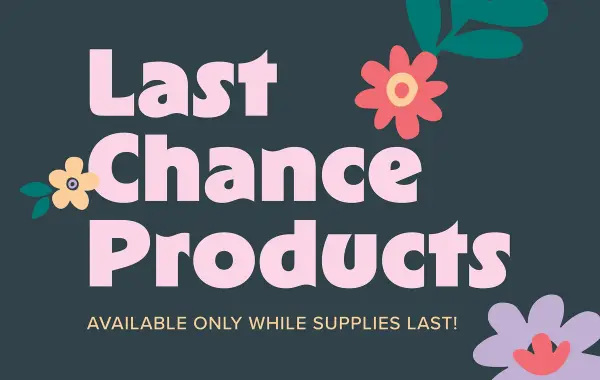
Click here to go straight to the Last Chance Products page on the Stampin’ Up! site! Some products are discounted! More products were added on February 3, 2026!
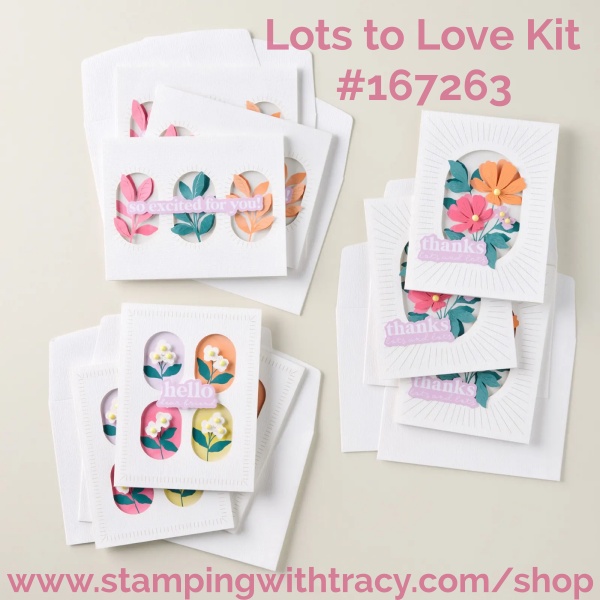
Stampin’ Up! Kits – We Have Two New Kits
Click the images below for more information about the kits.


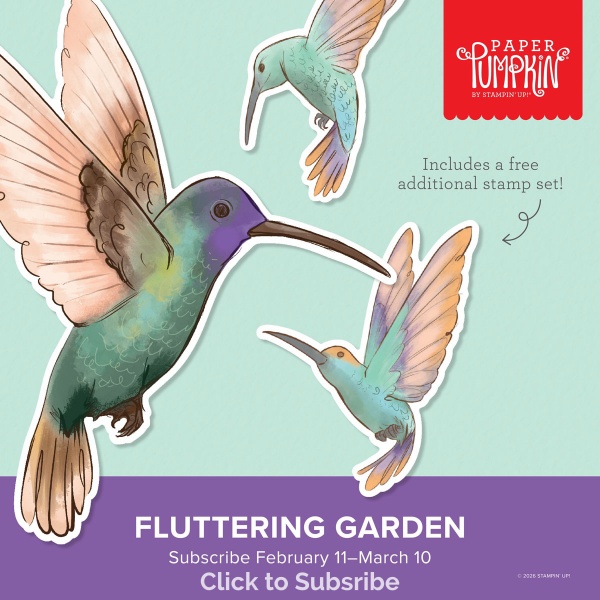
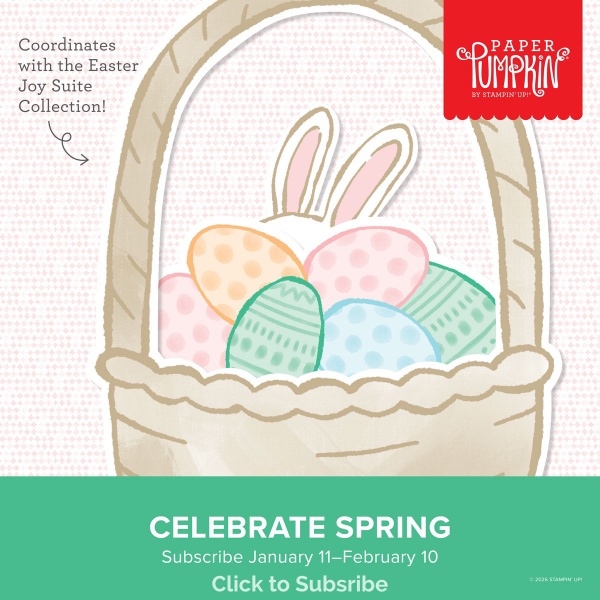
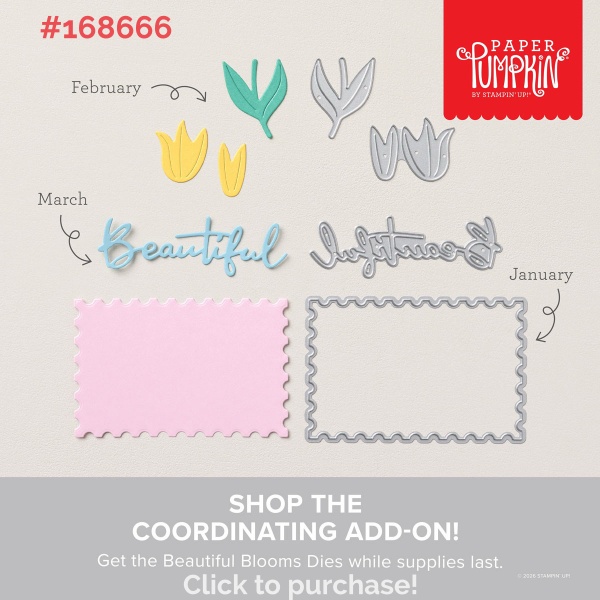
Paper Pumpkin for March – Subscribe by March 10th!
The additional coordinating add-on has sold out!
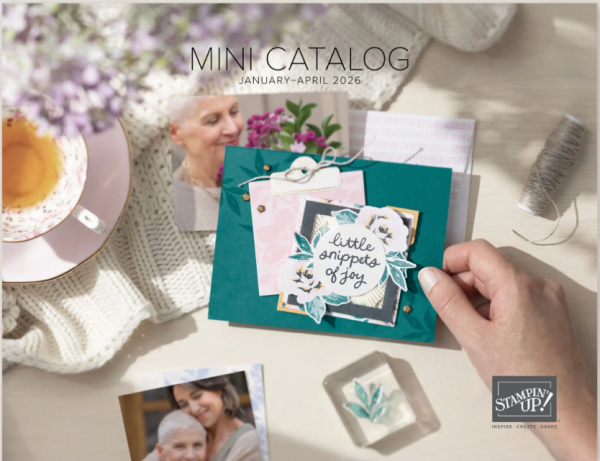
Mini Catalog January – April 2026
You can download the new Mini Catalog January – April 2026, here, or the graphic below
Thanks for stopping by today! Enjoy your weekend!
by Tracy | Jan 19, 2026 | Thank You Card
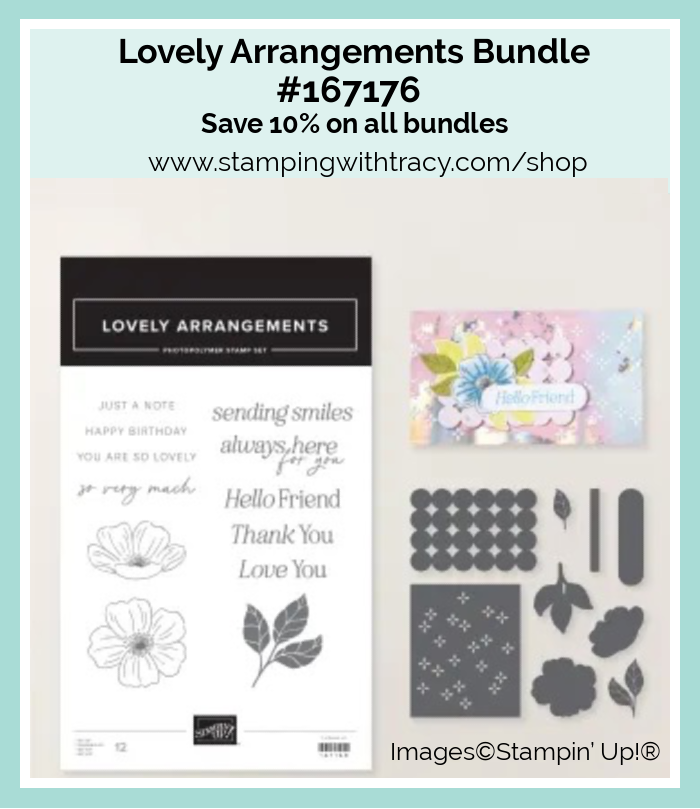
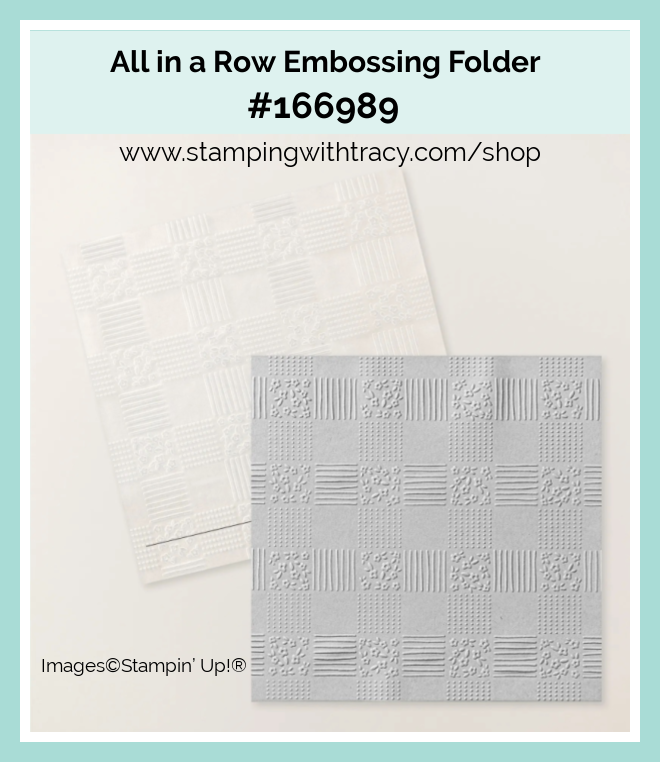
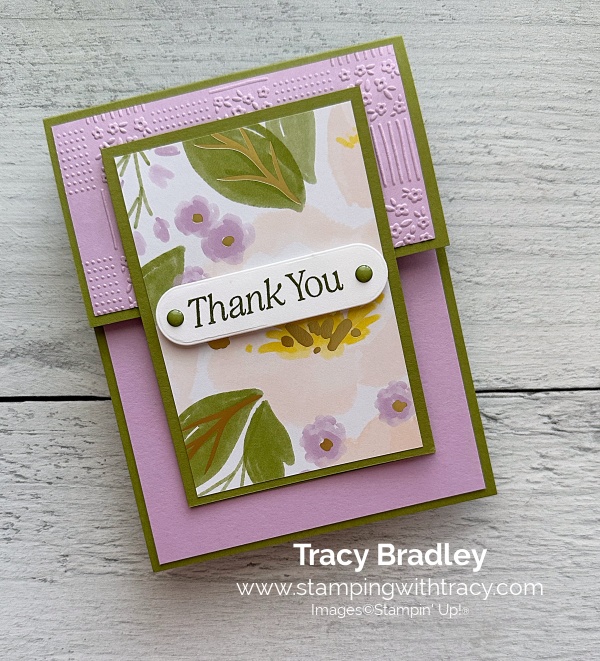
I’m sharing a fun-fold card with you today! I used the Lovely Arrangements Bundle (an Online Exclusive), Lovely & Beautiful Specialty Designer Series Paper, All in a Row Embossing Folder and Moody Palette Glossy Dots (an Online Exclusive).
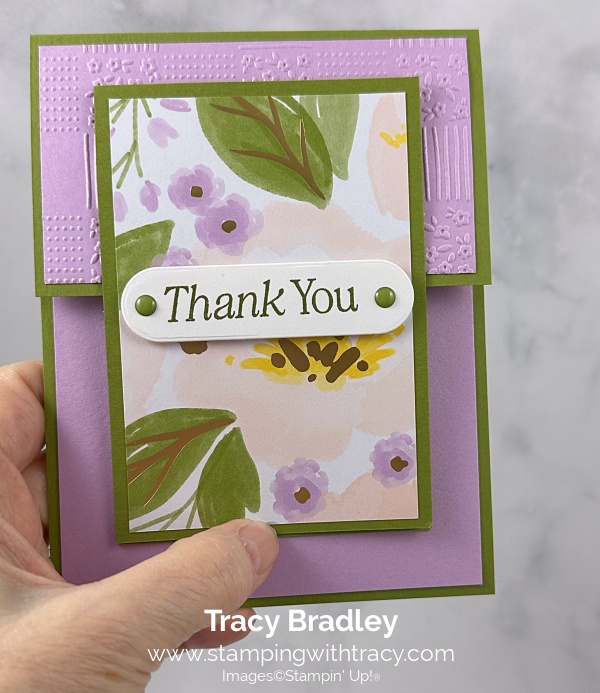
I started with a piece of Old Olive cardstock for the base of my card (you can find the measurements I used below the Supply List). I cut a piece off the end but saved it to use on the front of the card. Next, I cut a piece of Fresh Freesia cardstock and ran it through one of the All in a Row Embossing Folder and adhered it to the top of the card.
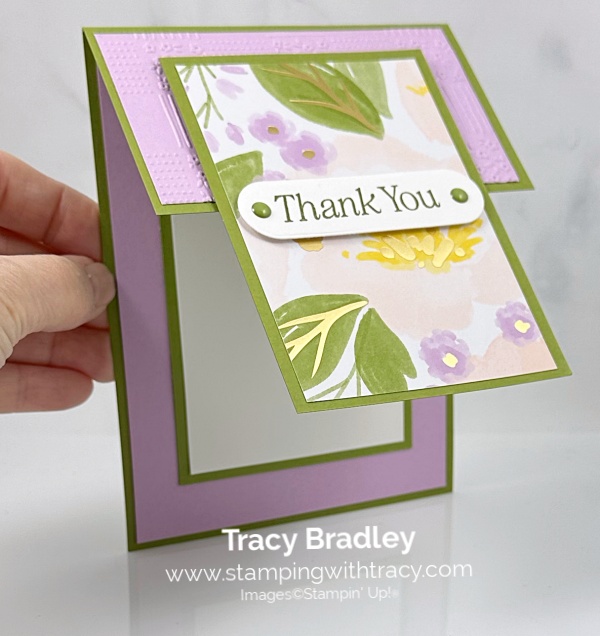
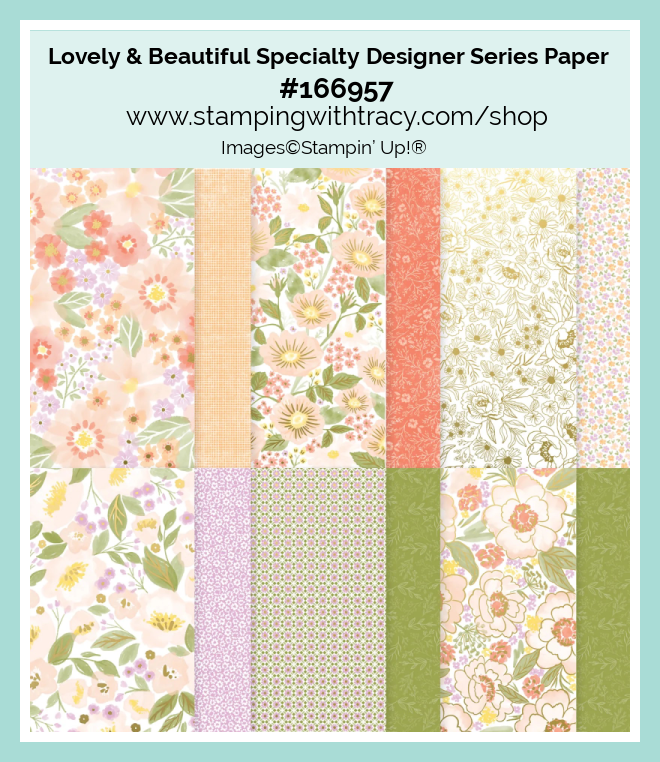
I used the piece of Fresh Freesia, I cut off the base of the card and layered it with a piece of Lovely & Beautiful Specialty Designer Series Paper. I added Stampin’ Dimensionals to the back, just at the top, and adhered it to the embossed Fresh Freesia cardstock.
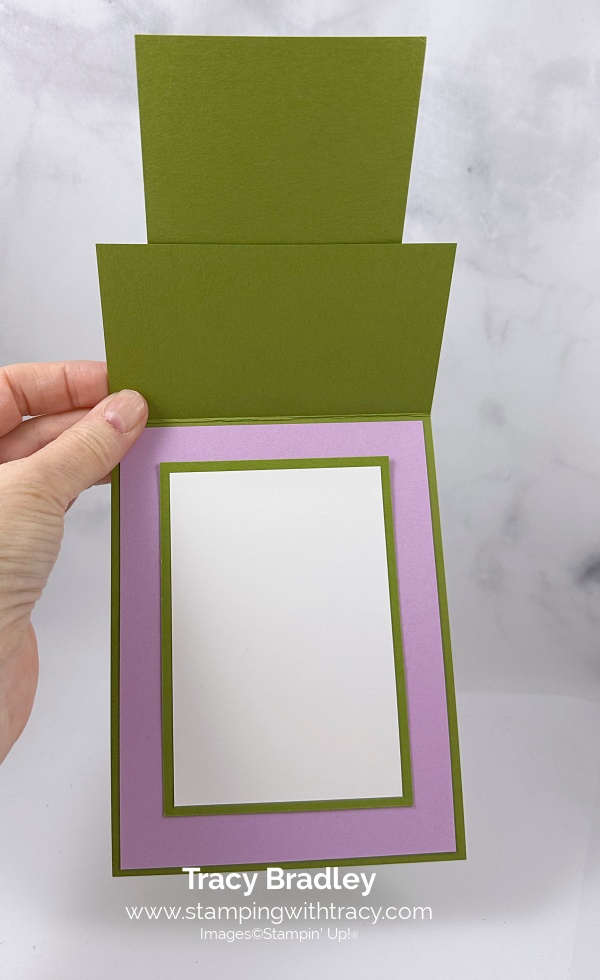
I cut another piece of Fresh Freesia cardstock and adhered it to the inside of the card. Then I cut a piece of Old Olive cardstock and layered it with a piece of Basic White cardstock and adhered it to the inside of the card, being careful that it can’t be seen underneath the top part,.
I stamped the sentiment in Old Olive ink using the Lovely Arrangements Stamp Set and then cut it out using the die that comes with the Lovely Arrangements Dies Then, I added Stampin’ Dimensionals to the back and adhered it to the front of the card. To complete my card, I added two Moody Palette Glossy Dots at either end of the sentiment in Old Olive.

Supply List
Below you’ll find all the Stampin’ Up! supplies I used for today’s card. If you need any stamping supplies, I’d love to be your demonstrator! You can place an order by clicking any of the images below to go to my Stampin’ Up! online store.
Measurements
- Old Olive cardstock: 4-1/4″ x 11″ cut down to 8″ (save this piece) scored at 5-1/2″
- Old Olive cardstock: (inside card): 3″ x 4-1/4″
- Fresh Freesia cardstock (embossed): 4″ x 2-1/4″
- Fresh Freesia cardstock (inside card): 4″ x 5-1/4″
- Lovely & Beautiful Specialty Designer Series Paper: 2-3/4″ x 4″
- Basic White cardstock(inside card): 2-3/4″ x 4″
- Basic White cardstock (sentiment): approximately 3″ x 1″
Bonus Days

Here’s how it works:
- Between January 6th and February 2nd when you spend $50, you will earn a $5.00 coupon!
- There’s no limit to how many coupons you can earn!
- You will be able to redeem your coupons February 3-28, 2026
- All coupon codes will be emailed right after a qualifying purchase has been made. Customers must have a customer account with a valid email address to earn coupons when they shop.
- If you earn multiple codes from a single order, you will receive one email with multiple codes. If you earn multiple codes from multiple orders, you will receive separate emails for each code earned. Save these codes! Stampin’ Up! cannot look codes up!
- All order types qualify for this promotion. Phone and email orders still require an email address.
- Orders started before the promotion begins will not count toward earning coupon codes. You must add items to your cart and complete your purchase during the earning period.
- It’s an ideal time to stock up on the Basics: cardstock, envelopes, etc!
If you’d like a flyer with all this information, click here.
Place an order here!
If you don’t see my picture, click again, please
January Product of the Month
Each month, a single product of the month will be released. These items won’t be in any catalog or on the Online Exclusives page on the Stampin’ Up! website. Stock is limited, so once a Product of the Month sells out, it’s gone for good. Make sure if you like the Product of the Month, to snag your Product of the Month early!
Product of the Month Details
- You must have a Stampin’ Up online account to participate.
- Add the Product of the Month after your cart reaches $75. You can purchase the Product of the Month for just $5! The cart must be $75 (after Stampin’ Rewards).
- Limit 1 per Stampin’ Up! account.
Click here to see the flyer with all the important information.
This is the Product of the Month for January. Click the graphic below to see if you want to get this for only $5!

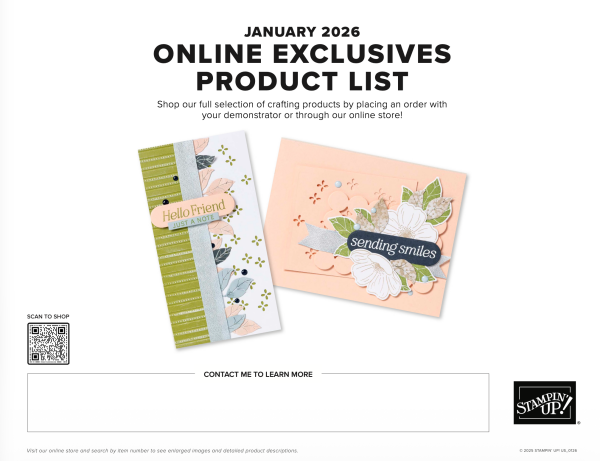
Online Exclusives – January 2026
Click the graphic below to access the January Online Exclusives Product List! Stampin’ Up! has made a printable flyer and they’ve made it much easier to shop the new products! You won’t find Online Exclusives in any catalog, they’ll be listed in the Online Store. Click here to shop Online Exclusives. Click here to download the January 2025 Online Exclusive Product List.
Last Chance Products

Click here to go straight to the Last Chance Products page on the Stampin’ Up! site! Some products are discounted! More products were added on December 2, 2025!
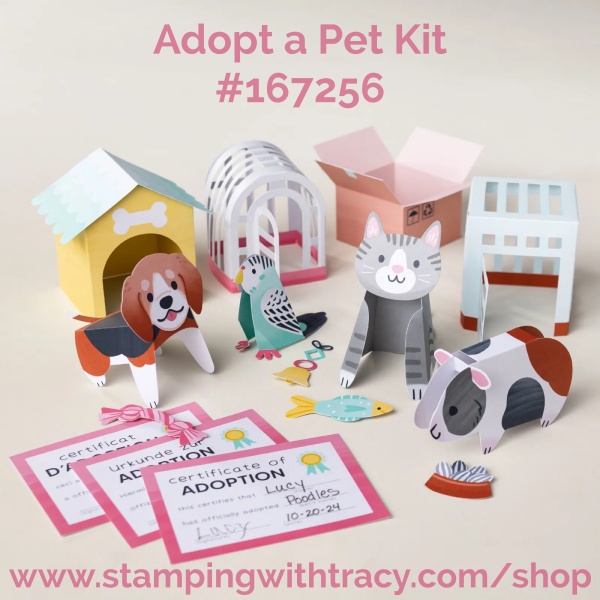
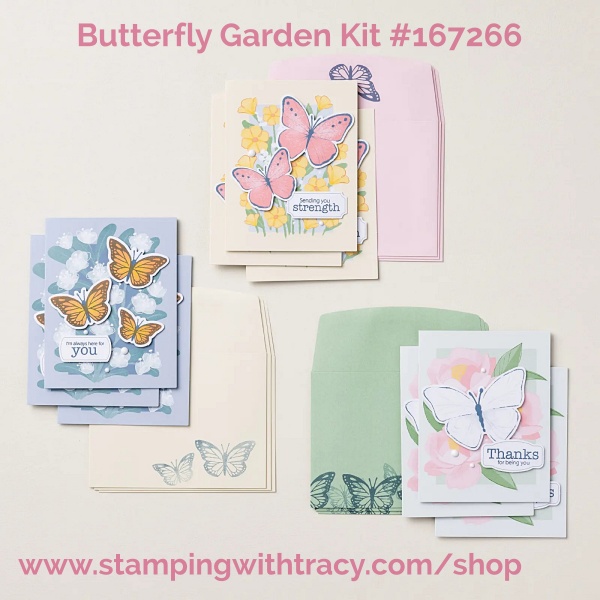
Stampin’ Up! Kits – We Have Three New Kits
Click the graphics for more information about the kits.
Paper Pumpkin for February
An additional coordinating add-on is available but only for Paper Pumpkin subscribers. Click the image below for more information. The dies below coordinates with the upcoming February and March Paper Pumpkin Kits!
Thanks for stopping by today! Enjoy your day!
by Tracy | May 2, 2025 | Thank You Card

Before sharing my card with you today, I want to let you know that Stampin’ Up! is offering 2X Stampin’ Rewards starting today and ending tomorrow in honor of National Scrapbooking Day on May 3rd.
- The threshold to receive rewards is $20
- To participate, you must have a Stampin’ Up! account and be opted in to receive rewards.
- This offer applies to ALL products (excluding Paper Pumpkin subscriptions). However any new subscriptions or prepaid subscriptions offered during the offer will earn double points.

On to my card! I used two new products on my card today, Floral Impressions Designer Series Paper #165603 and the Floral Impressions Stamp Set # 165605 (both of these products will be available on May 6th and are both Online Exclusives). I also used the Eyelet 3D Embossing Folder and the Mixed Labels Dies.


I started with a piece of Misty Moonlight cardstock for the base of my card. Then, I embossed a piece of Basic White cardstock using the Eyelet 3D Embossing Folder and my Stampin’ Cut & Emboss Machine. I adhered the embossed Basic White cardstock to the front of the card. You can find all the measurement I used below the Supply List.


I cut two pieces of Misty Moonlight cardstock and layered them using Floral Impressions Designer Series Paper (available May 6th). I love this Designer Series Paper!!!
I adhered the horizontal piece using Multipurpose Glue and on the square piece I added Stampin’ Dimensionals to the back and then adhered it to the front of the card.

I stamped the sentiment onto Basic White cardstock using Misty Moonlight ink and the Impressions Abloom Stamp Set (available May 6th). I cut the sentiment out using the Mixed Labels Dies. These dies are a staple in my craft room.
To complete my card, I added a piece of Basic White cardstock to the inside of the card.

Supply List
Below you’ll find all the Stampin’ Up! supplies I used for today’s card. If you need any stamping supplies, I’d love to be your demonstrator! You can place an order by clicking any of the images below to go to my Stampin’ Up! online store. The Specialty Plate is used with 3D Embossing Folders and Hybrid Embossing Folders.
I also used Floral Impressions Designer Series Paper #165603 and the Floral Impressions Stamp Set # 165605 (both of these products will be available on May 6th and are both Online Exclusives).
Bundle Alert: The Mixed Labels Bundle is available with a 10% discount rather than buying the products separately

Measurements
- Misty Moonlight cardstock: 5-1/2″ x 8-1/2″ score at 4-1/4″
- Misty Moonlight cardstock (horizontal piece): 4-3/4″ x 2-1/2″
- Misty Moonlight cardstock (square): 3-1/2″ x 3-1/2″
- Floral Impressions Designer Series Paper (horizontal piece): 4-1/2″ x 2-1/4″
- Floral Impressions Designer Series Paper (square): 3-1/4″ x 3-1/4″
- Basic White cardstock (embossed and inside card): (2) 5-1/4″ x 4″
- Basic White cardstock (sentiment); scrap
The New Stampin’ Rewards Program

The New Stampin’ Rewards Program was rolled out on April 15th. You will receive 10% in rewards when your order is $20 or more but you have to opt in to get the rewards. The more you shop, the more you earn!
Last Chance Products
Click here to go straight to the Last Chance Products page on the Stampin’ Up! site!
Three New Stampin’ Up! Kits
Click each graphic below for more information about the kit.


Mountain Majesties Paper Pumpkin Kit
Did you know that Paper Pumpkin has moved to the Stampin’ Up! website? You can now order subscriptions and manage your subscription on the Stampin’ Up! website! If you’d like to subscribe, please click the graphic below.

An additional coordinating add-on is available but only for Paper Pumpkin subscribers. Click the image below for more information.

Thanks for stopping by today! Enjoy your weekend!
by Tracy | Dec 5, 2022 | Uncategorized
Today’s card is a variation of the one I shared on Friday using Fitting Florets Designer Series Paper. You can see Fridays’ card here. This Designer Series Paper is only available while supplies last.


I started with a piece of Balmy Blue cardstock for the base of my card (you can find the measurements I used below the Supply List). I cut a piece off the end but saved it to use on the front of the card. Next, I cut a piece of Evening Evergreen cardstock and ran it through one of the Elegant Eucalyptus 3D Embossing Folders and adhered it to the top of the card. I used the piece of Balmy Blue I cut off the base of the card and layered it with a piece of Fitting Florets Designer Series Paper. I added Stampin’ Dimensionals to the back, just at the top, and adhered it to the embossed Evening Evergreen cardstock.


I cut another piece of Evening Evergreen cardstock and adhered it to the inside of the card. Then I cut a piece of Balmy Blue cardstock and layered it with a piece of Basic White cardstock and adhered it to the inside of the card. I stamped the sentiment in Evening Evergreen ink using the Inspired Thoughts stamp set. I cut it out using the Stylish Shapes Dies. added Stampin’ Dimensionals to the back and adhered it to the front of the card. To complete the card, I added three Elegant Faceted Gems to the Fitting Florets Designer Series Paper.


Supply List
Below you’ll find all the Stampin’ Up! supplies I used for today’s card. If you need any stamping supplies, I’d love to be your demonstrator! You can place an order by clicking any of the images below to go to my Stampin’ Up! online store.
Measurements
- Balmy Blue cardstock: 11″ x 4-1/4″ cut down to 8″ (save this piece!) score @ 5-1/2″
- Balmy Blue cardstock (inside): 4-1/4″ x 3″
- Evening Evergreen cardstock (embossed): 4″ x 2-1/4″
- Evening Evergreen cardstock (inside): 5-1/4″ x 4″
- Basic White cardstock (sentiment): approx 3-1/4″ x 1″
- Basic White cardstock (inside): 4″ x 2-3/4″
- Fitting Florets Designer Series Paper: 4″ x 2-3/4″
By My Side Card Sampler

Place a minimum $50 order (before tax/shipping) at my Stampin’ Up! Online Store using my special host code F9BQ6NF3 and I’ll send you my By My Side Card Sampler.
You’ll receive six card kits (two cards each of three different designs) and everything will be cut, scored, and die cut for you! You’ll quickly have six cards ready to mail or give to someone special. For more details and the supplies you’ll need, please click HERE.
Don’t forget to use the host code when placing your order so I’ll know you want this sampler. When you use the host code, it allows me to continue to offer my Samplers for the low cost of free! EXCEPTION: if your order is $150 or more do not use the host code so you can receive Stampin’ Rewards directly from Stampin’ Up!. Contact me after you’ve placed the order to let me know that you’d like the Sampler – you only need to contact me if your order is $150 or more.
Orders must be placed by December 7, 2022 and the Card Samplers will be mailed approximately December 17, 2022.


Thanks for stopping by today! Enjoy your day!
by Tracy | Aug 25, 2022 | Uncategorized
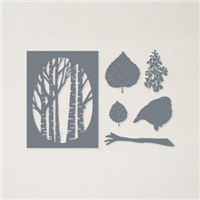
Today’s card was created using the Aspen Tree Dies which happens to be a FREE Sale-a-Bration product you can earn FREE with a $100 purchase. The special Sale-a-Bration item number is 163102 (if you use the catalog number, it won’t be recognized as being a free Sale-a-Bration product. The regular product number is 159798.


The Aspen Tree Dies can be purchased several different ways:
- Spend $100 and they will be free when you use this product number: 163102
- Purchase the Perched in a Tree Bundle which includes the Aspen Tree Dies and the stamp set, Perched in a Tree. The product number is: 159799
- Purchase the Aspen Tree Dies. The product number is: 159798
Silver Foil 12″ x 12″Specialty Paper can be purchased two different ways:
- Spend $50 and they will be free when you use this product number: 163096
- Purchase this product using the product number: 156457

Back to my card! I started with a base of Night of Navy cardstock. Then I cut a piece of Hues of Happiness Designer Series Paper (DSP) the same size as a piece of Basic White cardstock (you can find the measurements I used below the Supply List). I ran the Basic White cardstock through the Stampin’ Cut & Emboss Machine using the Aspen Tree Dies. Then I adhered the Hues of Happiness DSP to the die cut piece by simply adding adhesive all around the edges. Next, I glued this piece to my card front.

I stamped the sentiment onto Basic White cardstock with Night of Navy ink using the stamp set, Inspired Thoughts and then cut it out using the Meadow Dies. I used our Silver Foil to cut two leaves using the Aspen Tree Dies (I love the texture of the leaves). I adhered the larger leaf to the card and then added Stampin’ Dimensionals to the sentiment and adhered it to the card. Then, I added Stampin’ Dimensionals to the smaller leaf and placed it so the stem was slightly on the sentiment. To finish the card, I added a piece of Basic White cardstock to the inside.


Supply List
Below you’ll find all the Stampin’ Up! supplies I used for today’s card. If you need any stamping supplies, I’d love to be your demonstrator! You can place an order by clicking any of the images below to go to my Stampin’ Up! online store.
Two products on this list can be earned FREE during Sale-a-Bration BUT the item numbers are different than those listed below. If you use the item numbers in the list of products, the ordering system will not flag them as free.
- Aspen Tree Dies can be earned with a $100 purchase and the special Sale-a-Bration product number is 163102.
- Silver Foil 12″ x 12″ Specialty Pack can be earned with a $50 purchase and the special Sale-a-Bration product number is 163096
Measurements
- Night of Navy cardstock: 11″ x 4-1/4″
- Basic White cardstock: (2) 5-1/4″ x 4″
- Basic White cardstock (sentiment): approx. 3-1/4″ x 1-1/4″
- Hues of Happiness Designer Series Paper: 5-1/4″ x 4″
- Silver Foil: scraps
July – August Card Kits

During the month of July and August 2022, place a minimum $50 order using the host code 3AP9YADK at my Stampin’ Up! online store and I’ll send you at least six card kits. A card kit includes all the cardstock and Designer Series Paper you’ll need to complete a card. I cut, score, die cut and emboss all the pieces for you! You’ll just need to supply your own stamp set, ink and adhesive. You can use the stamp set I used to create the cards (Soft Seedlings) or use what you already own.
- $50.00 – $99.99 = 6 card kits
- $100 – $149.99 = 7 card kits
- $150 or more = 8 card kits
If your order is $150 or more, do NOT use the host code so you can receive Stampin’ Rewards directly from Stampin’ Up! You will automatically receive 8 card kits from me.
I have designed thirteen different cards using the same layout but with a variety of different cardstock, Designer Series Paper and embossing folders.
You’ll receive:
- At least six card kits with your minimum $50 order
- A nine page PDF tutorial with directions for the card, a supply list and twelve more ideas using the same layout
- At least one FREE Sale-a-Bration gift directly from Stampin’ Up!
- At least one Bradley Point (earn points and redeem them for free product)
- A thank you card you can send to someone!
If your order is $150 or more, do NOT use the host code so you can receive Stampin’ Rewards directly from Stampin’ Up! You will automatically receive 8 card kits from me.
This offer expires on August 31, 2022

Sale-a-Bration is Almost Over!

Sale-a-Bration is that time of year when you earn FREE product with every $50 or $100 purchase! There’s no limit to how many free items you can earn. All products are available while supplies last!
Three Sale-a-Bration products are no longer available:
- Brushed Metallic 12″ x 12″ Cardstock
- Pool Party & Soft Sea Foam Cards & Envelopes
- Tree Lot Dies
Learn all about Sale-a-Bration here.
Thanks for stopping by today! Enjoy your day!