by Tracy | Jan 2, 2024 | Uncategorized
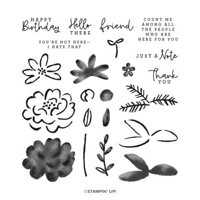
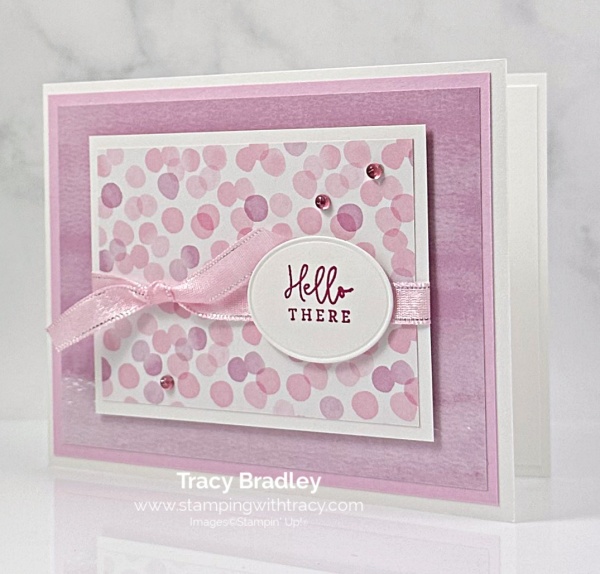
Today’s card is another sneak peek of new products available this Thursday on January 4th! I used the Thoughtful Expressions Bundle #162822 which includes the Thoughtful Expressions stamp set and Thoughtful Expressions Dies. I also used the Softly Sophisticated Bundle #162947 which includes the Softly Sophisticated stamp set and the Softly Sophisticated 3D Embossing Folder. This Bundle is FREE with a $100 purchase during Sale-a-Bration!!
I’ve shared two other cards using this layout and you can see them here and here BUT please note that I did change some of the measurements and I didn’t add the extra piece of Designer Series Paper.


I started with a piece of Orchid Oasis cardstock for the base of my card (you can find the measurements I used below the Supply List). Then I embossed a piece of Basic White cardstock using the Softly Sophisticated Embossing Folder (free with a $100 purchase during Saleabration) and adhered it to the front of the card. I cut another piece of Basic White cardstock and embossed it with the same embossing folder and then adhered it to another piece of Orchid Oasis cardstock. Then, I added it to the front of the card.
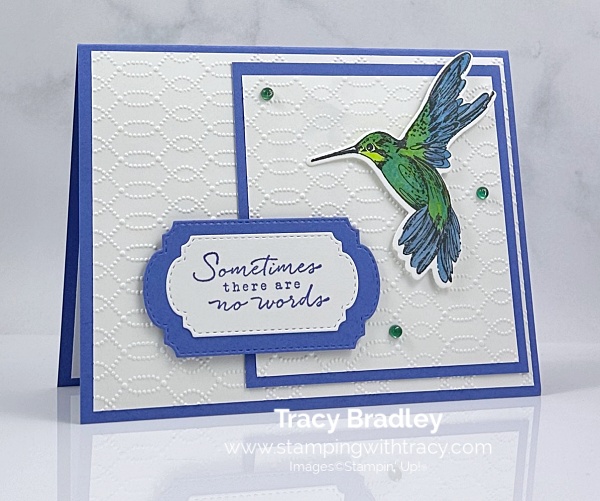
I stamped the hummingbird from the Thoughtful Expressions stamp set in Memento ink onto Basic White cardstock. Then I colored the hummingbird using the following Stampin’ Blends:
Body: Dark Parakeet Party & Light Azure Afternoon (I laid down the Parakeet Party first and then blended Azure Afternoon into it).
Wings: Dark and Light Boho Blue
After coloring the hummingbird, I cut him out with the Thoughtful Expressions Dies, added Stampin’ Dimensionals to the back and adhered it to the front of the card.

I stamped the sentiment in Orchid Oasis ink onto Basic White cardstock using the Thoughtful Expressions stamp set and then cut it out using the Thoughtful Expressions Dies. I cut the same shape, but larger out of Orchid Oasis cardstock, adhered the sentiment to the front and then added Stampin’ Dimensionals to the back (only on the part that would be on the same piece as the hummingbird) and adhered it to the card front.
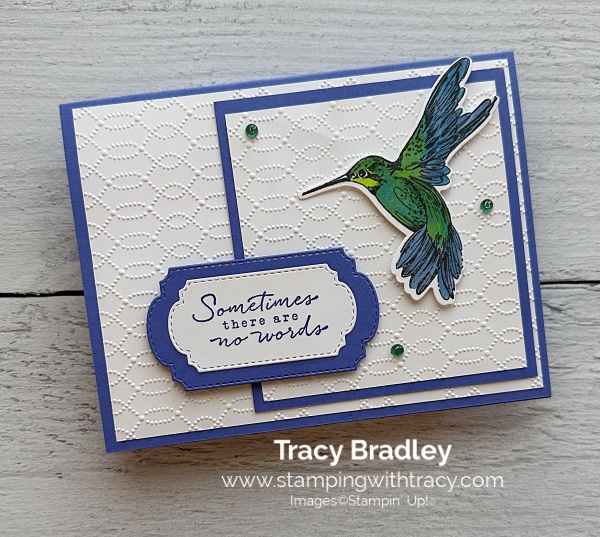
To complete my card, I added three Tinsel Gems around the hummingbird and added a piece of Basic White cardstock to the inside.
Supply List
Below you’ll find all the Stampin’ Up! supplies I used for today’s card (except for the products that won’t be available until January 4, 2024). If you need any stamping supplies, I’d love to be your demonstrator! You can place an order by clicking any of the images below to go to my Stampin’ Up! online store.
The Specialty Plate is used with 3D Embossing Folders.
Measurements
- Orchid Oasis cardstock: 8-1/2″ x 5-1/2″ scored at 4-1/4″
- Orchid Oasis cardstock: 3-3/4″ x 3-1/2″
- Orchid Oasis cardstock: approx. 3-1/4″ x 2″
- Basic White cardstock (one of these is embossed): (2) 5-1/4″ x 4″
- Basic White cardstock (embossed): 3-1/2″ x 3-1/4″
- Basic White cardstock (sentiment): approx. 2-3/4″ x 1-1/2″
- Basic White cardstock (hummingbird): scrap
Lovely Lavender Paper Pumpkin Kit

Make love-themed cards for special occasions, Valentine’s Day, anniversaries, and more!
• Makes 8 cards: 4 each of 2 designs with 8 coordinating envelopes
• 4 bonus tags that punch out from the card front
• Precut paper pieces and linen thread
• Coordinating colors: Garden Green, Pretty Peacock, Lost Lagoon, Highland Heather,
Gorgeous Grape (Classic Stampin’ Spot), Berry Burst
Coordinates with the Perennial Lavender Suite Collection (item 162613) – coming in January!!
The last day to order the Lovely Lavender Paper Pumpkin Kit is January 10th. Click here to order!
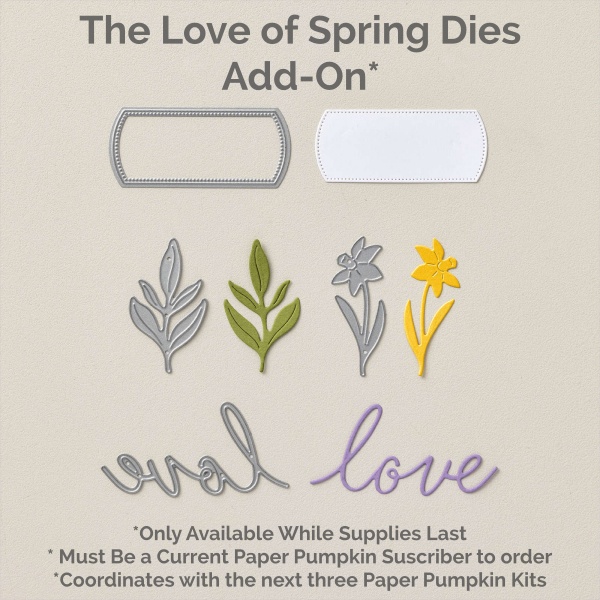
Click here to order The Love of Spring Dies Add-On
Click here for a flyer that shows a sneak peek of the next three months of Paper Pumpkin!
Retiring Products from the September-December Mini Catalog

There are just a few days left to get products from the Stampin’ Up! September – December Catalog before they retire! Some products are on sale up to 60% and once a product is out of stock, it’s gone! You can see what’s still available and what’s on sale, here.
Painted Wishes Card Kit by Stampin’ Up!

This kit includes:
- Enough supplies to create 9 cards—3 each of 3 designs
- 9 coordinating envelopes
- Printed card bases, printed die cuts, adhesive, sequins, and gold cord
- Finished card size: 4-1/4″ x 5-1/2″ (10.8 x 14 cm)
- Coordinating colors: Garden Green, Lemon Lime Twist, Moody Mauve, Petal Pink, Pretty Peacock, Wild Wheat
Click here to purchase the Painted Wishes Card Kit
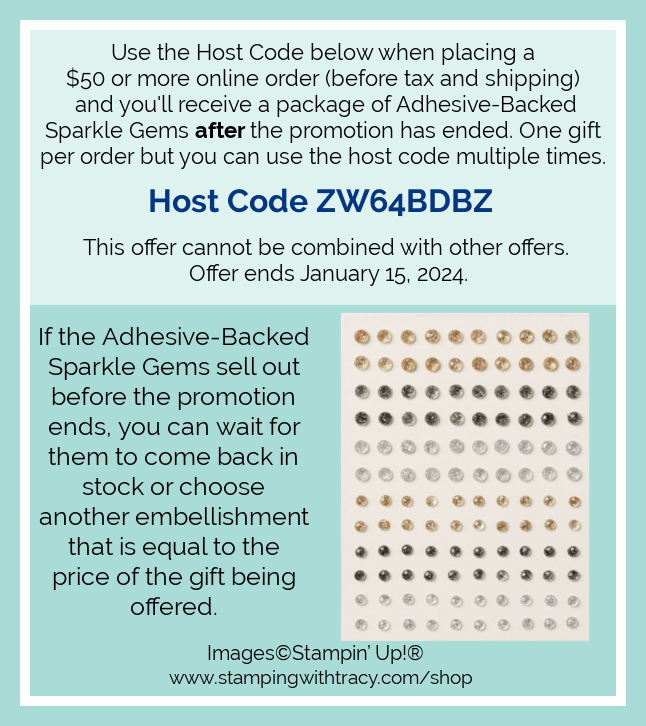
Host Code
Use the host code ZW64BDBZ to receive a package of Adhesive-Backed Sparkle Gems with your $50 or more order BUT if your order is $150 or more do NOT use the host code so you can receive the Stampin’ Rewards. After you place your order, email me (only if your order is $150 or more) and let me know you’d like the Adhesive-Backed Sparkle Gems. Offer ends January 15, 2024.
Thanks for stopping by today!
by Tracy | Sep 22, 2023 | Uncategorized
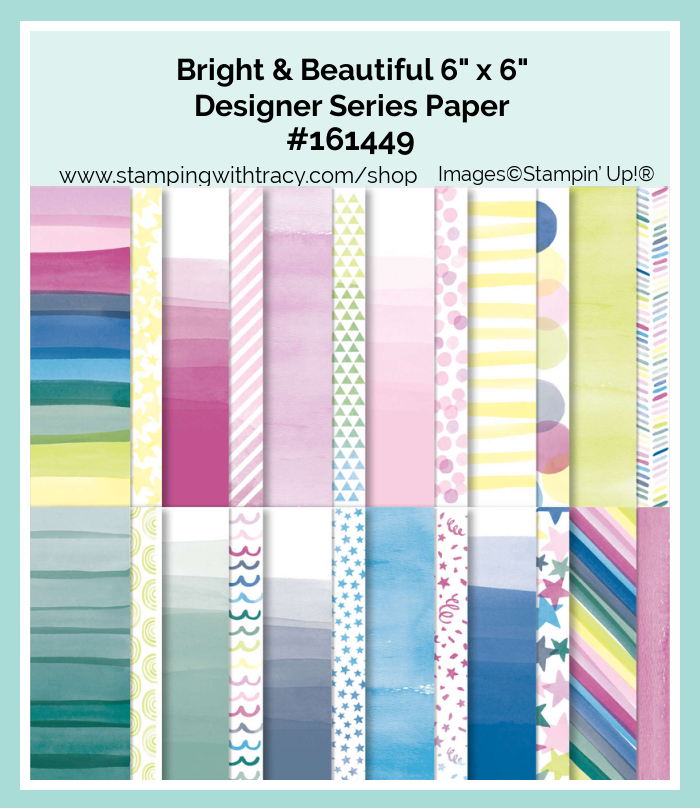
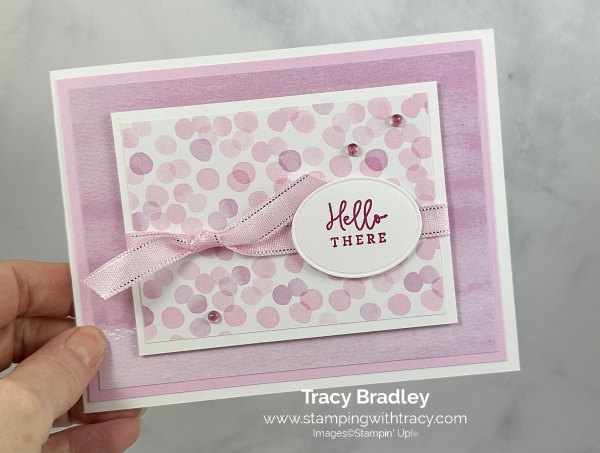
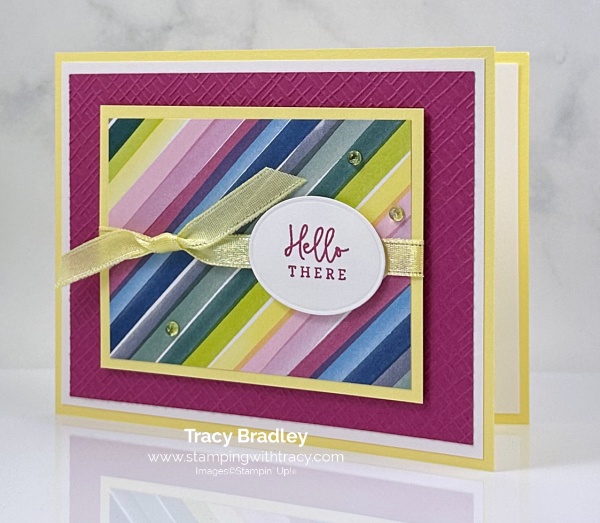
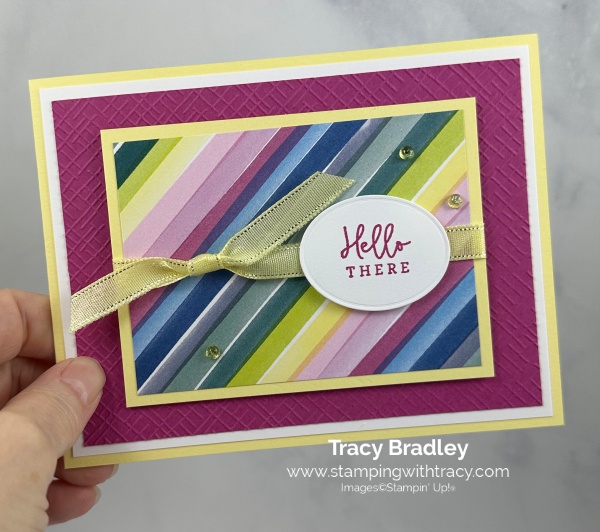
Today’s card is a variation of one I shared earlier this week and you can see it here. Instead of using one piece of Bright & Beautiful Designer Series Paper, I used two. I used the stamp set, Darling Details, Tinsel Gems Four Pack, 3/8″ Sheer Ribbon Combo Pack and All That Dies.

I started with a piece of Thick Basic White cardstock for the base of my card. Then, I adhered a piece of Bright and Beautiful Designer Series Paper to a piece of Bubble Bath cardstock and then adhered it to the front of the card (you can find the measurements I used below the Supply List).

Next, I cut a piece of Basic White cardstock and adhered another piece of Bright & Beautiful Designer Series Paper to the front. I wrapped a piece of Sheer Ribbon around the piece and tied a knot over to the left. I added Stampin’ Dimensionals to the back and adhered it to the front of the card.

I stamped the sentiment onto Basic White cardstock using the stamp set, Darling Details, using Berry Burst ink. I cut it out using the All That Dies and then added Stampin’ Dimensionals to the back and adhered to the front of the card.To complete my card I added three Tinsel Gems in Berry Burst to the front of the card and added a piece of Basic White cardstock to the inside.
Supply List
Below you’ll find all the Stampin’ Up! supplies I used for today’s card. If you need any stamping supplies, I’d love to be your demonstrator! You can place an order by clicking any of the images below to go to my Stampin’ Up! online store.
Measurements
- Thick Basic White cardstock: 11″ x 4-1/4″
- Bubble Bath cardstock: 5-1/4″ x 4″
- Basic White cardstock: 4″ x 3″
- Basic White cardstock (sentiment): approx. 2″ x 1-1/2″
- Basic White cardstock (inside): optional 5-1/4″ x 4″
- Bright & Beautiful Designer Series Paper: 3-3/4″ x 2-3/4″
- Bright & Beautiful Designer Series Paper: 5″ x 3-3/4″
Host Code
Use the host code WPWWQYXW to receive a package of Blooming Pearls (in the Mini Catalog) with your $50 or more order BUT if your order is $150 or more do NOT use the host code so you can receive the Stampin’ Rewards. After you place your order, email me (only if your order is $150 or more) and let me know you’d like the Blooming Pearls.

Newest Additions to the Online Exclusives
These papers are only available while supplies last!!
Christmas Everywhere Kit
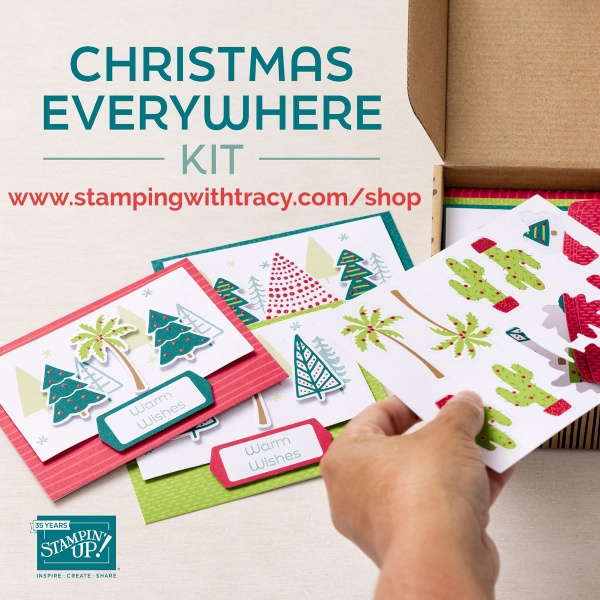
This kit includes:
- Enough supplies to create 9 cards—3 each of 3 designs
- 9 coordinating envelopes
- Christmas Everywhere photopolymer stamp set
- One Lost Lagoon Ink Spot
- Printed card bases, printed die-cut labels and images with red glitter, adhesive, and a clear block
- Finished card size: 5-1/2″ x 4-1/4″ (14 x 10.8 cm)
- Coordinating colors: Granny Apple Green, Lost Lagoon, Pecan Pie, Pretty Peacock, Real Red
Click here to purchase this new kit!
Home for the Holidays Paper Pumpkin Kit

This kit includes:
- All the supplies you’ll need to create 8 sparkly and dazzling Christmas cards—4 each of 2 designs—and eight coordinating envelopes.
- A coordinating photopolymer stamp set with endearing holiday sentiments and festive designs.
- A Real Red Stampin’ Spot
- A bottle of Glitter Glue
- Beautiful Christmasy-themed precut pieces
Finished folded card size: 4-1/4″ x 5-1/2″
Coordinating Stampin’ Up! colors: Balmy Blue, Blueberry Bushel, Cherry Cobbler, Crumb Cake, Crushed Curry, Daffodil Delight, Lemon Lolly, Mossy Meadow, Night of Navy, Old Olive, Pecan Pie, Real Red
Click here to purchase this month’s Paper Pumpkin kit.
Thank you for stopping by today!
by Tracy | Sep 19, 2023 | Uncategorized
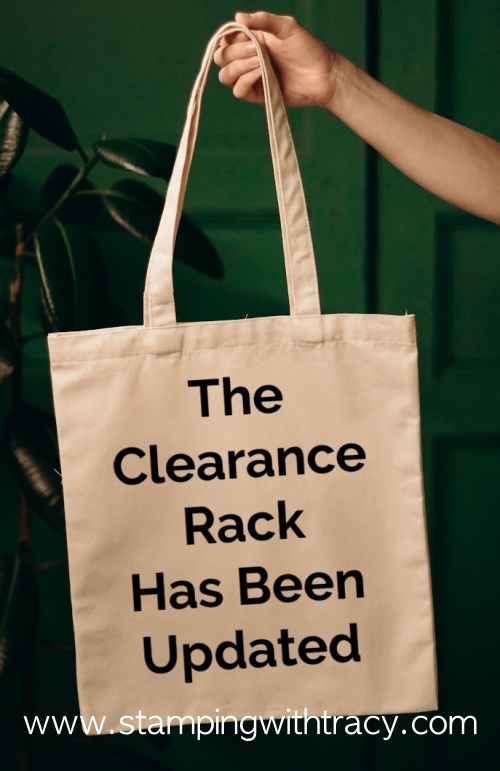
Edited to Add: I found out this morning that the Clearance Rack has been updated! You can shop the Clearance Rack HERE
I have two cards to share with you today that were created using Bright & Beautiful Designer Series Paper. I also used the Darling Details stamp set, two of the Basics 3D Embossing Folders and our Sheer Ribbon Combo Pack. They are both variations of the same card.


For this first card, the base of the card is Bubble Bath cardstock. I then embossed a piece of Basic White cardstock using one of the Basics 3D Embossing Folders and adhered it to the card base. I cut another piece of Bubble Bath cardstock and adhered a piece of Bright & Beautiful Designer Series Paper to the front. I then wrapped a piece of 3/8″ Sheer Ribbon around this piece and tied a knot. I absolutely love this ribbon. It’s so pretty and it comes in three colors: Bubble Bath, Azure Afternoon and Lemon Lolly. I added Stampin’ Dimensionals to the back and adhered it to the embossed cardstock.
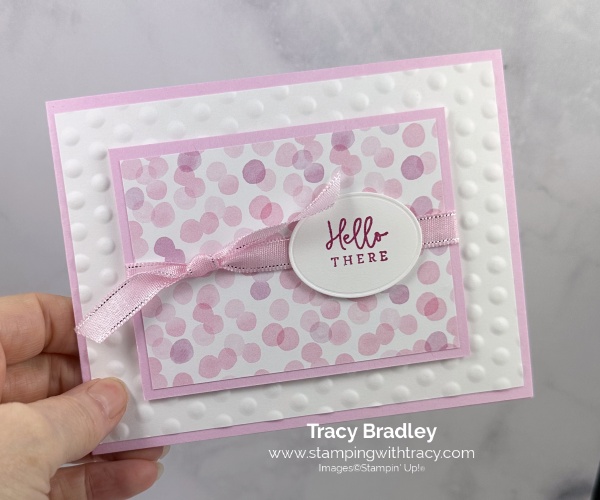

I stamped the sentiment onto Basic White cardstock using the stamp set, Darling Details, in Berry Burst ink and cut it out using the All That Dies. I added Stampin’ Dimensionals to the back and placed it on the ribbon. To complete my card, I added a piece of Basic White cardstock to the inside.
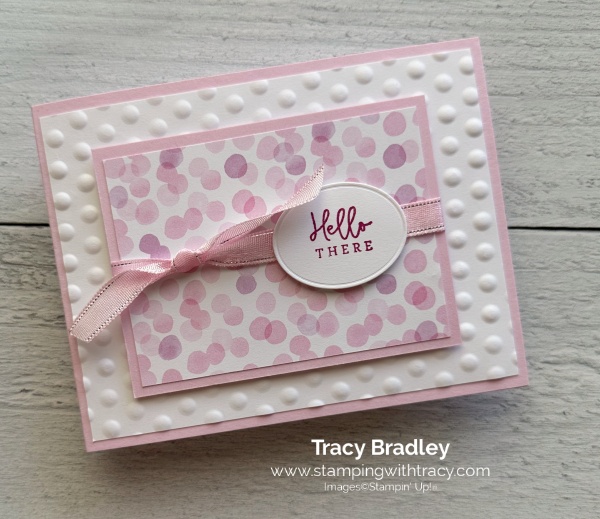
For this second card, the base is Lemon Lolly cardstock. I added a piece of Basic White cardstock to the front and a piece of Berry Burst cardstock that I embossed using the Basics 3D Embossing Folder. I cut another piece of Lemon Lemon Lolly cardstock and a piece of Bright & Beautiful Designer Series Paper and adhered them together. I wrapped Lemon Lolly sheer ribbon around it and tied a knot. I added Stampin’ Dimensionals to the back and adhered it to the front of the card. Just as I did for the first card, I stamped the sentiment in Berry Burst ink onto Basic White cardstock using the stamp set, Darling Details and cut it out using the All That Dies.
To complete my card, I added three Tinsel Gems to the front of the card and a piece of Basic White cardstock to the inside.
Supply List
Below you’ll find all the Stampin’ Up! supplies I used for today’s card. If you need any stamping supplies, I’d love to be your demonstrator! You can place an order by clicking any of the images below to go to my Stampin’ Up! online store.
The Specialty Plate is used with 3D Embossing Folders.
Measurements
First Card
- Bubble Bath cardstock: 11″ x 4-1/4″
- Bubble Bath cardstock: 4″ x 3″
- Basic White cardstock: (2) 5-1/4″ x 4″
- Basic White cardstock (sentiment): approx. 2″ x 1-1/2″
- Bright & Beautiful Designer Series Paper: 3-3/4″ x 2-3/4″
Second Card:
- Lemon Lolly cardstock: 11″ x 4-1/4″
- Lemon Lolly cardstock: 4″ x 3″
- Berry Burst cardstock: 5″ x 3-3/4″
- Basic White cardstock: (2) 5-1/4″ x 4″
- Basic White cardstock (sentiment): approx. 2″ x 1-1/2″
- Bright & Beautiful Designer Series Paper: 3-3/4″ x 2-3/4″
Host Code
Use the host code WPWWQYXW to receive a package of Blooming Pearls (in the Mini Catalog) with your $50 or more order BUT if your order is $150 or more do NOT use the host code so you can receive the Stampin’ Rewards. After you place your order, email me (only if your order is $150 or more) and let me know you’d like the Blooming Pearls.
Newest Additions to the Online Exclusives
These papers are only available while supplies last!!
Christmas Everywhere Kit
This kit includes:
- Enough supplies to create 9 cards—3 each of 3 designs
- 9 coordinating envelopes
- Christmas Everywhere photopolymer stamp set
- One Lost Lagoon Ink Spot
- Printed card bases, printed die-cut labels and images with red glitter, adhesive, and a clear block
- Finished card size: 5-1/2″ x 4-1/4″ (14 x 10.8 cm)
- Coordinating colors: Granny Apple Green, Lost Lagoon, Pecan Pie, Pretty Peacock, Real Red
Click here to purchase this new kit!
Home for the Holidays Paper Pumpkin Kit
This kit includes:
- All the supplies you’ll need to create 8 sparkly and dazzling Christmas cards—4 each of 2 designs—and eight coordinating envelopes.
- A coordinating photopolymer stamp set with endearing holiday sentiments and festive designs.
- A Real Red Stampin’ Spot
- A bottle of Glitter Glue
- Beautiful Christmasy-themed precut pieces
Finished folded card size: 4-1/4″ x 5-1/2″
Coordinating Stampin’ Up! colors: Balmy Blue, Blueberry Bushel, Cherry Cobbler, Crumb Cake, Crushed Curry, Daffodil Delight, Lemon Lolly, Mossy Meadow, Night of Navy, Old Olive, Pecan Pie, Real Red
Click here to purchase this month’s Paper Pumpkin kit.
Thank you for stopping by today!