by Tracy | Dec 12, 2022 | Uncategorized
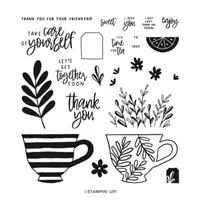
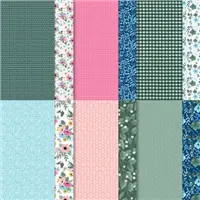
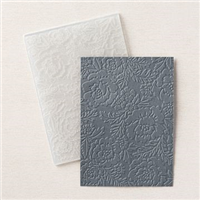
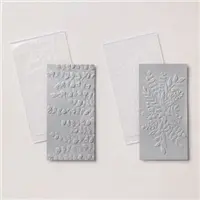
Today’s card is a fun fold using Fitting Florets Designer Series Paper, Cup of Tea stamp set and Pretty Flowers Embossing Folder. You can find the measurements I used below the Supply List.
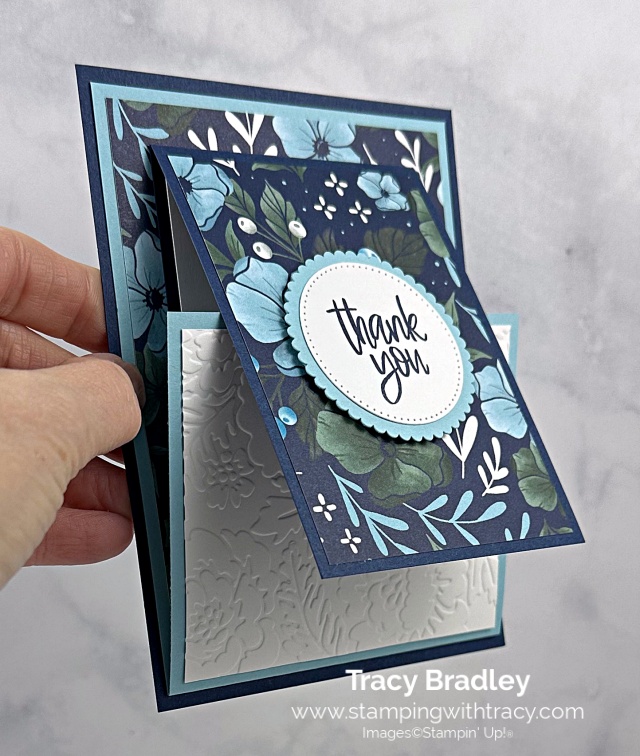

I started with a base of Night of Navy cardstock. Then I cut a piece of Balmy Blue cardstock, scored it and adhered it to the base (with the flap at the bottom). I adhered a piece of Fitting Florets Designer Series Paper to the inside – I love the colors in this paper!


Next, I cut a piece of Night of Navy cardstock, scored it and folded it in half. Then I “opened” the Balmy Blue piece, centered the Night of Navy piece and adhered it to the Designer Series Paper.
I cut a piece of Basic White cardstock and ran it through the Stampin’ Cut & Emboss Machine using the Pretty Flowers Embossing Folder. I then adhered it to the Balmy Blue flap.
I adhered another piece of Fitting Florets Designer Series Paper to the front of the Night of Navy folded piece and added a piece of Basic White cardstock to the inside.


I stamped the sentiment in Night of Navy ink onto a piece of Basic White cardstock and cut it out using the Stylish Shapes Dies. I used the Layering Circles Dies to cut a larger scalloped circle out of Balmy Blue cardstock and adhered the sentiment to it. I added Stampin’ Dimensionals to the back and adhered it to the front of the card.

The card below was made using all the same measurements but the Night of Navy piece is a little narrower with a measurement of 8-1/2″ x 2-1/2″ and scored at 4-1/4″. The Designer Series Paper measures 4″ x 2-1/4″.

Supply List
Below you’ll find all the Stampin’ Up! supplies I used for today’s card. If you need any stamping supplies, I’d love to be your demonstrator! You can place an order by clicking any of the images below to go to my Stampin’ Up! online store.
Measurements
- Night of Navy cardstock (base): 5-1/2″ x 4-1/4″
- Night of Navy cardstock: 8-1/2″ x 3″ scored at 4-1/4″
- Balmy Blue cardstock: 8-1/2″ x 4″ scored at 3-1/4″
- Balmy Blue cardstock (scalloped circle): approx. 2-3/4″ x 2-3/4″
- Basic White cardstock (embossed): 3-3/4″ x 3″
- Basic White cardstock (sentiment): approx. 2-1/2″ x 2-1/2″
- Basic White cardstock (inside Night of Navy piece): 4″ x 2-3/4″
- Fitting Florets Designer Series Paper: 5″ x 3-3/4″
- Fitting Florets Designer Series Paper: 4″ x 2-3/4″
December Thank You Gift Host Code
I have a host code you can use when placing a minimum $50 order (before tax and shipping) during the month of December. You’ll receive a package of Iridescent Pearls in January as a thank you gift from me.
Host Code Details
- Place a minimum $50 order (before tax and shipping) using the host code 3TSQRPRE and receive a package of Iridescent Pearls.
- Your gift will be sent to you once the host code has closed (January 1st) and I have received the product (approximately 2-3 weeks).
- This is a gift from me, not Stampin’ Up! You will not receive the pearls in your order.
- Anyone who places any size order (whether you use the host code or not) will receive at least one PDF Tutorial
- This host code cannot be combined with a Card Sampler host code.
- Please do NOT use the Host Code if your order is $150 or more so you can receive Host Rewards directly from Stampin’ Up! You will automatically receive the pearls from me.
- Offer expires December 31, 2022




Thank you for stopping by today!
by Tracy | Dec 9, 2022 | Uncategorized
Today’s card is a gift card holder or it can be used to just add a note and it’s so easy to make! I used Fitting Florets Designer Series Paper and the stamp set, Framed & Festive. Both of these products are available while supplies last.

I started with a piece of Real Red cardstock and scored it in two places to create a flap and pocket (you can find the measurements I used below the Supply List). Then, I added Tear & Tape on the smaller section and folded it up to create a pocket.

I cut two pieces of Fitting Florets Designer Series Paper and then colored the berries with a Dark Real Red Stampin’ Blend. If you’ve never used Stampin’ Blends before, you’ll want to cover your work surface because the pens will bleed through the paper. Next, I adhered the larger piece to the front flap and folded it down and then added the smaller piece to the pocket. If you adhere the bigger piece first and fold the piece over, you can see how much of a border you’ll have when you adhere the smaller piece.


I stamped the sentiment onto a piece of Basic White cardstock using Evening Evergreen ink and the stamp set, Framed & Festive. Then I cut it out using the Layering Circles Dies. I cut a larger scalloped circle out of Real Red cardstock and adhered the two together. I added Stampin’ Dimensionals to the top half of the circle and adhered it to the top flap.
I cut a piece of Basic White cardstock and placed it it in the pocket on the inside of the card.

Supply List
Below you’ll find all the Stampin’ Up! supplies I used for today’s card. If you need any stamping supplies, I’d love to be your demonstrator! You can place an order by clicking any of the images below to go to my Stampin’ Up! online store.
Measurements
- Real Red cardstock: 8-1/2″ x 5-1/2″ score at 2-3/4″ and 6-3/4″
- Real Red cardstock (scalloped circle): approx. 3-1/4″ x 3-1/4″
- Basic White cardstock (in pocket): 4-3/4″ x 3-1/2″
- Basic White cardstock (sentiment): approx. 3″ x 3″
- Fitting Florets Designer Series Paper: 5-1/4″ x 1″
- Fitting Florets Designer Series Paper: 5-1/4″ x 2-1/2″
Host Code
I have a host code you can use when placing a minimum $50 order (before tax and shipping) during the month of December. You’ll receive a package of Iridescent Pearls in January as a thank you gift from me.
Host Code Details
- Place a minimum $50 order (before tax and shipping) using the host code 3TSQRPRE and receive a package of Iridescent Pearls.
- Your gift will be sent to you once the host code has closed (January 1st) and I have received the product (approximately 2-3 weeks).
- This is a gift from me, not Stampin’ Up! You will not receive the pearls in your order.
- Anyone who places any size order (whether you use the host code or not) will receive at least one PDF Tutorial
- This host code cannot be combined with a Card Sampler host code.
- Please do NOT use the Host Code if your order is $150 or more so you can receive Host Rewards directly from Stampin’ Up! You will automatically receive the pearls from me.
- Offer expires December 31, 2022

Thank you for stopping by today! Enjoy your weekend!
by Tracy | Dec 7, 2022 | Uncategorized
Today’s the last chance to earn my free By My Side Card Sampler by placing a minimum $50 order and using my special host code. I used Tea Boutique Designer Series Paper and Tea Boutique Cards & Envelopes to create the sampler. Scroll down to see the cards!

Here’s how you can earn it FREE!
- Place a minimum $50 order (before tax/shipping) at my Stampin’ Up! online store.
- Use my special By My Side Card Sampler Host Code when placing your order (see below) BUT if your order reaches $150 or more, please DO NOT use the host code so you can receive Stampin’ Rewards (free product directly from Stampin’ Up!). Once you place your order, simply drop me an email (only necessary if your order is over $150) letting me know that you’d like the by My Side Card Sampler.
- Place your order by the end of today, December 7, 2022.

Here’s What You’ll Receive:
- All the paper and embellishments needed to make six cards (two each of three different designs). The paper will be cut, scored, and die cut for you! Envelopes will also be provided. You’ll need to supply your own adhesive, ink and stamp set.
- A PDF Tutorial with instructions, pictures, cutting measurements and a complete supply list of all the products used.
- Earn at least one Bradley Point (earn ten Bradley Points and redeem them for free product)..
All the Other Important Information:
- Your By My Side Card Sampler will ship first-class mail approximately December 17, 2022 and will be mailed to the address used on your online order.
- You’ll receive an email when I mail your Card Sampler and the PDF Tutorial will be included in that email.
- When using the By My Side Card Sampler Host Code to place your order, you will not qualify for other current host code rewards.
- Per Stampin’ Up! policy, Card Samplers can only be mailed within the United States.
The special By My Side Card Sampler HOST CODE will close today, December 7, 2022 and after today, the Card Sampler will no longer be available.
Approximate ship date of the Card Sampler is December 17, 2022.
These are the cards you’ll be making in the By My Side Card Sampler.


Click here to place an order
Supplies Needed To Create the Card Sampler
Listed below are the supplies you’ll need to complete the cards exactly as shown (or you can use what you already own). Simply click any of the products and you’ll be taken to my Stampin’ Up! online store. When placing your order, don’t forget to use the special Card Sampler Host Code (please do not use host code if your order is over $150 – see above).
Love Treats Kit Now Available
Love Treats Kit Includes
- 20 treat boxes measuring 3″ x 2″ x 15/16″ (7.6 x 5.08 x 2.3 cm)
- One photopolymer love-themed stamp set
- One Basic Gray Ink Spot
- Different die-cut stickers with heart designs
- Coordinating colors include Petal Pink and Soft Succulent
- Building the 20 treat boxes takes less than 60 minutes to complete

Click here to see this new kit!
The Clearance Rack was recently updated and there’s still a lot of great buys available!

Thanks for stopping by today!
by Tracy | Dec 6, 2022 | Uncategorized
Many, many items from the Mini Catalog are retiring and some are discounted up to 60%. Today I’m going to share some of my favorite retiring products and some of my cards using these products. Please note that some items used to make the cards may no longer be available.
Several bundles are retiring such as the Cottage Wreaths Bundle but the products themselves are not. This means that if you purchase the Country Wreaths Dies and the Cottage Wreaths stamp set after January 4th, you will have to purchase the products separately without a 10% discount. Please note that some products are not showing up that they are retiring on the SU! website. such as the Cottage Wreaths Bundle. I put a call in to SU! yesterday and they are aware that this is a problem.

This first card was also made with Painted Christmas Designer Series Paper, which is on sale. You can find more information about this paper further down in the post.


Another bundle that’s retiring but the products aren’t, is the Brightest Glow Bundle which includes the Brightest Glow stamp set and the Labels Aglow Dies. Again, this product isn’t showing up as retiring, but it is.

Many products are discounted up to 60% and here are some of my favorite discounted items. This first product is the Scottie Dog Punch and is discounted 30%. It was $19.00 and is now $13.30.


The Whimsical Woodland 3D Embossing Folder was $10.00 and is now $4.00!


The Fine Sparkle Adhesive Backed Gems were $7.50 and they are now $3.00!

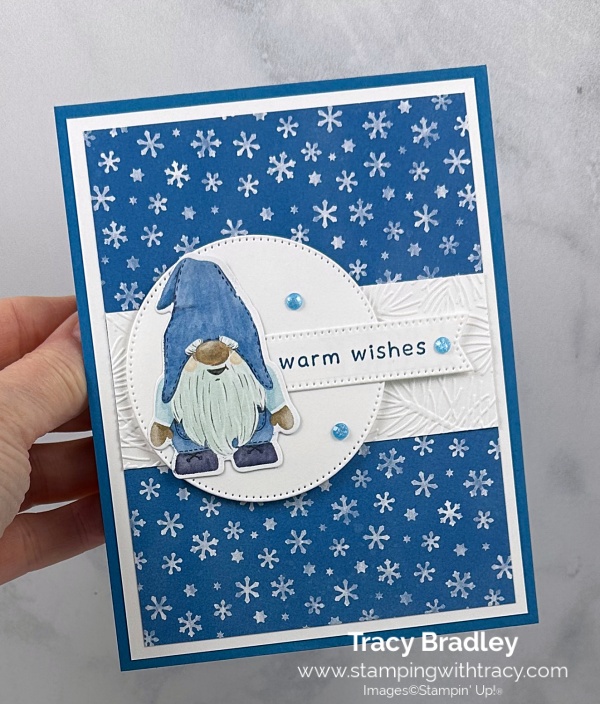
The Perched in a Tree Bundle is retiring but the Perched in a Tree stamp set and the Aspen Tree Dies are not retiring. This is the last chance to get the bundle price.


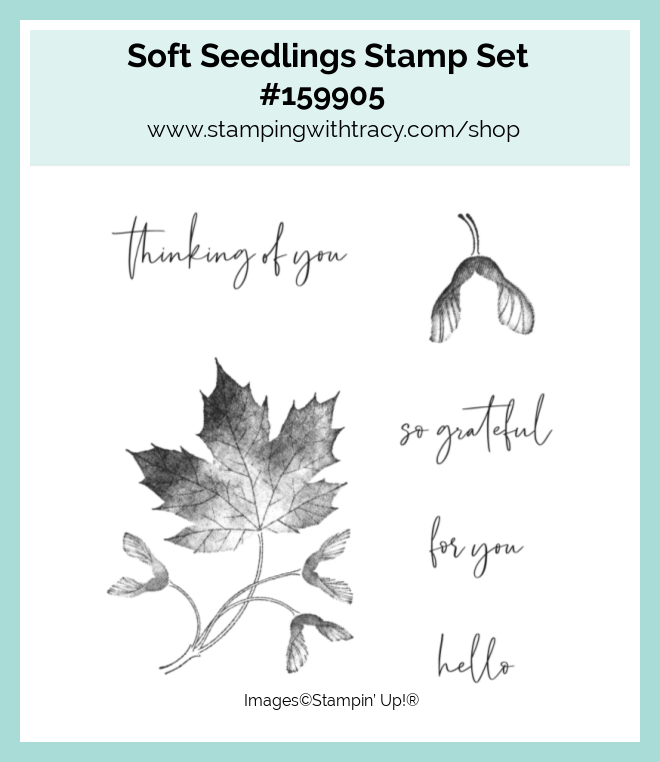
I love the greetings in the Soft Seedlings stamp set. This stamp set is retiring and isn’t on sale.

Splendid Day 12″ x 12″ Designer Series Paper is retiring. It was normally $15.00 and is now $6.00.


Painted Christmas Designer Series Paper was in last year’s Mini Catalog and was carried over into this years catalog. It’s normally $12.00 and is now $4.80!


Here are some other discounted products!
Sale: $13.60
Price: $34.00
Sale: $28.00
Price: $35.00
Sale: $15.50
Price: $31.00
Sale: $6.00
Price: $12.00
Sale: $13.60
Price: $34.00
Sale: $25.60
Price: $32.00
Sale: $19.60
Price: $28.00
Sale: $8.40
Price: $12.00
Sale: $18.00
Price: $30.00
Sale: $27.30
Price: $39.00
Sale: $23.40
Price: $39.00
By My Side Card Sampler
Place a minimum $50 order (before tax/shipping) at my Stampin’ Up! Online Store using my special host code F9BQ6NF3 and I’ll send you my By My Side Card Sampler.
You’ll receive six card kits (two cards each of three different designs) and everything will be cut, scored, and die cut for you! You’ll quickly have six cards ready to mail or give to someone special. For more details and the supplies you’ll need, please click HERE.
Don’t forget to use the host code when placing your order so I’ll know you want this sampler. When you use the host code, it allows me to continue to offer my Samplers for the low cost of free! EXCEPTION: if your order is $150 or more do not use the host code so you can receive Stampin’ Rewards directly from Stampin’ Up!. Contact me after you’ve placed the order to let me know that you’d like the Sampler – you only need to contact me if your order is $150 or more.
Orders must be placed by December 7, 2022 and the Card Samplers will be mailed approximately December 17, 2022.
Thanks for stopping by today!
by Tracy | Dec 5, 2022 | Uncategorized
Today’s card is a variation of the one I shared on Friday using Fitting Florets Designer Series Paper. You can see Fridays’ card here. This Designer Series Paper is only available while supplies last.

I started with a piece of Balmy Blue cardstock for the base of my card (you can find the measurements I used below the Supply List). I cut a piece off the end but saved it to use on the front of the card. Next, I cut a piece of Evening Evergreen cardstock and ran it through one of the Elegant Eucalyptus 3D Embossing Folders and adhered it to the top of the card. I used the piece of Balmy Blue I cut off the base of the card and layered it with a piece of Fitting Florets Designer Series Paper. I added Stampin’ Dimensionals to the back, just at the top, and adhered it to the embossed Evening Evergreen cardstock.


I cut another piece of Evening Evergreen cardstock and adhered it to the inside of the card. Then I cut a piece of Balmy Blue cardstock and layered it with a piece of Basic White cardstock and adhered it to the inside of the card. I stamped the sentiment in Evening Evergreen ink using the Inspired Thoughts stamp set. I cut it out using the Stylish Shapes Dies. added Stampin’ Dimensionals to the back and adhered it to the front of the card. To complete the card, I added three Elegant Faceted Gems to the Fitting Florets Designer Series Paper.


Supply List
Below you’ll find all the Stampin’ Up! supplies I used for today’s card. If you need any stamping supplies, I’d love to be your demonstrator! You can place an order by clicking any of the images below to go to my Stampin’ Up! online store.
Measurements
- Balmy Blue cardstock: 11″ x 4-1/4″ cut down to 8″ (save this piece!) score @ 5-1/2″
- Balmy Blue cardstock (inside): 4-1/4″ x 3″
- Evening Evergreen cardstock (embossed): 4″ x 2-1/4″
- Evening Evergreen cardstock (inside): 5-1/4″ x 4″
- Basic White cardstock (sentiment): approx 3-1/4″ x 1″
- Basic White cardstock (inside): 4″ x 2-3/4″
- Fitting Florets Designer Series Paper: 4″ x 2-3/4″
By My Side Card Sampler
Place a minimum $50 order (before tax/shipping) at my Stampin’ Up! Online Store using my special host code F9BQ6NF3 and I’ll send you my By My Side Card Sampler.
You’ll receive six card kits (two cards each of three different designs) and everything will be cut, scored, and die cut for you! You’ll quickly have six cards ready to mail or give to someone special. For more details and the supplies you’ll need, please click HERE.
Don’t forget to use the host code when placing your order so I’ll know you want this sampler. When you use the host code, it allows me to continue to offer my Samplers for the low cost of free! EXCEPTION: if your order is $150 or more do not use the host code so you can receive Stampin’ Rewards directly from Stampin’ Up!. Contact me after you’ve placed the order to let me know that you’d like the Sampler – you only need to contact me if your order is $150 or more.
Orders must be placed by December 7, 2022 and the Card Samplers will be mailed approximately December 17, 2022.
Thanks for stopping by today! Enjoy your day!