by Tracy | Oct 3, 2025 | Christmas Card
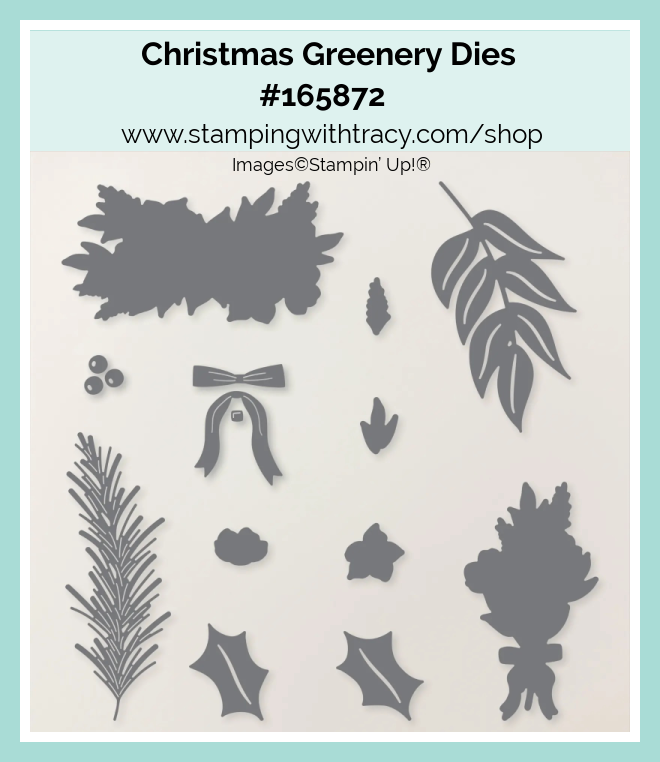
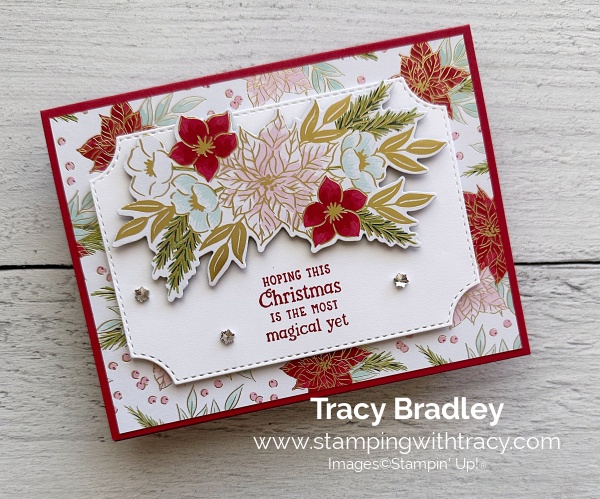
The card I’m sharing with you today was made with the Traditions of Christmas Specialty Designer Series Paper (this paper is so elegant looking and some of the sheets include gold foiling), Jolly Delivery Stamp Stamp Set, Branching Out Dies, Christmas Greenery Dies, and Faceted Snowflakes (an Online Exclusive).
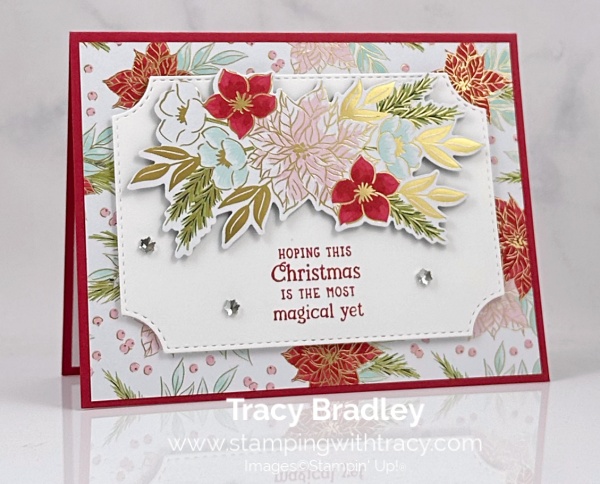

I started off with a piece of Real Red cardstock for the base of my card. Then, I cut a piece of Basic White cardstock using the Branching Out Dies (using the second largest die). Next, I die-cut a piece of Traditions of Christmas Specialty Designer Series Paper using the Christmas Greenery Dies.

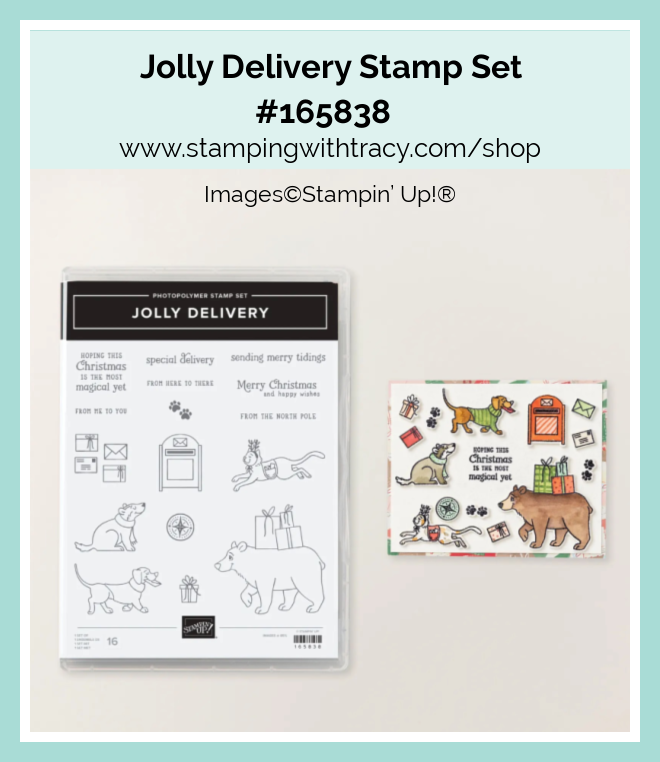
I then, stamped the sentiment onto the Branching Out die cut using the Jolly Delivery stamp set in Real Red ink. I popped the die-cut (out of the Traditions of Christmas Specialty Designer Series Paper) using Stampin’ Dimensionals and I adhered it to the front of the card on the Branching Out die cut. I added more Stampin’ Dimensionals to the back of the Branching Out die-cut and adhered it to the front of the card.
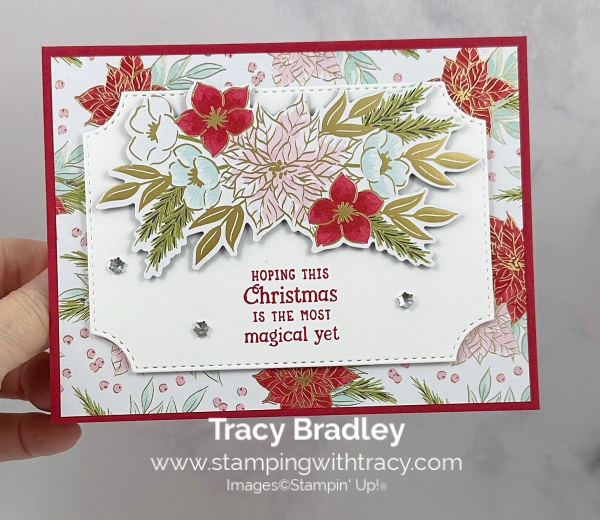

To complete my card, I added three Faceted Snowflakes in clear to the front of my card and also added a piece of Basic White cardstock to the inside of the card.

Supply List
Below you’ll find all the Stampin’ Up! supplies I used for today’s card. If you need any stamping supplies, I’d love to be your demonstrator! You can place an order by clicking any of the images below to go to my Stampin’ Up! online store.
Bundle Alert: The Branching Out Bundle is available with a 10% discount rather than buying the products separately.

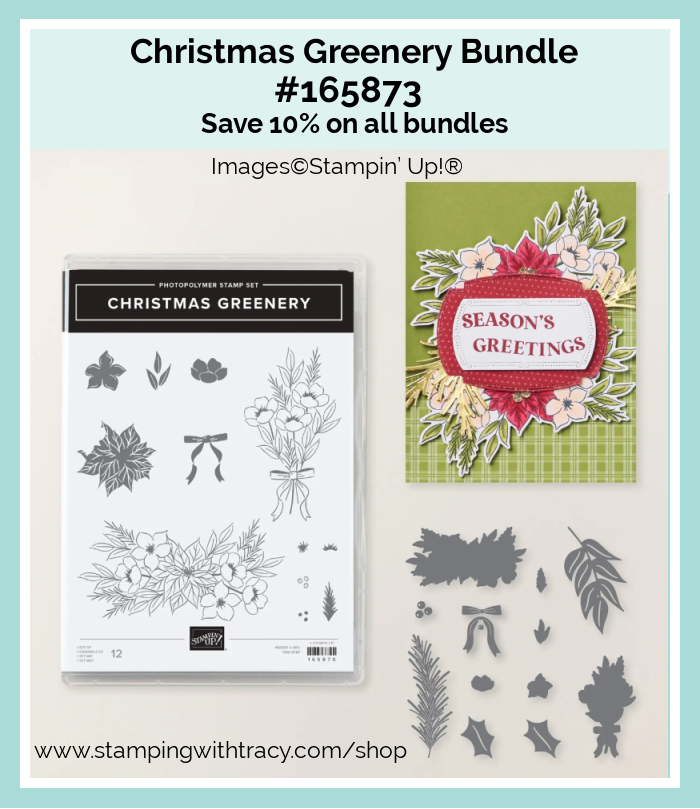
Bundle Alert: The Christmas Greenery Bundle is available with a 10% discount rather than buying the products separately.
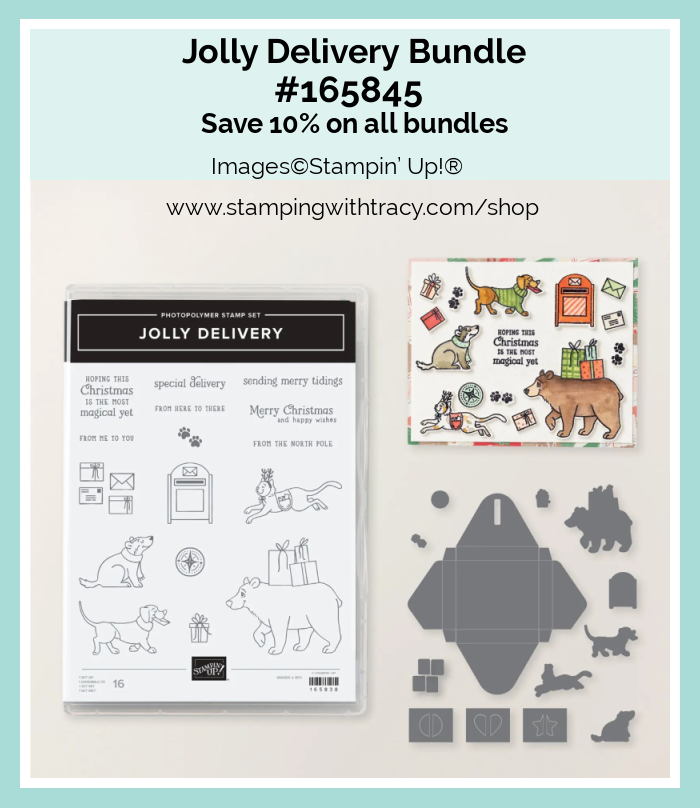
Bundle Alert: The Jolly Delivery Bundle is available with a 10% discount rather than buying the products separately.
Measurements For Today’s Card
- Real Red cardstock: 5-1/2″ x 8-1/2″ scored at 4-1/4″
- Basic White cardstock (die cut): approximately 3-3/4″ x 5″
- Basic White cardstock (inside card): 4″ x 5-1/4″
- Traditions of Christmas Specialty Designer Series Paper: die cut
- Traditions of Christmas Specialty Designer Series Paper: 4″ x 5-1/4″
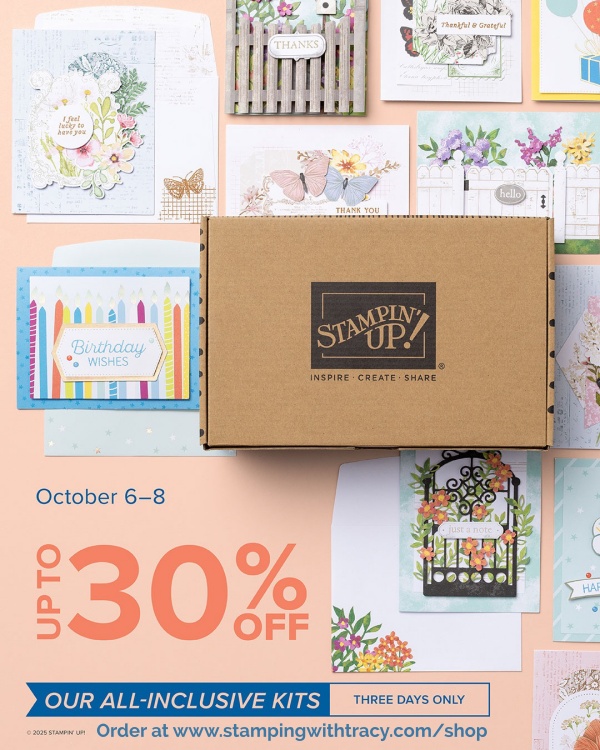
Kits Sale October 6th Through the 8th
Starting October 6, all kits in the Kits Collection will be on sale for up to 30% off.
Sale Details:
- All kits in the Kits Collection will range from 10–30% off during this three-day sale.
- Sale excludes Paper Pumpkin Kits, Scrapbooking Workshop Kits, and Starter Kits.
- Available while supplies last.
Click here to go to Kits Collection page and start your shopping list!
Best Starter Kit Offers Ever
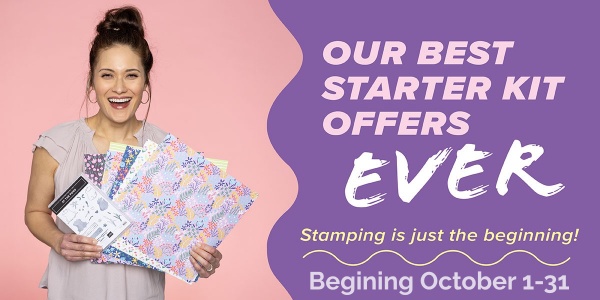
Stampin’ Up! is doing a join offer October 1st and running through the end of the month! You will be able to choose from two offers! $125 worth of products for just $35 or $189 worth of products for just $99!

OR

Promotion Details
- Promotion Dates: October 1-31
- New team members who purchase their starter kit from October 1 to 31 will be able to choose between these two offers $125 for just $35 or $189 for just $99.
- New demonstrators who submit their Independent Demonstrator Agreement (IDA) before October 1 or after October 31 will not be eligible for these offers.
- Deadline to join October 31, 2025 at 11:59 p.m (Mountain Time).
- The Starter Kit SHIPS FREE!
If you’d like to sign up to purchase the Starter Kit, you can do it here!
If you’d like more information about the Starter Kit, please click here!
Traditions of Christmas Craft Class
To sign up for the Traditions of Christmas Craft Class, click here or the graphic below!
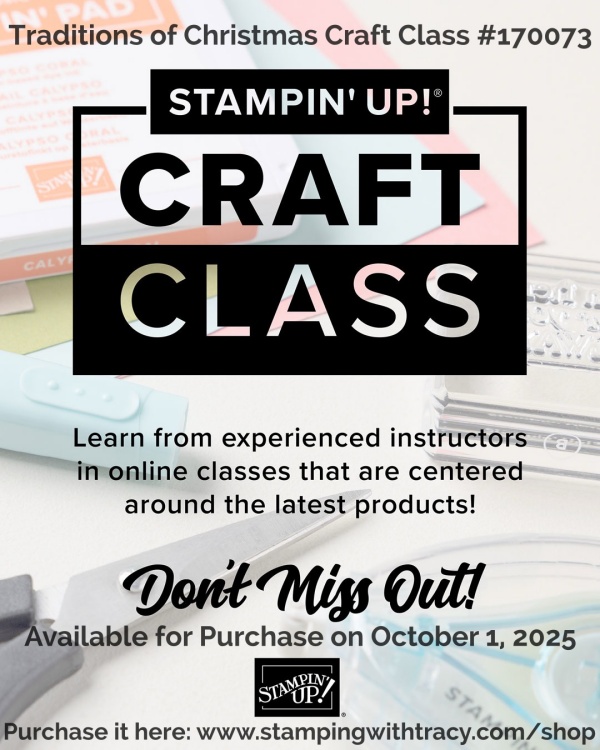
Traditions of Christmas Craft Class Details:
- Available for Purchase: October 1, 2025
- Price: $30 (Suite not included)
- Live Stream: October 23 at 2:00 p.m. (MT)
- Where: An exclusive Facebook page
- Class: Traditions of Christmas Craft Class (170073)
- Product: Traditions of Christmas Suite Collection (165877)
- Language: The class will be presented in English.
- Video on Demand: We will record this live class, which will be available as a video on demand right after the live stream. Videos with English, French, German, and Dutch captioning will be available through the Facebook page one week after the live stream.
Click here for the Additional Supplies You’ll Need!
Last Chance Products

Click here to go straight to the Last Chance Products page on the Stampin’ Up! site! Some products are discounted! More products were added on October 1, 2025!
12 Days of Crafting Advent Calendar
To learn more about the 12 Days of Crafting Advent Calendar, just click the graphic below.

Introducing the 12 Days of Crafting Advent Calendar, a brand-new calendar full of products that you can craft with all year long! Every day of this calendar contains never-before-seen dies, paper, embellishments, and even more items you won’t find in any of our catalogs or in our online store. Once these calendars are sold out, they’ll be gone for good, so make sure you buy one before they’ve disappeared.
Advent Calendar Details
- Item: 12 Days of Crafting Advent Calendar (167335)
- Price: $99
- Includes: Exclusive dies, paper, embellishments, and more
- Ordering Begins: September 23, 2025
- Available only while supplies last.
World Card Making Day
You can sign up for the free event on World Card Making Day, here. The event will be on October 4th from 2:00-3:00 (Mountain Time).
Here’s all the Details About World Card Making Day:
When: October 4, 2025, from 2:00 to 3:00 p.m. (MT)
Where: Online
Price of Event: Free
Registration Dates: September 3–October 3, 2025, until 2:00 p.m. (MT)
- Registration for this event is free. You must register to receive a link to view the event. Also, those who register will receive a gift after the event ends.
Language of Event: Most of the event will be presented in English with language interpretation voiceover and subtitles in English, French, German, and Dutch.
Video on Demand: We will record this live event. Anyone who has the event link will be able to watch the recorded event after it’s over.
Click the graphic below to learn more about the Handmade & Heartfelt Kit

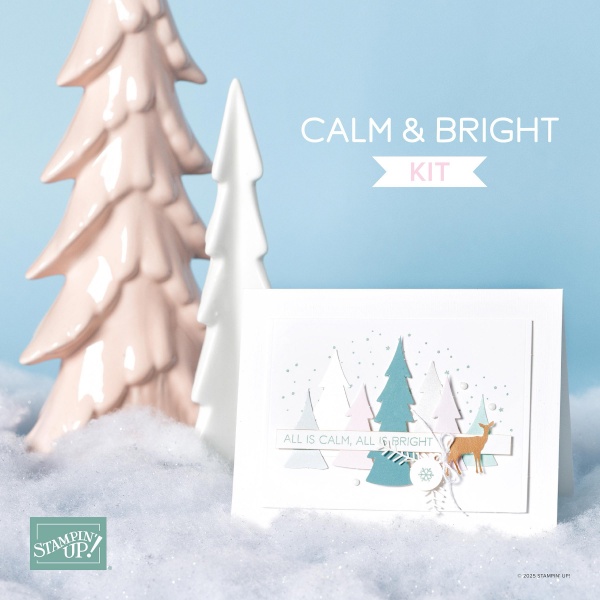
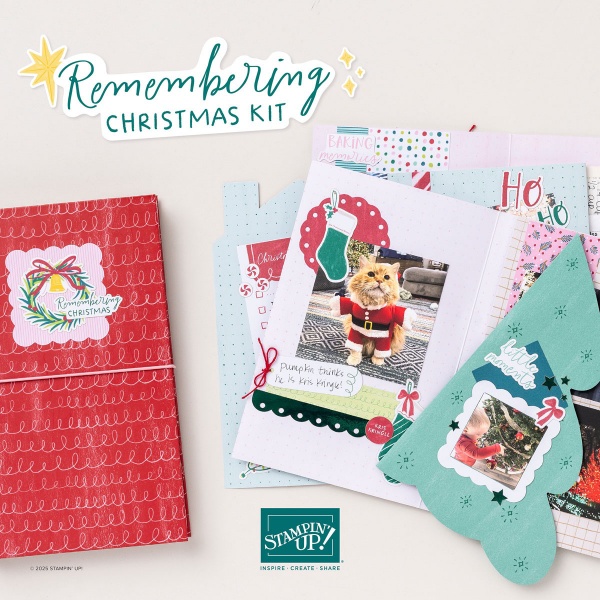
We Have Three New Kits
Click the graphics for more information about the kits.
October Paper Pumpkin – Cozy Christmas
You can now order subscriptions and manage your Paper Pumpkin subscription on the Stampin’ Up! website! You can cancel your Paper Pumpkin subscription at any time. If you want to skip the next kit, you can do that! You also receive Stampin’ Rewards when you order a single kit or purchase a 3-month, 6-month or 12-month subscription to Paper Pumpkin. If you’d like to subscribe, please click the graphic below.

An additional coordinating add-on is available but only for Paper Pumpkin subscribers. Click the image below for more information.

Thanks for stopping by today! Enjoy your weekend!
by Tracy | Oct 1, 2025 | Kindness Card
Before I share my cards with you today, I wanted to let you know that Stampin’ Up! is now offering card classes and the first one is available today! Click here to purchase the Traditions of Christmas Craft Class.
All the Details:
- Available for Purchase: October 1, 2025
- Price: $30 (Suite not included)
- Live Stream: October 23 at 2:00 p.m. (MT)
- Where: An exclusive Facebook page
- Class: Traditions of Christmas Craft Class (170073)
- Product: Traditions of Christmas Suite Collection (165877)
- Language: The class will be presented in English.
- Video on Demand: We will record this live class, which will be available as a video on demand right after the live stream. Videos with English, French, German, and Dutch captioning will be available through the Facebook page one week after the live stream.
Click here for the Additional Supplies You’ll Need!
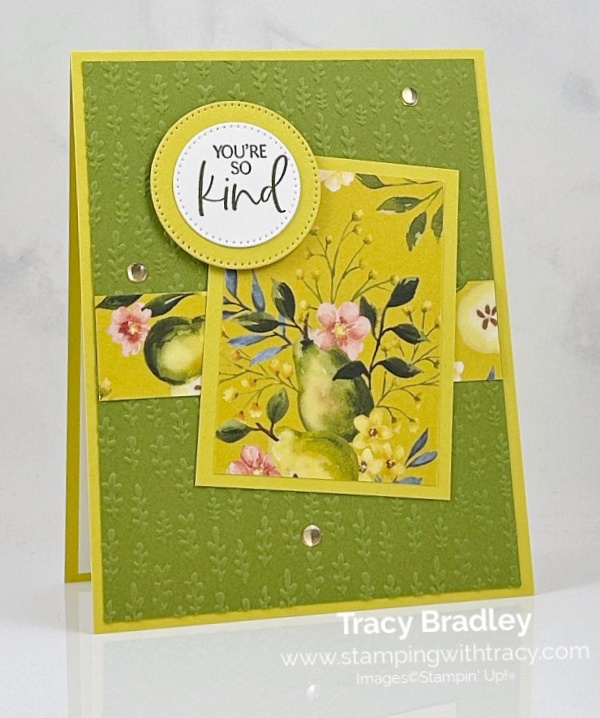
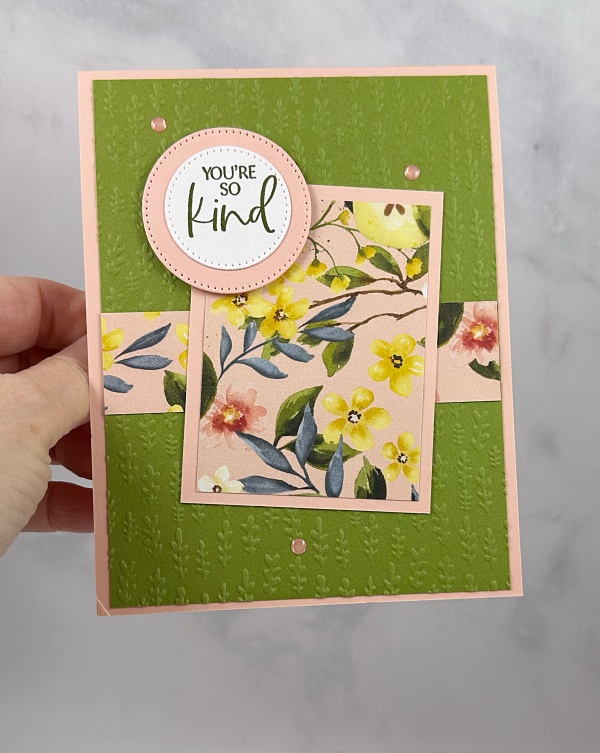
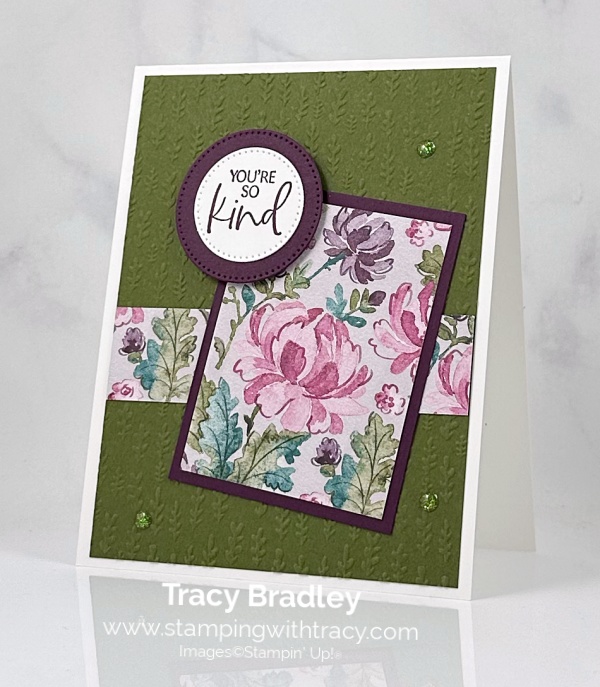
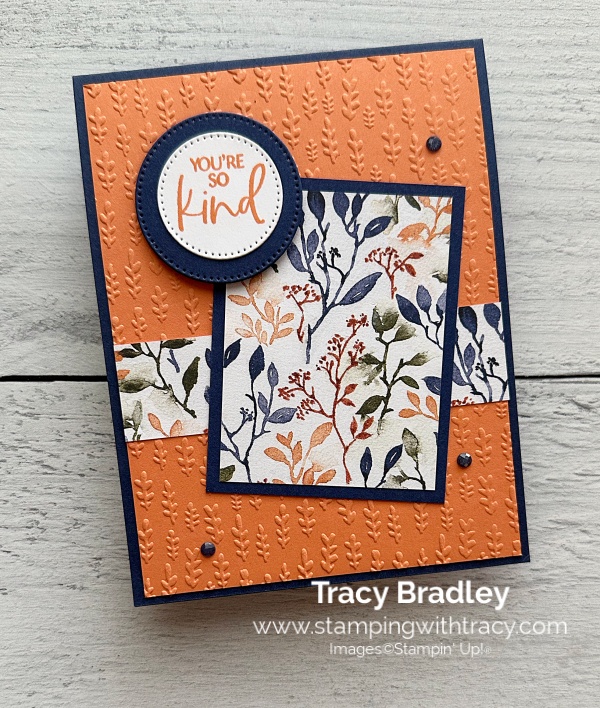
Now onto my cards! Both of my cards have the same layout of Friday’s card and Monday’s card. You can see them here and here. I used all the same products as Friday and Monday’s cards but I changed up the Designer Series Paper. I used The Right Words Stamp Set, Painterly Pears Designer Series Paper, Stylish Shapes Dies, Gathering Leaves Embossing Folder and Low Profile Dots.
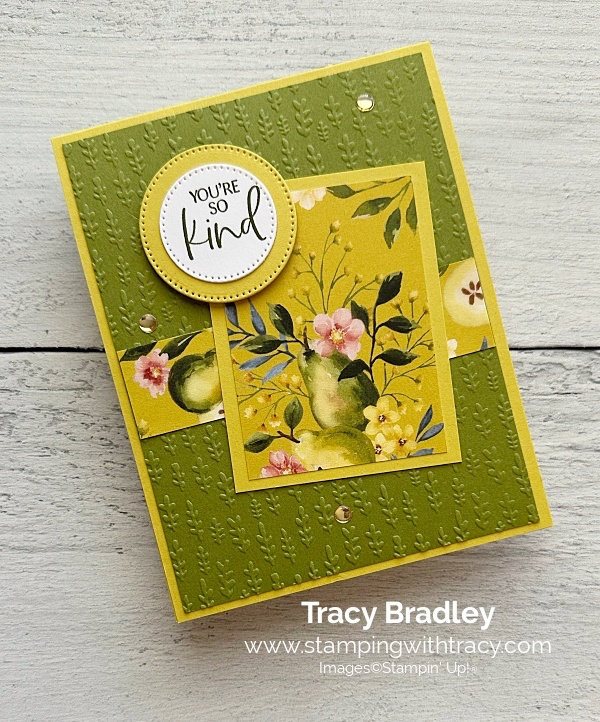

I started off with a piece of Darling Duckling for the base of my card. Then, I embossed a piece of Old Olive cardstock using the Gathering Leaves Embossing Folder. Next, I adhered this piece to the front of my card.
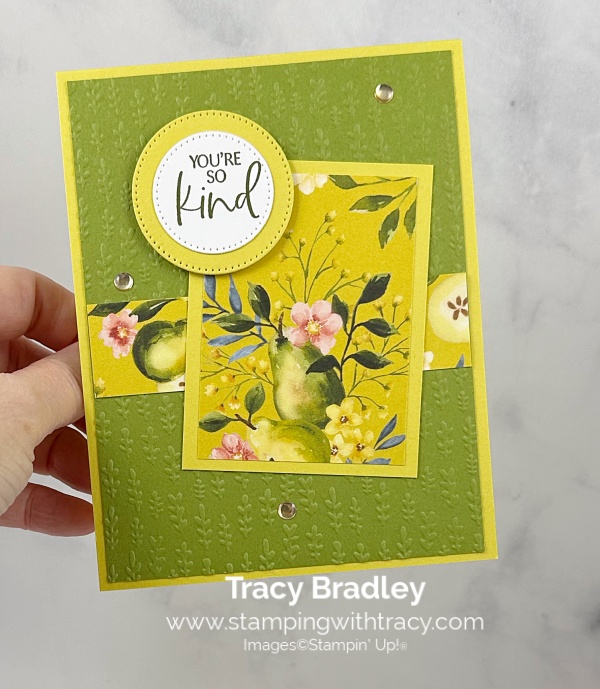

I layered a piece of Painterly Pears Designer Series Paper (DSP) to a piece of Darling Duckling cardstock and then set it aside. I cut another piece of Painterly Pears DSP and adhered it to the front of the card. Then, I adhered the piece I set aside, at an angle.
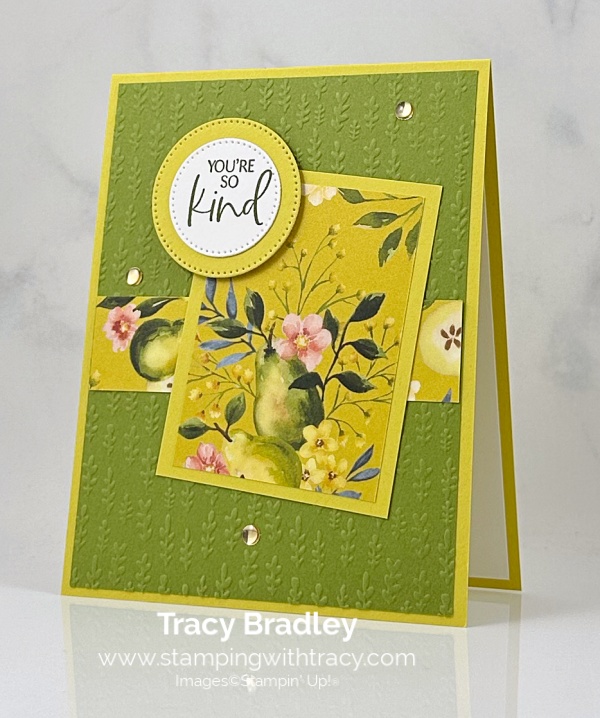


Next, I stamped the sentiment in Old Olive ink onto Basic White cardstock using the stamp set, The Right Words. I cut it out using the second smallest die in the Stylish Shapes Dies set. Then, I cut another circle out of Darling Duckling using the third smallest die in the Stylish Shapes Dies. I adhered the sentiment to the Darling Duckling circle added Stampin’ Dimensionals to the back of the circle and adhered it to the card front.
To complete my card, I added three Low Profile Dots in gold to the embossed cardstock and I added a piece of Basic White cardstock to the inside of the card.

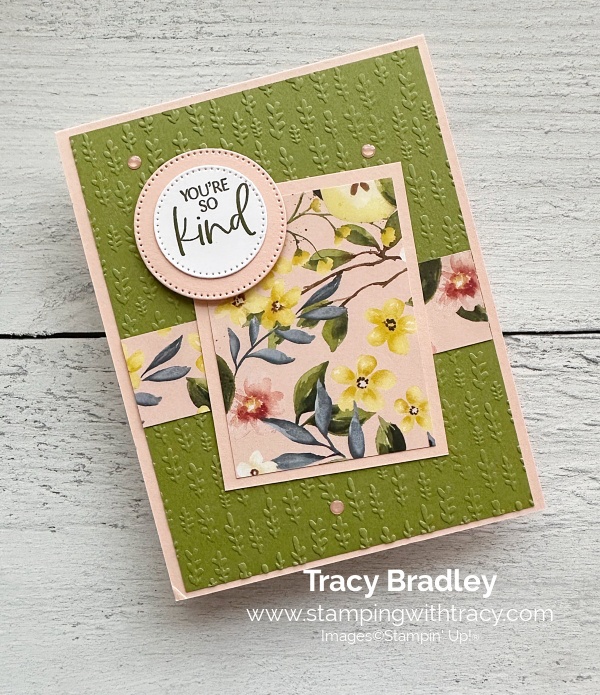
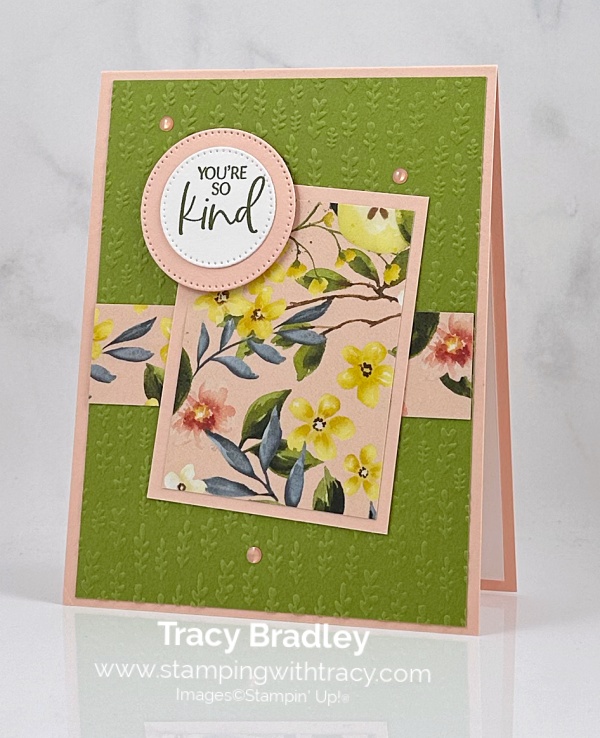
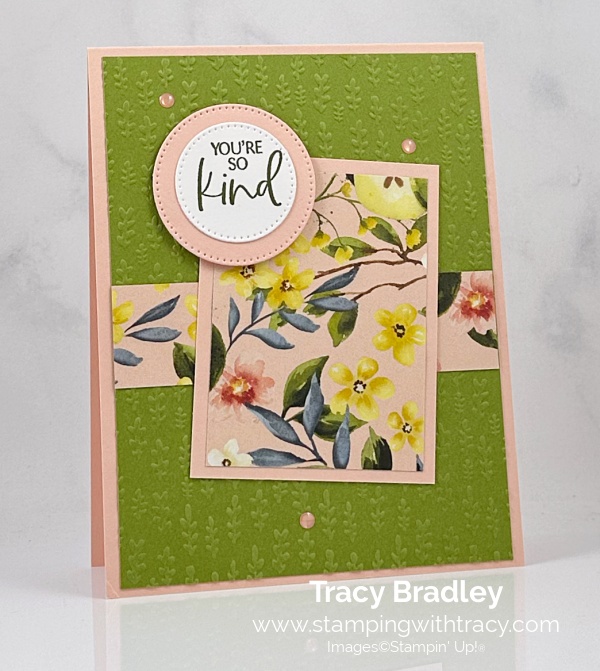
Here’s the second card. I used the Low Profile Dots in Petal Pink. I used Old Olive ink for the sentiment and Petal Pink cardstock.
Supply List
Below you’ll find all the Stampin’ Up! supplies I used for today’s card. If you need any stamping supplies, I’d love to be your demonstrator! You can place an order by clicking any of the images below to go to my Stampin’ Up! online store.
Measurements
- Darling Duckling or Petal Pink cardstock: 4-1/4″ x 11″ scored at 5-1/2″
- Darling Duckling or Petal Pink cardstock: 2-1/2″ x 3-1/4″
- Darling Duckling or Petal Pink cardstock (circle): approximately 2″ x 2″
- Old Olive cardstock: 4″ x 5-1/4″
- Basic White cardstock (sentiment): approximately 1-3/4″ x 1-3/4″
- Basic White cardstock (inside of the card): 4″ x 5-1/4″
- Painterly Pears Designer Series Paper: 2-1/4″ x 3″
- Painterly Pears Designer Series Paper: 1″ x 4″
Best Starter Kit Offers Ever
Stampin’ Up! is doing a join offer starting TODAY and running through the end of the month! You will be able to choose from two offers! $125 worth of products for just $35 or $189 worth of products for just $99!
OR
Promotion Details
- Promotion Dates: October 1-31
- New team members who purchase their starter kit from October 1 to 31 will be able to choose between these two offers $125 for just $35 or $189 for just $99.
- New demonstrators who submit their Independent Demonstrator Agreement (IDA) before October 1 or after October 31 will not be eligible for these offers.
- Deadline to join October 31, 2025 at 11:59 p.m (Mountain Time
If you’d like to sign up to purchase the Starter Kit, you can do it here!
Last Chance Products
Click here to go straight to the Last Chance Products page on the Stampin’ Up! site! Some products are discounted! More products were added today!
12 Days of Crafting Advent Calendar
To learn more about the 12 Days of Crafting Advent Calendar, just click the graphic below.
Introducing the 12 Days of Crafting Advent Calendar, a brand-new calendar full of products that you can craft with all year long! Every day of this calendar contains never-before-seen dies, paper, embellishments, and even more items you won’t find in any of our catalogs or in our online store. Once these calendars are sold out, they’ll be gone for good, so make sure you buy one before they’ve disappeared.
Advent Calendar Details
- Item: 12 Days of Crafting Advent Calendar (167335)
- Price: $99
- Includes: Exclusive dies, paper, embellishments, and more
- Ordering Begins: September 23, 2025
- Available only while supplies last.
World Card Making Day
You can sign up for the free event on World Card Making Day, here. The event will be on October 4th from 2:00-3:00 (Mountain Time).
Here’s all the Details About World Card Making Day:
When: October 4, 2025, from 2:00 to 3:00 p.m. (MT)
Where: Online
Price of Event: Free
Registration Dates: September 3–October 3, 2025, until 2:00 p.m. (MT)
- Registration for this event is free. You must register to receive a link to view the event. Also, those who register will receive a gift after the event ends.
Language of Event: Most of the event will be presented in English with language interpretation voiceover and subtitles in English, French, German, and Dutch.
Video on Demand: We will record this live event. Anyone who has the event link will be able to watch the recorded event after it’s over.
Click the graphic below to learn more about the Handmade & Heartfelt Kit
We Have Three New Kits
Click the graphics for more information about the kits.
October Paper Pumpkin – Cozy Christmas
You can now order subscriptions and manage your Paper Pumpkin subscription on the Stampin’ Up! website! You can cancel your Paper Pumpkin subscription at any time. If you want to skip the next kit, you can do that! You also receive Stampin’ Rewards when you order a single kit or purchase a 3-month, 6-month or 12-month subscription to Paper Pumpkin. If you’d like to subscribe, please click the graphic below.
An additional coordinating add-on is available but only for Paper Pumpkin subscribers. Click the image below for more information.
Thanks for stopping by today! Enjoy your day!
by Tracy | Sep 29, 2025 | Kindness Card
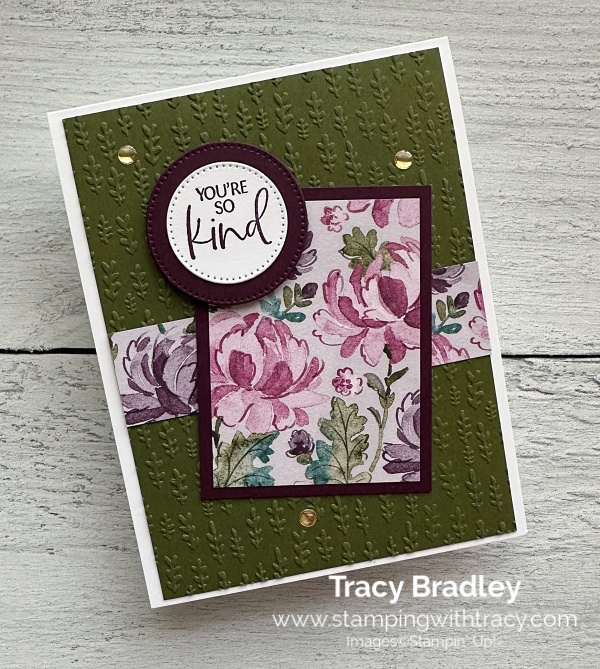
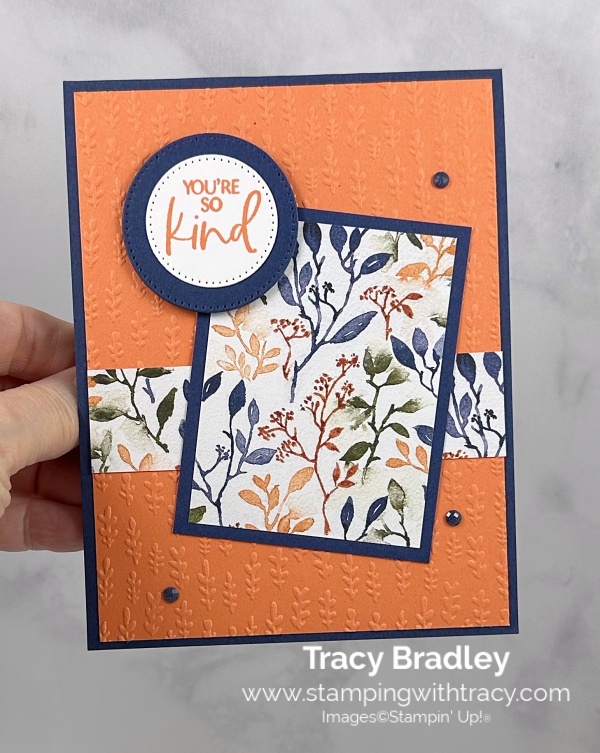
I’m sharing two cards with you today! They were made with same layout as Friday’s card. You can see Friday’s card, here. I used the Right Words Stamp Set, Floral Charm Designer Series Paper (an Online Exclusive), Stylish Shapes Dies, Gathering Leaves Embossing Folder (an Online Exclusive) and Low Profile Sparkle Dots (an Online Exclusive). On the second card, I used Low Profile Dots (also an Online Exclusive).
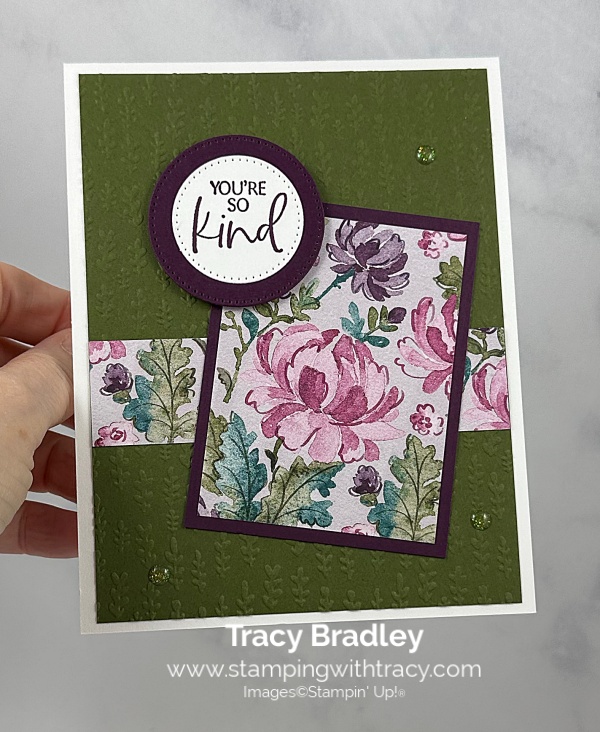
I started off with a piece of Thick Basic White cardstock for the base of my card. Then, I embossed a piece of Mossy Meadow cardstock using the Gathering Leaves Embossing Folder. Next, I adhered this piece to the front of my card.
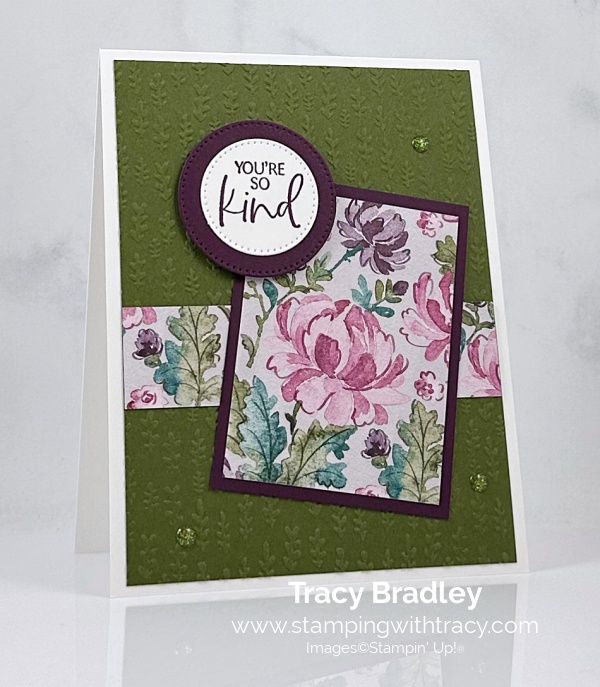

I layered a piece of Floral Charm Designer Series Paper (DSP) to a piece of Blackberry Bliss cardstock and then set it aside. I cut another piece of Floral Charm DSP and adhered it to the front of the card. Then, I adhered the piece I set aside, at an angle.
Next, I stamped the sentiment in Blackberry Bliss ink onto Basic White cardstock using the stamp set, The Right Words. I cut it out using the second smallest die in the Stylish Shapes Dies set. Then, I cut another circle out of Blackberry Bliss cardstock using the third smallest die in the Stylish Shapes Dies. I adhered the sentiment to the Blackberry Bliss circle added Stampin’ Dimensionals to the back of the circle and adhered it to the card front.
To complete my card, I added three Low Profile Sparkle Dots to the front of the card.

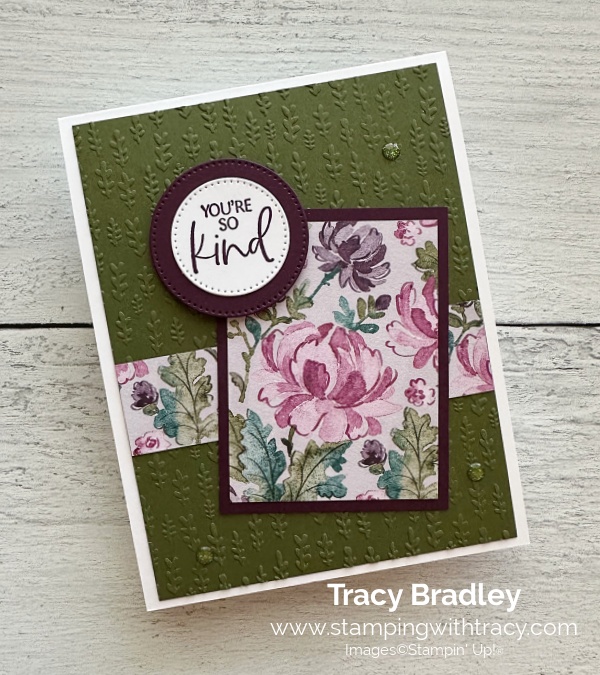
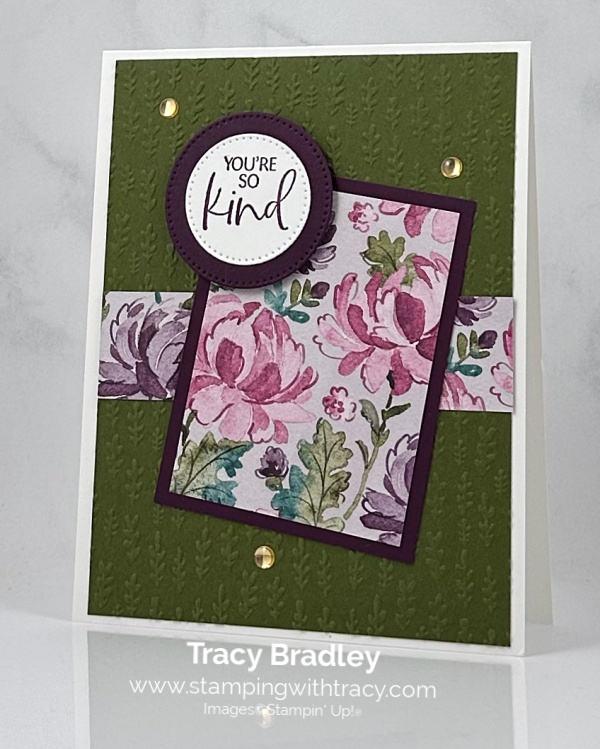
Here’s the second card using Low Profile Dots.
‘
Supply List
Below you’ll find all the Stampin’ Up! supplies I used for today’s card. If you need any stamping supplies, I’d love to be your demonstrator! You can place an order by clicking any of the images below to go to my Stampin’ Up! online store.
Measurements
- Thick Basic White cardstock: 4-1/4″ x 11″ scored at 5-1/2″
- Mossy Meadow cardstock (embossed): 4″ x 5-1/4″
- Blackberry Bliss cardstock: 2-1/2″ x 3-1/4″
- Blackberry Bliss cardstock (circle): approximately 2″ x2″
- Basic White cardstock (sentiment): approximately 1-3/4″ x 1-3/4″
- Floral Charm Designer Series Paper: 2-1/4″ x 3″
- Floral Charm Designer Series Paper: 1″ x 4″
Best Starter Kit Offers Ever
Stampin’ Up! is doing a join offer starting October 1 and running through the end of the month! You will be able to choose from two offers! $125 worth of products for just $35 or $189 worth of products for just $99!
OR
Promotion Details
- Promotion Dates: October 1-31
- New team members who purchase their starter kit from October 1 to 31 will be able to choose between these two offers $125 for just $35 or $189 for just $99.
- New demonstrators who submit their Independent Demonstrator Agreement (IDA) before October 1 or after October 31 will not be eligible for these offers.
- Deadline to join October 31, 2025 at 11:59 p.m (Mountain Time
Last Chance Products
Click here to go straight to the Last Chance Products page on the Stampin’ Up! site! Some products are discounted!
12 Days of Crafting Advent Calendar
To learn more about the 12 Days of Crafting Advent Calendar, just click the graphic below.
Introducing the 12 Days of Crafting Advent Calendar, a brand-new calendar full of products that you can craft with all year long! Every day of this calendar contains never-before-seen dies, paper, embellishments, and even more items you won’t find in any of our catalogs or in our online store. Once these calendars are sold out, they’ll be gone for good, so make sure you buy one before they’ve disappeared.
Advent Calendar Details
- Item: 12 Days of Crafting Advent Calendar (167335)
- Price: $99
- Includes: Exclusive dies, paper, embellishments, and more
- Ordering Begins: September 23, 2025
- Available only while supplies last.
Two New Kits By Stampin’ Up!
Click each graphic for more information about the kits! You can sign up for the free event on World Card Making Day, here. The event will be on October 4th from 2:00-3:00 (Mountain Time).
Here’s all the Details About World Card Making Day:
When: October 4, 2025, from 2:00 to 3:00 p.m. (MT)
Where: Online
Price of Event: Free
Registration Dates: September 3–October 3, 2025, until 2:00 p.m. (MT)
- Registration for this event is free. You must register to receive a link to view the event. Also, those who register will receive a gift after the event ends.
Language of Event: Most of the event will be presented in English with language interpretation voiceover and subtitles in English, French, German, and Dutch.
Video on Demand: We will record this live event. Anyone who has the event link will be able to watch the recorded event after it’s over.
Road to Christmas Kit is temporarily unavailable but you can sign up to get a notification when it’s back in stock! Click on the graphic below to sign up for a notification when it’s back in stock.

October Paper Pumpkin – Cozy Christmas
You can now order subscriptions and manage your Paper Pumpkin subscription on the Stampin’ Up! website! You can cancel your Paper Pumpkin subscription at any time. If you want to skip the next kit, you can do that! You also receive Stampin’ Rewards when you order a single kit or purchase a 3-month, 6-month or 12-month subscription to Paper Pumpkin. If you’d like to subscribe, please click the graphic below.
An additional coordinating add-on is available but only for Paper Pumpkin subscribers. Click the image below for more information.
Thanks for stopping by today! Enjoy your day!
by Tracy | Sep 26, 2025 | Kindness Card
The card I’m sharing with you today was made using Floral Charm Designer Series Paper (an Online Exclusive), The Right Words Stamp Set, Gathering Leaves Embossing Folder (an Online Exclusive), Stylish Shapes Dies, and Charming Shimmer Faceted Dots (another Online Exclusive).
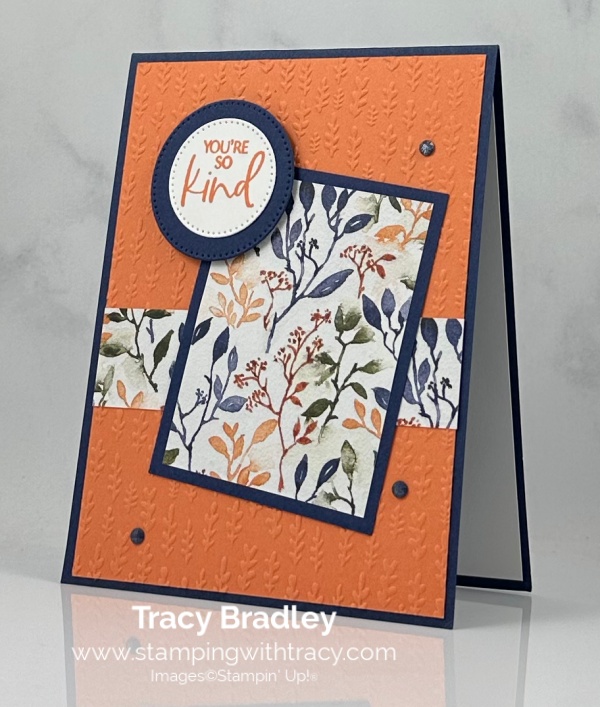
I started with a piece of Night of Navy cardstock for the base of my card. Then, I embossed a piece of Timid Tiger cardstock using the Gathering Leaves Embossing Folder. Next, I adhered this piece to the front of my card.
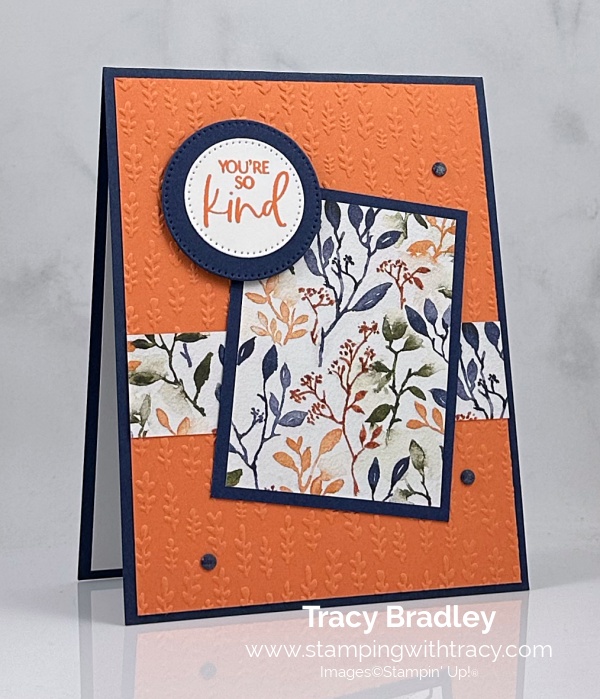
I layered a piece of Floral Charm Designer Series Paper (DSP) to a piece of Night of Navy cardstock and then set it aside. I cut another piece of Floral Charm DSP and adhered it to the front of the card. Then, I adhered the piece I set aside, at an angle.
Next, I stamped the sentiment in Timid Tiger ink onto Basic White cardstock using the stamp set, The Right Words. I cut it out using the second smallest die in the Stylish Shapes Dies set. Then, I cut another circle out of Night of Navy using the third smallest die in the Stylish Shapes Dies. I adhered the sentiment to the Night of Navy circle added Stampin’ Dimensionals to the back of the Night circle and adhered it to the card front.
To complete my card, I added three Charming Shimmer Faceted Dots to the front of the card. I also added a piece of Basic White cardstock to the inside of the card.

Supply List
Below you’ll find all the Stampin’ Up! supplies I used for today’s card. If you need any stamping supplies, I’d love to be your demonstrator! You can place an order by clicking any of the images below to go to my Stampin’ Up! online store.
Measurements
- Night of Navy cardstock: 4-1/4″ x 11″
- Night of Navy cardstock: 2-1/2″ x 3-1/4″
- Night of Navy cardstock (circle): approximately 2″ x 2″
- Timid Tiger cardstock: 4″ x 5-1/4″
- Basic White cardstock (sentiment): approximately 1-3/4″ x 1-3/4″
- Basic White cardstock (inside card): 4″ x 5-1/4″
- Floral Charm Designer Series Paper: 2-1/4″ x 3″
- Floral Charm Designer Series Paper: 1″ x 4″
Best Starter Kit Offers Ever
Stampin’ Up! is doing a join offer starting October 1 and running through the end of the month! You will be able to choose from two offers! $125 worth of products for just $35 or $189 worth of products for just $99!
OR
Promotion Details
- Promotion Dates: October 1-31
- New team members who purchase their starter kit from October 1 to 31 will be able to choose between these two offers $125 for just $35 or $189 for just $99.
- New demonstrators who submit their Independent Demonstrator Agreement (IDA) before October 1 or after October 31 will not be eligible for these offers.
- Deadline to join October 31, 2025 at 11:59 p.m (Mountain Time
Last Chance Products
Click here to go straight to the Last Chance Products page on the Stampin’ Up! site! Some products are discounted!
12 Days of Crafting Advent Calendar
To learn more about the 12 Days of Crafting Advent Calendar, just click the graphic below.
Introducing the 12 Days of Crafting Advent Calendar, a brand-new calendar full of products that you can craft with all year long! Every day of this calendar contains never-before-seen dies, paper, embellishments, and even more items you won’t find in any of our catalogs or in our online store. Once these calendars are sold out, they’ll be gone for good, so make sure you buy one before they’ve disappeared.
Advent Calendar Details
- Item: 12 Days of Crafting Advent Calendar (167335)
- Price: $99
- Includes: Exclusive dies, paper, embellishments, and more
- Ordering Begins: September 23, 2025
- Available only while supplies last.
Two New Kits By Stampin’ Up!
Click each graphic for more information! You can sign up for the free event on World Card Making Day, here. The event will be on October 4th from 2:00-3:00 (Mountain Time).
Road to Christmas Kit is temporarily unavailable but you can sign up to get a notification when it’s back in stock! Click on the graphic below to sign up for a notification when it’s back in stock.
October Paper Pumpkin – Cozy Christmas
You can now order subscriptions and manage your Paper Pumpkin subscription on the Stampin’ Up! website! You can cancel your Paper Pumpkin subscription at any time. If you want to skip the next kit, you can do that! You also receive Stampin’ Rewards when you order a single kit or purchase a 3-month, 6-month or 12-month subscription to Paper Pumpkin. If you’d like to subscribe, please click the graphic below.
An additional coordinating add-on is available but only for Paper Pumpkin subscribers. Click the image below for more information.
Thanks for stopping by today! Enjoy your weekend!
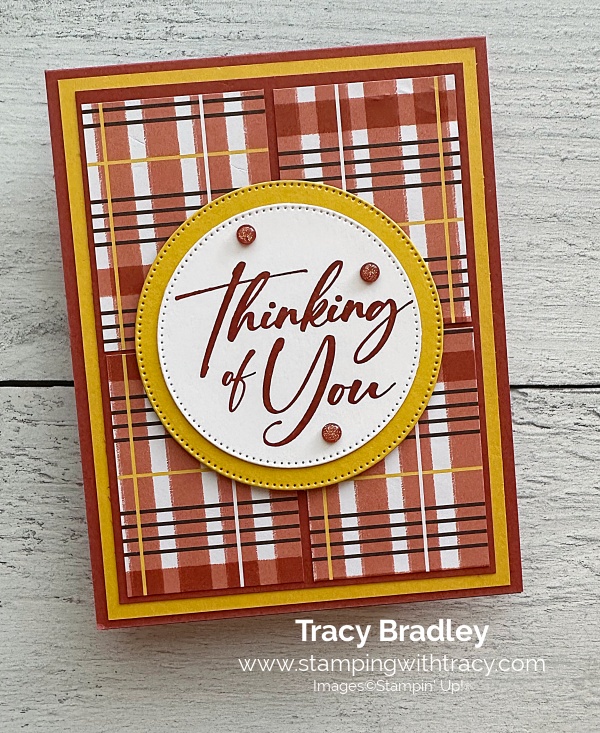
by Tracy | Sep 24, 2025 | Thinking of You Card
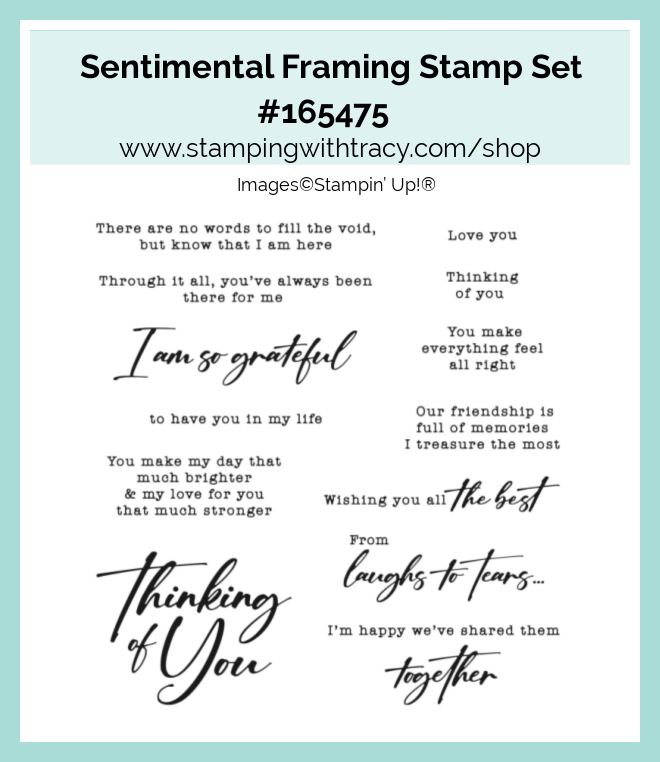
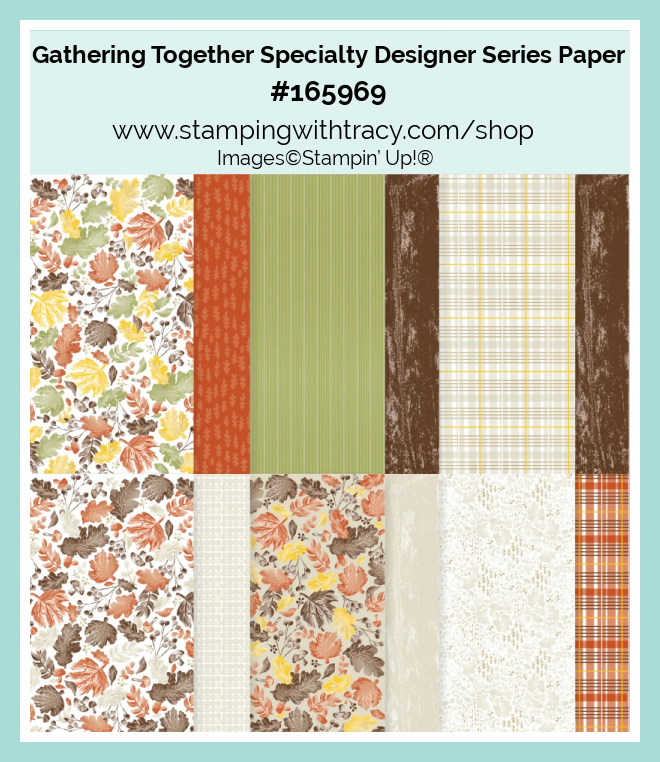
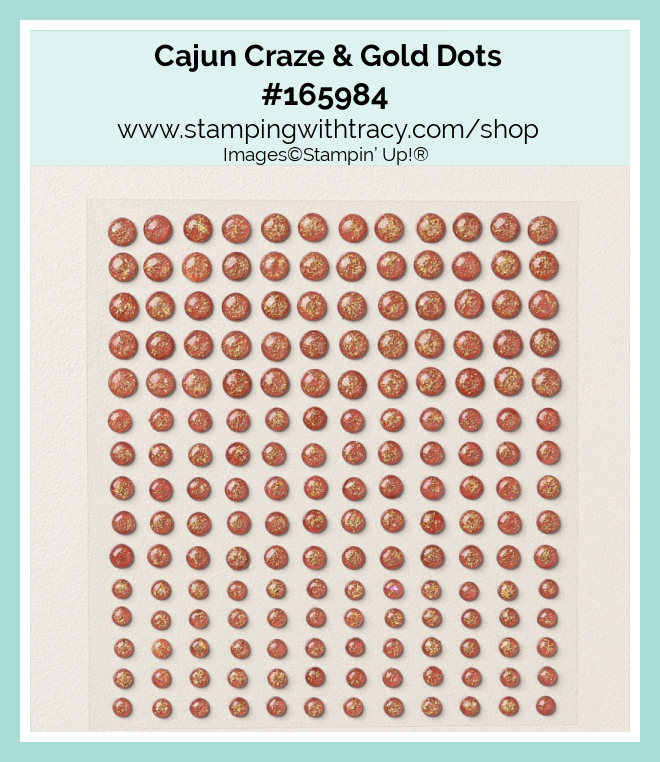
The card I’m sharing with you today was made using the Sentimental Framing Stamp Set (an Online Exclusive), Gathering Together Specialty Designer Series Paper (an Online Exclusive), Stylish Shapes Dies and Cajun Craze & Gold Dots (an Online Exclusive).
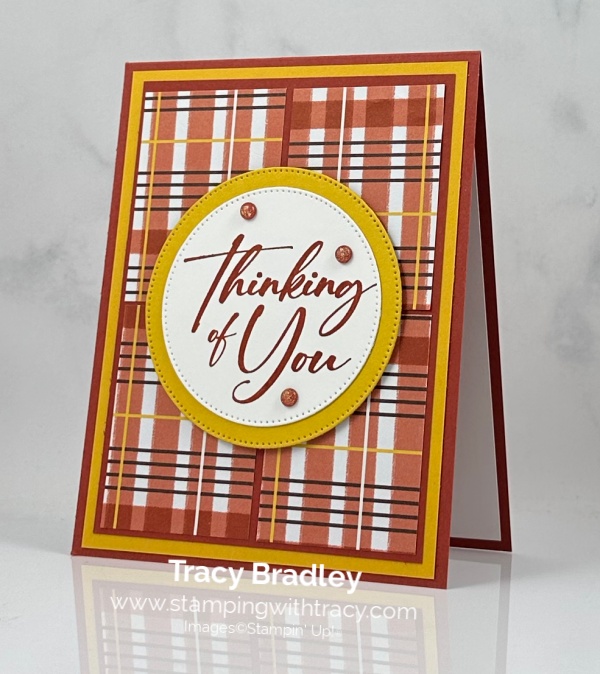
I started with a piece of Cajun Craze cardstock for the base of my card. Then, I cut a piece of Crushed Curry cardstock and set it aside. I cut another piece of Cajun Craze cardstock and arranged my pieces of Gathering Together Specialty Designer Series Paper on it. Next, I adhered this piece to the piece of Crushed Curry cardstock and then I adhered the piece to the front of the card (you can find all the measurements I used below the Supply List).
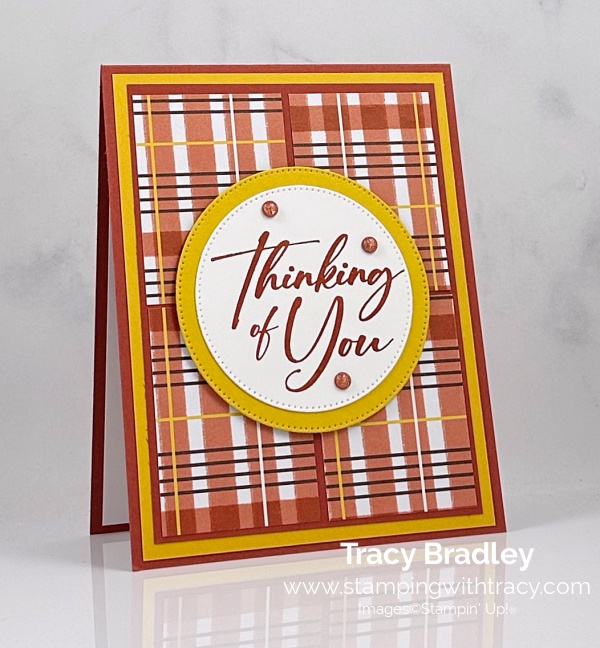
Then, I stamped a piece of Basic White cardstock using the Sentimental Framing Stamp Set in Cajun Craze ink. I cut it out with the second largest die in the Stylish Shapes Dies. I cut another circle out using Crushed Curry cardstock (the largest die) and adhered the sentiment to Crushed Curry circle. Next, I added Stampin’ Dimensionals to the back and adhered it to the front of the card.
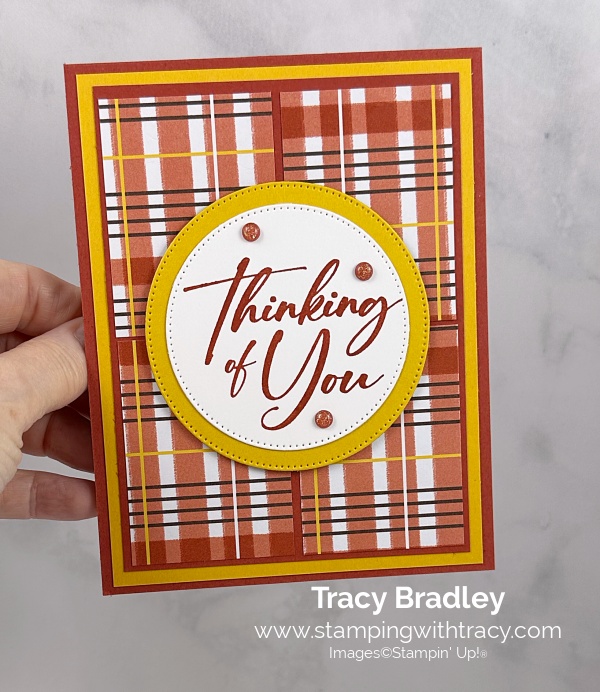
To complete my card, I added three Cajun Craze & Gold Dots around the sentiment and I adhered a piece of Basic White cardstock to the inside of the card.
Supply List
Below you’ll find all the Stampin’ Up! supplies I used for today’s card. If you need any stamping supplies, I’d love to be your demonstrator! You can place an order by clicking any of the images below to go to my Stampin’ Up! online store.
Bundle Alert: The Sentimental Framing Bundle is available with a 10% discount rather than buying the products separately.

Measurements
- Cajun Craze cardstock: 4-1/4″ x 11″ scored at 5-1/2″
- Cajun Craze cardstock: 4″ x 5-1/4″
- Crushed Curry cardstock: 3-3/4″ x 5″
- Crushed Curry cardstock (circle): approximately 3-1/2″ x 3-1/2″
- Basic White cardstock (sentiment): approximately 3″ x 3″
- Basic White cardstock (inside card): 4″ x 5-1/4″
- Gathering Together Specialty Designer Series Paper: (4) 1-3/4″ x 2-3/8″
Last Chance Products
Click here to go straight to the Last Chance Products page on the Stampin’ Up! site! Some products are discounted!
12 Days of Crafting Advent Calendar
To learn more about the 12 Days of Crafting Advent Calendar, just click the graphic below.
Introducing the 12 Days of Crafting Advent Calendar, a brand-new calendar full of products that you can craft with all year long! Every day of this calendar contains never-before-seen dies, paper, embellishments, and even more items you won’t find in any of our catalogs or in our online store. Once these calendars are sold out, they’ll be gone for good, so make sure you buy one before they’ve disappeared.
Advent Calendar Details
- Item: 12 Days of Crafting Advent Calendar (167335)
- Price: $99
- Includes: Exclusive dies, paper, embellishments, and more
- Ordering Begins: September 23, 2025
- Available only while supplies last.
Two New Kits By Stampin’ Up!
Click each graphic for more information! You can sign up for the free event on World Card Making Day, here. The event will be on October 4th from 2:00-3:00 (Mountain Time).
Road to Christmas Kit is temporarily unavailable but you can sign up to get a notification when it’s back in stock!
October Paper Pumpkin – Cozy Christmas
You can now order subscriptions and manage your Paper Pumpkin subscription on the Stampin’ Up! website! You can cancel your Paper Pumpkin subscription at any time. If you want to skip the next kit, you can do that! You also receive Stampin’ Rewards when you order a single kit or purchase a 3-month, 6-month or 12-month subscription to Paper Pumpkin. If you’d like to subscribe, please click the graphic below.
An additional coordinating add-on is available but only for Paper Pumpkin subscribers. Click the image below for more information.
Thanks for stopping by today!


