by Tracy | Oct 4, 2017 | Uncategorized

Are you looking for an easy way to package up treats? If so, Stampin’ Up! Clear Tiny Treat Boxes are what you’re looking for! These acetate 2″ x 2″ x 2″ clear boxes are packaged flat and then with a few folds and several tabs tucked in, your box is ready to go!
The idea for my treat boxes came right from the Stampin’ Up! Holiday catalog. There are so many ideas packed into each Stampin’ Up! catalog! I used the very popular cat punch which is currently on backorder but is expected in stock on October 16th.
We used to have two adorable kitty cats, our Misty was all black and Joey was black & white. I grew up with dogs and really didn’t care for cats. When I was teaching and my husband was away a lot, we knew a dog wouldn’t work for our family so we rescued two kitties, a brother and sister, at the animal shelter. I’d always heard that cats were aloof but these two were anything BUT. They loved snuggling with us and many nights I woke up with Joey right on my pillow with me, well, actually he was hogging the pillow. Those two showered our family with love. We lost Misty when she was 14 years old and Joey when he was 19. If you’re an animal lover like me, I’m sure you’ll agree that our animals are an important part of our family and when we lose them, it’s heartbreaking. Needless to say, when I saw the cat punch, I knew I had to have it!
Back to my treat boxes! I used three products from the Spooky Night Suite: the Cat Punch, Spooky Cat stamp set and the Spooky Night Designer Series Paper. On the Skittles box, I cut the cat out of Basic Black cardstock with the Cat punch. The two cats on the pistachio box were cut right out of one of the sheets in the Spooky Night Designer Series Paper package. How easy is that?
The sentiments are from the Spooky Cat stamp set and I used Memento Ink & a Pumpkin Pie Stampin’ Pad. The Classic Label punch was used to cut out Happy Halloween. The cats are attached to the Clear Treat Boxes with Glue Dots and I used Stampin’ Dimensionals for the sentiments.
You can fill these Clear Tiny Treat Boxes with just about anything and they’re pretty just wrapped up with ribbon!
Just an FYI: Tomorrow I’m participating in the Glitter Queens’ Blog Hop (formerly called First Fridays Blog Hop)! I’ll be posting two times tomorrow, in the morning for my regular post and in the evening for my blog hop projects. After the blog hop post, I’ll be back on Saturday.
All of the products I used to create the projects are listed below. If you click on any of them, you’ll head to my Stampin’ Up! online store where you can read more information about a particular product or make a purchase. If you have questions, please feel free to contact me!

For more information about the World Card Making Day Sale (October 1-10) and the Designer Series Paper Sale (October 1-31), click here!


by Tracy | Oct 3, 2017 | Uncategorized

This is usually the day for Tool Time Tuesday but I’ll be back with a new installment next week.
I can think of several people who would prefer a Starbucks card instead of candy so this is a cute way “to wrap” it up! Several weeks ago I shared the same box below but I filled it with Treat Tubes (you can see it here). As shown in the picture below, you can bag candy up in our food safe Gusseted Cellophane Bags.

Both boxes were made using our Painted Autumn Designer Series Paper (click here to see how you can get a package of this paper FREE). The boxes are easily made with the Popcorn Box Thinlits and a Big Shot. The Thinlits make all of the score lines so once you cut it out, you just need to fold on the score lines, add adhesive (I used Tear and Tape) and easily assemble the box. You’ll cut out two pieces and attach them together as shown in the picture below. Then the two ends will come together and the bottom will fold up.

More Details on the Starbucks Popcorn Box
- The sentiment is from the stamp set, Labels to Love and was punched out with the Everyday Label Punch. It was stamped using Memento Ink.
- The shape behind the sentiment is in Basic Black and cut out with the Starburst Punch.
- The sentiment has Stampin’ Dimensionals on the back. The Starburst shape has Fast Fuse but you could easily add Stampin’ DImensionals instead.
- Two Basic Rhinestones add the finishing touch!

More Details on the Candy Corn Popcorn Box
- The candy corn is in a Gusseted Cellophane Bag and wrapped up with Jute Twine.
- The sentiment is from the stamp set, Seasonal Chums and stamped in Memento Ink. It was punched out with a 1″ Circle Punch.
- The Tangerine Tango shape behind the sentiment is included in the Popcorn Box Thinlits. It’s attached to the box with Stampin’ Dimensionals.
- Black Rhinestones finish off the box!
Thanks so much for stopping by! If you’d like to purchase any of the products I used to create today’s boxes, click on any of the product pictures below. If you have any questions, don’t hesitate to email me!
by Tracy | Oct 2, 2017 | Uncategorized

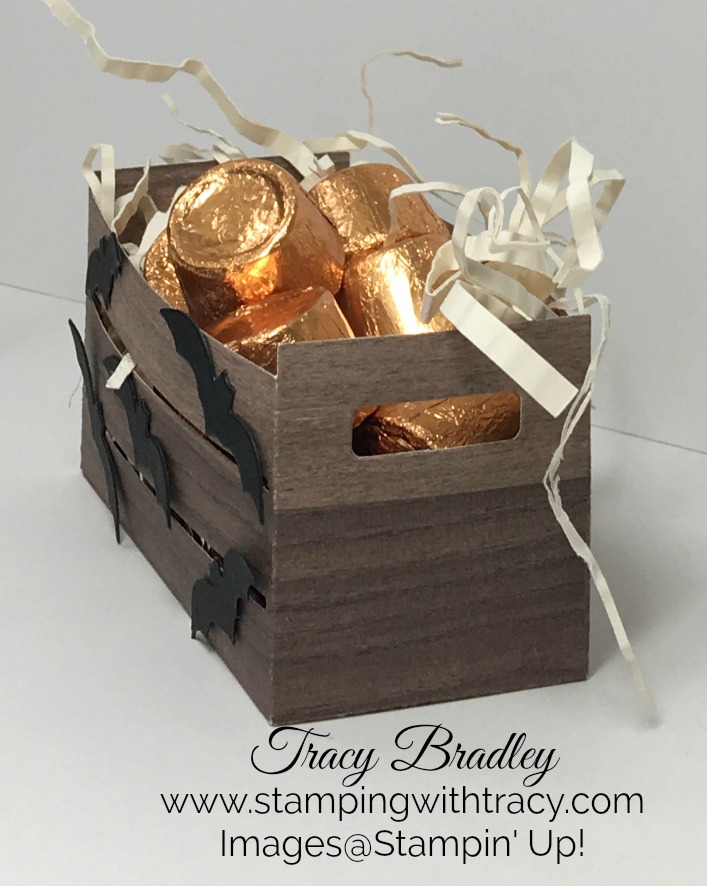
It’s Day 5 of my Treat Packaging Series and today my project uses the super cute Wood Crate Framelits! What a fun way to present a gift and don’t you love the paper I used? It comes from the Wood Textures Designer Series Paper Stack which happens to be included in the Buy 3, Get 1 Free Sale (for more information about the sale, click here),


The crate is very easy to put together and it’s made by cutting out (2) of the largest piece in the Framelits. Each piece has two flaps where Tear and Tape is placed as well as on one of the larger sections (this creates the bottom of the crate). After that, it’s easy to assemble! The black bats were cut out using the Seasonal Tags Framelits Dies which were each attached with a single glue dot.
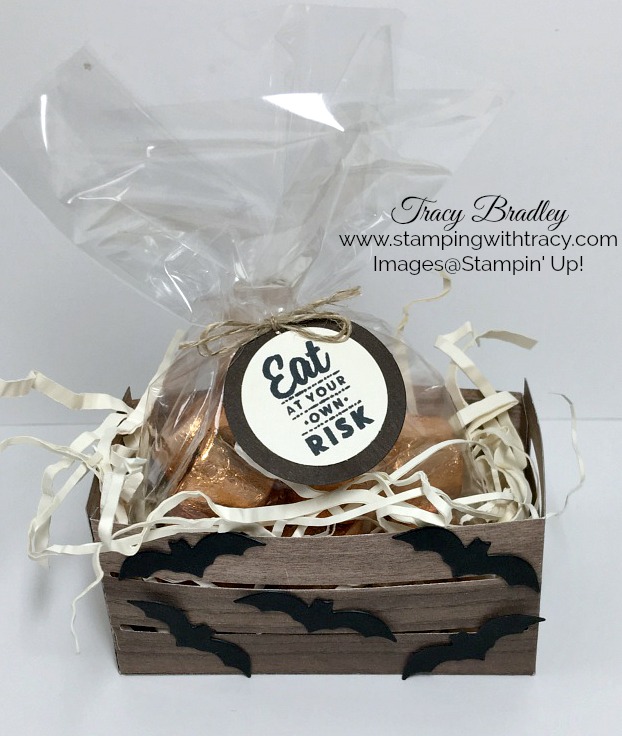
Instead of placing candy directly in the crate, another option would be to wrap it up in a Gusseted Cellophane Bag and tie it with Linen Thread. The sentiment on my crate is from the stamp set Spooky Cat and cut out with a 1″ Circle Punch. It sits on an Early Espresso circle using the 1-1/4″ Circle Punch.
If you’d like to purchase any of the supplies I used to create today’s projects, they are listed below. Simply click on any of the pictures and you’ll be taken to my Stampin’ Up! online store.
Thank you for stopping by!
Click here for more information about the Buy 3, Get 1 Free Designer Series Paper Sale (October 1-31) and the World Card Making Sale (October 1-10).
by Tracy | Oct 1, 2017 | Uncategorized

I love chocolate and I love macadamia nuts and the two combined are absolutely delicious! I saw this gem of a bag in the grocery store and knew I had to make a gift bag for it. Don’t you think the acorn paper is perfect for a “Happy Fall” gift bag? This paper is one of the sheets in the Painted Autumn Designer Series Paper and it’s currently my favorite package of paper in the two catalogs combined.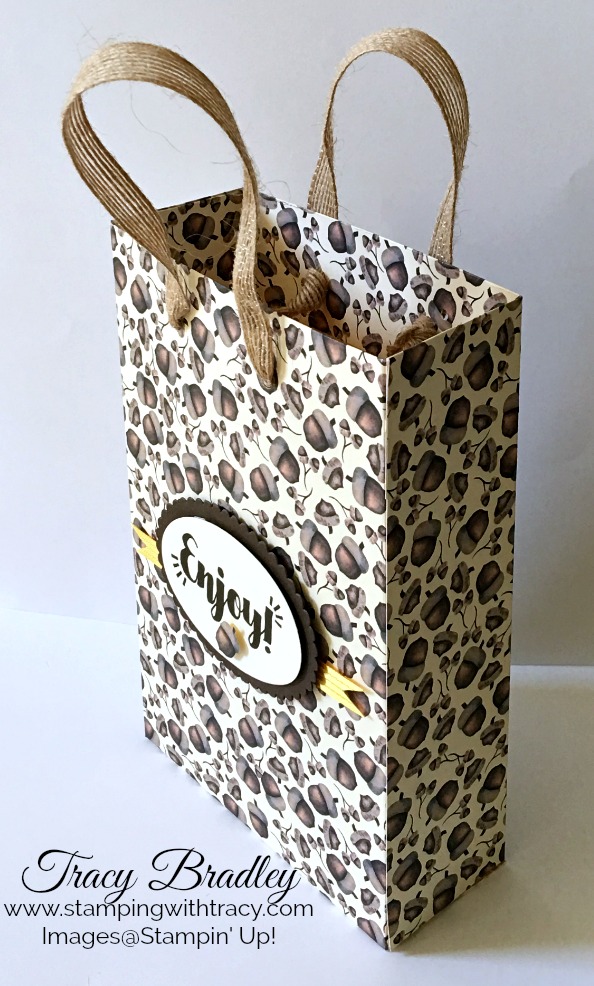
(more…)
by Tracy | Sep 30, 2017 | Uncategorized

I was so excited when I realized that the Ghirardelli Minis I bought fit inside our 2″ x 8″ Cellophane Bags! A perfect fit for four of them! It’s the little things that make me so happy!
To create today’s project I used the Seasonal Chums Bundle (available in wood and clear mount) as well as the stamp set, Spooky Cat. To save 10%, purchase the stamp set Seasonal Chums and the matching Seasonal Tags Framelits together! The bundle is also available in either wood or clear (see supplies list below).

Let’s Make This!
- Stamp the pumpkin in Memento Ink on Whisper White cardstock, cut him out with the Seasonal Tags Framelits and color him (I used Copic markers, a non-Stampin’ Up! product). What you might not realize is that the pumpkin also has a back side! The Seasonal Tags Framelits Dies cuts the front and back and they are attached at the top. There’s also a little piece near the top that allows you to thread Baker’s Twin through so that you could attach the tag to the package but I just snipped that part off.

- Cut a piece of Whisper White cardstock that measures 2-1/4″ x 4″ . Score it at 2″ and fold. This will be the topper for your bag.
- Stamp the sentiment on the topper using Memento Black ink.
- Place Tear and Tape on the front and back of the cellophane bag so when you place the Whisper White topper on it, it will adhere well. Attach the topper to the bag.

- Glue the pumpkin to the topper using Multipurpose glue. I used this adhesive so I’d have a little big of wiggle room when placing it on the topper.
- Cut two Basic Black bats using the Seasonal Tags Framelits Dies. Attach to the topper using Glue Dots or Multipurpose glue.
This really is a quick and easy project to make. By the way, the cellophane bags are food safe so you can fill them up with any type of unwrapped candy. Thanks so much for stopping by!
Non-Stampin’ Up! supplies: Copic Markers
Designer Series Paper Sale Starts Tomorrow!

New Host Code Effective Today! 


