

I love chocolate and I love macadamia nuts and the two combined are absolutely delicious! I saw this gem of a bag in the grocery store and knew I had to make a gift bag for it. Don’t you think the acorn paper is perfect for a “Happy Fall” gift bag? This paper is one of the sheets in the Painted Autumn Designer Series Paper and it’s currently my favorite package of paper in the two catalogs combined.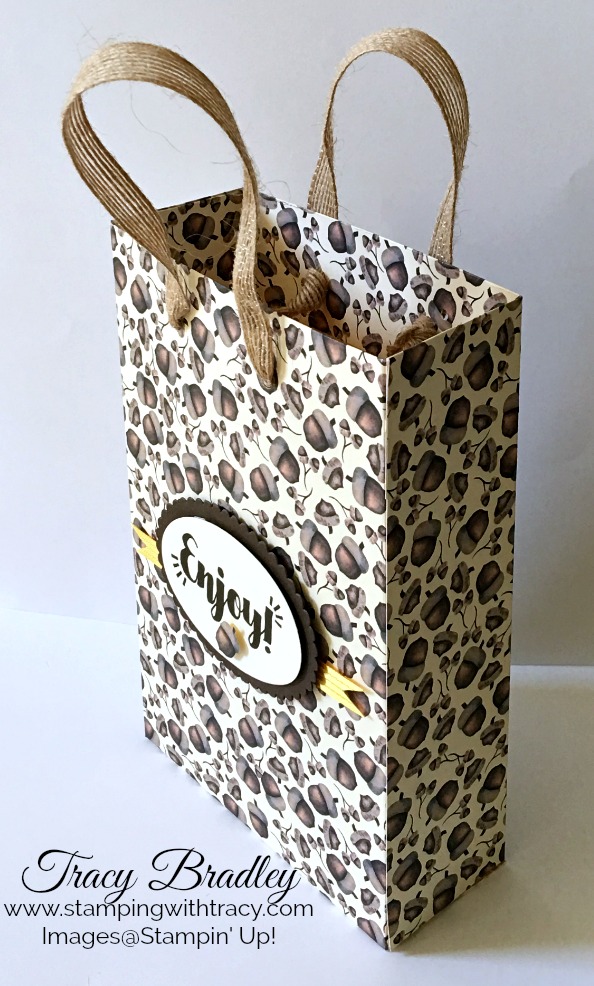
Before I move on to the details of the bag, I want to let you know that several Stampin’ Up! specials are starting today!!! The first sale is all about paper – Buy 3 Get 1 Free – and Painted Autumn is included in this special along with 12 other designs. Order any three packages from the list below and you’ll be prompted to enter in your FREE package. Read more about the sale at the end of the post.

I created my bag to specifically fit the package of chocolate macadamia nuts but it’s a nice sized bag – not too little and not too big. You’ll need two sheets of 12″ x 12″ paper that you’ll cut down to 9″ x 11″.
You ‘ll use these measurements on both pieces: On the 9″ side, score the paper at 2″ & 7″. On the 11″ side, score it at 1-1/2″ & 9″.
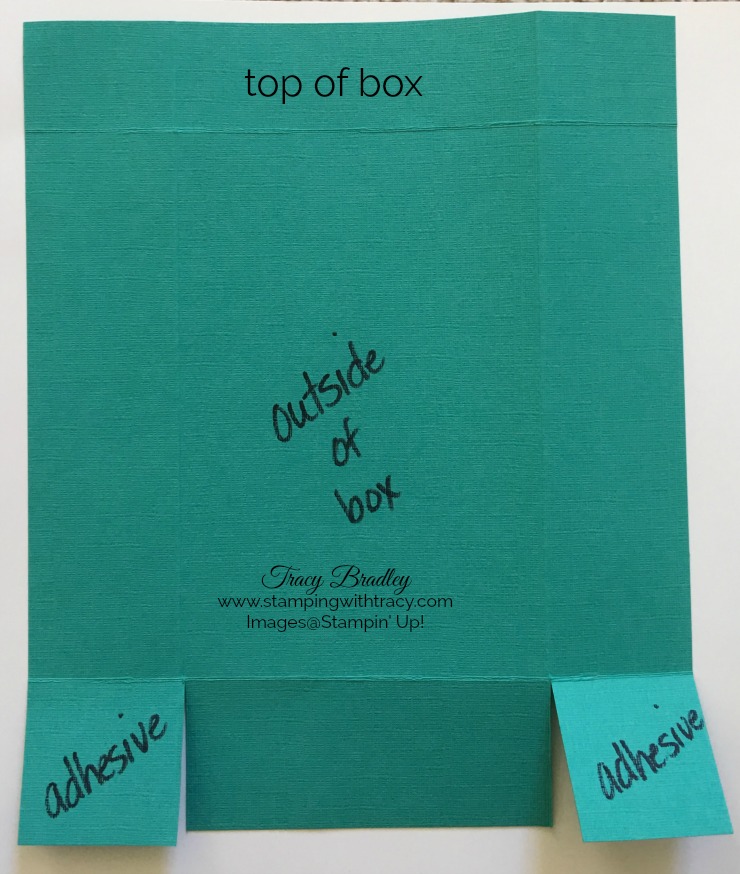
When you look at both sheets of paper after you’ve scored them, one side will be narrower. This will be the top of your bag and you’ll be folding this piece to the inside or outside of your bag. I chose to fold mine to the inside of the bag because I didn’t want the other side of the acorn paper to show as I didn’t care for the two designs together.

Next, on one of the sheets, remove the two squares as shown below.

On the other sheet, only cut on the score lines and cut up to the horizontal score line as shown below.

Now you’re ready for adhesive. Here’s where you’ll place it on the sheet with the two squares cut off. I used Tear and Tape but you could also use Fast Fuse. I don’t recommend Snail adhesive.

On the other piece, apply adhesive in the areas shown below.
It’s time to assemble one half of the bag. Make sure that your top flap on both sheets is either folded in or out. Use your bone folder to give it a nice crease. Make sure to use use your bone folder on ALL score lines of the bag. I glued the top flap down with Fast Fuse but this step is optional.
Now start with the sheet that has the two squares of adhesive. Flip the paper over so that the inside of the box is facing up. Bring the two side flaps up and over to form the sides of the box.. Bring the middle top flap up and attach it to the two squares of adhesive. This will make sense when you’re actually assembling the box.
Now take the other sheet with the adhesive on the large flap and slide that flap to the inside of the other half of the bag (remember, the adhesive is on the bottom of the flap). Bring the sides with adhesive up and attach them to the other half of the bag. You’re done! I hope these directions aren’t too confusing. If they are, email me and I’ll work on a video.
More Details About the Acorn Bag
- I used a hole punch to punch two holes on each side of the bag for handles. I used Burlap Ribbon and made a knot on each end.
- The sentiment is from the stamp set, Tags and Trimmings, from the Holiday Catalog. It’s stamped using Early Espresso ink onto Very Vanilla cardstock and cut out with the Layering Ovals Framelits.
- The sentiment sits on an Early Espresso oval, also cut out using the Layering Ovals Framelits. Both the sentiment and Early Espresso oval have Stampin’ Dimensionals on the back.
- Before adding the sentiment to the bag, notches were clipped on each end of a small piece of Crushed Curry ribbon and glued to the bag with Fast Fuse.
- The cute little acorn was cut out of the scraps of the same paper as the bag. It has a Mini Stampin’ Dimensional on the back
|
|


 Burlap Ribbon")


As I mentioned earlier, the Buy 3 Get 1 FREE Designer Series special started today! The 13 papers listed below are eligible for this promotion. Add three of them to your cart and you’ll be prompted to enter in your free package! Click any of the papers below and you’ll be directed to my Stampin’ Up! online store. Once there, you’ll be able to click the magnifying glass and see a larger image of the designs.
|
|
|
|


If this sale wasn’t enough, another sale also started today! The Designer Series Paper is on sale ALL month but the items below are ONLY AVAILABLE until October 10th.


Thanks so much for stopping by today! I hope you’ll give the bag a try and if you do, I’d love to see your creation!


