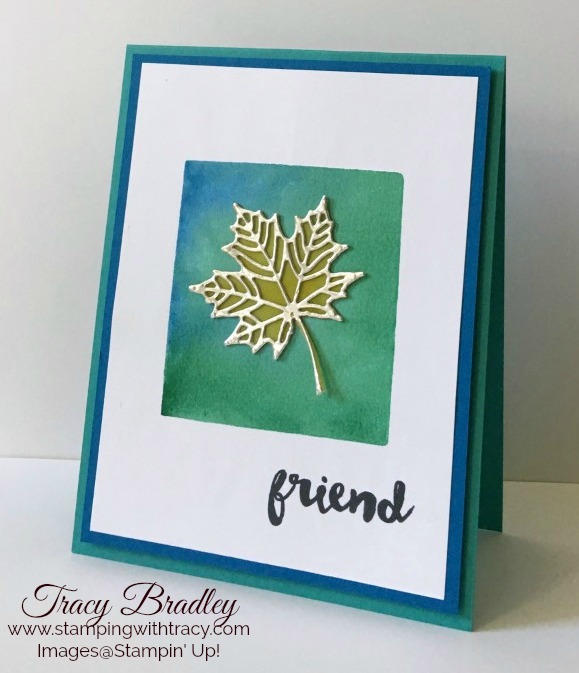
Earlier this week I shared a card with leaves made using copper foil and today I have one using silver foil. Just as beautiful, don’t you think?? It sure looks like gold in the pictures below but it really is silver.
Are you wondering how I created my blue/green rectangle? I used a clear stamp block (size D) and two stamp pads. Using Emerald Envy and Pacific Point stamp pads, I applied ink directly to my clear block and then using a spritzer, lightly misted the block. I placed the block onto Thick Whisper White card stock and let it sit for five minutes. I placed a book on top of it for just a small amount of pressure. When the five minutes was up, I carefully removed the block. Your results will be different with the amount of water you spritz on the block and you may have to try it a few times to get a feel for it.
My paper did warp a bit and I tried to flatten it out by placing quite a few heavy items on top of it after it had thoroughly dried. I also used my heat tool on both sides. As I’m writing this, I realize I could have taped my paper down with blue painters tape and that would have helped with the warping. It wasn’t too much of a problem but if you’re worried about it, I’d try taping it down. I wouldn’t suggest using regular Whisper White paper as it won’t accept the water very well. Watercolor paper or our Shimmery White are both other options.
The stained glass look of the leaf was created with vellum card stock. I explain how I created the leaf in Monday’s post and you can read all about it here. So easy and so pretty!
My sentiment comes from a stamp set that I reach for all the time and it’s included in the Oh Happy Day Card Kit. Unfortunately you can’t purchase the stamp set separately but the kit is filled with enough supplies to make 20 cards, a Basic Black Stampin’ Spot and a clear stamp block.
I went and took another pictures of my card and think this one shows that I used silver a bit better.
Stamping Supplies – Below you’ll find the list of Stampin’ Up! products I used to create today’s card. Click on any of the items and you’ll be directed to my Stampin’ Up! online store!
I always love hearing from you whether it’s a comment about today’s project or a question! Have a great day!
|
|
|
|
|
|
|
|||
|
|
|


Beautiful background. You used two stamp pads, but did you stamp on say the green and then the blue–how did you keep the ink from transferring to the blue pad?
Hi Shirley,
Good question! I was a bit concerned about color transferring from one stamp pad to the other but it ended up being just fine. I used the lighter color first, Emerald Envy, and tried to apply the ink on just half of the block. Then I used Pacific Point, knowing that a little bit of Emerald Envy might transfer over. When I was done, I placed a paper towel over the top of the pad and pressed lightly just in case some Emerald Envy got on my pad. I’m pretty picky about this kind of thing but I would do it again. Also, the spritzing really spreads the color around so it was okay to apply color, half and half. Another option is using our Uninked Stampin’ Spots and adding color to them with our refills. Because they are smaller, you can see where you’re stamping on the block and there’s less chance of getting another color on the ink pad. Hope that answers your question!