by Tracy | Mar 27, 2026 | Hello Card
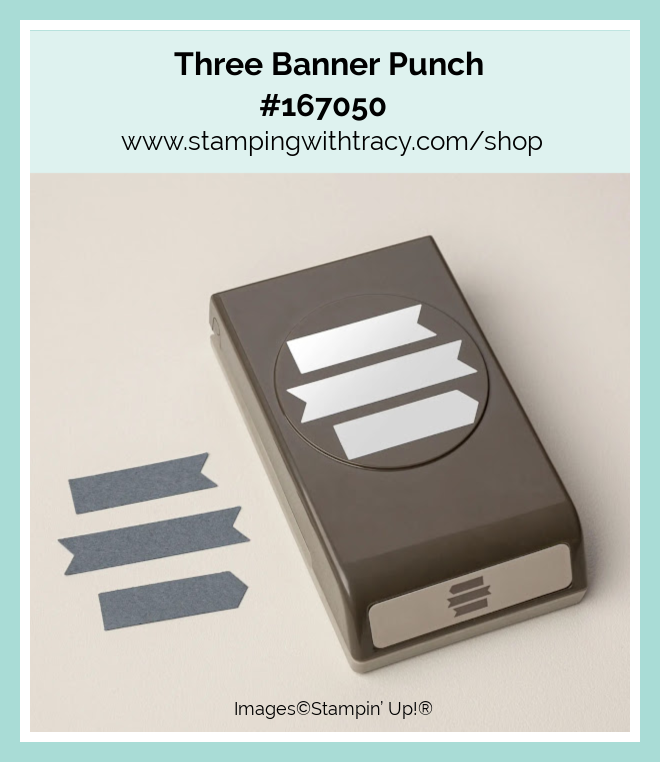
I made my card using the Paradise Garden Hybrid Embossing Folder (and it comes with thirteen dies and it’s an Online Exclusive), Fragrant Layers Stamp Set (an Online Exclusive), Lovely Blossoms Designer Series Paper (an Online Exclusive, Three Banner Punch (an Online Exclusive) and Moody Palette Glossy Dots (these embellishments have been out of stock for some time now and they are back in stock – yay! I don’t know how long they will be in stock. These embellishments are an Online Exclusive). You can see another version, here.


I started with Cloud Cover cardstock for the base of my card. Then, I embossed a piece of Basic White cardstock using the Paradise Garden Hybrid Embossing Folder and my Stampin’ Cut & Emboss Machine. Next, I adhered it to the front of the card.


I cut the out the focal point and I layered it with a Cloud Cover cardstock. I added Stampin’ Dimensionals to the back and adhered it to the front of the card.


I stamped my sentiment directly onto the banner which I punched out using Basic White cardstock. I used the Three Banner Punch to punch the banner. I used Secret Sea ink using the Fragrant Layers Stamp Set. I added Stampin’ Dimensionals to the back of the sentiment and adhered it to the front of the my card.
To complete my card, I added a piece of Basic White cardstock to the inside of the card and I added three Moody Palette Glossy Dots to the focal point in Cloud Cover.


Supply List
Below you’ll find all the Stampin’ Up! supplies I used for today’s card. If you need any stamping supplies, I’d love to be your demonstrator! You can place an order by clicking any of the images below to go to my Stampin’ Up! online store. The Specialty Plate is used with 3D Embossing Folders and Hybrid Embossing Folders.
Bundle Alert: The Fragrant Layers Bundle is available with a 10% discount rather than buying the products separately. You can get more information above or clicking the graphic below. I’m sorry that Fragrant Layers Bundle is unavailable at this time. You can sign up to know when it will be back in stock.

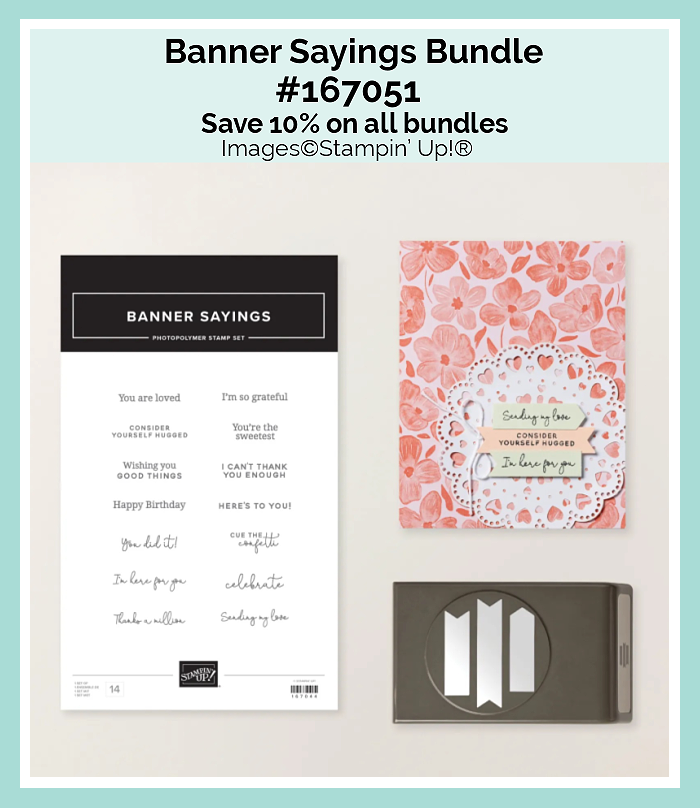
Bundle Alert: The Banner Saying Bundle is available with a 10% discount rather than buying the products separately. You can get more information above or clicking the graphic below.
Bundle Alert: The Paradise Garden Bundle is available with a 10% discount rather than buying the products separately. You can get more information above or clicking the graphic below.

Measurements
- Cloud Cover cardstock: 4-1/4″ x 11″ scored at 5-1/2″
- Cloud Cover cardstock: 3-1/4″ x 4-1/4″
- Lovely Blossoms Designer Series Paper (focal point): cut down to the 3″ x 4″
- Basic White cardstock (embossed and inside card): (2) 4″ x 5-1/4″
- Basic White cardstock (sentiment): directly stamp on the banner
Sneak Peek of New In Color Ink Pads 2026-2028

This design features a felt ink pad in a magnet-based, stackable case. This case is exclusive to the In- Colors 2026 -2028 only!
Retiring In Colors 2024-2026
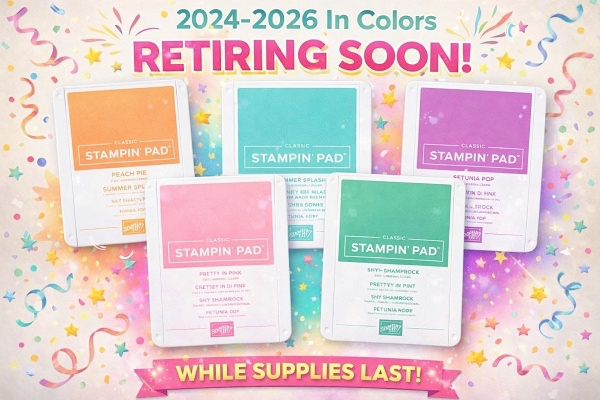
The colors that are retiring are: Pretty in Pink, Petunia Pop, Peach Pie, Shy Shamrock, and Summer Splash (I’m going to miss these colors). Some stamp pads and cardstock are in low inventory! Click here to see what’s still around.
March Product of the Month

Each month, a single product of the month will be released. These items won’t be in any catalog or on the Online Exclusives page on the Stampin’ Up! website. Stock is limited, so once a Product of the Month sells out, it’s gone for good. Make sure if you like the Product of the Month, to snag your Product of the Month early!
Product of the Month Details
The Product of the Month for March
For more information about the Product of the Month, click here, or the graphic below.

Online Exclusives – March 2026
Click the graphic below to access the March Online Exclusives Product List! Stampin’ Up! has made a printable flyer and they’ve made it much easier to shop the new products! You won’t find Online Exclusives in any catalog, they’ll be listed in the Online Store. Click here to shop Online Exclusives. Click here to download the March 2026 Online Exclusive Product List.

Last Chance Products
Click here to go straight to the Last Chance Products page on the Stampin’ Up! site! Some products are discounted! More products were added on February 3, 2026!
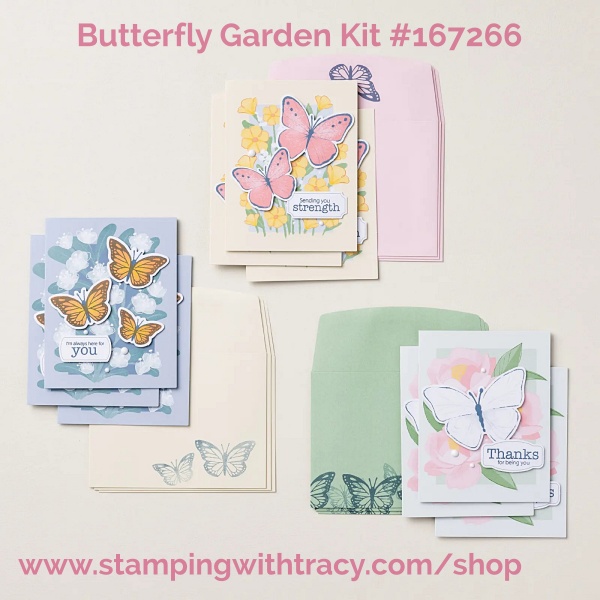
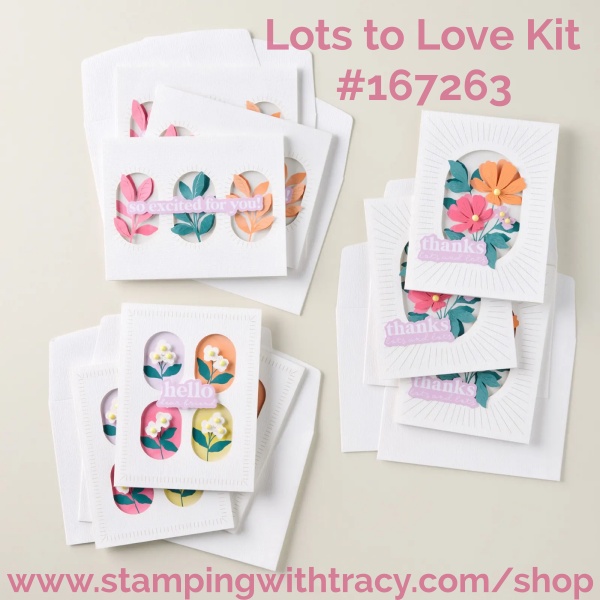
Stampin’ Up! Kits – We Have Two New Kits
Click the images below for more information about the kits.


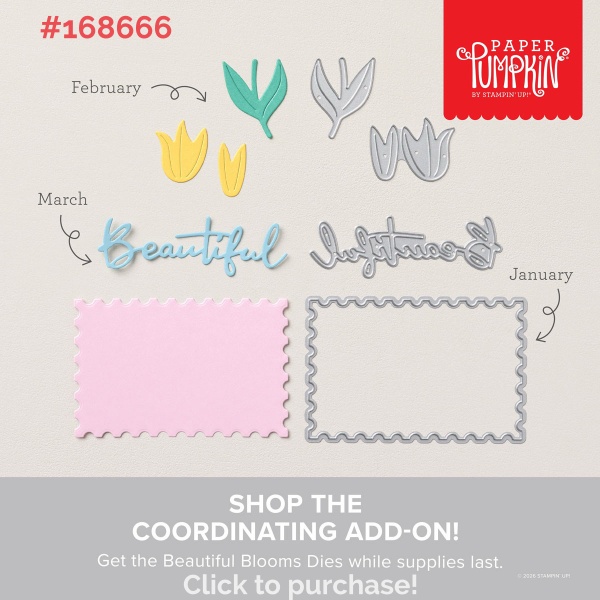
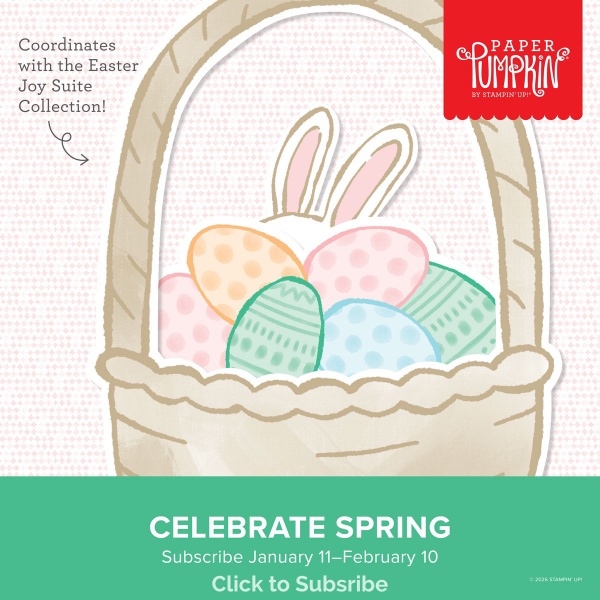
Paper Pumpkin for April- Subscribe by April 10th!
Click the graphic below to subscribe to Paper Pumpkin!

There’s coordinating ADD-ON, but only for Paper Pumpkin subscribers! Click here or the graphic below to learn more about the coordinating ADD-ON!

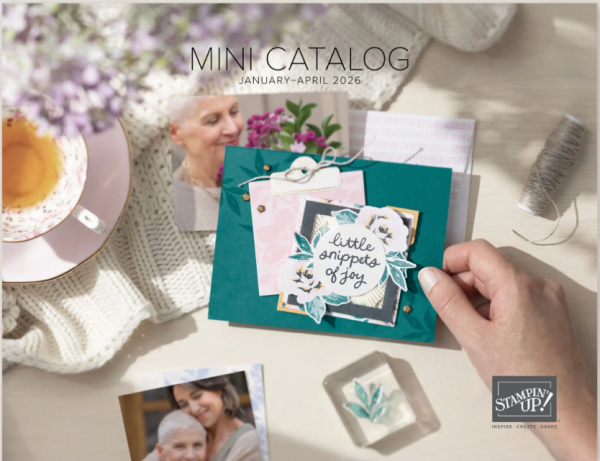
Mini Catalog January – April 2026
You can download the new Mini Catalog January – April 2026, please click here.
Thanks for stopping by today! Enjoy your weekend!
by Tracy | Feb 16, 2026 | Hello Card
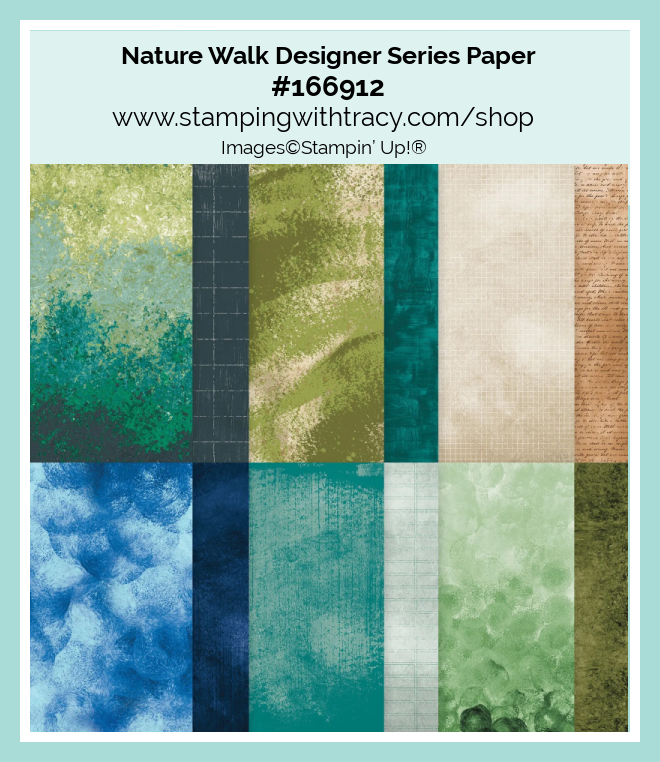
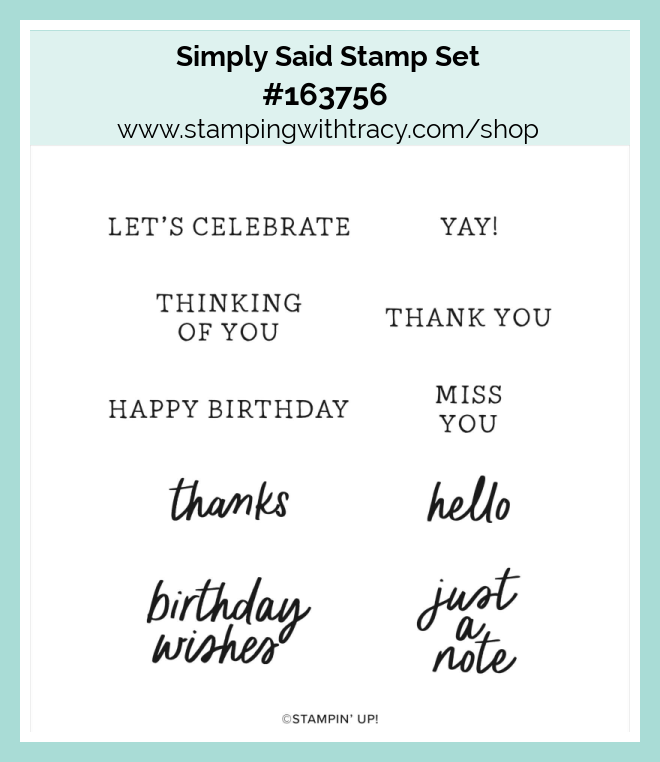
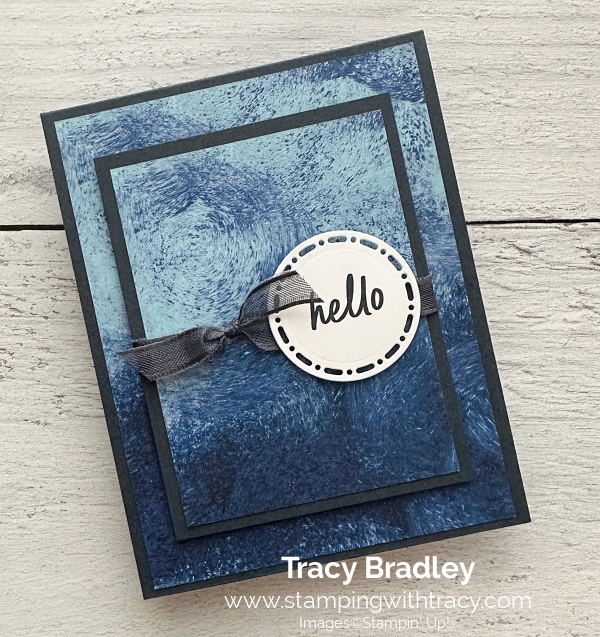
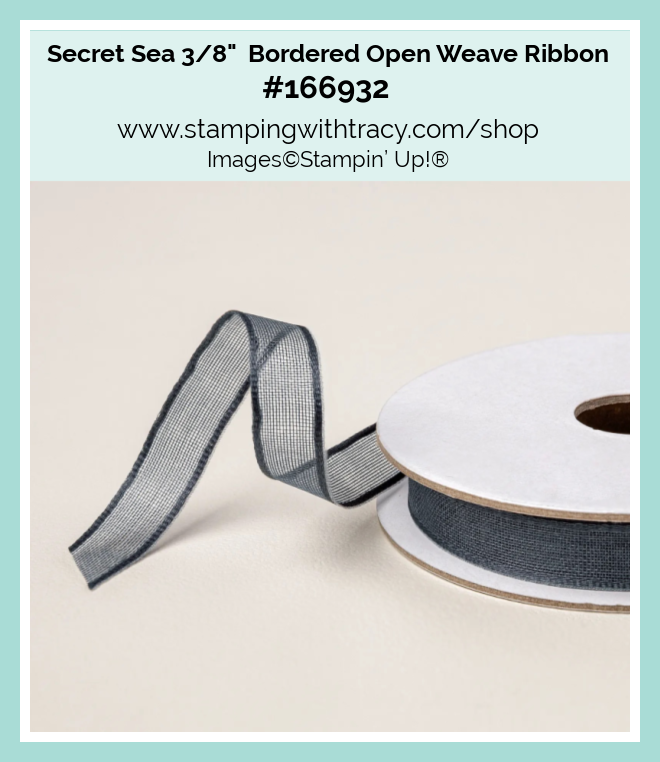
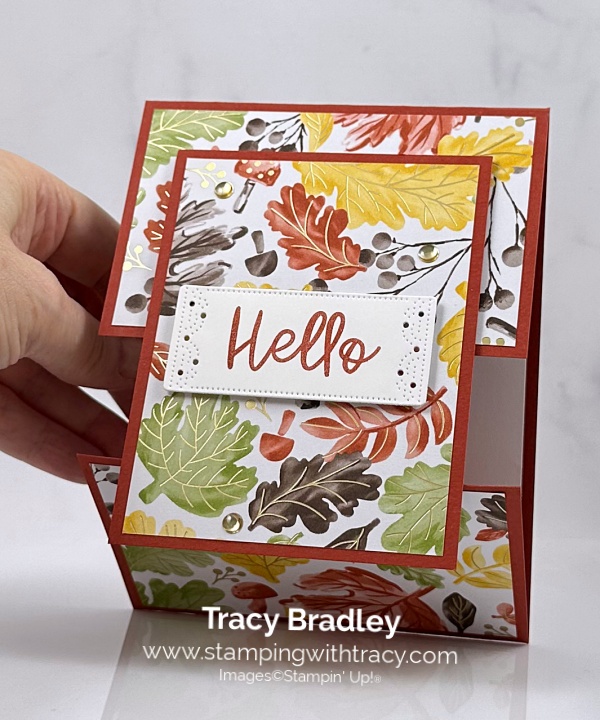
I made a card to share with you today. I used Nature Walk Designer Series Paper, Simply Said Stamp Set, Spotlight on Nature Dies (an Online Exclusive) and Secret Sea 3/8″ Bordered Open Weave Ribbon.
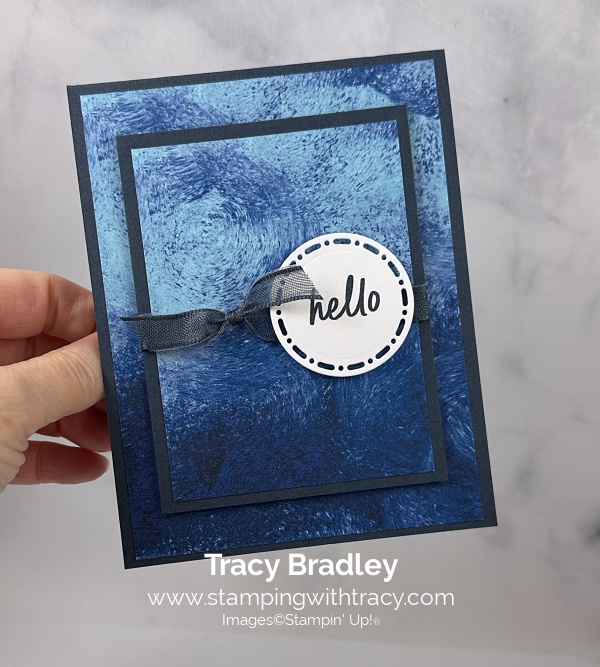
I started with a piece of Secret Sea cardstock for the base of my card. Then I cut a piece of Nature Walk Designer Series Paper and adhered it to the front of the card.
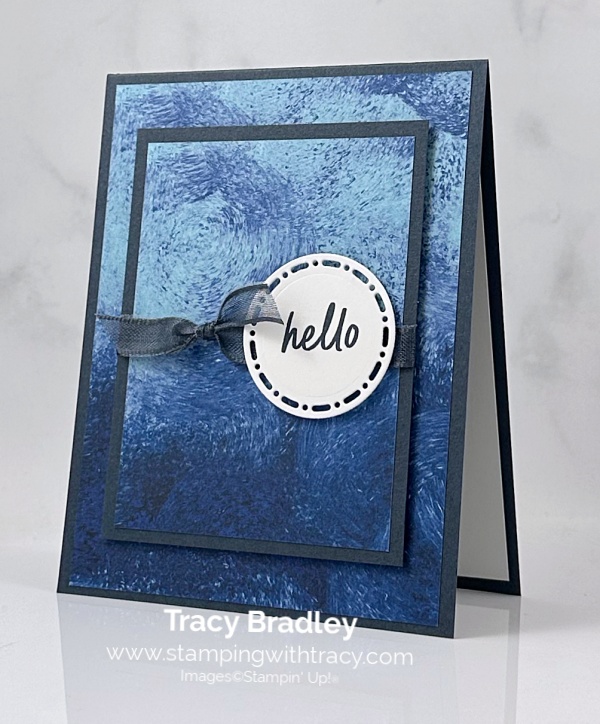
Next, I cut a piece of Secret Sea cardstock and a piece of Nature Walk Designer Series Paper and adhered them together. I wrapped a piece of Secret Sea 3/8” Bordered Open Weave Ribbon around this piece and tied a knot over to the left. I then added Stampin’ Dimensionals to the back and placed it on the front of the card.
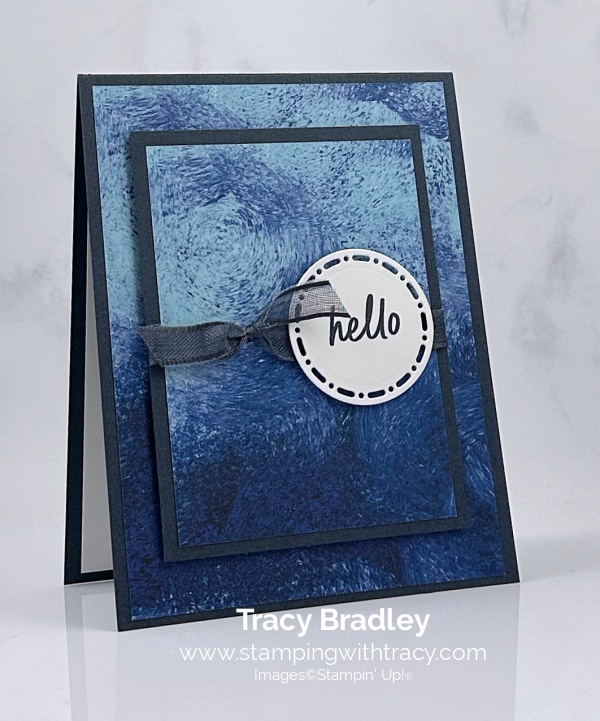

I stamped the sentiment onto Basic White cardstock in Secret Sea ink using the stamp set, Simply Said. I then cut the sentiment out using the Spotlight on Nature Dies, added Stampin’ Dimensionals at the top and bottom and adhered it on top of the ribbon. To complete my card, I added a piece of Basic White cardstock to the inside.
Supply List
Below you’ll find all the Stampin’ Up! supplies I used for today’s card. If you need any stamping supplies, I’d love to be your demonstrator! You can place an order by clicking any of the images below to go to my Stampin’ Up! online store.
Measurements
- Secret Sea cardstock: 4-1/4″ x 11″ scored at 5-1/2″
- Secret Sea cardstock: 4-1/4″ x 3 1/4″
- Nature Walk Designer Series Paper: 4″ x 5-1/4″
- Nature Walk Designer Series Paper: 3″ x 4″
- Basic White cardstock (for inside card): 4″ x 5-1/4″
- Basic White cardstock (sentiment): approximately 2″ x 2″
- Secret Sea Ribbon: approximately 11″
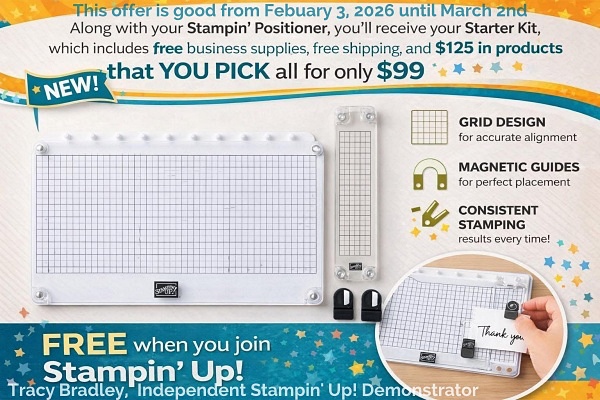
Join Offer – February 3rd – March 2nd
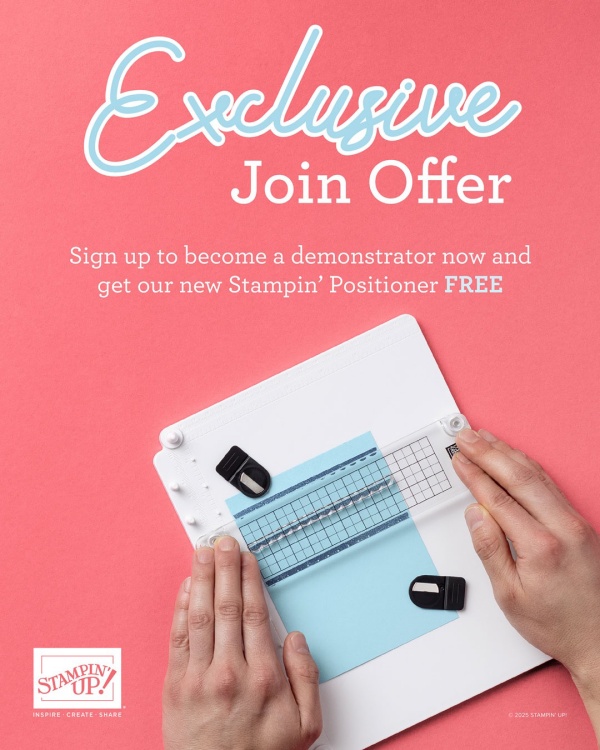
When you sign up to be a demonstrator beginning February 3, 2026, you will get a FREE Stampin’ Positioner!
What’s the Stampin’ Positioner?
It’s our new stamping alignment tool that makes stamping easier and more accurate. It allows you to stamp precisely aligned images, create repeating patterns and Two-Step Stampin’ images easily, and make multiple projects in minutes.
Stampin’ Positioner Grid Paper will also be available for but it isn’t available in the Starter Kit!
****If you’d like to see a flyer on this offer, click here.****
Join Offer Details
- New team members who purchase their Starter Kit February 3–March 2 will also receive our new Stampin’ Positioner.
- New demonstrators who submit their Independent Demonstrator Agreement (IDA) before February 3 or after March 2 will not be eligible for this offer.
- The Stampin’ Positioner is a $49 value!
When I purchased the Starter Kit in 2009, it was solely for the discount. I loved the products and would go through the catalog numerous times from cover to cover every chance I got! The Starter Kit is completely customizable and you can choose what you want. When I joined, the kit was preselected by Stampin’ Up! so I love that you can pick what you want now. I love being a Stampin’ Up! demonstrator!
The Stampin’ Up! Starter Kit is for someone who loves purchasing Stampin’ Up! products and also loves getting a 20%+ discount! But, it’s also for the person who would like to start their own business and share their love of paper crafting. You never have to sell or have a party (unless you want to). See below for frequently asked questions about the Starter Kit.
Commonly Asked Questions
- If I purchase the Starter Kit, do I have to sell Stampin’ Up! products to my family and friends? No, you are under NO obligation to sell. You can be your only customer. Of course once your friends see the cute cards you’re making, they’ll want to buy their stamping supplies from you.
- Will I receive a discount on any products I buy? Yes!! This is the best part! You’ll receive at least a 20% discount on all your purchases.
- Do I have to buy/sell a certain amount of product? The quarterly minimum is $300 in product (which is only $240 after your discount!) that can be from personal orders, online orders or ones from family and friends. The quarters are January – March, April – June, July – September, October – December. Once you join, your quarterly minimum begins during your first FULL quarter.
- What if I can’t make the quarterly minimum? You’ll simply be dropped. No one will hassle you. No one will bother you. It truly is risk free to purchase the Starter Kit!
Are there other perks to purchasing the Starter Kit? Yes! Here are just a few:
- The Starter Kit ships FREE!
- Approximately a month before new products are released, you’ll be able to participate in a preorder and purchase brand new products ahead of the public
- Attend Stampin’ Up! events like OnStage
- Personal purchases of $20 are eligible to receive Stampin’ Rewards. Yes, demonstrators can also receive Stampin’ Rewards!
- Complimentary copy of each current catalog from Stampin’ Up! Once the preorder begins, a complimentary copy will be included in your order. If no preorder is made, the catalog will be included in the first order placed during the catalog sales period.
- Free access to the tutorials I give to my customers!
- You wouldn’t have to have your quarterly minimum until July 2026!
If you have more questions, please reach out to me sending an email to me (you can send me an email on the sidebar of my blog).
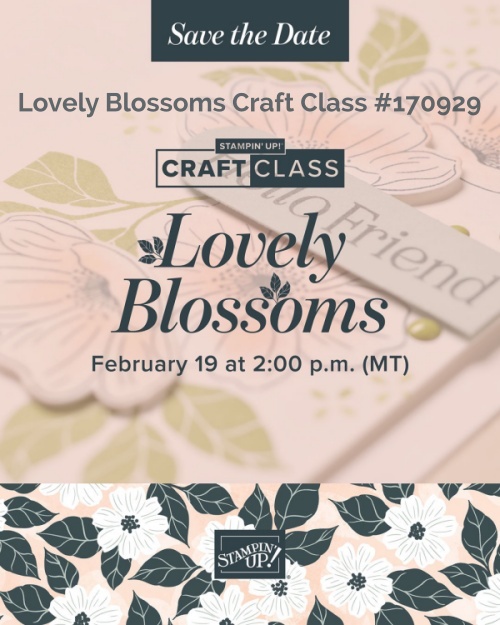
Lovely Blossoms Craft Class
Details:
- Class Price: $25
- Livestream: February 19,2026 at 2:00 (MT)
- Lovely Blossoms Craft Class Item #170929
- Where: An exclusive Facebook group
- Language: The class will be presented in English. Attendees will have access to supply lists and project instructions in English, French, German, and Dutch.
- Video on Demand: We will record this live class, which will be available as a video on demand immediately after the livestream. Videos with English, French, German, and Dutch captioning will be available through the Facebook page one week after the livestream.
After you purchase the Craft Class, you’ll receive an email with a link to an exclusive Facebook group. To view this group, you’ll need to enter the name and email address you used when you purchased the Craft Class; you’ll also need to enter your Craft Class order number. With this information, the group administrator can admit you to join the group. Please allow adequate time for the group administrator to admit you—at least 24 hours. If you aren’t admitted to the group, you won’t be able to view the class. Once you’re on the Facebook group, you can download the instructions for the projects you’ll make during the class. We recommend you review the instructions before you view the class so you can have everything prepped and ready to go.
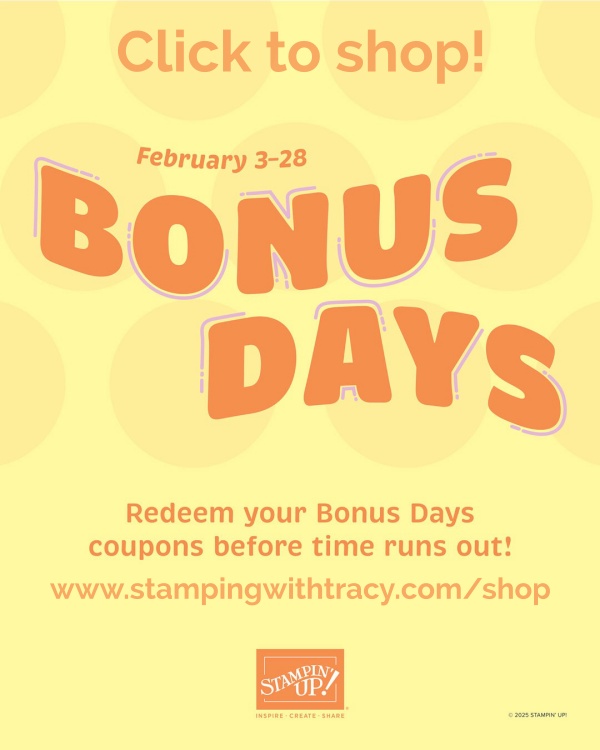
Bonus Days Redemption
If you don’t see my picture, click again, please
February Product of the Month
Each month, a single product of the month will be released. These items won’t be in any catalog or on the Online Exclusives page on the Stampin’ Up! website. Stock is limited, so once a Product of the Month sells out, it’s gone for good. Make sure if you like the Product of the Month, to snag your Product of the Month early!
Product of the Month Details
- You must have a Stampin’ Up online account to participate.
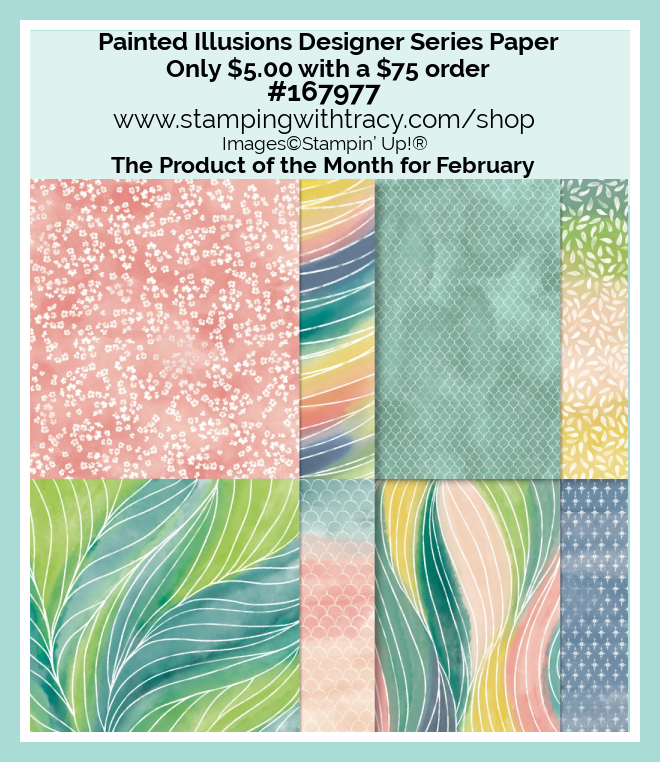
- Add the Product of the Month after your cart reaches $75. You can purchase the Product of the Month for just $5! The cart must be $75 (after Stampin’ Rewards).
- Limit 1 per Stampin’ Up! account.
- You must add the The Product of the Month to your cart after you reach $75
The Product of the Month for February
For more information about the Product of the Month, click here, or the graphic below.
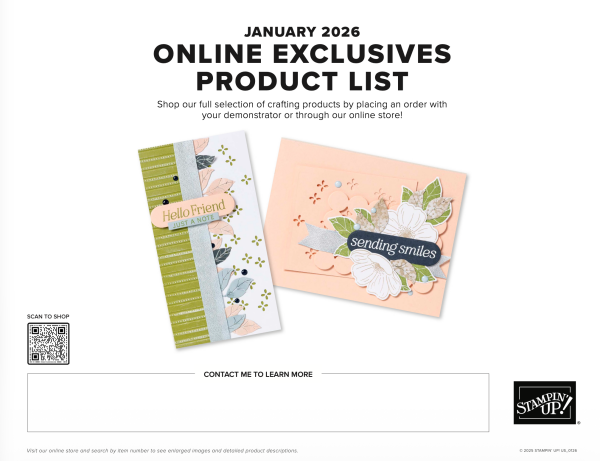
Online Exclusives – January 2026
Click the graphic below to access the January Online Exclusives Product List! Stampin’ Up! has made a printable flyer and they’ve made it much easier to shop the new products! You won’t find Online Exclusives in any catalog, they’ll be listed in the Online Store. Click here to shop Online Exclusives. Click here to download the January 2025 Online Exclusive Product List.
Last Chance Products
Click here to go straight to the Last Chance Products page on the Stampin’ Up! site! Some products are discounted! More products were added on February 3, 2026!
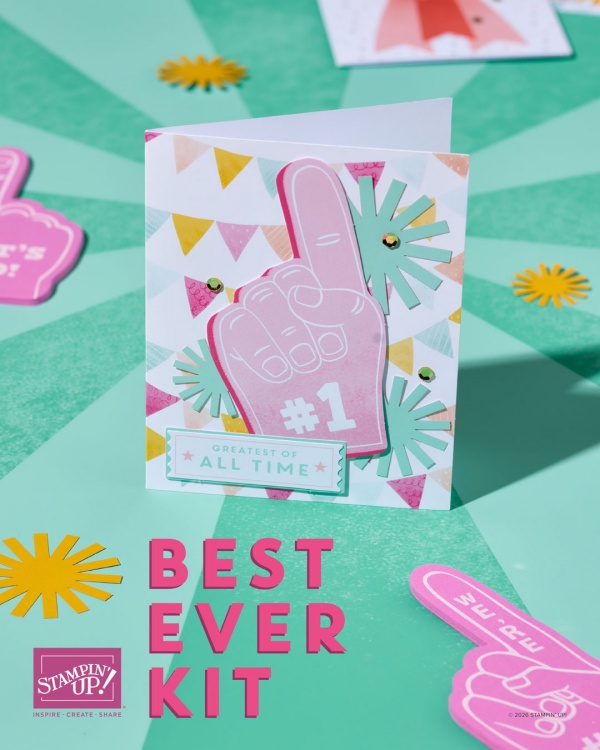
Stampin’ Up! Kits – We Have Two New Kits
Click the images below for more information about the kits.

Paper Pumpkin for March – Subscribe by March 10th!
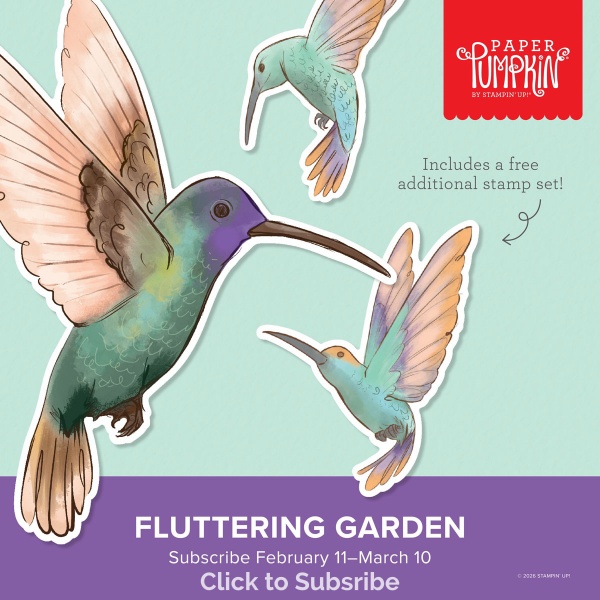
An additional coordinating add-on is available but only for Paper Pumpkin subscribers. Click the image below for more information. The dies below coordinates with the upcoming February and March Paper Pumpkin Kits!
Mini Catalog January – April 2026
You can download the new Mini Catalog January – April 2026, here, or the graphic below
Thanks for stopping by today! Enjoy your day!
by Tracy | Jan 28, 2026 | Hello Card
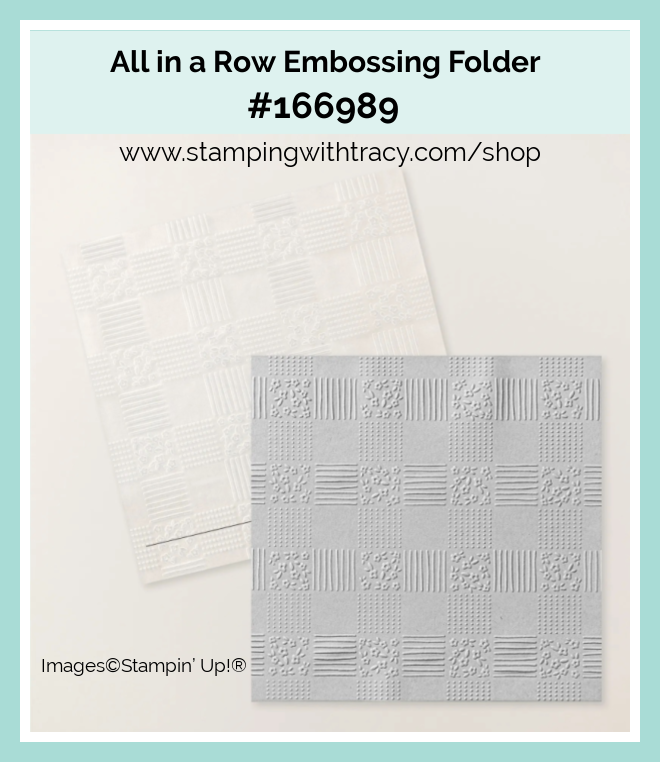
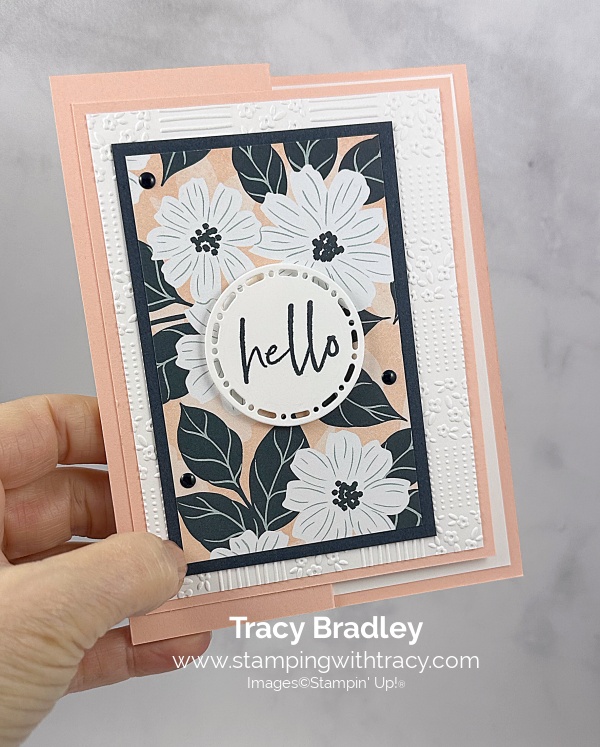
I’m sharing another fun fold card with you today! I used Fabulous Sayings Stamp Set (the Product of the Month for January), Lovely Blossoms Designer Series Paper, Spotlight on Nature Dies (an Online Exclusive), All in a Row Embossing Folder, and Moody Palette Glossy Dots (another Online Exclusive). You can see the Product of the Month details below!
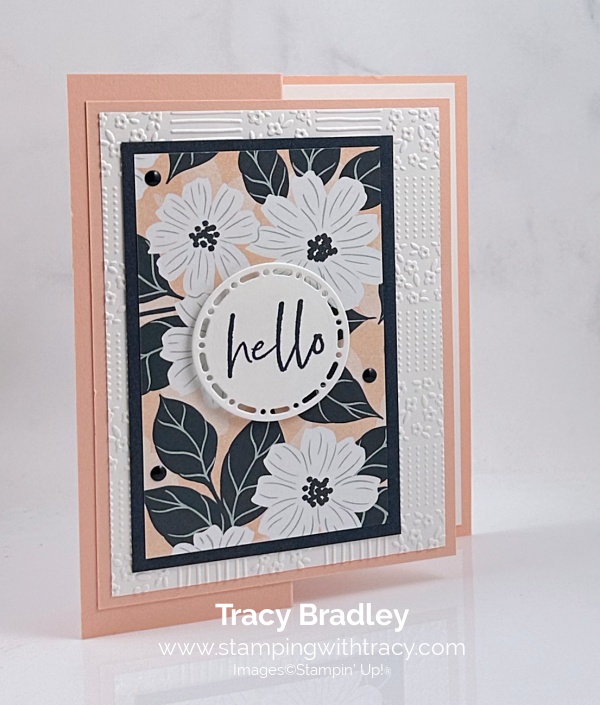

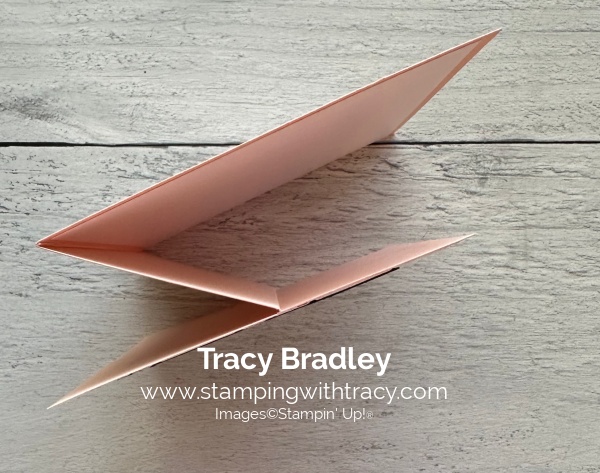
I started out with a piece of Petal Pink cardstock for the base of the card. I folded it in half on the score line and then folded on the other score line towards the middle fold to create the fun fold (you can find all the measurements I used below the Supply List). This is how the scoring will look.
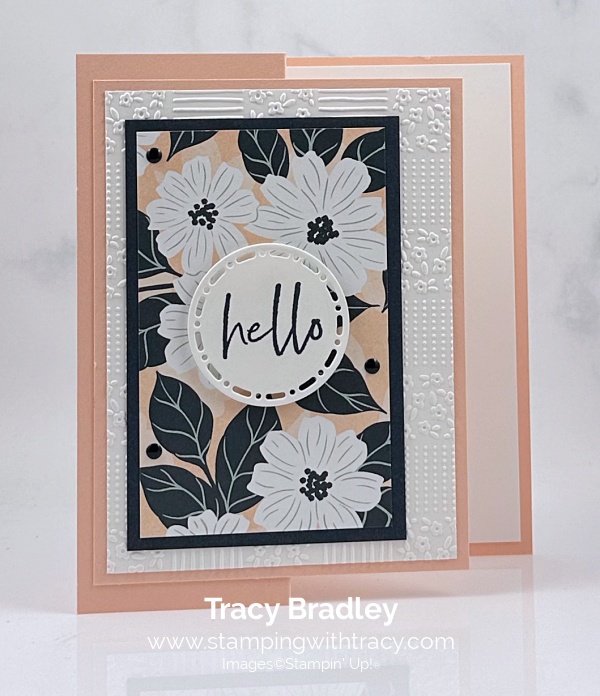
I embossed a piece of Basic White cardstock using the All in a Row Embossing Folder and the Stampin’ Cut & Emboss Machine. Then, I layered it with a piece of Petal Pink cardstock. When you’re looking at this piece on the back, I added adhesive to the right side only and adhered it to the front flap. I cut a piece of Lovely Blossoms Designer Series Paper and adhered it to a piece of Secret Sea cardstock and then placed it on the front of the card (using Multipurpose Glue).
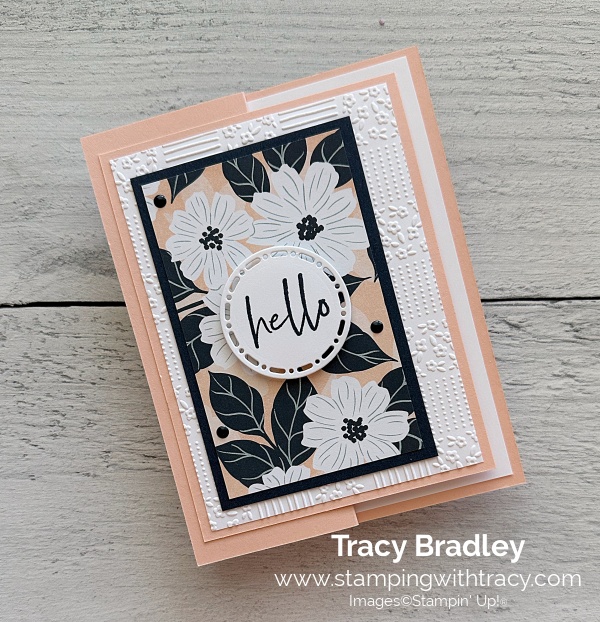
I stamped the sentiment using the stamp set, Fabulous Sayings Stamp Set, in Secret Sea ink. I cut the sentiment out using the Spotlight on Nature Dies. I added Stampin’ Dimensionals to the back and adhered it to the front of the card.
To complete my card I added three Moody Palette Glossy Dots in Secret Sea and I added a piece of Basic White cardstock to the inside of the card.
Supply List
Below you’ll find all the Stampin’ Up! supplies I used for today’s card. If you need any stamping supplies, I’d love to be your demonstrator! You can place an order by clicking any of the images below to go to my Stampin’ Up! online store.
Measurements
- Petal Pink cardstock: 8-1/2″ x 5-1/2″ scored at 2-1/8″ and 4-1/4″
- Petal Pink cardstock: 3-3/4″ x 5″
- Secret Sea cardstock: 2-3/4″ x 4-1/4″
- Basic White cardstock (inside card): 4″ x 5-1/4″
- Basic White cardstock (embossed): 3-1/2″ x 4-3/4″
- Basic White cardstock (sentiment): approximately 2″ x 2″
- Lovely Blossoms Designer Series Paper: 2-1/2″ x 4″
Fabulous Join Offer – February 3 – March 2nd
When you sign up to be a demonstrator beginning February 3, 2026, you will get a FREE Stampin’ Positioner!
What’s the Stampin’ Positioner?
It’s our new stamping alignment tool that makes stamping easier and more accurate. It allows you to stamp precisely aligned images, create repeating patterns and Two-Step Stampin’ images easily, and make multiple projects in minutes.
Stampin’ Positioner Grid Paper will also be available for but it isn’t available in the Starter Kit!
****If you’d like to see a flyer on this offer, click here.****
Join Offer Details
- New team members who purchase their Starter Kit February 3–March 2 will also receive our new Stampin’ Positioner.
- New demonstrators who submit their Independent Demonstrator Agreement (IDA) before February 3 or after March 2 will not be eligible for this offer.
- The Stampin’ Positioner is a $49 value!
When I purchased the Starter Kit in 2009, it was solely for the discount. I loved the products and would go through the catalog numerous times from cover to cover every chance I got! The Starter Kit is completely customizable and you can choose what you want. When I joined, the kit was preselected by Stampin’ Up! so I love that you can pick what you want now. I love being a Stampin’ Up! demonstrator!
The Stampin’ Up! Starter Kit is for someone who loves purchasing Stampin’ Up! products and also loves getting a 20%+ discount! But, it’s also for the person who would like to start their own business and share their love of paper crafting. You never have to sell or have a party (unless you want to). See below for frequently asked questions about the Starter Kit.
Commonly Asked Questions
- If I purchase the Starter Kit, do I have to sell Stampin’ Up! products to my family and friends? No, you are under NO obligation to sell. You can be your only customer. Of course once your friends see the cute cards you’re making, they’ll want to buy their stamping supplies from you.
- Will I receive a discount on any products I buy? Yes!! This is the best part! You’ll receive at least a 20% discount on all your purchases.
- Do I have to buy/sell a certain amount of product? The quarterly minimum is $300 in product (which is only $240 after your discount!) that can be from personal orders, online orders or ones from family and friends. The quarters are January – March, April – June, July – September, October – December. Once you join, your quarterly minimum begins during your first FULL quarter.
- What if I can’t make the quarterly minimum? You’ll simply be dropped. No one will hassle you. No one will bother you. It truly is risk free to purchase the Starter Kit!
Are there other perks to purchasing the Starter Kit? Yes! Here are just a few:
- The Starter Kit ships FREE!
- Approximately a month before new products are released, you’ll be able to participate in a preorder and purchase brand new products ahead of the public
- Attend Stampin’ Up! events like OnStage
- Personal purchases of $20 are eligible to receive Stampin’ Rewards. Yes, demonstrators can also receive Stampin’ Rewards!
- Complimentary copy of each current catalog from Stampin’ Up! Once the preorder begins, a complimentary copy will be included in your order. If no preorder is made, the catalog will be included in the first order placed during the catalog sales period.
- Free access to the tutorials I give to my customers!
- You wouldn’t have to have your quarterly minimum until July 2026!
If you have more questions, please reach out to me sending an email to me (you can send me an email on the sidebar of my blog).
Bonus Days – Ends on Monday, February 2, 2026!

Here’s how it works:
- Between January 6th and February 2nd when you spend $50, you will earn a $5.00 coupon!
- There’s no limit to how many coupons you can earn!
- You will be able to redeem your coupons February 3-28, 2026
- All coupon codes will be emailed right after a qualifying purchase has been made. Customers must have a customer account with a valid email address to earn coupons when they shop.
- If you earn multiple codes from a single order, you will receive one email with multiple codes. If you earn multiple codes from multiple orders, you will receive separate emails for each code earned. Save these codes! Stampin’ Up! cannot look codes up!
- All order types qualify for this promotion. Phone and email orders still require an email address.
- Orders started before the promotion begins will not count toward earning coupon codes. You must add items to your cart and complete your purchase during the earning period.
- It’s an ideal time to stock up on the Basics: cardstock, envelopes, etc!
If you’d like a flyer with all this information, click here.
Place an order here!
If you don’t see my picture, click again, please
January Product of the Month
Each month, a single product of the month will be released. These items won’t be in any catalog or on the Online Exclusives page on the Stampin’ Up! website. Stock is limited, so once a Product of the Month sells out, it’s gone for good. Make sure if you like the Product of the Month, to snag your Product of the Month early!
Product of the Month Details
- You must have a Stampin’ Up online account to participate.
- Add the Product of the Month after your cart reaches $75. You can purchase the Product of the Month for just $5! The cart must be $75 (after Stampin’ Rewards).
- Limit 1 per Stampin’ Up! account.
- You must add the Fabulous Sayings to your cart after you reach $75: #167972
Click here to see the flyer with all the important information.
This is the Product of the Month for January. Click the graphic below to see if you want to get this for only $5!

Online Exclusives – January 2026
Click the graphic below to access the January Online Exclusives Product List! Stampin’ Up! has made a printable flyer and they’ve made it much easier to shop the new products! You won’t find Online Exclusives in any catalog, they’ll be listed in the Online Store. Click here to shop Online Exclusives. Click here to download the January 2025 Online Exclusive Product List.
Last Chance Products

Click here to go straight to the Last Chance Products page on the Stampin’ Up! site! Some products are discounted! More products were added on December 2, 2025!
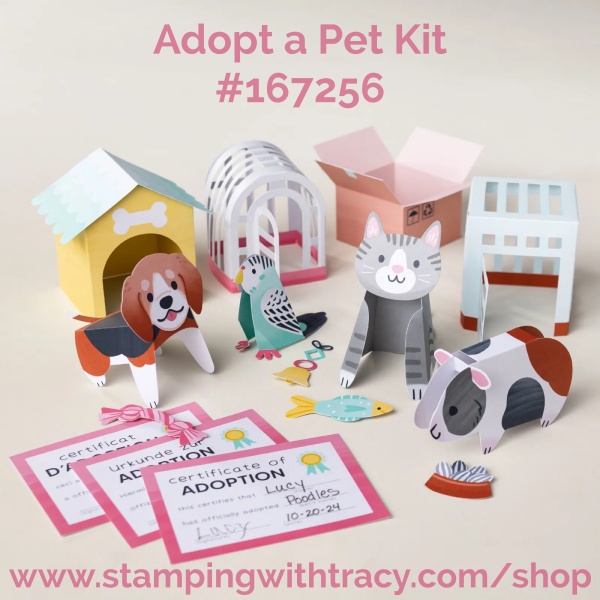
Stampin’ Up! Kits – We Have Three New Kits
Click the graphics for more information about the kits.
Paper Pumpkin for February
An additional coordinating add-on is available but only for Paper Pumpkin subscribers. Click the image below for more information. The dies below coordinates with the upcoming February and March Paper Pumpkin Kits!
Thanks for stopping by today! Enjoy your day!
by Tracy | Jan 2, 2026 | Hello Card
I have another card for you using brand new products which will be available on January 6, 2026! I used the Sweet Bugs Bundle #167002 (will be available on January 6, 2026), Cute as a Bug Designer Series Paper #166994 (will be available on January 6, 2026), Hearts of Love 3D Embossing Folder #167071 (will be available on January 6, 2026), and Ladybug Garden Epoxy Shapes #167005 (will be available on January 6, 2026).

I started with a piece of Old Olive cardstock for the base of my card. Then, I placed another piece of Old Olive in the Hearts of Love 3D Embossing Folder (will be available on January 6, 2026) using my Stampin’ Cut & Emboss Machine.

I used the Sweet Bugs Dies (will be available on January 6, 2026) to cut the shapes out of Cute as a Bug Designer Series Paper (will be available on January 6, 2026) and then I set them aside.

I cut a piece of Cute as a Bug Designer Series Paper (will be available on January 6, 2026) and adhered it to embossed Old Olive cardstock. Then, I adhered the embossed cardstock to the front of the card.
I cut a “square” out of Old Olive cardstock and another “square” out of Very Vanilla cardstock. I stamped the sentiment onto the Very Vanilla cardstock (in the lower right corner) using the Sweet Bugs Stamp Set in Old Olive ink. I adhered the Very Vanilla cardstock to the Old Olive cardstock, added Stampin’ Dimensionals to the back and adhered it to the front of the card.
I added the ladybug and the bee to the front of the card using Stampin’ Dimensionals.

To complete my card, I added a piece of Very Vanilla cardstock to the inside of the card and one ladybug and four clear dots using the Ladybug Garden Epoxy Shapes (will be available on January 6, 2026).
Here’s how I get perfect die cuts every time (or almost every time). I cut the die out and then I perfectly line up the die cut under the paper. I use Scotch Removable Tape or you could use Post It Notes (3″ x 3″ is the ideal size) to adhere the tape or post it notes to the clear plate.

Supply List
Below you’ll find all the Stampin’ Up! supplies I used for today’s card. If you need any stamping supplies, I’d love to be your demonstrator! You can place an order by clicking any of the images below to go to my Stampin’ Up! online store. The Specialty Plate is used with 3D Embossing Folders and Hybrid Embossing Folders.
I also used: Sweet Bugs Bundle #167002, Cute as a Bug Designer Series Paper #166994, Hearts of Love 3D Embossing Folder #167071, and Ladybug Garden Epoxy Shapes #167005. All of these products will be available on January 6, 2026!
Measurements
- Old Olive cardstock: 5-1/2″ x 8-1/2″
- Old Olive cardstock (embossed): 5-1/4″ x 4″
- Old Olive cardstock (“square”): 3″ x 3-1/4″
- Very Vanilla cardstock (“square”): 2-3/4″ x 3″
- Very Vanilla cardstock (inside card): 5-1/4″ x 4″
- Cute as a Bug Designer Series Paper: 1-1/4″ x 4
- Cute as a Bug Designer Series Paper: die cuts
Bonus Days Are Coming – January 6th!

Here’s how it works:
- Between January 6th and February 2nd when you spend $50, you will earn a $5.00 coupon!
- There’s no limit to how many coupons you can earn!
- You will be able to redeem your coupons February 3-28, 2026
- All coupon codes will be emailed right after a qualifying purchase has been made. Customers must have a customer account with a valid email address to earn coupons when they shop.
- If you earn multiple codes from a single order, you will receive one email with multiple codes. If you earn multiple codes from multiple orders, you will receive separate emails for each code earned. Save these codes! Stampin’ Up! cannot look codes up!
- All order types qualify for this promotion. Phone and email orders still require an email address.
- Orders started before the promotion begins will not count toward earning coupon codes. You must add items to your cart and complete your purchase during the earning period.
- It’s an ideal time to stock up on the Basics: cardstock, envelopes, etc!
If you’d like a flyer with all this information, click here.
January Product of the Month
The January Product of the Month will be released on January 6, 2026! Each month, a single product of the month will be released. These items won’t be in any catalog or on the Online Exclusives page on the Stampin’ Up! website. Stock is limited, so once a Product of the Month sells out, it’s gone for good. Make sure if you like the Product of the Month, to snag your Product of the Month early!
Product of the Month Details
- You must have a Stampin’ Up online account to participate.
- Add the Product of the Month after your cart reaches $75. You can purchase the Product of the Month for just $5! The cart must be $75 (after Stampin’ Rewards).
- Limit 1 per Stampin’ Up! account.
Click here to see the flyer with all the important information.
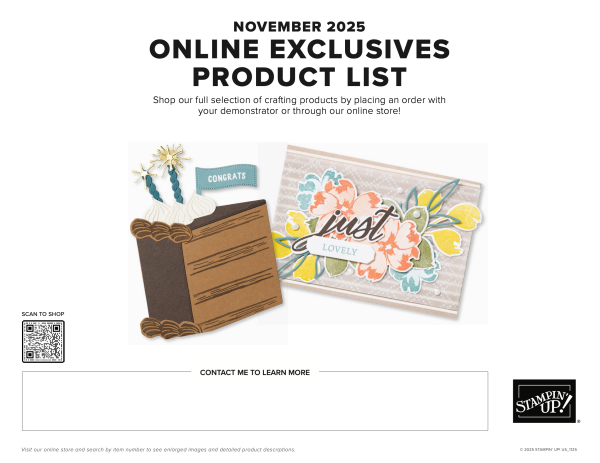
Online Exclusives – November 2025
Click the graphic below to access the November 2025 Online Exclusives Product List! Stampin’ Up! has made a printable flyer and they’ve made it much easier to shop the new products! You won’t find Online Exclusives in any catalog, they’ll be listed in the Online Store. Click here to shop Online Exclusives.
Last Chance Products
Click here to go straight to the Last Chance Products page on the Stampin’ Up! site! Some products are discounted! More products were added on December 2, 2025!
Stampin’ Up! Kits – We Have Two New Kits!
Click the graphics below for information about the kits!


Paper Pumpkin for January
An additional coordinating add-on is available but only for Paper Pumpkin subscribers. Click the image below for more information. The dies below coordinates with the upcoming January, February and March Paper Pumpkin kits!
Thanks for stopping by today! Enjoy your weekend!
by Tracy | Aug 27, 2025 | Fun Fold Card, Hello Card
I have a sneak peek of two new products coming out on September 3, 2025! The new products are:
- Gathering Together Specialty Designer Series Paper #165969. This Designer Series Paper will be an Online Exclusive.
- Branching Out Stamp Set #165771. This product can be found in our September – December 2025 Mini Catalog.
The other products I used were Sentimental Framing Dies and Low Profile Dots. Both of these products are Online Exclusives.
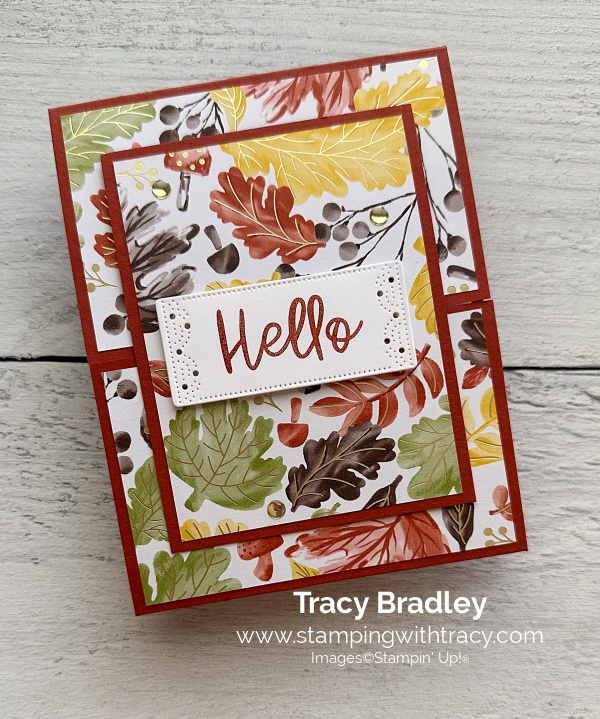

I started with a piece of Cajun Craze cardstock that I scored in two places (you can find the measurements I used below the Supply List). I added Gathering Together Specialty Designer Series Paper on both of the front flaps.
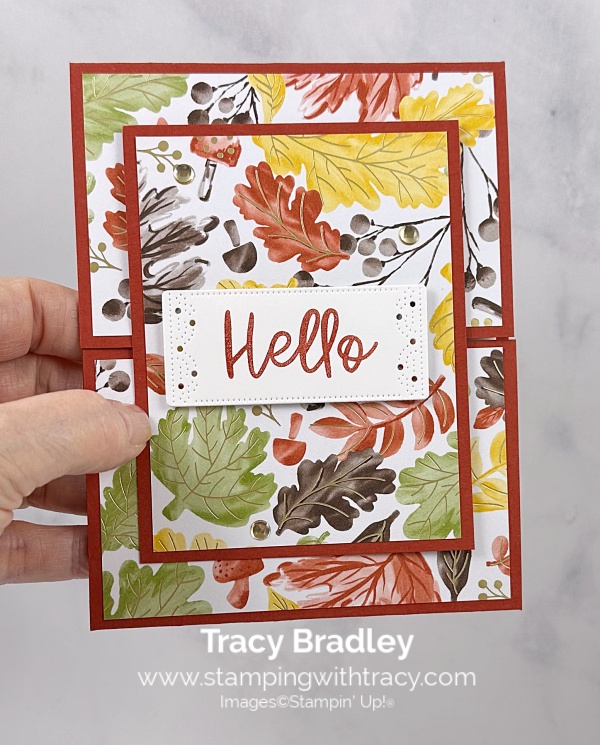

Then, I cut another piece of Cajun Craze cardstock and layered it with another piece of Gathering Together Specialty Designer Series Paper. I added Stampin’ Dimensionals at the top and adhered it to the top flap.
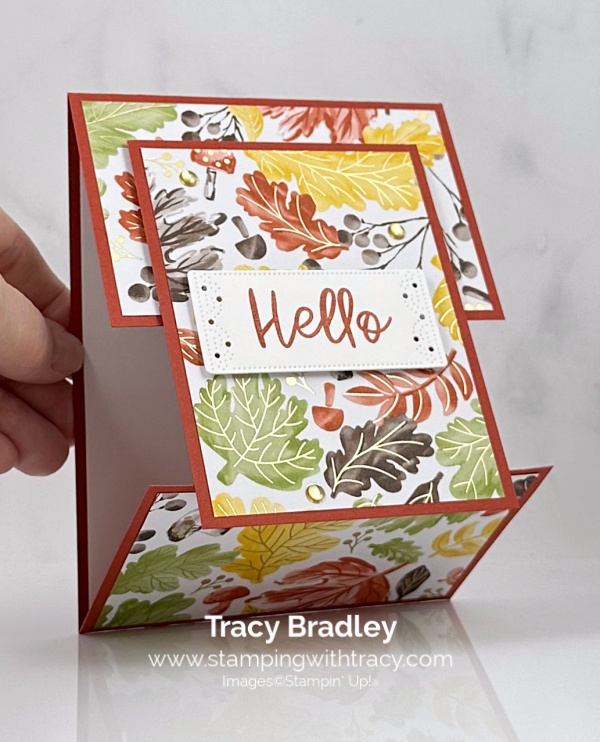
I stamped the sentiment onto a piece of Basic White cardstock using the Branching Out Stamp Set (this stamp set will be available on September 3, 2025). I stamped the sentiment using Cajun Craze ink. I cut it out using the Sentimental Framing Dies, added Stampin’ Dimensionals to the back and adhered it to the front of the card.
To complete my card, I added three gold Low Profile Dots on the Designer Series Paper (the leaves have gold on them) and added a piece of Basic White cardstock to the inside of the card.
Supply List
Below you’ll find all the Stampin’ Up! supplies I used for today’s card. If you need any stamping supplies, I’d love to be your demonstrator! You can place an order by clicking any of the images below to go to my Stampin’ Up! online store.
I also used these products below that will be released on September 3, 2025:
- Gathering Together Specialty Designer Series Paper #165969. This Designer Series Paper will be an Online Exclusive.
- Branching Out Stamp Set #165771. This product can be found in our September – December 2025 Mini Catalog.
Bundle Alert: The Sentimental Framing Bundle is available with a 10% discount rather than buying the products separately.

Measurements
- Cajun Craze cardstock: 11″ x 4-1/4″ scored at 2-3/4″ & 8-1/4″
- Cajun Craze cardstock: 3-1/4″ x 4-1/4″
- Gathering Together Specialty Designer Series Paper: (2) 4″ x 2-1/2″
- Gathering Together Specialty Designer Series Paper: 3″ x 4″
- Basic White cardstock (inside card): 4″ x 5-1/4″
- Basic White cardstock (sentiment): 2-3/4″ x 1-1/2″
In Color Sale – Ends This Sunday

Promotion Details:
- Sale includes 2025-2027 select inks, cardstock, Designer Series Paper, embellishments, and other products that include these new In Colors. The select products will be 15% off!
- Some products are excluded from the sale, including the Month by Month Album Retreat 2025 kit (167338).
- Products are only available while supplies last!
- This sale will end on August 31, 2025.
- Shop the sale here!
Sale-a-Bration
We bid a fond farewell to Sale-a-Bration but something is in the works to replace it!
Stampin’ Up! will be offering some of the 2025 Sale-A-Bration items as Last Chance Products!!
- Available Sale-A-Bration items will be sold in the Last Chance Products category and will show a discounted price of the retail value of the item.
- As with all Last Chance products, once the inventory is gone the product will be removed from the online store.
- This sale ends when supplies run out or by September 4, 2025.
Click here to go straight to the Last Chance Products page on the Stampin’ Up! site! Some products are discounted! Many items have been added!
Three New Stampin’ Up! Kits
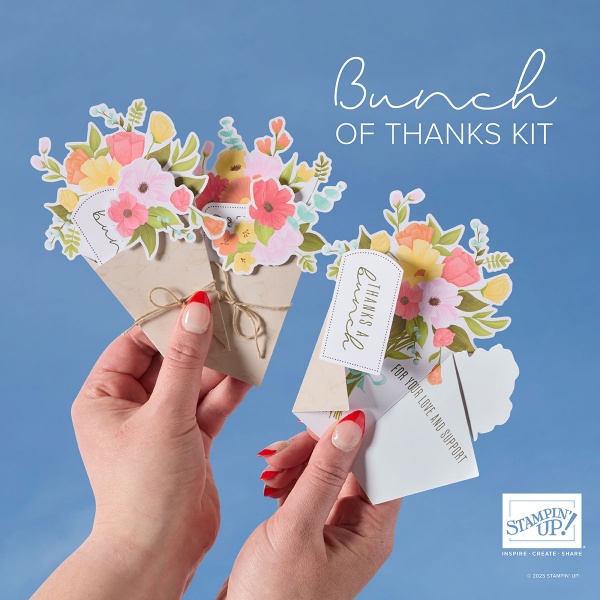
Click each graphic below for more information about the kit. These kits can be found in the Online Exclusives part of the Stampin’ Up! website. The Bunch of Thanks Kit is on sale the month of August!
Fall For Toile Paper Pumpkin Kit – Last Day to Order: September 10th
You can now order subscriptions and manage your Paper Pumpkin subscription on the Stampin’ Up! website! You can cancel your Paper Pumpkin subscription at any time. If you want to skip the next kit, you can do that! You also receive Stampin’ Rewards when you order a single kit or purchase a 3-month, 6-month or 12-month subscription to Paper Pumpkin. If you’d like to subscribe, please click the graphic below.

An additional coordinating add-on is available but only for Paper Pumpkin subscribers. Click the image below for more information.

Thanks for stopping by today!
by Tracy | Jun 4, 2025 | Fun Fold Card, Hello Card
The card I’m sharing with you today was made using the Beautiful Butterflies Bundle (an Online Exclusive), Beautiful Bokeh Designer Series Paper, Textured Notes Dies (an Online Exclusive) and Two-Tone Sparkle Gems (an Online Exclusive).
If my links don’t work, please click them again!


I started with a piece of Balmy Blue cardstock for the base of my card (you can find all the measurements I used below the Supply List). Then, I embossed two pieces of Basic White cardstock using the Beautiful Butterflies Hybrid Embossing and my Stampin’ Cut & Emboss Machine. I adhered one to the top panel and the other inside the card.
Then, I cut two pieces of Balmy Blue cardstock using the second largest die in the Textured Notes Dies. Then, I used the third largest die and cut a piece out of Beautiful Bokeh Designer Series Paper and one out of Basic White cardstock. I adhered both to the Balmy Blue pieces (one will go inside the card and one will go in the front).


I adhered the Balmy Blue & Basic White cardstock piece to the inside (you can see the picture below) and the other to the front of the card, making sure they are on top of each other (I added two rows of Stampin’ Dimensionals to the front piece). I cut a butterfly out of Beautiful Bokeh Designer Series Paper and adhered a tiny strip of glue on the back and adhered it to the front of the card.
I stamped the sentiment in Balmy Blue ink using the Beautiful Butterflies stamp set onto Basic White cardstock. Then, I cut it out using the Textured Notes Dies. I added Stampin’ Dimensionals to the back and adhered it below the butterfly.
To complete my card, I added a Two-Tone Sparkle Gem to the middle of the butterfly and added two more at each end of the sentiment.


Supply List
Below you’ll find all the Stampin’ Up! supplies I used for today’s card. If you need any stamping supplies, I’d love to be your demonstrator! You can place an order by clicking any of the images below to go to my Stampin’ Up! online store.
The Specialty Plate is used with 3D Embossing Folders and Hybrid Embossing Folders
Measurements
- Balmy Blue cardstock: 4-1/4″ x 8 score @ 2-1/2″
- Balmy Blue cardstock: (2) approx. 5-1/4″ x 3-3/4″
- Beautiful Bokeh Designer Series Paper: approx. 3-1/4″ x 4-3/4″
- Beautiful Bokeh Designer Series Paper (butterfly): approx. 4″ x 3-1/4″
- Basic White cardstock (top piece): 4″ x 2-1/4″
- Basic White cardstock (inside card): 4″ x 5-1/4″
- Basic White cardstock (on top of Balmy Blue cardstock): approx. 3-1/4″ x 4-3/4″
- Basic White cardstock (sentiment): approx. 2-1/2″ x 1″
Virtual Album Retreat
Calling all scrapbookers! Simply purchase the Month by Month Album Retreat 2025 Kit, and you can attend the event Stampin’ Up! is putting on. This item is only while supplies last!
- Who: Crafters who love to scrapbook!
- When: July 16–18, 2025, 2:00–10:30 p.m. (MT)
- Where: Private Facebook Group
- Registration: There is no registration for this event! By purchasing the Month by Month Album Retreat 2025 Kit, you’ll get access to an exclusive Facebook group where the live event will stream.
- Price of Month by Month Album Retreat 2025 kit: $250
- Language of Event: This event will be presented in English only.
- After the Event: You can access the recorded event videos on the Virtual Album Retreat Facebook group page.


All Suites & Suite Products, Buy One, Get One 50% Off

- All available suites and suite products from the 2025–2026 Annual Catalog and Online Exclusives are buy one, get one 50% off.
- When you shop the sale, the 50% off discount will apply to the lower-priced item (for example, if you buy a suite collection and a stamp set from a suite, the suite would be full price, and the stamp set would be 50% off).
- Suite collections are available if all items are in stock; if all items are not in stock, you can still shop the available suite products.
- You don’t have to buy a suite and suite products all from the same suite collection for the discount to apply. You can buy any suite products from any suite.
- The discount will appear in your cart once you’ve added two items within the sale parameters to your cart.
- Products are available only while supplies last.
Two New Stampin’ Up! Kits
These kits can be found in Online Exclusives. Click the graphic for more information about each kit.


Last Chance Products
Click here to go straight to the Last Chance Products page on the Stampin’ Up! site!
Full of Charm Paper Pumpkin Kit
You can now order subscriptions and manage your Paper Pumpkin subscription on the Stampin’ Up! website! You can cancel your Paper Pumpkin subscription at any time. If you want to skip the next kit, you can do that! You also receive Stampin’ Rewards when you order a single kit or purchase a 3-month, 6-month or 12-month subscription to Paper Pumpkin. If you’d like to subscribe, please click the graphic below.

An additional coordinating add-on is available but only for Paper Pumpkin subscribers. Click the image below for more information.

Thanks for stopping by today!