

Yesterday I posted the Gate Fold Card I made using the new DSP Naturally Eclectic. I made the card specifically so that I could put a gift card inside and I gave it to a male. I’ll admit that most of the cards I make are usually given to a women so I had to go through my stash of paper to pick a sheet of paper that wasn’t too girlie.
I did promise that I’d have a picture tutorial and I’m sorry that I’m posting it late today. My husband and I went away for a few days, just the two of us, and I wasn’t able to get this done once we got home. Fun can be exhausting!
I really think you’ll enjoy making this card. If you give it a try, I’d LOVE it if you’d email me a picture! Let’s get started!
Start with a piece of 12″ x 12″ DSP (I’m using Naturally Eclectic Designer Series Paper). Cut it down to 10-5/8″ x 10-5/8″. Save the strips that you’ll have after trimming it. One will be for the belly band and the other can go on the inside of the card.
Fold your paper, corner to corner, as shown below. Use the bone folder to get a nice crease. I won’t say it on each step, but do this for every fold you make.

Open it up and bring the other two corners together.

Get out your trimmer and place the fold line on the 5″ mark and score.

Open it up and fold it in the other direction and repeat this step again. You’ll see score lines in the places I’ve indicated.

Open your paper and fold on the score lines as indicated below.
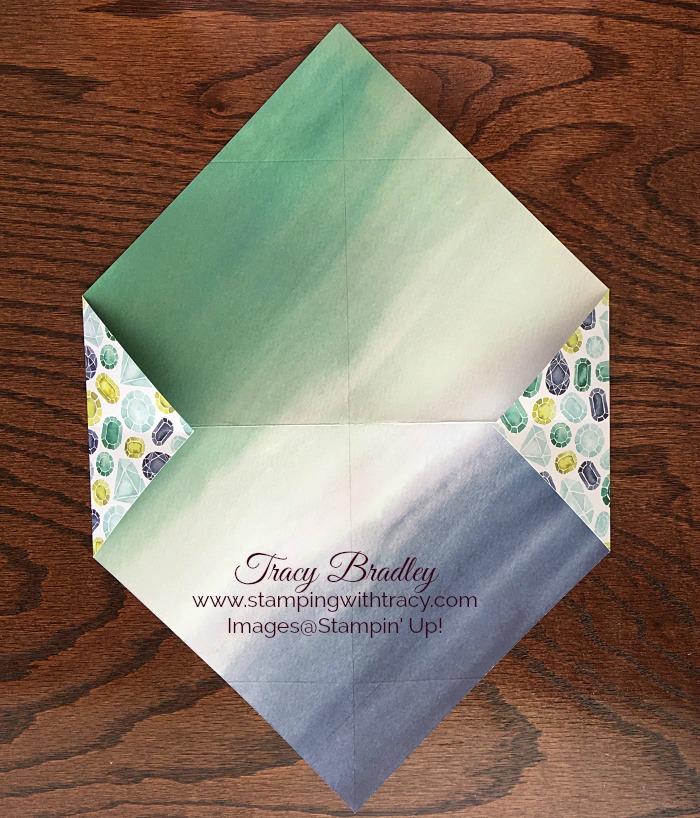
Turn your paper over. You can’t see it in the picture, but you’ll have a score line right down the center.

Bring both sides into the middle of the paper where the fold line is.

Here’s how it will look with both sides folded in.

Take both flaps at the end and just fold them back.

It will now look like this.

Now bring the two ends up to meet in the middle. You’ll be folding on a score line so it should be easy!

And you’re done! That was pretty easy, wasn’t it??

Here are the measurements and colors I used for the inside of my card yesterday. This is where you can write a note to the recipient.
Night of Navy cardstock for inside of card: 4-3/4″ x 4-3/4″
Whisper White cardstock for inside of card: 4-1/2″ x 4-1/2″‘
Below is a picture of the belly band on yesterday’s card. I used the Layering Squares Framelits to cut out Emerald Envy and Night of Navy. I used the stamp set Happy Birthday Gorgeous for my balloons and embossed them with white embossing powder. They were punched out with the Balloon Bouquet Punch. The word congratulations is also from the Happy Birthday Gorgeous stamp set and was punched out with the Classic Label Punch.
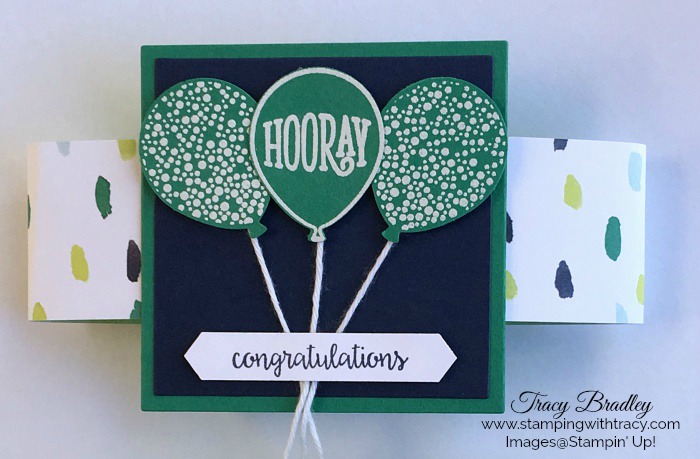
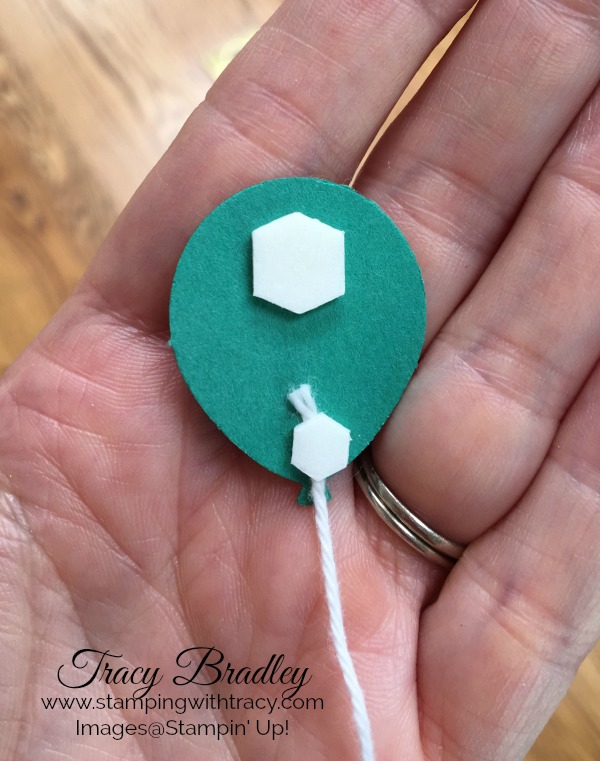
I used a Mini Stampin’ Dimensional to attach the Baker’s Twine to the balloon.
Inside the card I have another Congratulations. This banner comes from the Welcome Home Framelits. I was shocked how huge it was but it worked perfectly for my card. I used the Congratulations from the stamp set Home Life (these two products are bundled together for a 10% discount – see it in the Stamping Supplies below).

To attach it to my card, I just placed dimensional on the upper part of the banner.

I hope you’ll give this fancy fold card a try!
Stamping Supplies – You’ll find all the products I used to create my card listed below. If you’d like to order any of them, just click the pictures and you’ll be taken to my Stampin’ Up! online store!
|
|
|
||
|
|
|
|
|
|
|
|||
|
|
|
||
|
|
|
||
|
|
|


