
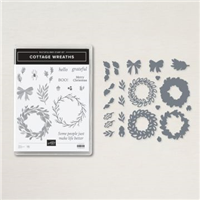
Today I have one more card using the Cottage Wreaths Bundle and a trick for using the stamps and dies so they line up easily. This bundle is on the low inventory list so if you’ve been thinking about it, you’ll want to get it before it’s unavailable. It will return but I have no idea how long that will take.
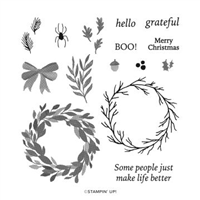
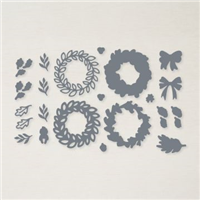
The Cottage Wreaths Bundle includes the Cottage Wreaths stamp set and the Country Wreaths Dies.


I started with a piece of Real Red cardstock and then added a layer of Painted Christmas Designer Series Paper. This paper was released last year at this time and was brought back for the new catalog. I love the designs in this paper so I was happy that it made a return!
Next, I added a layer of Garden Green cardstock and Basic White cardstock. I used the Stylish Shapes Dies to cut the Basic White square and then ran it through the Stampin’ Cut & Emboss Machine using one of the Wintry 3D Embossing Folders. I added Stampin’ Dimensionals to the back and adhered it to the front of the card.


I used Garden Green ink to stamp the wreath and here’s a tip for using the stamps and dies. Inside the case, you’ll find a notch beside each wreath and a notch on the die itself for easy alignment. See the graphics below for more explanation.


I cut a circle out of Basic White cardstock using the Layering Circles Dies (a little bit smaller than the wreath). I placed it under the wreath before I glued it so I could stamp the sentiment exactly where I wanted it. After stamping the sentiment using the Cottage Wreaths stamp set and Real Red ink, I glued the wreath to the circle, added Stampin’ Dimensionals to the back and adhered it to the square.


I used the beautiful Real Red & White Glimmer Paper and the Country Wreaths Dies to cut a bow and adhered it to the wreath using Multipurpose Glue. To finish my card, I added five Red Rhinestone Basic Jewels to the wreath.

Supply List
Below you’ll find all the Stampin’ Up! supplies I used for today’s card. If you need any stamping supplies, I’d love to be your demonstrator! You can place an order by clicking any of the images below to go to my Stampin’ Up! online store.


Measurements
- Real Red cardstock: 11″ x 4-1/4″ score at 5-1/2″
- Garden Green cardstock: 3″ x 3″
- Basic White cardstock (inside): 5-1/4″ x 4″
- Basic White cardstock (stitched square): approx 3-1/4″ x 3-1/4″
- Basic White cardstock (wreath): approx. 3″ x 3″
- Painted Christmas Designer Series Paper: 5-1/5″ x 4″
- Real Red Glimmer Paper (bow): scrap
Joyful Flurry Card Sampler

Place a minimum $50 order (before tax/shipping) at my Stampin’ Up! Online Store using my special host code 9NND7MKH and I’ll send you my Joyful Flurry Card Sampler.
You’ll receive six card kits (two cards each of three different designs) and everything will be cut, scored, and die cut for you! You’ll quickly have six cards ready to mail or give to someone special. For more details and the supplies you’ll need, please click HERE.
Don’t forget to use the host code when placing your order so I’ll know you want this sampler. When you use the host code, it allows me to continue to offer my Samplers for the low cost of free! EXCEPTION: if your order is $150 or more do not use the host code so you can receive Stampin’ Rewards directly from Stampin’ Up!. Contact me after you’ve placed the order to let me know that you’d like the Sampler – you only need to contact me if your order is $150 or more.
Orders must be placed by October 10, 2022 and the Card Samplers will be mailed approximately October 20, 2022.


Birthday Card Organizer Kit
Now available! Click here for more information!

Thanks for stopping by today!


A great Christmas card.
Thank you for sharing.
Thank you, Mary Katherine!
Love this card! You could make it for all occasions. Thanks so much for sharing your cards.
Thanks so much, Pat! It’s a fun bundle to create with!
Beautiful card and great tip for lining up the stamps and dies.
Thank you, Cheryl! So glad the tip was useful!