by Tracy | Jun 6, 2025 | Birthday Card, Special Day
The card I’m sharing with you today was made using the Beautiful Butterflies Bundle (an Online Exclusive), Celebratory Sips Designer Series Paper (an Online Exclusive), Textured Notes Dies (an Online Exclusive), Glass & Gardens Embossing Folders (an Online Exclusive) and Adhesive-Backed Sparkle Gems (an Online Exclusive – these on the Last Chance List and are on sale). You can see another version of this card, here!
If the links don’t work, please try again!


I started with a piece of Blackberry Bliss cardstock for the base of my card. Then I embossed a piece of Blackberry Bliss cardstock using one of the Glass & Gardens Embossing Folders and my Stampin’ Cut & Emboss Machine. I adhered it to a piece of Basic White cardstock. I cut a piece of Celebratory Sips Designer Series Paper and adhered it to the Basic White cardstock. Next, I adhered the Basic White cardstock to the front of the card.


I used the Textured Notes Dies to cut a rectangle out of Basic White cardstock. I stamped the sentiment on the rectangle using Blackberry Bliss ink and the Beautiful Butterflies stamp set. I added Stampin’ Dimensionals to the back and adhered it to the front of the card.


I cut two butterflies out of Celebratory Sips Designer Series Paper using the dies that come with the Beautiful Butterflies Hybrid Embossing Folder. I then attached them to the top of the sentiment using Mini Glue Dots.
I added two small Adhesive-Backed Sparkle Gem to each butterfly and three more to the card front (these gems are on the Last Chance List and they are sale)!
To complete my card, I added a piece of Basic White cardstock to the inside of the card.


Supply List
Below you’ll find all the Stampin’ Up! supplies I used for today’s card. If you need any stamping supplies, I’d love to be your demonstrator! You can place an order by clicking any of the images below to go to my Stampin’ Up! online store.
The Specialty Plate is used with 3D Embossing Folders and Hybrid Embossing Folders. I forgot to add it in, Specialty Plate #154711.
Measurements
- Blackberry Bliss cardstock: 4-1/4″ x 11″ score at 5-1/2″
- Blackberry Bliss cardstock: 2″ x 5″
- Celebratory Sips Designer Series Paper: 2″ x 3-3/4″
- Celebratory Sips Designer Series Paper (two butterflies): scraps
- Basic White cardstock: (2) 4″ x 5-1/4″
- Basic White cardstock (rectangle): approximately 4-1/8″ x 2-5/8″
Month by Month Album Retreat 2025 Kit
Calling all scrapbookers! Simply purchase the Month by Month Album Retreat 2025 Kit, and you can attend the event Stampin’ Up! is putting on. This item is only while supplies last!
- Who: Crafters who love to scrapbook!
- When: July 16–18, 2025, 2:00–10:30 p.m. (MT)
- Where: Private Facebook Group
- Registration: There is no registration for this event! By purchasing the Month by Month Album Retreat 2025 Kit, you’ll get access to an exclusive Facebook group where the live event will stream.
- Price of Month by Month Album Retreat 2025 kit: $250
- Language of Event: This event will be presented in English only.
- After the Event: You can access the recorded event videos on the Virtual Album Retreat Facebook group page.


All Suites & Suite Products, Buy One, Get One 50% Off

- All available suites and suite products from the 2025–2026 Annual Catalog and Online Exclusives are buy one, get one 50% off.
- When you shop the sale, the 50% off discount will apply to the lower-priced item (for example, if you buy a suite collection and a stamp set from a suite, the suite would be full price, and the stamp set would be 50% off).
- Suite collections are available if all items are in stock; if all items are not in stock, you can still shop the available suite products.
- You don’t have to buy a suite and suite products all from the same suite collection for the discount to apply. You can buy any suite products from any suite.
- The discount will appear in your cart once you’ve added two items within the sale parameters to your cart.
- Products are available only while supplies last.
Last Chance Products

Click here to go straight to the Last Chance Products page on the Stampin’ Up! site!
Two New Stampin’ Up! Kits
Click each graphic below for more information about the kit. These kits can be found in the Online Exclusives part of the Stampin’ Up! website.


Full of Charm Paper Pumpkin Kit
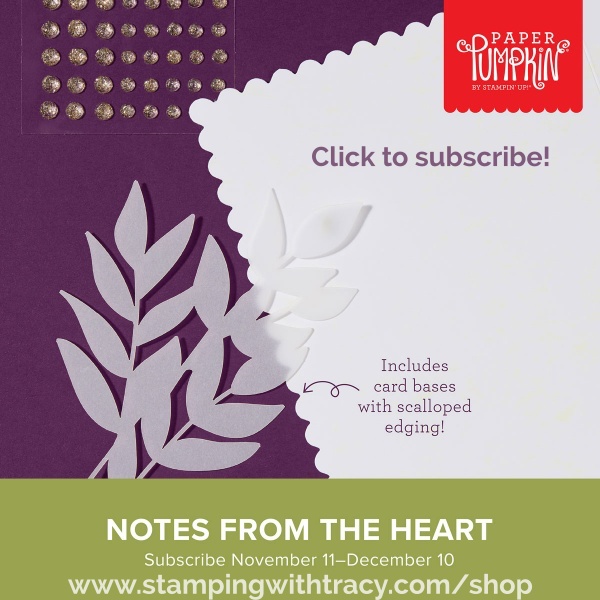
You can now order subscriptions and manage your Paper Pumpkin subscription on the Stampin’ Up! website! You can cancel your Paper Pumpkin subscription at any time. If you want to skip the next kit, you can do that! You also receive Stampin’ Rewards when you order a single kit or purchase a 3-month, 6-month or 12-month subscription to Paper Pumpkin. If you’d like to subscribe, please click the graphic below.

An additional coordinating add-on is available but only for Paper Pumpkin subscribers. Click the image below for more information.

Thanks for stopping by today! Enjoy your weekend!
by Tracy | Apr 28, 2025 | Thank You Card
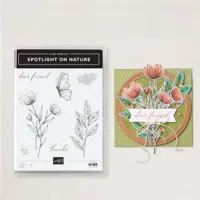
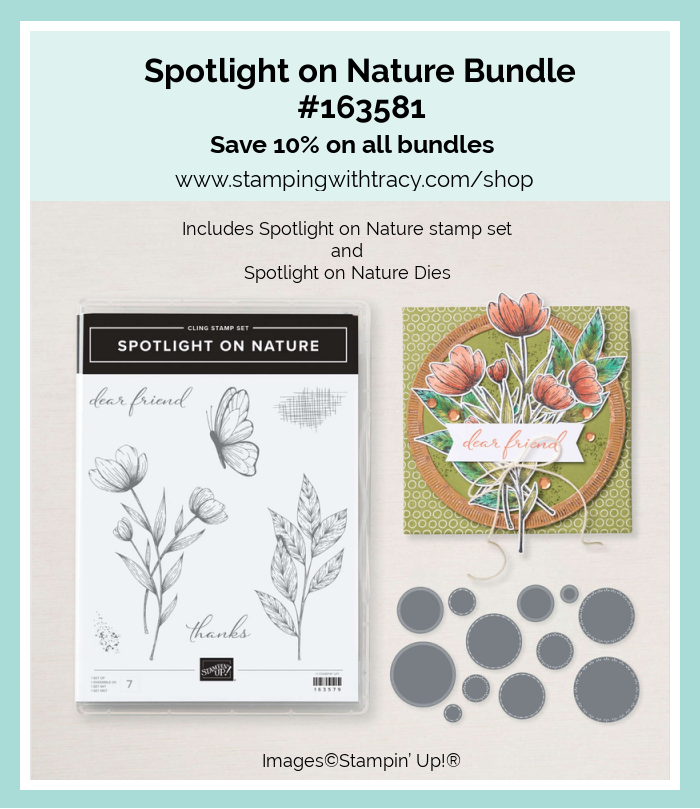
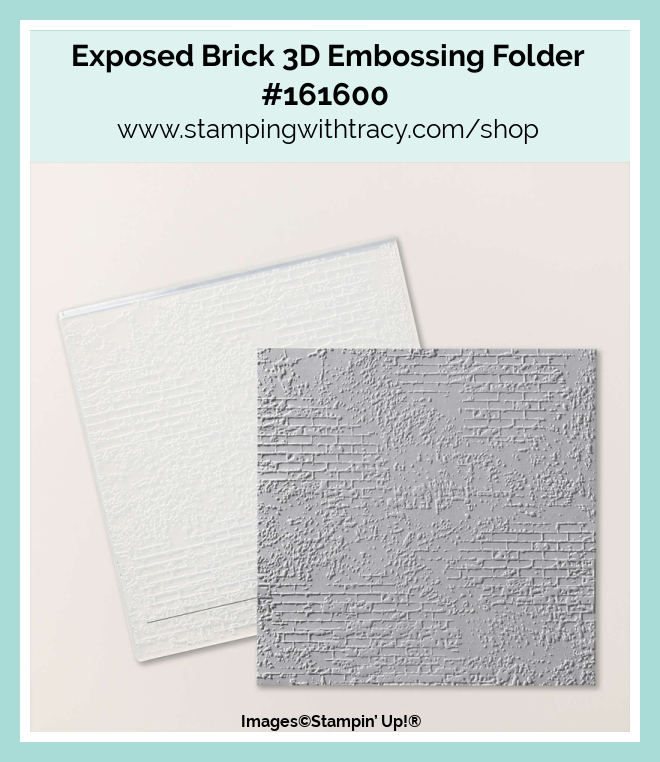
I’m sharing three cards with you today and one has a new product that will available for purchase on May 6th, Florals in Bloom Designer Series Paper #165175. The products I used on all the cards are the Spotlight on Nature Bundle and the Exposed Brick 3D Embossing Folder.
For this first one I used Florals in Bloom Designer Series Paper (available May 6. 2025) and Adhesive-Backed Sparkle Gems.
My links still aren’t working correctly. If the link doesn’t bring you to the product, please click again and possibly a third time. I have to call Stampin’ Up! about my links not working correctly. All of the products I’ve used, with the exception of the Florals in Bloom Designer Series Paper, are current so it shouldn’t say, “Out With the Old, In With the New”. I know it’s a pain to click on the links two or three times.

I started with a piece of Summer Splash cardstock for the base of my card. Then, I dry embossed a piece of Basic White cardstock using the Exposed Brick 3D Embossing Folder and my Stampin’ Cut & Emboss Machine. I adhered the embossed Basic White cardstock to the the base of my card.

I cut two smaller pieces of Summer Splash cardstock and layered them with Florals in Bloom Designer Series Paper (available May 6th). I used Multipurpose Glue to adhere the vertical one and added Stampin’ Dimensionals to the horizontal one and adhered it to the front of the card.


I stamped the sentiment in Summer Splash ink using the Spotlight on Nature stamp set. Then, I cut it out using the Spotlight on Nature dies. I added Stampin’ Dimensionals to the back and adhered it to the front of the card.
To complete my card, I added three Adhesive-Backed Sparkle Gems to the front and added a piece of Basic White cardstock to the inside.
For these next two cards I used the exact same products but I used the Rainbow Adhesive-Backed Dots and Floral Delight Designer Series Paper.
I used Lemon Lolly cardstock for this first card, Garden Green ink and Lemon Lolly Rainbow Adhesive Backed Dots.


I used Pool Party cardstock for this last card, Pool Party ink and Pool Party Rainbow Adhesive Backed Dots.


Supply List
Below you’ll find all the Stampin’ Up! supplies I used for today’s card. If you need any stamping supplies, I’d love to be your demonstrator! You can place an order by clicking any of the images below to go to my Stampin’ Up! online store. The Specialty Plate is used with 3D Embossing Folders and Hybrid Embossing Folder.
I also used Florals in Bloom Designer Series Paper #165175 (available May 6, 2025).
Measurements
- Summer Splash, Pool Party or Lemon Lolly cardstock: 5-1/2″ x 8-1/2″ score at 4-1/4″
- Summer Splash, Pool Party or Lemon Lolly cardstock: (2) 2″ x 3-3/4″
- Florals in Bloom and Floral Delight Designer Series Paper: 1-3/4″ x 3-1/2″
- Florals in Bloom and Floral Delight Designer Series Paper: 3-1/2″ x 1-3/4″
- Basic White cardstock (sentiment): approximately 2″ x 2″
- Basic White cardstock (inside card): 5-1/4″ x 4″
The New Stampin’ Rewards Program

The New Stampin’ Rewards Program was rolled out on April 15th. You will receive 10% in rewards when your order is $20 or more but you have to opt in to get the rewards. The more you shop, the more you earn!
Last Chance Products
Click here to go straight to the Last Chance Products page on the Stampin’ Up! site!
Three New Stampin’ Up! Kits
Click each graphic below for more information about the kit.


Mountain Majesties Paper Pumpkin Kit
Did you know that Paper Pumpkin has moved to the Stampin’ Up! website? You can now order subscriptions and manage your subscription on the Stampin’ Up! website! If you’d like to subscribe, please click the graphic below.

An additional coordinating add-on is available but only for Paper Pumpkin subscribers. Click the image below for more information.
Thanks for stopping by today!
by Tracy | Mar 28, 2025 | Thank You Card
I will be placing my final order for catalogs on March 30th, this Sunday!

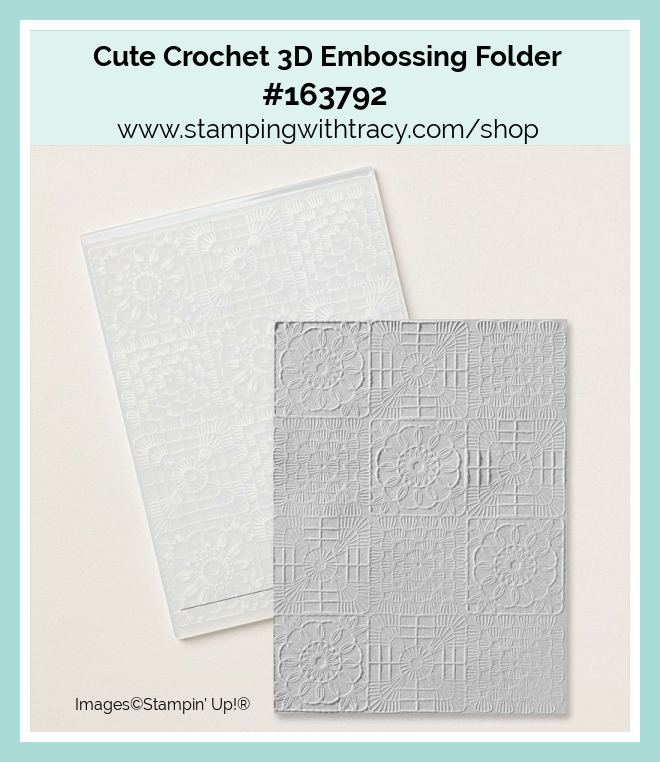
The card I’m sharing with you today was made using the Spotlight on Nature Bundle, Cute Crochet 3D Embossing Folder, and Adhesive Backed Sparkle Gems.

I started with a base of Granny Apple Green cardstock. Next, I embossed a piece of Basic White cardstock using the Cute Crochet 3D Embossing Folder and my Stampin’ Cut & Emboss Machine. Then, I adhered it to the front of the card. I also added a piece of Basic White cardstock to the inside of the card.

I cut a piece of Basic White cardstock using the Spotlight on Nature dies to cut a circle. Then, I stamped the flowers and sentiment onto the circle using Memento Ink and the Spotlight on Nature stamp set. I colored the flowers in using Granny Apple Green Stampin’ Blends and Calypso Coral Stampin’ Blends. When I was through coloring, I added Stampin’ Dimensionals to the back and adhered the circle to the front of the card.
To complete my card, I added three Adhesive-Backed Sparkle Gems to the front of the card.


Supply List
Below you’ll find all the Stampin’ Up! supplies I used for today’s card. If you need any stamping supplies, I’d love to be your demonstrator! You can place an order by clicking any of the images below to go to my Stampin’ Up! online store. The Specialty Plate is used with 3D Embossing Folders and Hybrid Embossing Folders.
Measurements
- Granny Apple Green cardstock:11” x 4-1/4” scored at 5-1/2” OR 8-1/2” x 5-1/2” scored at 4-1/4” the only difference is how the card opens
- Basic White cardstock (embossed and inside card): (2) 4″ x 5-1/4″
- Basic White cardstock (circle): approx. 4-1/4″ x 4-1/4″
Last Chance Products
Click here to go straight to the Last Chance Products page on the Stampin’ Up! site!
Two New Stampin’ Up! Kits
Click each graphic below for more information about the kit.


Inked Occasions Paper Pumpkin Kit
Did you know that Paper Pumpkin has moved to the Stampin’ Up! website? You can now order subscriptions and manage your subscription on the Stampin’ Up! website! If you’d like to subscribe, please click the graphic below.
If you have a current subscription to Paper Pumpkin, you will need to claim your subscription. You can follow written directions, here or you can watch a video, here.

An additional coordinating add-on is available but only for Paper Pumpkin subscribers. Click the image below for more information.
Thanks for stopping by today! Enjoy your weekend!
by Tracy | Nov 19, 2024 | Christmas Card
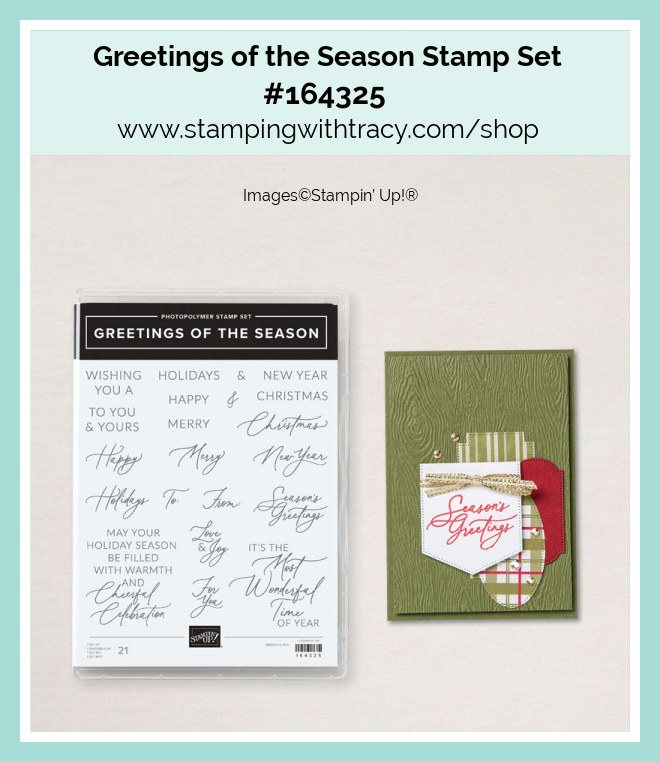
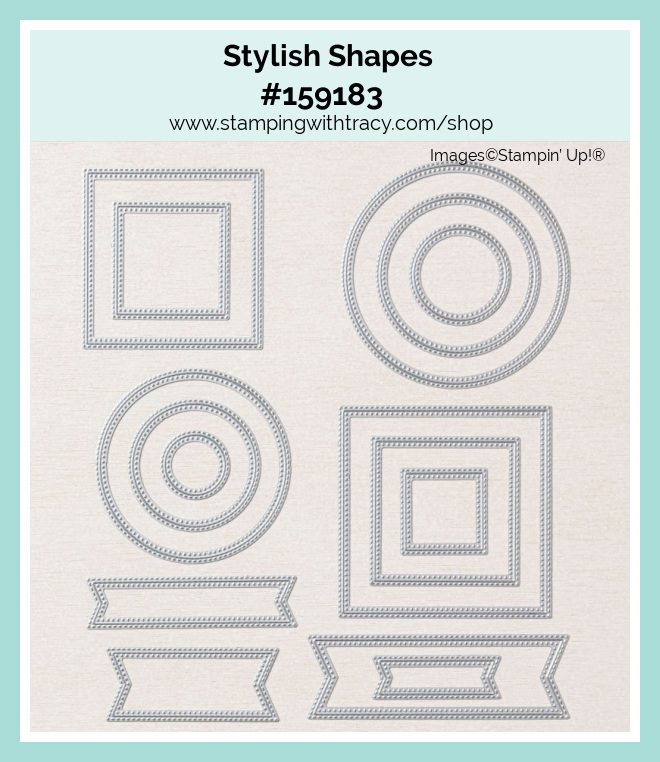
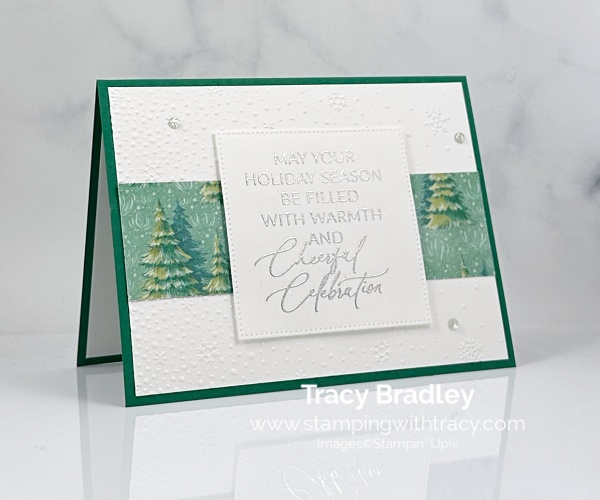
Today I’m sharing a card I made using Stampin’ Up! Sentimental Christmas Designer Series Paper, Greetings of the Season stamp set, Stylish Shapes Dies, Snowflake Sky 3D Embossing Folder (currently on the Low Inventory List). I also added some silver embossing powder to my sentiment to make it sparkle!
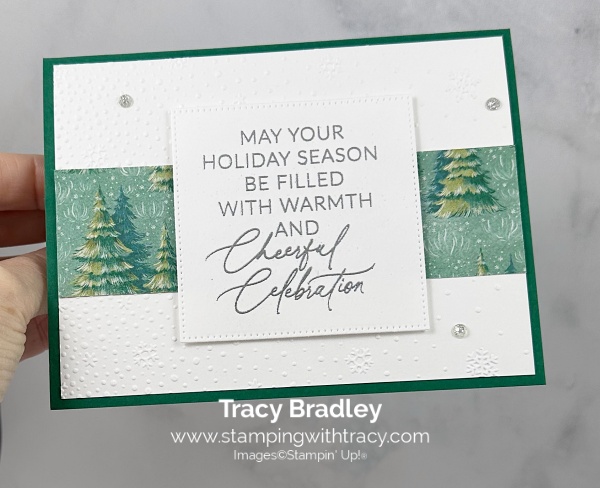


I started with a piece of Shaded Spruce for the base of my card. Then I embossed a piece of Basic White cardstock using the Snowflake Sky 3D Embossing Folder and my Stampin’ Cut & Emboss Machine. Next, I cut a piece of Sentimental Christmas Designer Series Paper (I like to cut this paper longer than I actually need and then trim it off; I will add the exact dimensions of the finished piece below the Supply List). I then adhered it to the embossed Basic White cardstock and then adhered it to the front of the card.
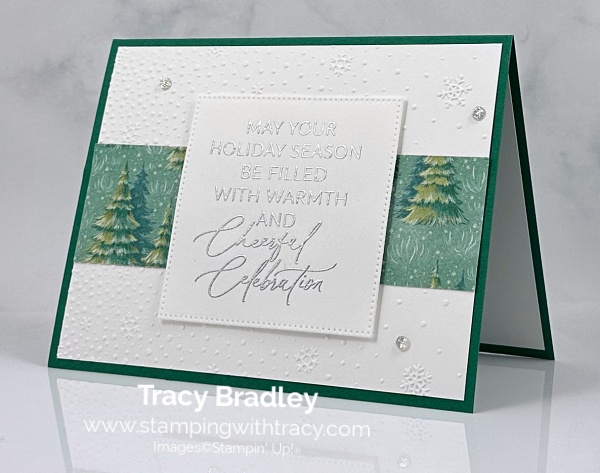
I stamped the sentiment onto Basic White cardstock using a Versamark ink pad, sprinkled my silver embossing powder over it and then heated it with my heat tool. I used the Stylish Shapes Dies to cut it out, added Stampin’ Dimensionals to the back (I like to use a lot of Dimensionals) and adhered it to the front of the card.
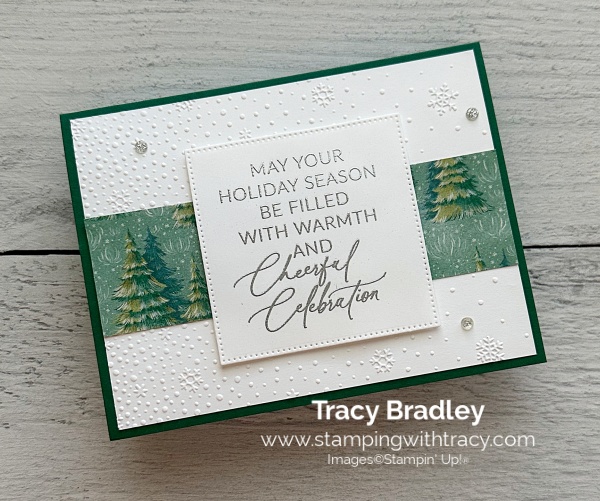
To complete my card, I added three Adhesive-Backed Sparkle Gems in silver, to the front and added a piece of Basic White cardstock to the inside of the card.
How to Heat Emboss
Prepare your cardstock by rubbing the Embossing Buddy (an anti-static pouch that can be found in the Embossing Additions Tool Kit) over the surface of the paper as it helps keep away stray particles of embossing powder. Stamp your sentiment or image using a Versamark pad. This is very sticky ink and your embossing powder will stick right to it. Sprinkle embossing powder over the stamped image and then shake off any excess. Before applying heat to your paper, heat the Heat Tool first so your paper won’t warp (about 10 seconds). Direct the heat over your image and watch as your image becomes shiny and beautiful!
Supply List
Below you’ll find all the Stampin’ Up! supplies I used for today’s card. If you need any stamping supplies, I’d love to be your demonstrator! You can place an order by clicking any of the images below to go to my Stampin’ Up! online store. The Specialty Plate is used with 3D Embossing Folders.
Bundle Alert: The Greetings of the Season Bundle is available with a 10% discount rather than buying the products separately.

Measurements for Today’s Card
- Shaded Spruce cardstock: 8-1/2″ x 5-1/2″ score at 4-1/4″
- Basic White cardstock: (2) 5-1/4″ x 4″
- Basic White cardstock (sentiment): approx. 3-1/4″ x 3-1/4″
- Sentimental Christmas Designer Series Paper: 5-1/4″ x 1-1/2″
Tomorrow is the Last Day to Get My Christmas Cards Card Sampler
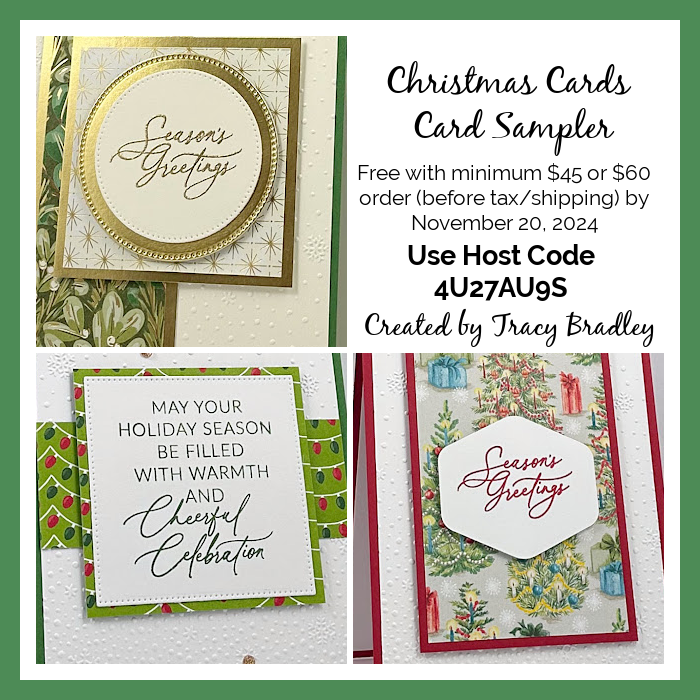
My Christmas Cards Card Sampler is now available! When you use the host code 4U27AU9S and your order is a minimum of $45 or $60 (before shipping/tax), I’ll send you one each of three different cards if your order is $45 (up to $59.99) or I’ll send you two each of three different cards when your order is $60 or more. To create this card sampler, I used the Greetings of the Season stamp set, Sentimental Christmas Designer Series Paper, Reindeer Days Designer Series Paper and Season of Green & Gold Designer Series Paper.
Here’s What You’ll Receive:
- All the paper and embellishments needed to make three or six cards. Envelopes will also be provided. For this Sampler you only need to provide a stamp set, ink and adhesive (see below for what you’ll need).
- A PDF Tutorial with instructions, pictures, cutting measurements and a complete supply list of all the products used.
- Earn at least one Bradley Point (earn ten Bradley Points and redeem them for free product) when your order is $50 or more.
- If your order is over $150, please do not use the host code or you won’t receive your Stampin’ Rewards. After you place your order, simply email me and let me know that you’d like the Greetings of the Season Card Sampler (you only need to do this if your order is over $150). You can send me an email on the sidebar.
All the Other Important Information:
- Your Christmas Cards Card Sampler Sampler will be shipped first-class mail approximately November 30, 2024 and will be mailed to the address used on your online order.
- You’ll receive an email when I mail your Card Sampler and the PDF Tutorial will be included in that email.
- When using the Christmas Cards Card Sampler host code to place your order, you will not qualify for other current host code rewards.
- Per Stampin’ Up! policy, card samplers can only be mailed within the United States.
For more information and the supplies you’ll need to complete the Christmas Cards Card Sampler, click here!
Free Drusy Adhesive-Backed Embellishments with an Order of $60 Using the Host Code
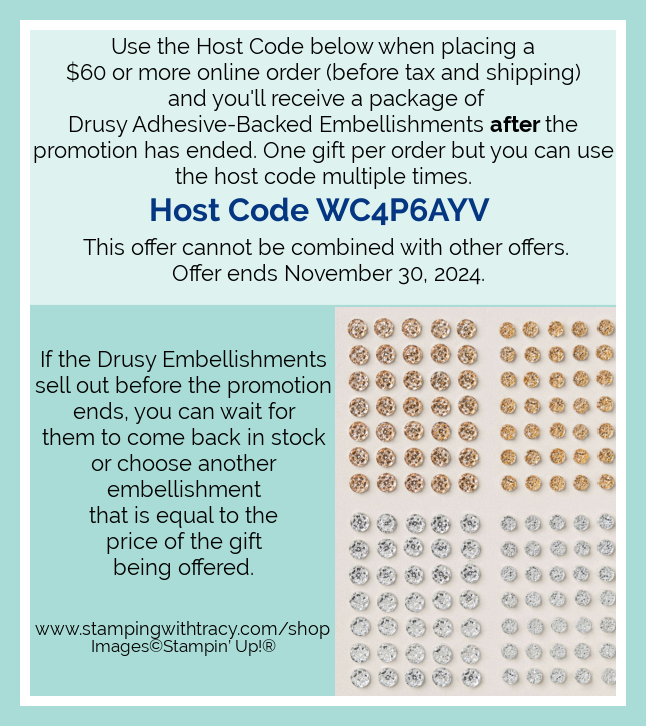

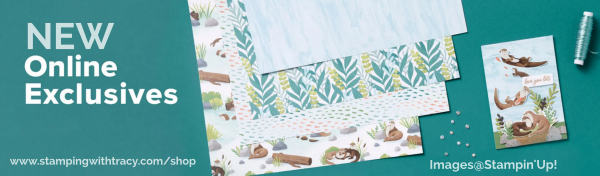
New Online Exclusives
New Online Exclusives went live November 5th. Click here to see what’s new!
Two New Stampin’ Up! Kits!
Click each graphic for more information!
December Paper Pumpkin Kit
An additional coordinating add-on is available but only for Paper Pumpkin subscribers. Click the image below for more information.

Thanks for stopping by today!
by Tracy | Oct 5, 2024 | A Little Note
Three Day Sale on All Stamps in the Annual Catalog Starting Monday, October 7th

- This stamp sale only happens once a year!
- The sale will run for three days.
- The 15% off discount will apply to all stamp sets (photopolymer and cling) from the 2024–2025 Annual Catalog.
- Bundles are not included in this sale.
- Stamp sets are available while supplies last.
Today I’m sharing several more cards I made using the Changing Leaves Bundle. If you’d like to see the card I shared on Thursday using this bundle, you can see it here. Be sure to scroll down on this page to fin
This first two cards were made using Oxidized Copper Specialty Designer Series Paper and Adhesive-Backed Sparkle Gems.


I started with a piece of Pretty Peacock cardstock for the base of my card. Then I embossed Basic White cardstock using the Changing Leaves Hybrid Embossing Folder and then adhered it to my card base. Next, I cut the leaf out using Oxidized Copper Specialty Paper with the Hybrid Embossing Folder and the bigger die in the set. I added adhesive to the back and adhered it to the card front.


I stamped the sentiment in Pretty Peacock ink onto Basic White cardstock using the Changing Leaves stamp set. I then cut the sentiment out using the Changing Leaves Dies (these dies come with the Hybrid Embossing Folder), added Stampin’ Dimensionals to the back and adhered it to the front of the card.
To complete my card, I adhered a piece of Basic White cardstock to the inside and added three Adhesive-Backed Sparkle Gems to the front of the card. These gems are very sparkly in person (I don’t think they show their sparkle in pictures).

This next card uses all of the same products as the first card. But I used Copper Clay cardstock for the base of my card and I used Copper Clay ink to stamp the sentiment. I used another die in the Changing Leaves Bundle to cut my sentiment out.


For this last card, I used Regal Winter Designer Series Paper for the leaf and the Leaf Fall 3D Embossing Folder. I also used Pretty Peacock cardstock for the base of my card and used Pretty Peacock ink to stamp my sentiment.


Supply List
Below you’ll find all the Stampin’ Up! supplies I used for today’s card. If you need any stamping supplies, I’d love to be your demonstrator! You can place an order by clicking any of the images below to go to my Stampin’ Up! online store. The Specialty Plate is used with 3D Embossing Folders.
Measurements
- Copper Clay or Pretty Peacock cardstock: 11” x 4-1/4” scored at 5-1/2” OR 8-1/2” x 5-1/2” scored at 4-1/4”
- Basic White cardstock: (2) 5-1/4″ x 4″
- Basic White cardstock(sentiment): scrap
- Oxidized Copper DSP or Regal Winter DSP: cut down to size if you don’t want to cut all three leaves
Kits Collection Sale!
During the month of October, you can save up to 30% off Stampin’ Up! Kits. Each kit comes with everything you need to create an unique paper craft. Each kit is only available while supplies last. This promotion will end on October 31st. Click here to see all the kits Stampin’ Up! offers.

Starter Kit Special

From October 1–31, anyone who signs up to be a Stampin’ Up! demonstrator will get $155 worth of products in their Starter Kit for just $99! This offering also includes FREE business supplies and FREE shipping. The Starter Kit is for anyone – the business minded person or the person who wants to get at least a 20% discount on the products they buy! It’s a great deal for anyone! For more information, please click here!

Annual Catalog 2024-2052 Products
Stampin’ Up! has created a PDF of Designer Series Paper, Dies and Punches that can be found in the Annual Catalog. You can download (or print) the PDF here.
Mystery Boxes
I’ve decided to extend my Mystery Boxes until Monday, October 7th. You have two choices now. I have filled Medium Flat Rate USPS shipping boxes stuffed with retired products. All of the products in the Mystery Boxes have retired but some have never been used, some are used and all are “as is”. Some of the stamp sets are wood mount and there is some staining on the wood but that doesn’t affect the quality of the stamps. Some of the photopolymer stamp sets are stained but that doesn’t affect the quality of the stamps. All of the stamp sets are a variety of red rubber, photopolymer and wood mount.

You have two choices:
Choice A New Update: I only have one of these boxes available. So please contact me before placing your order to see if I have any left:
- 3 Die/Stamp Set Bundles
- 8 stamp sets
- (2) packages of 12″ x 12″ Designer Series Paper
- one embossing folder
- 6″ x 6″ Designer Series Paper
- one punch
- ribbon and anything else I can fill it with
Choice B
- Ten stamp sets
- Two punches
- Two sets of dies that can be used with your Stampin’ Cut & Emboss Machine
- One Embossing Folder
- One or more embellishments and anything else I can fill it with
I will contact you and ask you which box you’d like!!
There are two ways to get a Mystery Box:
- Place a minimum $125 order (before shipping/tax) at my Stampin’ Up! online store using the host code MFFGQNBX and I will send a Mystery Box to you as a free gift and I’ll even pay the postage! Using the host code will alert me that you want a Mystery Box. If you order is $150 or more, please DO NOT use the host code so you can receive Stampin’ Rewards (free product) directly from Stampin’ Up! After you’ve placed your order (only if your order is $150 or more), please email me that you’d like a Mystery Box (click “Email Me” on the sidebar).
- If you don’t want to place an order, you can purchase a Mystery Box for $100 plus $16 postage. Email me that you’d like a Mystery Box and I’ll send you a PayPal invoice (click “Email Me” on the sidebar).
More Information
- You must use the host code MFFGQNBX when placing your minimum $125 order (if your order is $150 or more, do not use the host code- see above).
- One box per order.
- Using the host code will let me know you’d like a Mystery Box.
- You’ll receive at least two Bradley Points with your order.
- Each box will be different and a mystery. The boxes are already sealed up and I’m unable to take requests for the contents of the boxes.
- No refunds or exchanges.
- Feel free to email me before placing an order to see if I have boxes available.
- When using the Mystery Box host code to place your order, you will not be eligible for other host code rewards.
- This offer expires on October 7, 2024
- Click here to place an order

Two New Kits by Stampin’ Up!
Click each image below for more information about the kit. These new kits are also on sale!


To see all of the kits Stampin’ Up! offers, click here!
Online Exclusives

Click here to shop Stampin’ Up! Online Exclusives!
Nests of Christmas Paper Pumpkin

Have you thought about subscribing to Paper Pumpkin? Now is the time to do it! You’ll get 40% off the first month when you subscribe by October 10th. Use the code HOLIDAY40.
Please read the terms below:
- This offer is only for new month to month subscribers.
- The discount will be applied to one kit in the first shipment of the Paper Pumpkin subscription. After your first box has arrived, each month’s kit will return to the regular price of $25.00
- You will receive the Nests of Christmas Paper Pumpkin kit. To get your first month 40% off you must use the code HOLIDAY40
- This offer expires on October 10, 2024.
Subscribe by clicking here or the image above.

An additional coordinating add-on is available but only for Paper Pumpkin subscribers. Click the image below for more information.
Thanks for stopping by today! Enjoy your weekend!