by Tracy | Nov 22, 2022 | Uncategorized
Before I share my card with you today, I wanted to let you know that all of my PDF Tutorials are on sale beginning today, November 22 through November 28th for $5.95.

The SALE price of each PDF is $5.95 and will be reflected on the PayPal invoice you’ll receive from me.
Click here to shop my PDF tutorials.
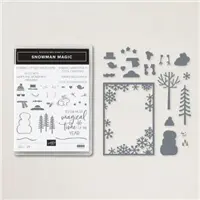
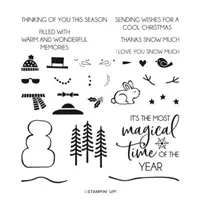
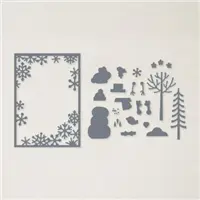
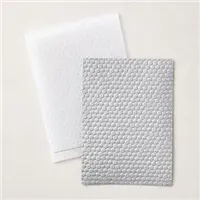
Today’s card features the Snowman Magic Bundle which includes the Snowman Magic stamp set and the Snowman Dies. I also used the Hive 3D Embossing Folder and Stylish Shapes Dies.


I started with a piece of Thick Basic White cardstock for the base of my card (you can find the measurements I used below the Supply List). Then I embossed a piece of Basic White cardstock using the Hive 3D Embossing Folder and adhered it to a piece of Real Red cardstock which I then adhered to the card base.


I stamped the sentiment onto a piece of Basic White cardstock and then cut it out using the Stylish Shapes Dies and adhered it to the card front. I cut another, smaller Basic White circle using these same dies. I used Memento ink to stamp the snowman from the Snowman Magic stamp set as well as the snowman hat onto a scrap piece of Basic White cardstock. I used Garden Green ink to stamp the scarf for the snowman and then cut out the snowman, hat and scarf using the Snowman Dies. I also cut two trees out of Garden Green cardstock using the Snowman Dies.

I adhered the hat and scarf to the snowman and then adhered him to the smaller circle. I added Stampin’ Dimensionals to the back of the circle but before adhering it to the front of the card, I adhered the trees to the front of the card and then placed the snowman circle. To complete my card, I added two small rhinestones and three larger ones.

Supply List
Below you’ll find all the Stampin’ Up! supplies I used for today’s card. If you need any stamping supplies, I’d love to be your demonstrator! You can place an order by clicking any of the images below to go to my Stampin’ Up! online store.
Measurements
- Thick Basic White cardstock: 8-1/2″ x 5-1/2″ score at 4-1/4″
- Real Red cardstock: 5-1/4″ x 4″
- Basic White cardstock (embossed): 5″ x 3-3/4″
- Basic White cardstock (large circle): approx. 3″ x 3″
- Basic White cardstock (small circle): approx. 2-1/2″ x 2-1/2″
- Basic White cardstock (snowman): approx. 2″ x 1-3/4″
- Basic White cardstock (scarf): scrap
- Basic White cardstock (hat): scrap
- Garden Green cardstock: (2) 2-3/4″ x 1-3/4″


Thanks for stopping by today!
by Tracy | Mar 15, 2022 | Die-Cutting, Embossing Folders
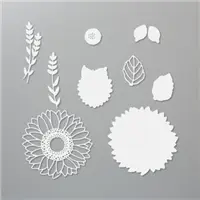
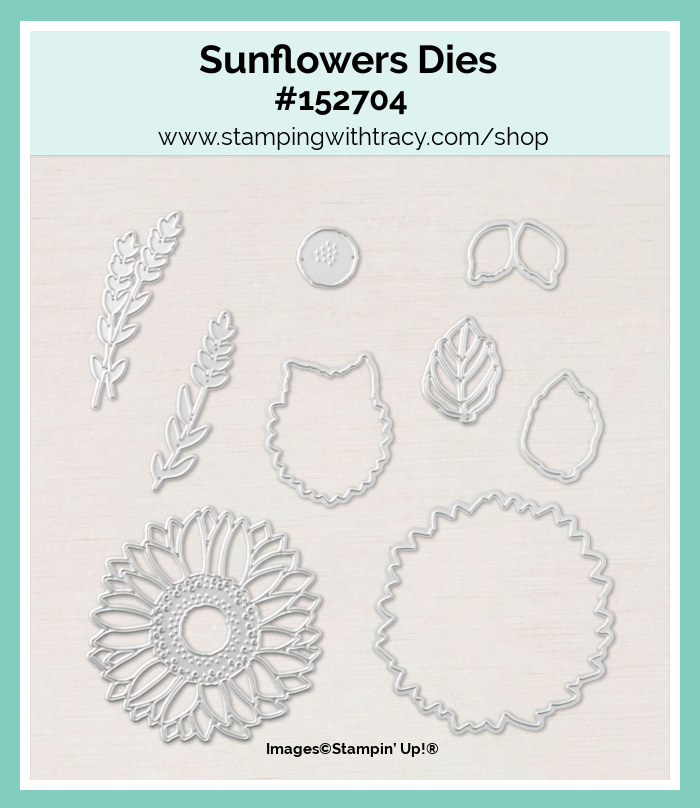
The card I’m sharing with you today was made using the Sunflowers Dies and Pansy Petals Designer Series Paper.
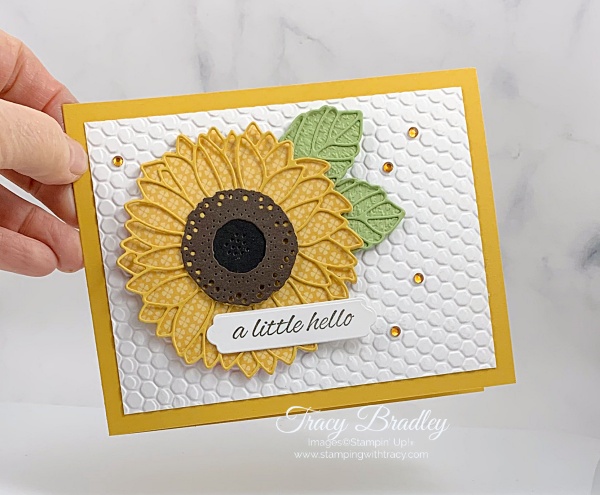
I started with a piece of Bumblebee cardstock for the card base. Then I added a layer of Basic White cardstock that I ran through the Stampin’ Cut & Emboss Machine using the Hive 3D Embossing Folder. I used the Sunflowers Dies to cut the sunflower out of Pansy Petals Designer Series Paper and the detailed part out of Bumblebee cardstock. I cut another detailed part out of Early Espresso cardstock and cut everything off so that just the middle remained. The center was cut using Basic Black cardstock. I cut the leaves out of Pear Pizzazz cardstock and ran them through the Stampin’ Cut & Emboss Machine using the Tasteful Textile 3D Embossing Folder. I also cut the detailed part of the leaves using Pear Pizzazz cardstock.

Bundle Alert Sale: Although I didn’t use the sentiment in the Celebrate Sunflowers Bundle, this bundle is on sale for this month only. It includes the Sunflowers Dies and Celebrate Sunflowers stamp set. This set of dies and stamp set were brought back just for this sale so on April 1st, you will no longer be able to purchase the two together with a discount.
To adhere the two bumblebee sunflower pieces together, I added Multipurpose Glue to the center of the detailed sunflower. Then I glued the Basic Black center to the sunflower and then glued the Early Espresso center to the top. I used Multipurpose glue (very small dots of glue) to add the detailed leaf to the embossed leaf. I added Mini Glue Dots to adhere the leaves to the sunflower. I added Stampin’ Dimensionals to the back of the sunflower and adhered it to the front of the card.

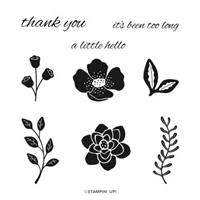
The sentiment was stamped in Early Espresso ink using the stamp set Boughs & Blossoms and then cut out using the Seasonal Labels Dies. I used Multipurpose Glue to adhere it to the sunflower. To complete the card, I added a piece of Basic White cardstock to the inside and then placed five Holiday Rhinestones on the front of the card.

Supply List
Below you’ll find all the Stampin’ Up! supplies I used for today’s card. If you need any stamping supplies, I’d love to be your demonstrator! You can place an order by clicking any of the images below to go to my Stampin’ Up! online store.
The Specialty Plate is used with 3D Embossing Folders.
Measurements
- Bumblebee cardstock: 11″ x 4-1/4″ score at 5-1/2″
- Bumblebee cardstock: approx. 4″ x 4″
- Pansy Petals Designer Series Paper: approx. 4″ x 4″
- Early Espresso cardstock: approx. 4″ x 4″
- Pear Pizzazz cardstock (leaves): scraps
- Basic White cardstock: 5″ x 3-3/4″
- Basic White cardstock (sentiment): scrap
- Basic White cardstock (inside): 5-1/4″ x 4″
- Basic Black cardstock: scrap for middle of sunflower
Thanks for stopping by today!