by Tracy | Nov 23, 2022 | Uncategorized
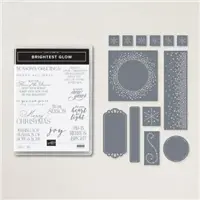
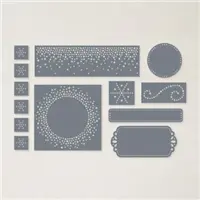
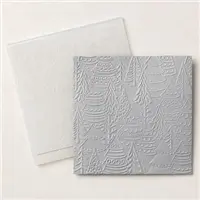
Today I have two Christmas cards to share with you that were made using the same design. One was made using Painted Christmas Designer Series Paper and the other was made with Storybook Gnomes Designer Series Paper. Both cards were made using the Brightest Glow Bundle which includes the Brightest Glow stamp set and the Labels Aglow Dies. I also used the Whimsical Woodland 3D Embossing Folder.


For this first card I used Night of Navy cardstock for the base of my card. Then I embossed a piece of Basic White cardstock using the Whimsical Woodland 3D Embossing Folder and adhered it to the base of the card. I also adhered a piece of Basic White to the inside. I cut two pieces of Night of Navy cardstock (the measurements I used are below the Supply List) and layered them with two pieces of Storybook Gnomes Designer Series Paper. I adhered the vertical piece to the front of the card but added Stampin’ Dimensionals to the other before adhering it to the card.


I heat embossed the sentiment with silver embossing powder and cut it out using the Labels Aglow Dies. If you aren’t sure how to emboss, you’ll find directions below. I added Stampin’ Dimensionals to the sentiment and adhered it to the horizontal piece. To complete the card, I added three silver Festive Pearls.


For this next card, I used Real Red cardstock and Painted Christmas Designer Series Paper. I also heat embossed the sentiment with silver embossing powder and used Rhinestone Basic Jewels.


How to Heat Emboss
Prepare your cardstock by rubbing the Embossing Buddy (an anti-static pouch that can be found in the Embossing Additions Tool Kit) over the surface of the paper as it helps keep away stray particles of embossing powder. Stamp your sentiment or image using a Versamark pad. This is very sticky ink and your embossing powder will stick right to it. Sprinkle embossing powder over the stamped image and then shake off any excess. Before applying heat to your paper, heat the Heat Tool first so your paper won’t warp (about 10 seconds). Direct the heat over your image and watch as your image becomes shiny and beautiful!
Supply List
Below you’ll find all the Stampin’ Up! supplies I used for today’s card. If you need any stamping supplies, I’d love to be your demonstrator! You can place an order by clicking any of the images below to go to my Stampin’ Up! online store.
Measurements
- Night of Navy or Real Red cardstock: 11″ x 4-1/4″ scored at 5-1/2″
- Night of Navy or Real Red cardstock: (2) 3-3/4″ x 2″
- Storybook Gnomes or Painted Christmas Designer Series Paper: (2) 3-1/2″ x 1-3/4″
- Basic White cardstock: (2) 5-1/4″ x 4″
- Basic White cardstock: approx. 2″ x 2″


Thank you for stopping by today! For those of you in the U.S., have a wonderful Thanksgiving!
by Tracy | Nov 9, 2022 | Uncategorized
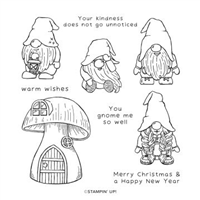
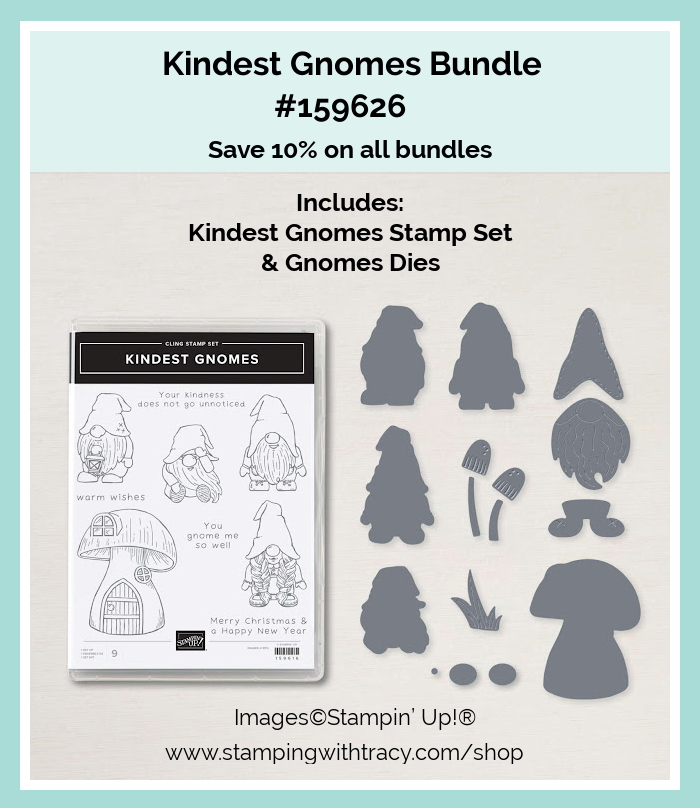
Today’s card features the Kindest Gnomes Bundle which includes the Kindest Gnomes stamp set and the Gnomes Dies. I also used Storybook Gnomes Designer Series Paper and one of the Wintry 3D Embossing Folders.
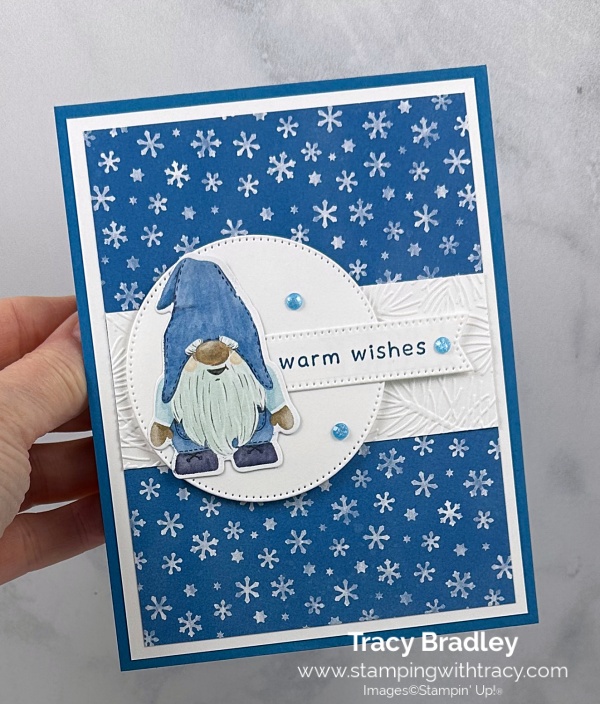
I started with a piece of Pacific Point cardstock for the base of my card. Then I added a layer of Basic White cardstock and Storybook Gnomes Designer Series Paper. I then ran a piece of Basic White cardstock (you can find the measurements I used below the Supply List) through my Stampin’ Cut & Emboss Machine and then adhered it to the middle of my card.

One of the sheets in Storybook Gnomes Designer Series Paper is just gnomes, so I used the Gnomes Dies to cut one of them out and set him aside.. I stamped the sentiment in Pacific Point using the Kindest Gnomes stamp set and then cut it out using the Stylish Shapes Dies. Using these same dies, I also cut a circle out of Basic White cardstock.


I tucked the sentiment behind the gnome using several Mini Glue Dots (I forgot to add these into the Supply List) and then adhered the gnome to the stitched circle. I added Stampin’ Dimensionals to the back of the circle and one at the very end of the sentiment that hangs off, and then adhered it to the embossed part of the card.

To complete my card, I added three Fine Sparkle Adhesive-Backed Gems and I added a piece of Basic White cardstock to the inside.
Supply List
Below you’ll find all the Stampin’ Up! supplies I used for today’s card. If you need any stamping supplies, I’d love to be your demonstrator! You can place an order by clicking any of the images below to go to my Stampin’ Up! online store.
Measurements
- Pacific Point cardstock: 11″ x 4-1/4″ scored @ 5-1/2″
- Basic White cardstock: (2) 5-1/4″ x 4″
- Basic White cardstock (embossed): 3-3/4″ x 1-1/2″
- Basic White cardstock (circle): approx. 3″ x 3″
- Basic White cardstock (sentiment): approx. 3-1/4″ x 1″
- Storybook Gnomes Designer Series Paper: 5″ x 3-3/4″
Paper Pumpkin Sale Today and Tomorrow
Today and tomorrow all past Paper Pumpkin refills, past kits and more are on sale! These products are only available to current Paper Pumpkin subscribers.
Click here to shop the Paper Pumpkin sale!
From the North Pole Paper Pumpkin Kit
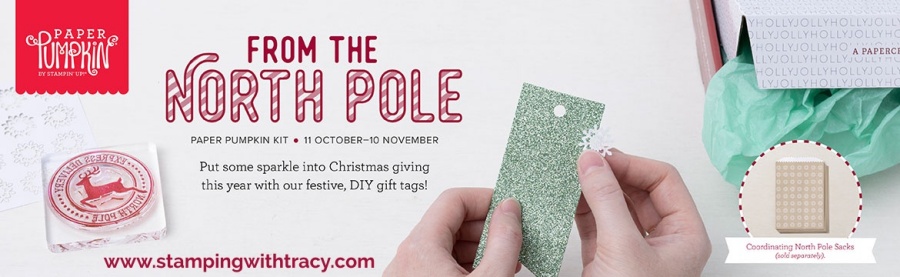
- This month’s kit contains enough elements to create 12 tags—4 each of 3 designs. This all-inclusive kit includes printed die-cut paper pieces, twine, adhesive, and more!
- Includes a Cherry Cobbler Classic Stampin’ Spot!
- You’ll love decorating your gift tags with snowflake and banner die-cut pieces on our Mint Macaron glitter specialty paper (a Paper Pumpkin exclusive).
- Create festive gift tags for all your packaging needs this holiday season with classic Christmas colors and designs.
Finished gift tag size: 2″ x 3″
Coordinating Stampin’ Up! colors: Basic Black, Cherry Cobbler, Crumb Cake, Mint Macaron, Shaded Spruce, Sweet Sorbet
Order must be placed by tomorrow, November 10, 2022
You can cancel at any time or even skip a month
Click here to order the From the North Pole Paper Pumpkin Kit
North Pole Sacks Add-On
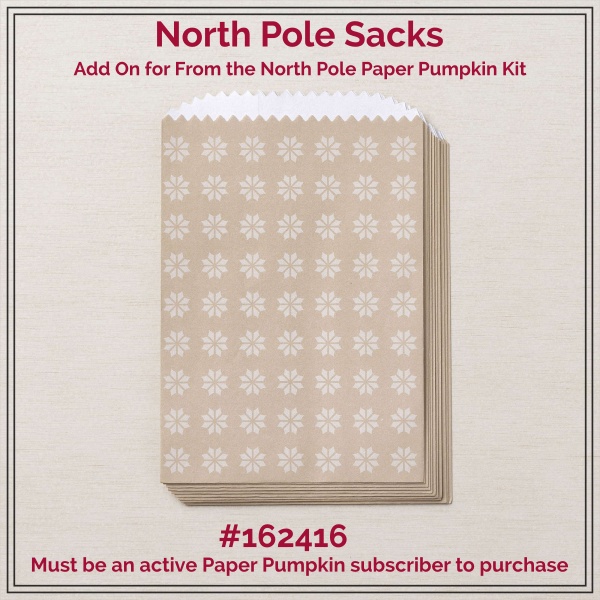
Item Number: 162416
Item Price: $4.00 USD Now on sale for $2.00
Add-on details:
- Includes 12 food-safe paper bags
- Create fun packaging for your seasonal gifts and treats
- Features a festive design in Crumb Cake
- Bag size: 4″ x 6″
- Must be a current Paper Pumpkin subscriber to order
Click here to order the North Pole Sacks
Click here to see the entire Fitting Florets Collection.
Some products are available while supplies last!
Thank you for stopping by today!
by Tracy | Oct 31, 2022 | Uncategorized
Happy Halloween!!
Today’s card features the stamp set, Framed & Festive (#160888). This stamp set and several other products will be available starting tomorrow, November 1st! Framed & Festive will only be available while supplies last!! If you click HERE, you can see the flyer with all the products, prices and item numbers.

I started with a piece of Thick Basic White cardstock for the base of my card. Then I layered Pool Party cardstock with a piece of Storybook Gnomes Designer Series Paper and adhered it at the bottom of the card base.

I stamped the sentiment onto a piece of Basic White cardstock using Pool Party ink and the Framed & Festive stamp set. Then I cut it out using the Stitched Rectangle Dies. I cut another, larger rectangle out of Pool Party cardstock using these same dies and adhered the sentiment to it. I added Stampin’ Dimensionals to the back but before I placed it on the card, I adhered the Wonderful Snowflake to the front of the card using a Mini Glue Dot and then placed the sentiment on top of it.


To complete the card, I added five Fine Sparkle Adhesive Backed Gems to the front of the card.
Supply List
Below you’ll find all the Stampin’ Up! supplies I used for today’s card. If you need any stamping supplies, I’d love to be your demonstrator! You can place an order by clicking any of the images below to go to my Stampin’ Up! online store.
The Framed & Festive stamp set #160888, will be available on November 1st.
Measurements
- Thick Basic White cardstock: 11″ x 4-1/4″
- Pool Party cardstock: 5-1/2″ x 2″
- Pool Party cardstock (stitched rectangle): approx. 4-1/4″ x 2-3/4″
- Storybook Gnomes Designer Series Paper: 5-1/4″ x 1-3/4″
- Basic White cardstock (sentiment): approx. 3-3/4″ x 2-1/4″
Last Chance Today!

Use the host code FWZ3BKN9 when placing your order at my Stampin’ Up! online store and you’ll receive my September – October PDF Tutorial with directions to make a featured card and fourteen more ideas using the same layout but with a variety of different colors of cardstock, embossing folders and Designer Series Paper.
All orders using the host code will receive the ten page PDF Tutorial and a thank you card.
If your order is $50 or more (before tax/shipping), you’ll also receive:
- At least six card kits* mailed to you via snail mail
- At least one Bradley Point (earn points and redeem them for free product)
*A card kit includes all the cardstock, Designer Series Paper and embellishments you’ll need to complete a card. I’ve cut, scored, die cut and embossed all the pieces for you! You’ll just need to supply your own stamp set, ink and adhesive. You can use the stamp set I used to create the cards (Soft Seedlings) or use what you already own.
- $50.00 – $99.99 = 6 card kits
- $100 – $149.99 = 7 card kits
- $150 or more = 8 card kits
If your order is $150 or more, do NOT use the host code so you can receive Stampin’ Rewards directly from Stampin’ Up! You will automatically receive 8 card kits from me.
You can use this host code multiple times. There are fifteen different card kits and I keep track of which card kits I’ve sent to you. Each time you’ll receive different kits unless you’ve earned all fifteen and then you’ll start to receive multiples. It’s a great way to have cards on hand to mail because who doesn’t love receiving happy mail!


Fitting Florets Collection Available Tomorrow

Click here for the flyer of this collection!
Last Day for Starter Kit Special

The Starter Kit is always $99 but today’s the last day you’ll be able to choose $155 in Stampin’ Up! product instead of $125. Both are great deals but $30 more, well, that’s even better! The Starter Kit ships free so you won’t have to pay shipping costs! If you’re thinking the Starter Kit is only for those who’d like to start a business, it isn’t. When I purchased the Starter Kit, I only did it for the discount because I loved Stampin’ Up! products. I had absolutely no intention of starting my own business (but as you can see, I changed my mind). There are quarterly minimums but if you don’t reach them, you’ll simply be dropped, no questions asked. It truly is risk free.
Click here for more information about the Starter Kit or feel free to contact me!
If you’re ready to purchase the Starter Kit, click here
From the North Pole Paper Pumpkin Kit
- This month’s kit contains enough elements to create 12 tags—4 each of 3 designs. This all-inclusive kit includes printed die-cut paper pieces, twine, adhesive, and more!
- Includes a Cherry Cobbler Classic Stampin’ Spot!
- You’ll love decorating your gift tags with snowflake and banner die-cut pieces on our Mint Macaron glitter specialty paper (a Paper Pumpkin exclusive).
- Create festive gift tags for all your packaging needs this holiday season with classic Christmas colors and designs.
Finished gift tag size: 2″ x 3″
Coordinating Stampin’ Up! colors: Basic Black, Cherry Cobbler, Crumb Cake, Mint Macaron, Shaded Spruce, Sweet Sorbet
Order must be placed by November 10, 2022
You can cancel at any time or even skip a month
Click here to order the From the North Pole Paper Pumpkin Kit
North Pole Sacks Add-On
Item Price: $4.00 USD
Add-on details:
- Includes 12 food-safe paper bags
- Create fun packaging for your seasonal gifts and treats
- Features a festive design in Crumb Cake
- Bag size: 4″ x 6″
Click here to order the North Pole Sacks
Enjoy your day!
by Tracy | Oct 28, 2022 | Uncategorized
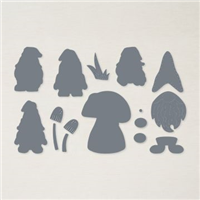
Today’s card features the Kindest Gnomes Bundle which includes the Kindest Gnomes stamp set and the Gnomes Dies. This was not a bundle I immediately purchased because I’m not really a “gnomes person”. But about a month ago my sister made the cutest gnomes to sell at a craft fair next month and after seeing her cute creations, I was hooked. Plus, I’ve seen so many cute gnome cards from fellow demonstrators. I’m hooked and had fun creating my first gnome card!
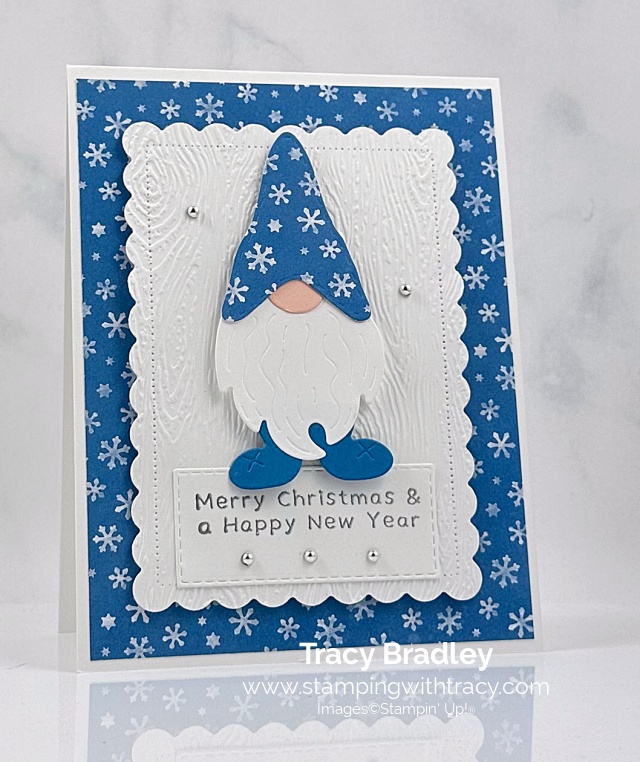
I started with a piece of Thick Basic White cardstock for the base of my card. Then I added a layer of Storybook Gnomes Designer Series Paper. Then I used that same design to cut a hat for my gnome using the Gnomes Dies.
Using the Scalloped Contours Dies, I cut a piece of Basic White cardstock and then ran it through the Stampin’ Cut & Emboss Machine using the Timber 3D Embossing Folder. I added Stampin’ Dimensionals to the back and adhered it to the front of the card.
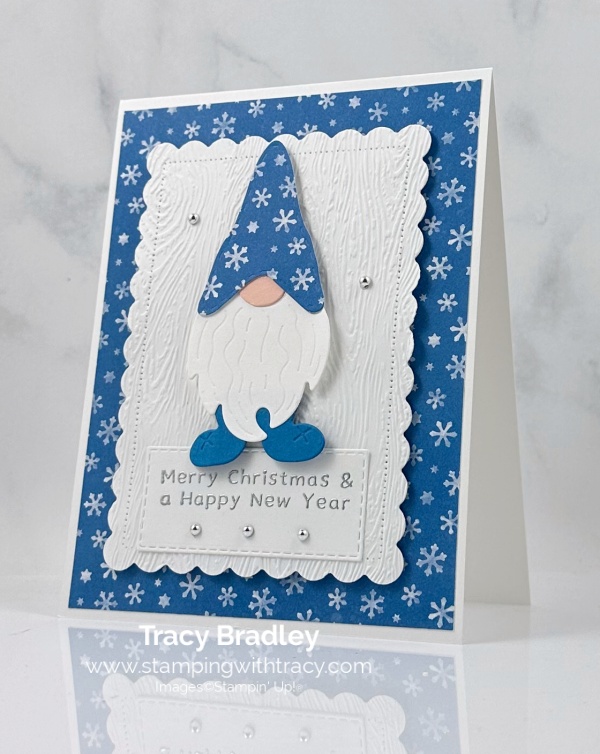
I used the Gnomes Dies to cut the beard out of Basic White cardstock, Petal Pink for the nose and Pacific Point for the feet. I adhered all those piece together, along with the hat and then added Stampin’ Dimensionals to the back and adhered my gnome to the front of the card.
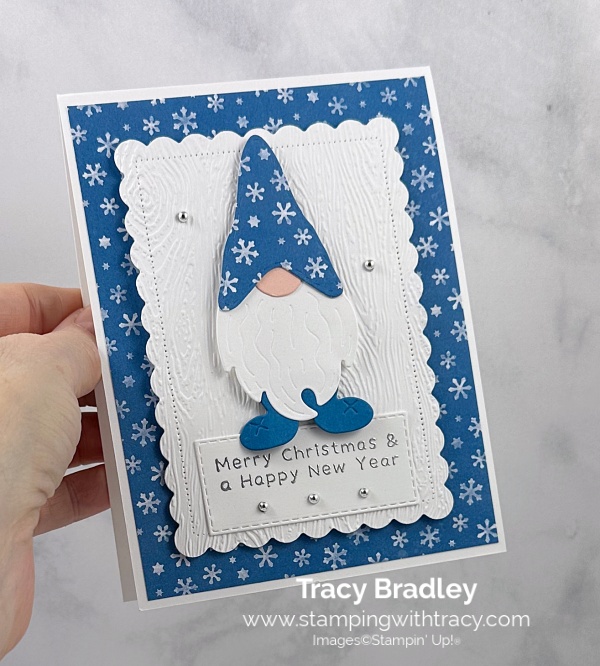
I heat embossed the sentiment onto Basic White cardstock using Silver Embossing Powder and then cut the sentiment out using the Stitched Rectangle Dies. I adhered it below the gnome and tucked it under his feet. To complete my card, I added three Festive Pearls below the sentiment and added two more on the embossed rectangle (unfortunately the Festive Pearls are not available at the moment but should be back in stock the week of November 21st).
How to Heat Emboss
Prepare your cardstock by rubbing the Embossing Buddy (an anti-static pouch that can be found in the Embossing Additions Tool Kit) over the surface of the paper as it helps keep away stray particles of embossing powder. Stamp your sentiment or image using a Versamark pad. This is very sticky ink and your embossing powder will stick right to it. Sprinkle embossing powder over the stamped image and then shake off any excess. Before applying heat to your paper, heat the Heat Tool first so your paper won’t warp (about 10 seconds). Direct the heat over your image and watch as your image becomes shiny and beautiful!
Supply List
Below you’ll find all the Stampin’ Up! supplies I used for today’s card. If you need any stamping supplies, I’d love to be your demonstrator! You can place an order by clicking any of the images below to go to my Stampin’ Up! online store.
Measurements
- Thick Basic White cardstock:11″ x 4-1/4″ score at 5-1/2″
- Basic White cardstock (rectangle): approx. 4-3/4″ x 3-1/2″
- Basic White cardstock (beard): approx. 2″ x 2″
- Basic White cardstock (sentiment): approx. 3″ x 1-3/4″
- Pacific Point cardstock (feet): approx. 1-3/4″ x 1″
- Petal Pink (nose): scrap
- Storybook Gnomes Designer Series Paper: 5-1/4″ x 4″
- Storybook Gnomes Designer Series Paper (hat): approx. 2″ x 2″
Card Kits – Only Available Until October 31st
Use the host code FWZ3BKN9 when placing your order at my Stampin’ Up! online store and you’ll receive my September – October PDF Tutorial with directions to make a featured card and fourteen more ideas using the same layout but with a variety of different colors of cardstock, embossing folders and Designer Series Paper.
All orders using the host code will receive the ten page PDF Tutorial and a thank you card.
If your order is $50 or more (before tax/shipping), you’ll also receive:
- At least six card kits* mailed to you via snail mail
- At least one Bradley Point (earn points and redeem them for free product)
*A card kit includes all the cardstock, Designer Series Paper and embellishments you’ll need to complete a card. I’ve cut, scored, die cut and embossed all the pieces for you! You’ll just need to supply your own stamp set, ink and adhesive. You can use the stamp set I used to create the cards (Soft Seedlings) or use what you already own.
- $50.00 – $99.99 = 6 card kits
- $100 – $149.99 = 7 card kits
- $150 or more = 8 card kits
If your order is $150 or more, do NOT use the host code so you can receive Stampin’ Rewards directly from Stampin’ Up! You will automatically receive 8 card kits from me.
You can use this host code multiple times. There are fifteen different card kits and I keep track of which card kits I’ve sent to you. Each time you’ll receive different kits unless you’ve earned all fifteen and then you’ll start to receive multiples. It’s a great way to have cards on hand to mail because who doesn’t love receiving happy mail!
Fitting Florets Collection Coming November 1, 2022
Click here for the Fitting Florets Collection flyer
Click here for more information about the Starter Kit!
The Starter Kit Special (an extra $30 in free product) is only available until October 31st!
Thanks for stopping by today! Enjoy your weekend!
by Tracy | Oct 13, 2022 | Uncategorized
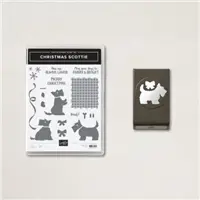
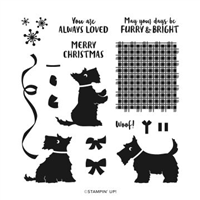
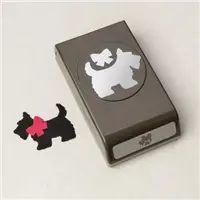
I have another card for you today using the Scottie Dog Punch but I also used the stamp set, Christmas Scottie, which is also included in the Christmas Scottie Bundle along with the Scottie Dog Punch. Yesterday’s card was an autumn card and today I have a Christmas card using Storybook Gnomes Designer Series Paper and one of the Wintry 3D Embossing Folders.


I started with a piece of Thick Basic White cardstock for the base of my card. Then I added a piece of Storybook Gnomes Designer Series Paper (you can find the measurements I used below the Supply List). Next, I cut a piece of Basic White cardstock using the Scalloped Contours Dies and then ran that piece through my Stampin’ Cut & Emboss Machine using one of the Wintry 3D Embossing Folders. I added Stampin’ Dimensionals to the back and adhered it to the front of the card.

I cut the dog out of Basic Black cardstock using the Scottie Dog Punch. I used the punch again to cut a bow out of Balmy Blue cardstock and then placed it inside the Wintry 3D Embossing Folder and embossed it. I attached the bow to the dog using a Mini Stampin’ Dimensional and then added our regular sized Stampin’ Dimensionals to the back of the dog and adhered it to the scalloped rectangle.


I stamped the sentiment in Balmy Blue ink using the stamp set, Christmas Scottie, and then cut it out using the Stitched Rectangle Dies. I added Stampin’ Dimensionals to the back and adhered it below the dog.


Supply List
Below you’ll find all the Stampin’ Up! supplies I used for today’s card. If you need any stamping supplies, I’d love to be your demonstrator! You can place an order by clicking any of the images below to go to my Stampin’ Up! online store.
Measurements
- Thick Basic White cardstock: 11″ x 4-1/4″ scored at 5-1/2″
- Storybook Gnomes Designer Series Paper: 5-1/4″ x 4″
- Basic White cardstock (scalloped rectangle): approx. 4-3/4″ x 3-1/2″
- Basic White cardstock (sentiment): approx. 3″ x 1-3/4″
- Basic Black cardstock (dog): scrap
- Balmy Blue cardstock (bow): scrap
September/October Card Kits
This is a different host code from last month. Host codes are only good for 30 days so it’s been changed.
Use the host code FWZ3BKN9 when placing your order at my Stampin’ Up! online store and you’ll receive my September – October PDF Tutorial with directions to make a featured card and fourteen more ideas using the same layout but with a variety of different colors of cardstock, embossing folders and Designer Series Paper.
All orders using the host code will receive the ten page PDF Tutorial and a thank you card.
If your order is $50 or more (before tax/shipping), you’ll also receive:
- At least six card kits* mailed to you via snail mail
- At least one Bradley Point (earn points and redeem them for free product)
*A card kit includes all the cardstock, Designer Series Paper and embellishments you’ll need to complete a card. I’ve cut, scored, die cut and embossed all the pieces for you! You’ll just need to supply your own stamp set, ink and adhesive. You can use the stamp set I used to create the cards (Soft Seedlings) or use what you already own.
- $50.00 – $99.99 = 6 card kits
- $100 – $149.99 = 7 card kits
- $150 or more = 8 card kits
If your order is $150 or more, do NOT use the host code so you can receive Stampin’ Rewards directly from Stampin’ Up! You will automatically receive 8 card kits from me.
You can use this host code multiple times. There are fifteen different card kits and I keep track of which card kits I’ve sent to you. Each time you’ll receive different kits unless you’ve earned all fifteen and then you’ll start to receive multiples. It’s a great way to have cards on hand to send to friends and loved ones!
Here’s a sample of one of the card kits using Hues of Happiness Designer Series Paper.

- This month’s kit contains enough elements to create 12 tags—4 each of 3 designs. This all-inclusive kit includes printed die-cut paper pieces, twine, adhesive, and more!
- Includes a Cherry Cobbler Classic Stampin’ Spot!
- You’ll love decorating your gift tags with snowflake and banner die-cut pieces on our Mint Macaron glitter specialty paper (a Paper Pumpkin exclusive).
- Create festive gift tags for all your packaging needs this holiday season with classic Christmas colors and designs.
Finished gift tag size: 2″ x 3″
Coordinating Stampin’ Up! colors: Basic Black, Cherry Cobbler, Crumb Cake, Mint Macaron, Shaded Spruce, Sweet Sorbet
Order must be placed by November 10, 2022
You can cancel at any time or even skip a month
Click here to order the From the North Pole Paper Pumpkin Kit
North Pole Sacks Add-On
Item Number: 162416
Item Price: $4.00 USD
Add-on details:
- Includes 12 food-safe paper bags
- Create fun packaging for your seasonal gifts and treats
- Features a festive design in Crumb Cake
- Bag size: 4″ x 6″
Click here to order the North Pole Sacks
For more information about the Starter Kit, please click here.
Thanks for stopping by today!