by Tracy | Apr 20, 2026 | Just a Note card
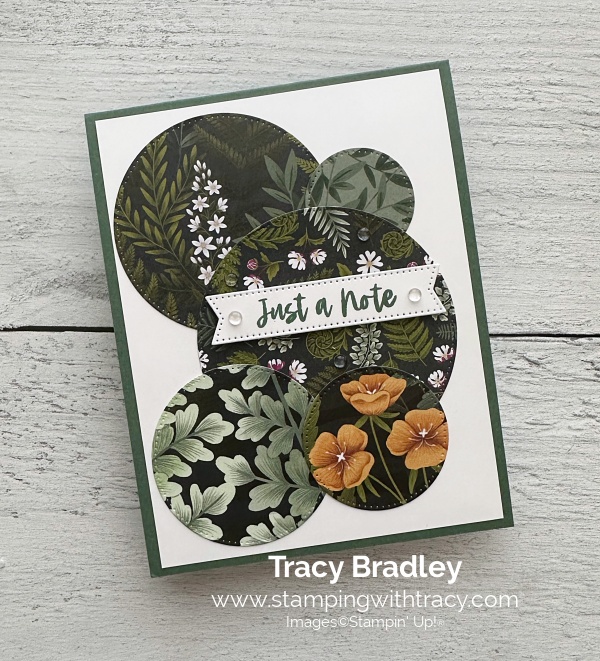
I’m using various new products on today’s card. They will all be available on May 5, 2026 when the new May – August 2026 Catalog goes live! I used Moonlit Flora Designer Series Paper #167737, Peaceful Pine cardstock #167691, Peaceful Pine Classic Stampin’ Pad #167679 and Dewdrops Embellishments #167748. All of these products will be available on May 5, 2026!
I also used the Stylish Shapes Dies and Fragrant Layers Stamp Set (an Online Exclusive).
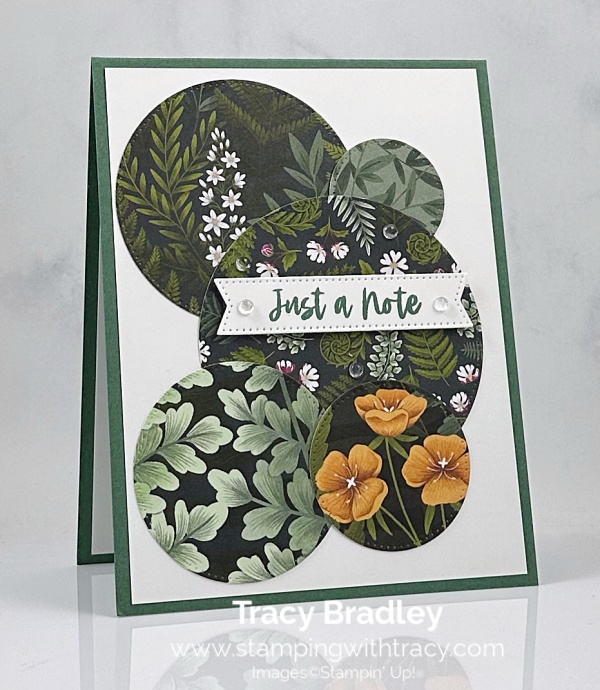

I started off with a piece of Peaceful Pine cardstock (available on May 5, 2026). I then adhered a piece of Basic White cardstock to the front of the card. Next, I started cutting the circles!
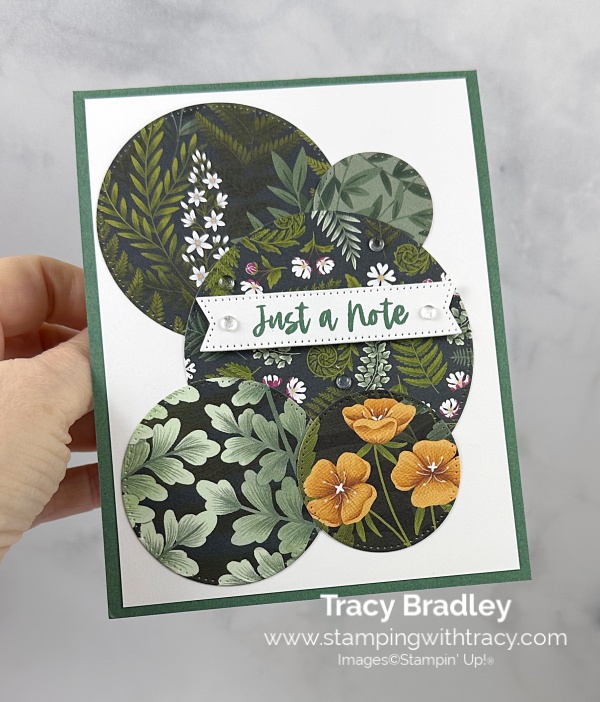

I started with the second largest circle (you can find all the measurements I used below the Supply List) and adhered that circle to the Basic White cardstock. I cut the second smallest circle and I adhered it to the Basic White cardstock. I cut the largest circle and adhered it to the front of the card. I cut the third largest circle and adhered it to the front of the card. I cut the third smallest circle and adhered it to the front of the card.
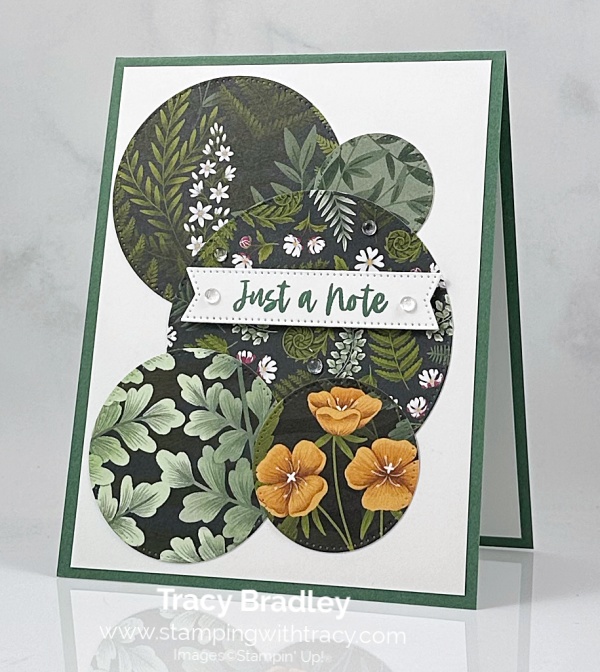
I stamped the sentiment on to Basic White cardstock using Fragrant Layers Stamp Set in Peaceful Pine ink (this won’t be available for purchase until May 5, 2026). I cut it out using the Stylish Shapes Dies. I added Stampin’ Dimensionals to the back and adhered it to the front of the card.
To complete my card, I added a piece of Basic White cardstock to the inside of the card and added three Dewdrops Embellishments in clear (this embellishment won’t be available until May 5, 2026) around the circles and added two more at each end of the sentiment.
Supply List
Below you’ll find all the Stampin’ Up! supplies I used for today’s card. If you need any stamping supplies, I’d love to be your demonstrator! You can place an order by clicking any of the images below to go to my Stampin’ Up! online store.
I also used Moonlit Flora Designer Series Paper #167737, Peaceful Pine cardstock #167691, Peaceful Pine Classic Stampin’ Pad #167679 and Dewdrops Embellishments #167748. All of these products will be available on May 5, 2026!
Bundle Alert: The Fragrant Layers Bundle is available with a 10% discount rather than buying the products separately. You can get more information above or clicking the graphic below. Unfortunately, the Fragrant Layers Bundle isn’t available at the moment. It is supposed to be in the week of April 27, 2026. You can get on a list to know when it is available.

Measurements
- Peaceful Pine cardstock: 4-1/4″ x 11″ scored at 5-1/2″
- Moonlit Flora Designer Series Paper (largest circle): 3-1/2″ x 3-1/2″
- Moonlit Flora Designer Series Paper (second largest circle): 3″ x 3″
- Moonlit Flora Designer Series Paper (third largest circle): 2-1/2″ x 2-1/2
- Moonlit Flora Designer Series Paper (third smallest circle): 2-1/4″ x 2-1/4″
- Moonlit Flora Designer Series Paper (second smallest circle): 1-1/2″ x 1-1/2″
- Basic White cardstock (on the front of the card and inside the card): (2) 4″ x 5-1/4″
- Basic White cardstock (sentiment): 3-1/4″ x 1″
Sneak Peek of New In Color Ink Pads 2026-2028

This design features a felt ink pad in a magnet-based, stackable case. This case is exclusive to the In- Colors 2026 -2028 only!
Retiring In Colors 2024-2026
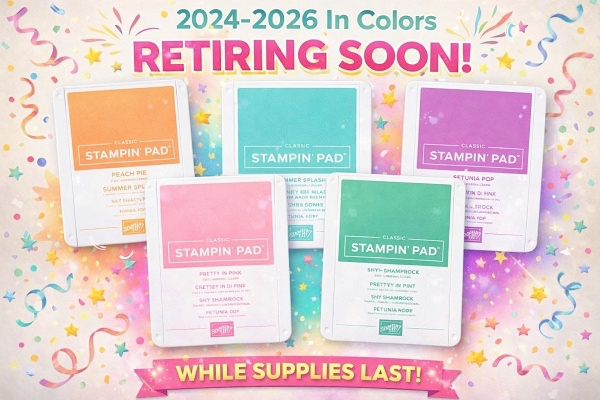
The colors that are retiring are: Pretty in Pink, Petunia Pop, Peach Pie, Shy Shamrock, and Summer Splash (I’m going to miss these colors). Some stamp pads and cardstock are in low inventory!
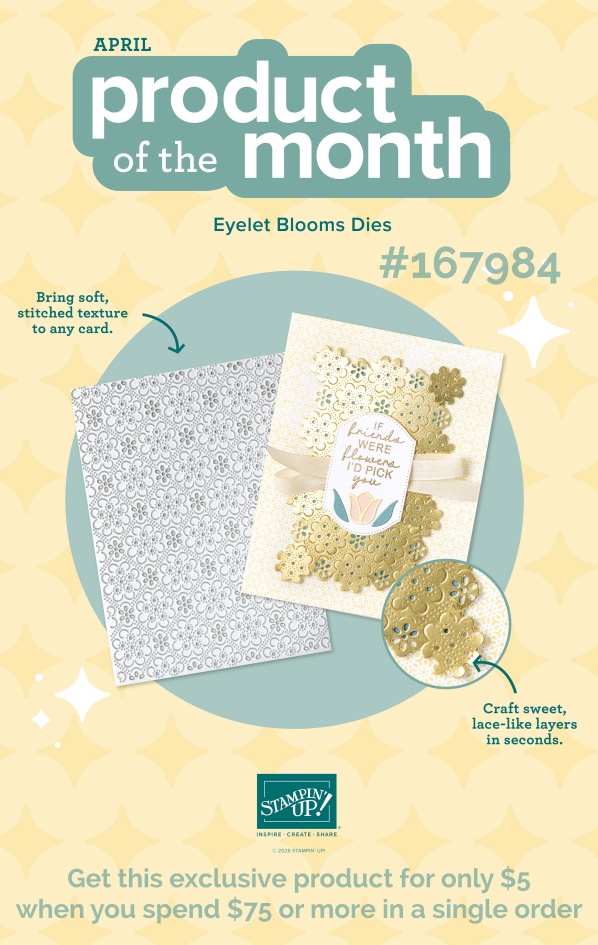
April Product of the Month

Each month, a single product of the month will be released. These items won’t be in any catalog or on the Online Exclusives page on the Stampin’ Up! website. Stock is limited, so once a Product of the Month sells out, it’s gone for good. Make sure if you like the Product of the Month, to snag your Product of the Month early!
Product of the Month Details
The Product of the Month for April
For more information about the Product of the Month, click here.
Online Exclusives – March 2026
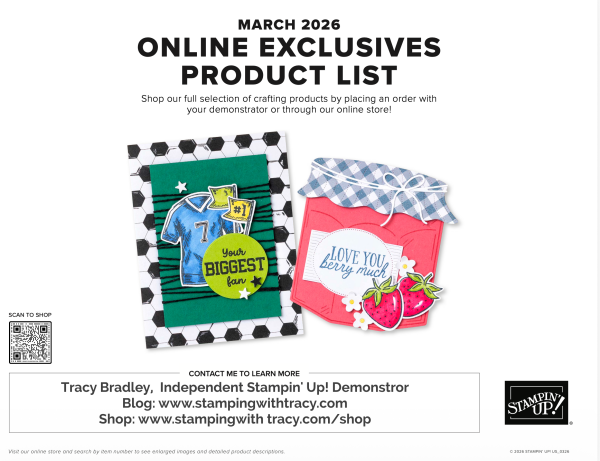
Stampin’ Up! has made a printable flyer and they’ve made it much easier to shop the new products! You won’t find Online Exclusives in any catalog, they’ll be listed in the Online Store. Click here to shop Online Exclusives. Click here to download the March 2026 Online Exclusive Product List.

Last Chance Products
Click here to go straight to the Last Chance Products page on the Stampin’ Up! site! Some products are discounted! More products were added on April 1, 2026!
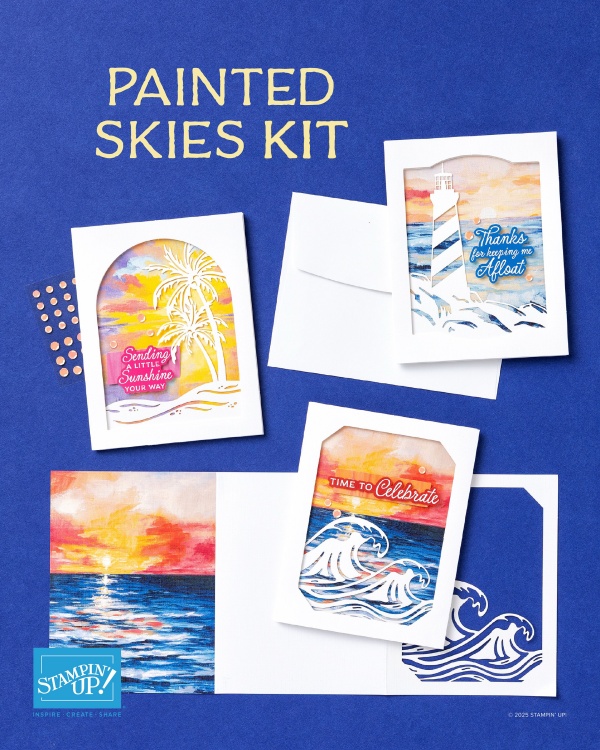
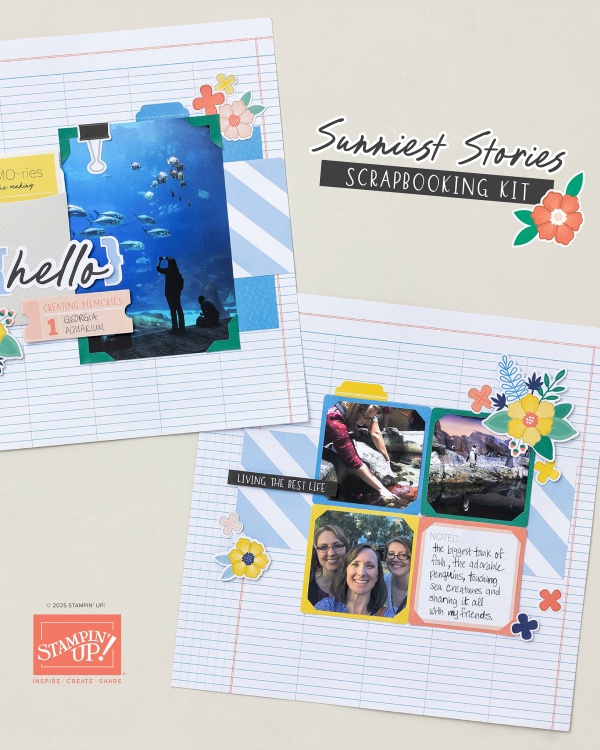
Stampin’ Up! Kits – We Have Two New Kits
Click the images for more information about the kits.
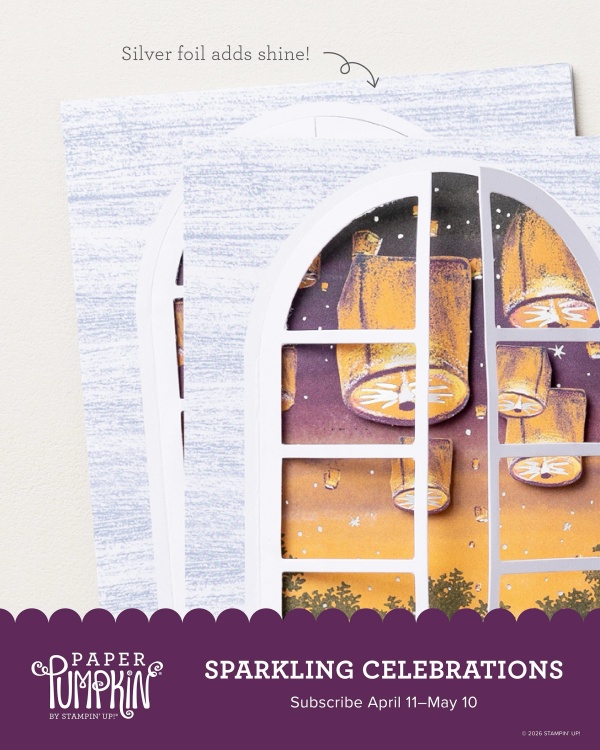
Paper Pumpkin for May- You’ll Need to Subscribe by May 10th!
Click the graphic below to subscribe to Paper Pumpkin!
There’s coordinating ADD-ON, but only for Paper Pumpkin subscribers! Click here or the graphic below to learn more about the coordinating ADD-ON!

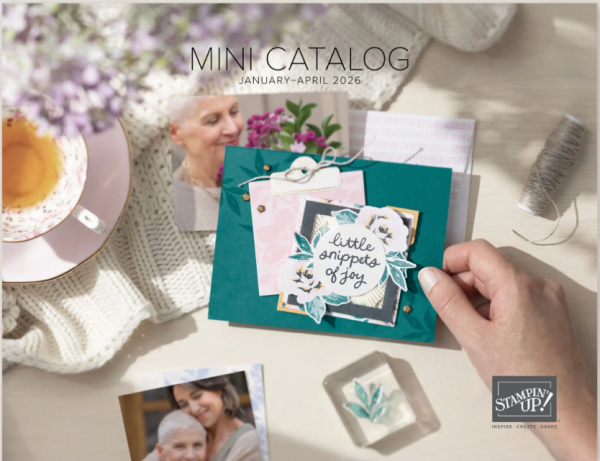
Mini Catalog January – April 2026
You can download the new Mini Catalog January – April 2026, please click here.
A lot of these products are the Last Chance List!!
Thanks for stopping by today! Enjoy your day!
by Tracy | Apr 17, 2026 | Birthday Card
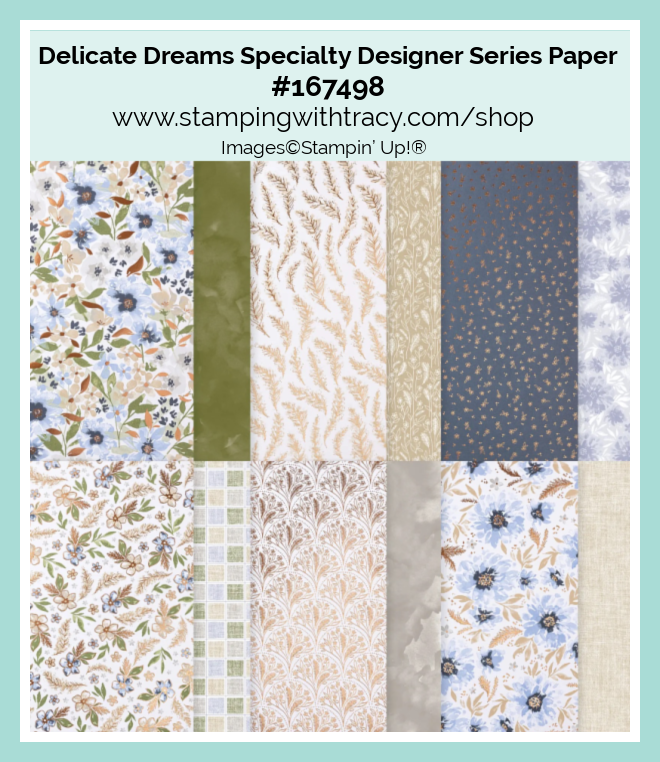
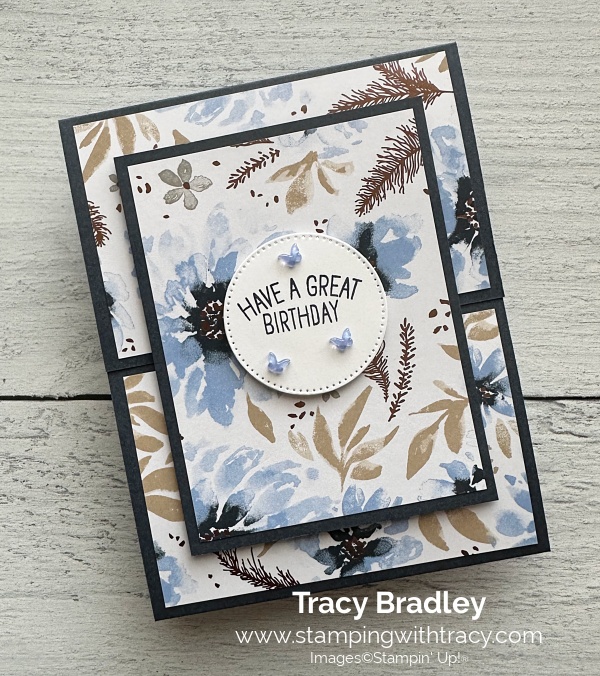
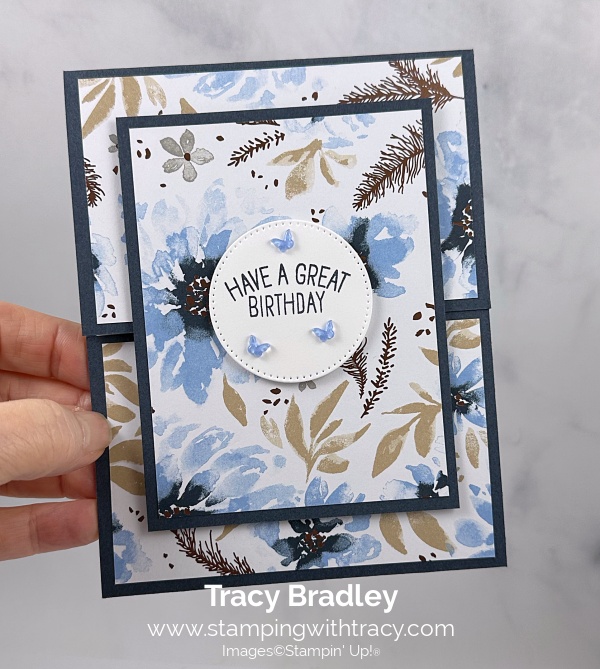
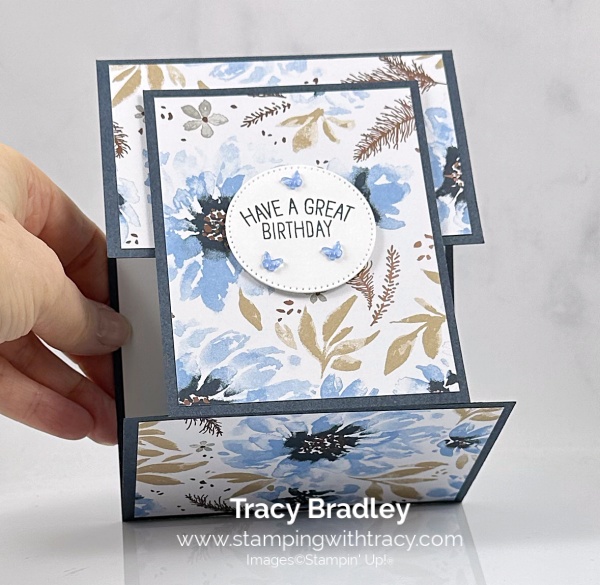
I made another fun fold today! I used a 2026-2028 In Color to make my card. Hydrangea Hue! I used the Relaxing Waterside Stamp Set #167922, Hydrangea Hue 8-1/2” x 11” cardstock #167686, Hydrangea Hue ink pad #167677 and the 2026-2028 In Color Butterflies #167656. All of these products will be available for purchase on May 5, 2026. I also used Delicate Dreams Specialty Designer Series Paper (an Online Exclusive). This Specialty Designer Series Paper has been out of stock for some time now. It is in now! I also used Stylish Shapes Dies. You can see another variation of this card, here.
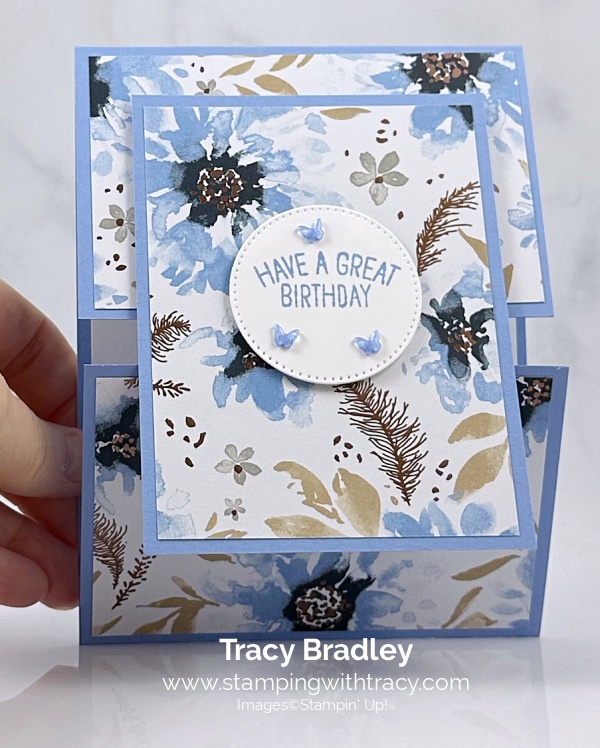
I started with Hydrangea Hue cardstock for the base of my card (you can find all the measurements I used below the Supply List). This cardstock won’t be available for purchase until May 5, 2026. Then, I cut two pieces of Delicate Dreams Specialty Designer Series Paper and adhered them to the top and the bottom of the fun fold.
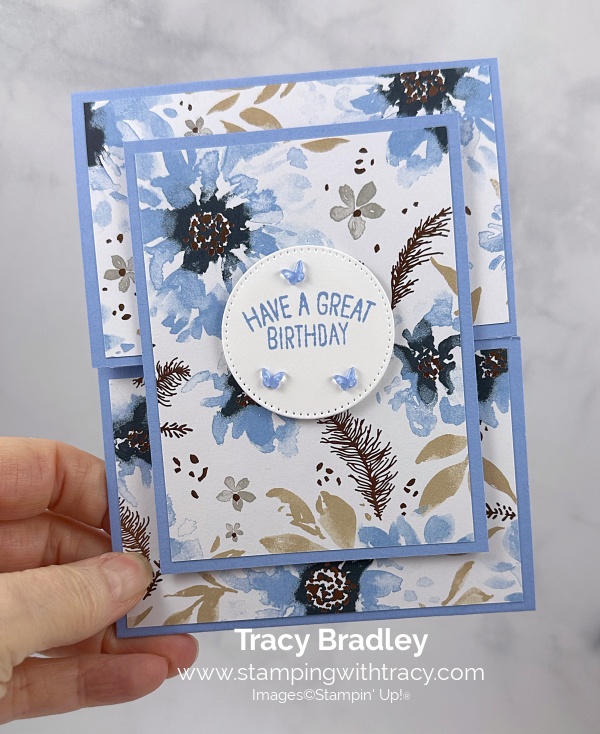
I layered a piece of Hydrangea Hue cardstock with a piece of Delicate Dreams Specialty Designer Series Paper and added two rows of Stampin’ Dimensionals to the back (at the top) and adhered it to the top flap.
I stamped the sentiment onto Basic White cardstock using the Relaxing Waterside Stamp Set (this stamp set won’t be available for purchase until May 5, 2026) in Hydrangea Hue ink (this ink pad won’t be available for purchase until May 5, 2026). I cut the sentiment out using the Stylish Shapes Dies. I added Stampin’ Dimensionals to the back and adhered it to the front of the card.
To finish my card, I added three large 2026-2028 In Color Butterflies in Hydrangea Hue (this embellishment won’t be available for purchase on May 5, 2026) around the sentiment and added a piece of Basic White cardstock to the inside.
Supply List
Below you’ll find all the Stampin’ Up! supplies I used for today’s card. If you need any stamping supplies, I’d love to be your demonstrator! You can place an order by clicking any of the images below to go to my Stampin’ Up! online store.
I also used the Relaxing Waterside Stamp Set #167922, Hydrangea Hue 8-1/2” x 11” cardstock #167686, Hydrangea Hue ink pad #167677 and the 2026-2028 In Color Butterflies #167656. All of these products will be available for purchase on May 5, 2026.
Measurements
- Hydrangea Hue cardstock: 4-1/4″ x 11″ scored at 2-3/4″ & 8-1/4″
- Hydrangea Hue cardstock: 3-1/4″ x 4-1/4″
- Delicate Dreams Specialty Designer Series Paper (top and bottom of the card): (2) 4″ x 2-1/2″
- Delicate Dreams Specialty Designer Series Paper: 3″ x 4″
- Basic White cardstock (inside card): 4″ x 5-1/4″
- Basic White cardstock (sentiment): approximately 2-1/4″ x 2-1/4″
For 3 days only (April 15–17) Stampin’ Up! is offering 2x rewards on all purchases! Ends today!
Offer Details:
- Earn double rewards (2x rewards) for three days only, starting April 15, 2026.
- This offer applies to ALL products (excluding an existing Paper Pumpkin subscription).
- All orders qualify once the rewards threshold of $20 is met.
- To participate, customers must have a Stampin’ Up! account and be opted in to Stampin’ Rewards.
Sneak Peek of New In Color Ink Pads 2026-2028
This design features a felt ink pad in a magnet-based, stackable case. This case is exclusive to the In- Colors 2026 -2028 only!
Retiring In Colors 2024-2026
The colors that are retiring are: Pretty in Pink, Petunia Pop, Peach Pie, Shy Shamrock, and Summer Splash (I’m going to miss these colors). Some stamp pads and cardstock are in low inventory!
April Product of the Month
Each month, a single product of the month will be released. These items won’t be in any catalog or on the Online Exclusives page on the Stampin’ Up! website. Stock is limited, so once a Product of the Month sells out, it’s gone for good. Make sure if you like the Product of the Month, to snag your Product of the Month early!
Product of the Month Details
The Product of the Month for April
For more information about the Product of the Month, click here.
Online Exclusives – March 2026
Stampin’ Up! has made a printable flyer and they’ve made it much easier to shop the new products! You won’t find Online Exclusives in any catalog, they’ll be listed in the Online Store. Click here to shop Online Exclusives. Click here to download the March 2026 Online Exclusive Product List.
Last Chance Products
Click here to go straight to the Last Chance Products page on the Stampin’ Up! site! Some products are discounted! More products were added on April 1, 2026!
Stampin’ Up! Kits – We Have Two New Kits
Click the images for more information about the kits.
Paper Pumpkin for May- You’ll Need to Subscribe by May 10th!
Click the graphic below to subscribe to Paper Pumpkin!
There’s coordinating ADD-ON, but only for Paper Pumpkin subscribers! Click here or the graphic below to learn more about the coordinating ADD-ON!
Mini Catalog January – April 2026
You can download the new Mini Catalog January – April 2026, please click here.
A lot of these products are the Last Chance List!!
Thanks for stopping by today! Enjoy your weekend!
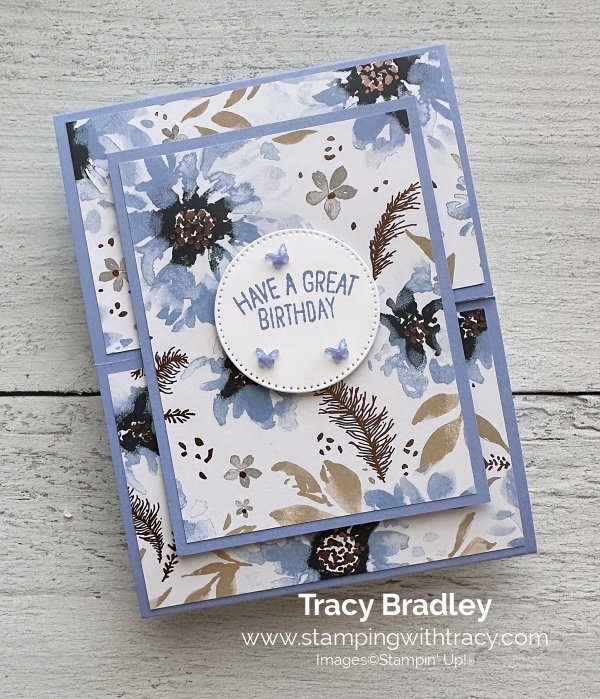
by Tracy | Apr 15, 2026 | Birthday Card
I made a fun fold card to share with you today! I used two new products that will be coming out May 5, 2026. I used the Relaxing Waterside Stamp Set #167922 and the 2026-2028 In Color Butterflies #167656. I also used Delicate Dreams Specialty Designer Series Paper (an Online Exclusive). This Specialty Designer Series Paper has been out of stock for some time now. It is in now! I don’t know how long it will be in! I also used Stylish Shapes Dies.
I started with Secret Sea cardstock for the base of my card (you can find all the measurements I used below the Supply List). Then, I cut two pieces of Delicate Dreams Specialty Designer Series Paper and adhered them to the top and the bottom of the fun fold.
I layered a piece of Secret Sea cardstock with a piece of Delicate Dreams Specialty Designer and added two rows of Stampin’ Dimensionals to the back (at the top) and adhered it to the top flap.
I stamped the sentiment onto Basic White cardstock using the Relaxing Waterside Stamp Set in Secret Sea ink. I cut the sentiment out using the Stylish Shapes Dies (the third smallest one). I added Stampin’ Dimensionals to the back and adhered it to the front of the card.
To finish my card, I added three large 2026-2028 In Color Butterflies in Hydrangea Hue around the sentiment and added a piece of Basic White cardstock to the inside.
Supply List
Below you’ll find all the Stampin’ Up! supplies I used for today’s card. If you need any stamping supplies, I’d love to be your demonstrator! You can place an order by clicking any of the images below to go to my Stampin’ Up! online store.
I also used Relaxing Waterside Stamp Set #167922 and 2026-2028 In Color Butterflies #167656. Both of the products will be available for purchase on May 5, 2026.
Measurements
- Secret Sea cardstock: 4-1/4″ x 11″ scored at 2-3/4″ & 8-1/4″
- Secret Sea cardstock: 3-1/4″ x 4-1/4″
- Delicate Dreams Specialty Designer Series Paper (top and bottom of the card): (2) 4″ x 2-1/2″
- Delicate Dreams Specialty Designer Series Paper: 3″ x 4″
- Basic White cardstock (inside card): 4″ x 5-1/4″
- Basic White cardstock (sentiment): approximately 2-1/4″ x 2-1/4″
For 3 days only (April 15–17) Stampin’ Up! is offering 2x rewards on all purchases! Starts today!
Offer Details:
- Earn double rewards (2x rewards) for three days only, starting April 15, 2026.
- This offer applies to ALL products (excluding an existing Paper Pumpkin subscription).
- All orders qualify once the rewards threshold of $20 is met
- To participate, customers must have a Stampin’ Up! account and be opted in to Stampin’ Rewards.
Sneak Peek of New In Color Ink Pads 2026-2028
This design features a felt ink pad in a magnet-based, stackable case. This case is exclusive to the In- Colors 2026 -2028 only!
Retiring In Colors 2024-2026
The colors that are retiring are: Pretty in Pink, Petunia Pop, Peach Pie, Shy Shamrock, and Summer Splash (I’m going to miss these colors). Some stamp pads and cardstock are in low inventory!
April Product of the Month
Each month, a single product of the month will be released. These items won’t be in any catalog or on the Online Exclusives page on the Stampin’ Up! website. Stock is limited, so once a Product of the Month sells out, it’s gone for good. Make sure if you like the Product of the Month, to snag your Product of the Month early!
Product of the Month Details
The Product of the Month for April
For more information about the Product of the Month, click here.
Online Exclusives – March 2026
Stampin’ Up! has made a printable flyer and they’ve made it much easier to shop the new products! You won’t find Online Exclusives in any catalog, they’ll be listed in the Online Store. Click here to shop Online Exclusives. Click here to download the March 2026 Online Exclusive Product List.
Last Chance Products
Click here to go straight to the Last Chance Products page on the Stampin’ Up! site! Some products are discounted! More products were added on April 1, 2026!
Stampin’ Up! Kits – We Have Two New Kits
Click the images for more information about the kits.
Paper Pumpkin for May- You’ll Need to Subscribe by May 10th!
Click the graphic below to subscribe to Paper Pumpkin!
There’s coordinating ADD-ON, but only for Paper Pumpkin subscribers! Click here or the graphic below to learn more about the coordinating ADD-ON!
Mini Catalog January – April 2026
You can download the new Mini Catalog January – April 2026, please click here.
A lot of these products are the Last Chance List!!
Thanks for stopping by today! Enjoy your day!
by Tracy | Apr 13, 2026 | Wishing you a Lovely Day
I do have a card for you today but first . . .
Price Increases Coming May 5th
- Adhesive Sheets +1.50
- Antique Pearls +.50
- Basic White Notecards & Envelopes +$3.00
- Blender Pens +$1.00
- Blending Brushes Small $1.00 Large $2.00
- Brayer +$1.00
- Basic White Medium Envelopes +$4.00
- Cardstock – No Price Change
- Color Lifter +.50
- Cutting Blades Multipack +$1.00
- Daubers +$1.50
- Dimensionals – Both Mini and Regular +.75
- Heat Tool +$2.00
- Foam Adhesive Sheets and Strips +.75
- Ink Pads (Current) +$2.00
- Ink Pads (New Magnetic Ones) $14. 00
- Ink Refills (Current & New) +.50
- Iridescent Pearls Basic Jewels +.50
- Fine Tip Glue Pen +.75
- Grid Paper (-100 to 50 sheets per pack)
- Linen Thread +1.00
- Masking Paper +2.00
- Metallic Gems +.50
- Mini Glue Dots +.75
- Multipurpose Liquid Glue – No Price Change
- Rhinestone Basic Jewels +1.00
- Stampin’ Blends +1.00
- Stampin’ Seal + and Stampin Seal (Refills, too) +1.00
- Take Your Pick Brush Tip +$3.00
- Twine 5 pack +$1.00
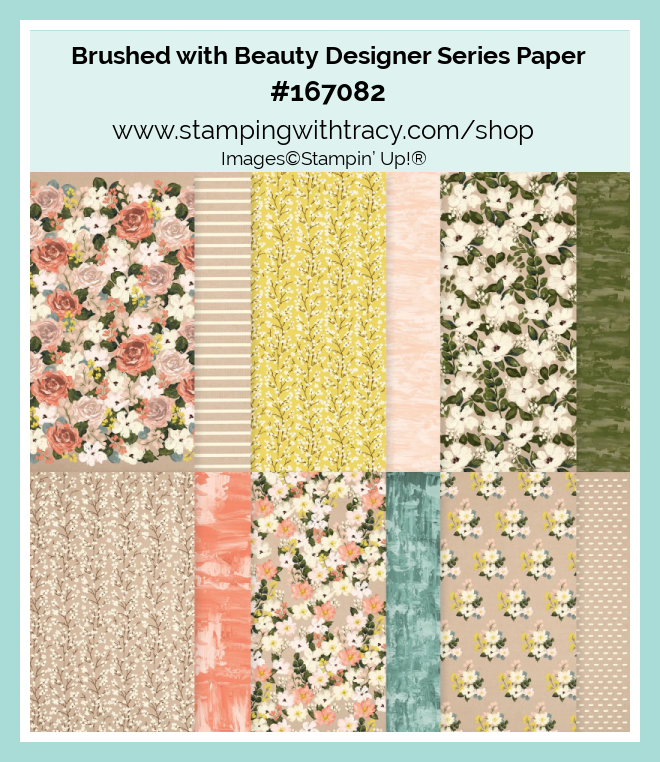
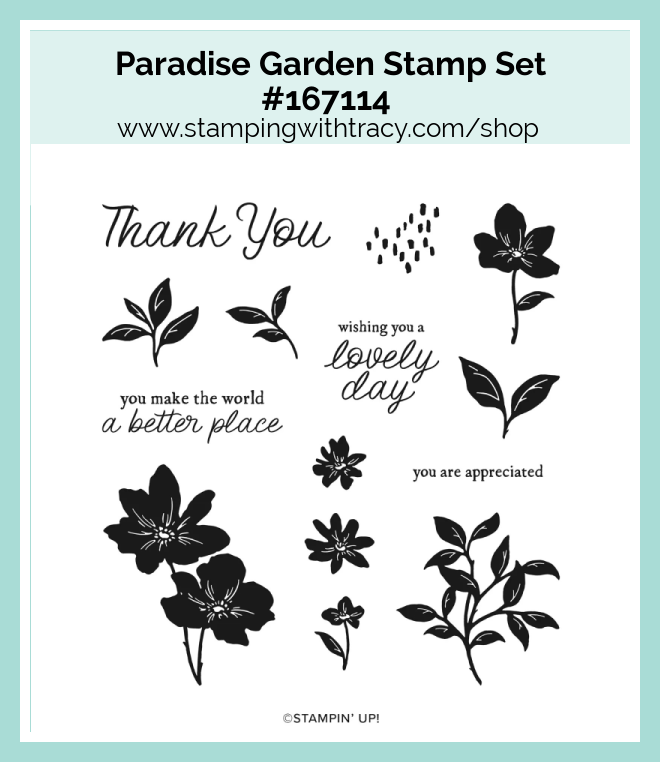
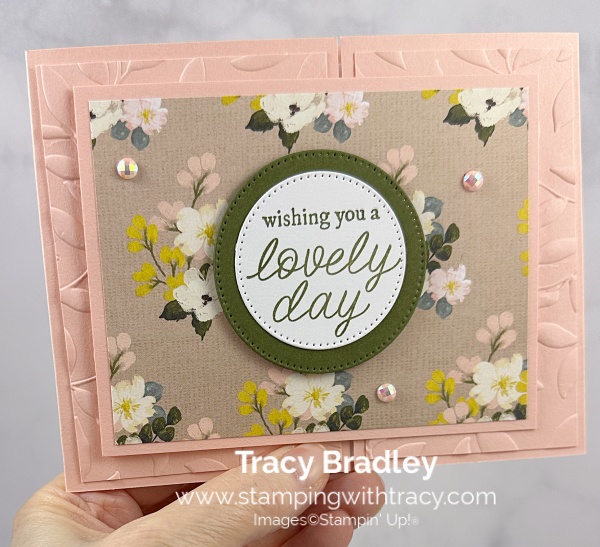
Now onto my card! I used Brushed with Beauty Designer Series Paper (an Online Exclusive), Paradise Garden Stamp Set ( an Online Exclusive), Stylish Shapes Dies, Paradise Garden Hybrid Embossing Folder (an Online Exclusive), and Pearlized Faceted Circles. You can see another version, here.
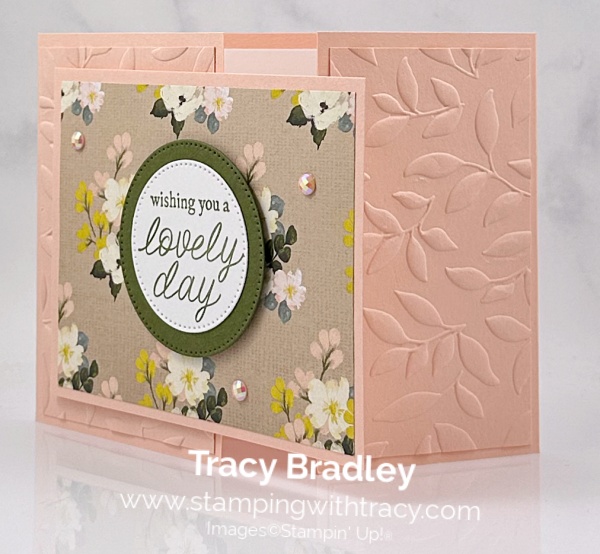
I used Petal Pink cardstock for the base of my card (you can find the measurements I used below the Supply List). I then embossed two pieces of Petal Pink cardstock using the Paradise Garden Hybrid Embossing Folder and then adhered them to the front of the card.
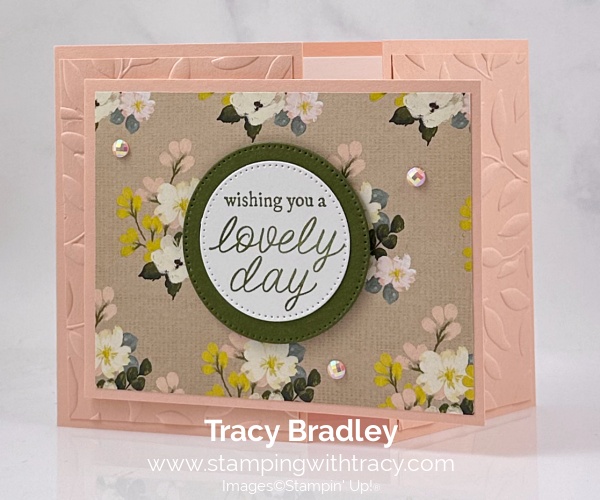
Next, I layered a piece of Petal Pink cardstock with a piece of Brushed with Beauty Designer Series Paper. On the back, I added three rows of Stampin’ Dimensionals on the right and then adhered it to the left panel being careful that you can’t see the Stampin’ Dimensionals when you open the card.
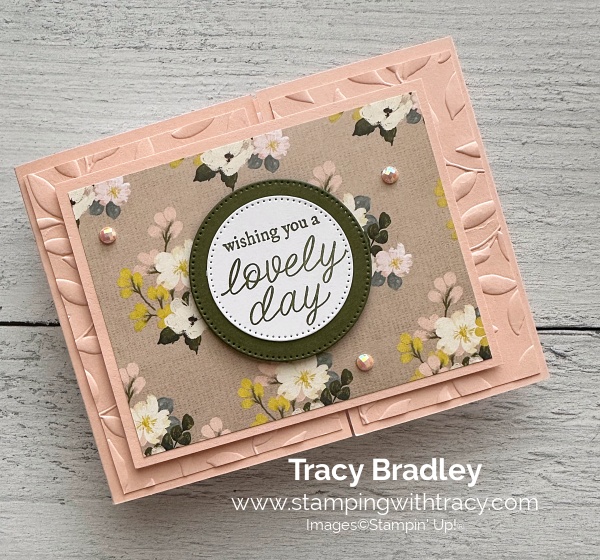

I stamped the sentiment in Mossy Meadow ink onto a piece of Basic White cardstock using the Paradise Garden Stamp Set and then cut it out using Stylish Shapes Dies (the third smallest die). I added a bigger circle cut out of Mossy Meadow cardstock (the third largest die). I adhered the sentiment to the Mossy Meadow cardstock. I added Stampin’ Dimensionals to the back and adhered it the front of the card.
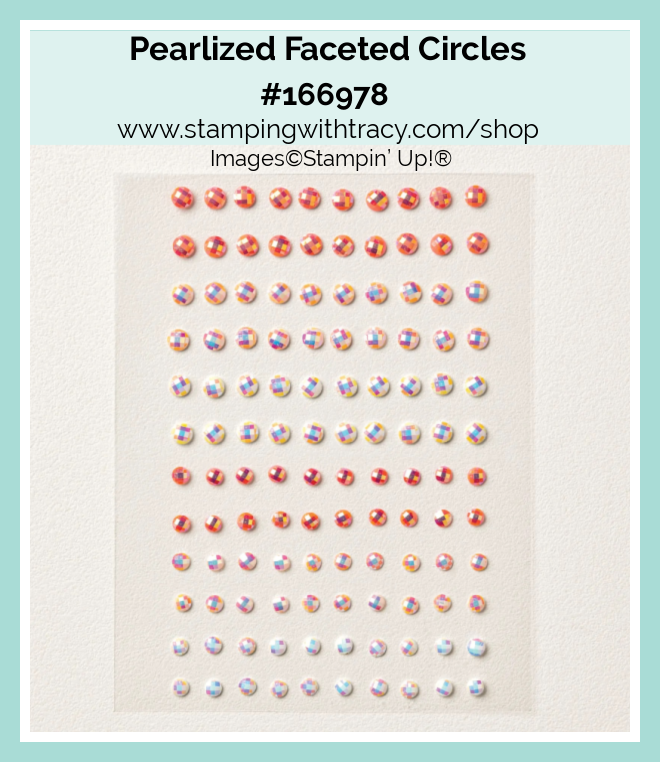
To complete my card, I added a piece of Basic White cardstock to the inside of the card and I added three large Pearlized Faceted Circles (in Petal Pink) to the front of Brushed with Beauty Designer Series Paper.
Supply List
Below you’ll find all the Stampin’ Up! supplies I used for today’s card. If you need any stamping supplies, I’d love to be your demonstrator! You can place an order by clicking any of the images below to go to my Stampin’ Up! online store. The Specialty Plate is used with 3D Embossing Folders and Hybrid Embossing Folders.
Bundle Alert: The Paradise Garden Bundle is available with a 10% discount rather than buying the products separately. You can get more information above or clicking the graphic below.

Measurements
- Petal Pink cardstock: 4-1/4″ x 11″ scored at 3″ & 8-1/2″
- Petal Pink cardstock: 4-1/2″ x 3-1/2″
- Petal Pink cardstock (embossed and left panel): 4″ x 2-3/4″
- Petal Pink cardstock (embossed and right panel): 4″ x 2-1/4″
- Mossy Meadow cardstock (under sentiment): approximately 2-1/2″ x 2 1-1/2″
- Basic White cardstock (inside of the card): 4″ x 5-1/4″
- Basic White cardstock (sentiment); approximately 2″ x 2″
- Brushed with Beauty Designer Series Paper: 4-1/4″ x 3-1/4″
Sneak Peek of New In Color Ink Pads 2026-2028
This design features a felt ink pad in a magnet-based, stackable case. This case is exclusive to the In- Colors 2026 -2028 only!
Retiring In Colors 2024-2026
The colors that are retiring are: Pretty in Pink, Petunia Pop, Peach Pie, Shy Shamrock, and Summer Splash (I’m going to miss these colors). Some stamp pads and cardstock are in low inventory!
April Product of the Month
Each month, a single product of the month will be released. These items won’t be in any catalog or on the Online Exclusives page on the Stampin’ Up! website. Stock is limited, so once a Product of the Month sells out, it’s gone for good. Make sure if you like the Product of the Month, to snag your Product of the Month early!
Product of the Month Details
The Product of the Month for April
For more information about the Product of the Month, click here.
Online Exclusives – March 2026
Stampin’ Up! has made a printable flyer and they’ve made it much easier to shop the new products! You won’t find Online Exclusives in any catalog, they’ll be listed in the Online Store. Click here to shop Online Exclusives. Click here to download the March 2026 Online Exclusive Product List.
Last Chance Products
Click here to go straight to the Last Chance Products page on the Stampin’ Up! site! Some products are discounted! More products were added on April 1, 2026!
Stampin’ Up! Kits – We Have Two New Kits
Click the images for more information about the kits.
Paper Pumpkin for May- You’ll Need to Subscribe by May 10th!
Click the graphic below to subscribe to Paper Pumpkin!
There’s coordinating ADD-ON, but only for Paper Pumpkin subscribers! Click here or the graphic below to learn more about the coordinating ADD-ON!
Mini Catalog January – April 2026
You can download the new Mini Catalog January – April 2026, please click here.
A lot of these products are the Last Chance List!!
Thanks for stopping by today! Enjoy your day!
by Tracy | Apr 8, 2026 | Take Care
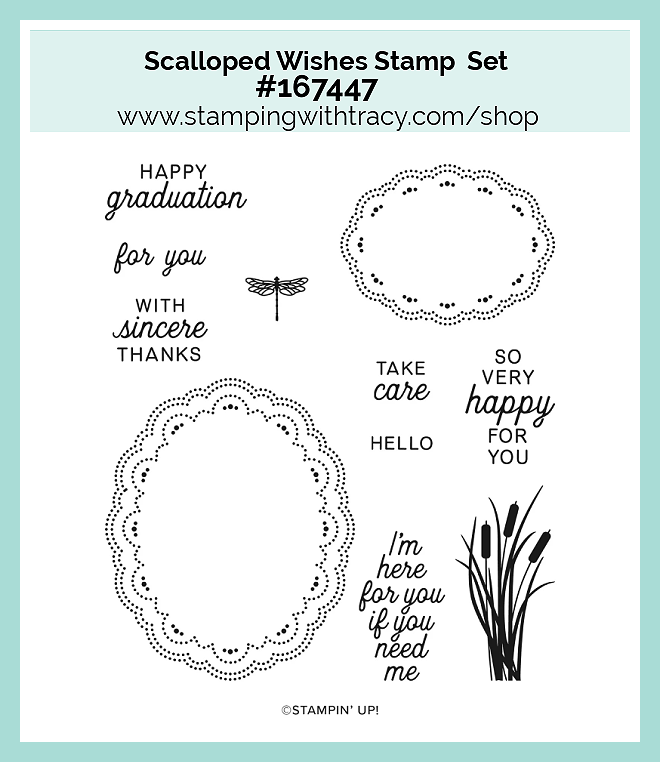
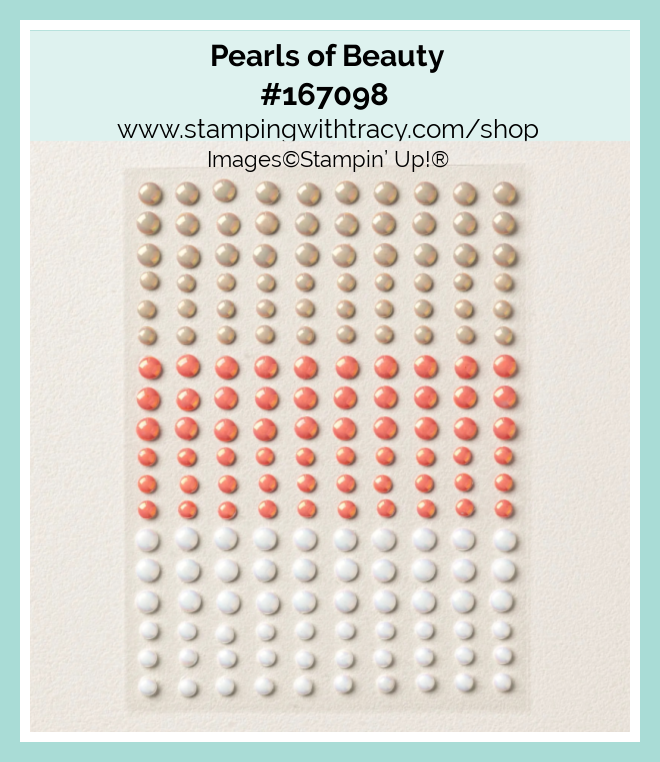
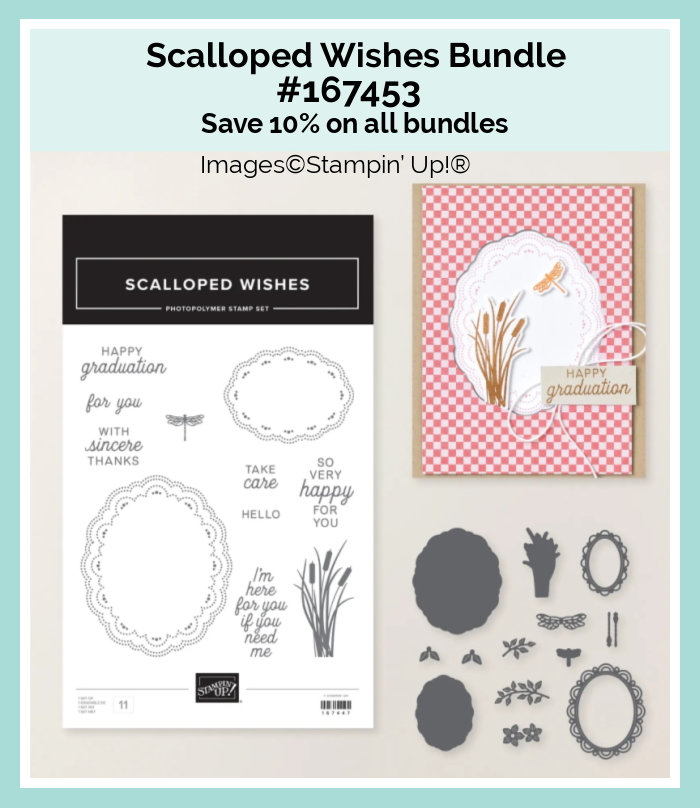
I’m introducing Velvet Meadow Specialty Designer Series Paper. #167904. It can’t be ordered until May 5, 2026! Something to look forward to! Select sheets includes specialty flocking. I also used Scalloped Wishes Stamp Set (an Online Exclusive), Stylish Shapes Dies, Paradise Garden Hybrid Embossing Folder (an Online Exclusive, and Pearls of Beauty (an Online Exclusive).
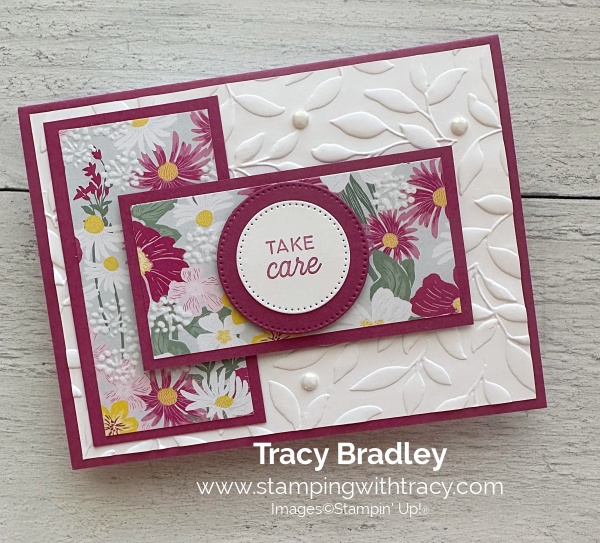
I started with a piece of Berry Burst cardstock for the base of my card. Next, I embossed a piece of Basic White cardstock using the Paradise Garden Hybrid Embossing Folder and my Stampin’ Cut & Emboss Machine. I then adhered the embossed cardstock to the front of the card.
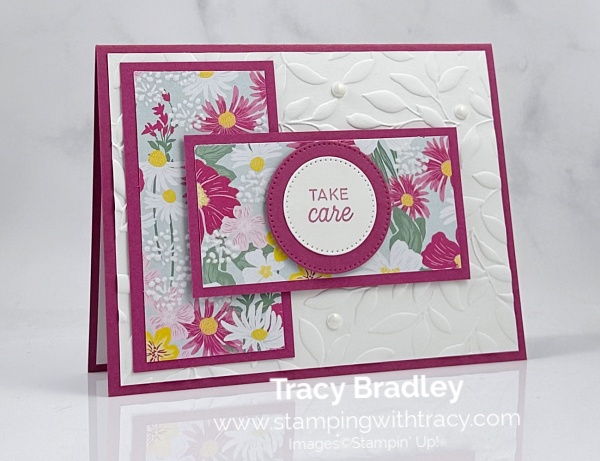
I layered two pieces of Berry Burst cardstock with Velvet Meadow Specialty Designer Series Paper (just be sure the DSP design on the horizontal piece is going horizontal). I adhered the vertical piece down with Multipurpose Glue and with the horizontal piece, I added Stampin’ Dimensionals to the back and adhered it to the front of the card.
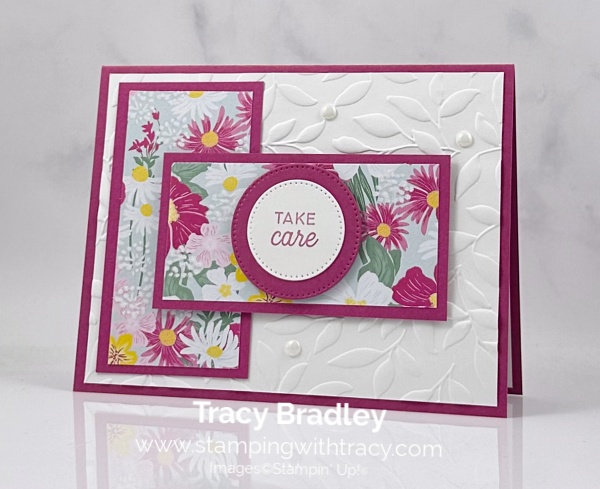
I stamped the sentiment onto Basic White cardstock using the Scalloped Wishes Stamp Set in Berry Burst ink. I cut it out using the Stylish Shapes Dies (the second smallest circle die). I cut a piece of Berry Burst cardstock and cut another circle out of Berry Burst cardstock (using the third smallest circle die). I added the sentiment to the Berry Burst circle, I added Stampin’ Dimensionals to the back and adhered it to the horizontal piece.
To complete my card, I added three large Pearls of Beauty in white to the embossed cardstock (the Pearls of Beauty are really shiny and they just pop when they are on the card) and added a piece of Basic White cardstock to the inside.
Supply List
Below you’ll find all the Stampin’ Up! supplies I used for today’s card. If you need any stamping supplies, I’d love to be your demonstrator! You can place an order by clicking any of the images below to go to my Stampin’ Up! online store. The Specialty Plate is used with 3D Embossing Folders and Hybrid Embossing Folders.
I also used Velvet Meadow Specialty Paper and it will be available for purchase on May 5, 2026, #167904.
Bundle Alert: The Paradise Garden Bundle is available with a 10% discount rather than buying the products separately. You can get more information above or clicking the graphic below.
Bundle Alert: The Scalloped Wishes Bundle is available with a 10% discount rather than buying the products separately. You can get more information above or clicking the graphic below.
Measurements
- Berry Burst cardstock: 5-1/2″ x 8-1/2″ scored at 4-1/4″
- Berry Burst cardstock (horizontal piece and vertical piece): (2) 2 x 3-3/4″
- Berry Burst cardstock (under sentiment): approximately 2″ x 2″
- Velvet Meadow Specialty Designer Series Paper (vertical piece): 1-3/4″ x 3-1/2″
- Velvet Meadow Specialty Designer Series Paper (horizontal piece): 3-1/2″ x 1-3/4″
- Basic White cardstock (embossed and inside card): (2) 5-1/4″ x 4″
- Basic White cardstock (sentiment): approximately 1-1/2″ x 1-1/2″
Sneak Peek of New In Color Ink Pads 2026-2028
This design features a felt ink pad in a magnet-based, stackable case. This case is exclusive to the In- Colors 2026 -2028 only!
Retiring In Colors 2024-2026
The colors that are retiring are: Pretty in Pink, Petunia Pop, Peach Pie, Shy Shamrock, and Summer Splash (I’m going to miss these colors). Some stamp pads and cardstock are in low inventory!
April Product of the Month
Each month, a single product of the month will be released. These items won’t be in any catalog or on the Online Exclusives page on the Stampin’ Up! website. Stock is limited, so once a Product of the Month sells out, it’s gone for good. Make sure if you like the Product of the Month, to snag your Product of the Month early!
Product of the Month Details
The Product of the Month for April
For more information about the Product of the Month, click here.
Online Exclusives – March 2026
Stampin’ Up! has made a printable flyer and they’ve made it much easier to shop the new products! You won’t find Online Exclusives in any catalog, they’ll be listed in the Online Store. Click here to shop Online Exclusives. Click here to download the March 2026 Online Exclusive Product List.
Last Chance Products
Click here to go straight to the Last Chance Products page on the Stampin’ Up! site! Some products are discounted! More products were added on April 1, 2026!
Stampin’ Up! Kits – We Have Two New Kits
Click the images for more information about the kits.
Paper Pumpkin for April- Subscribe by April 10th!
Click the graphic below to subscribe to Paper Pumpkin!

There’s coordinating ADD-ON, but only for Paper Pumpkin subscribers! Click here or the graphic below to learn more about the coordinating ADD-ON!
Mini Catalog January – April 2026
You can download the new Mini Catalog January – April 2026, please click here.
A lot of these products are the Last Chance List!!
Thanks for stopping by today! Enjoy your day!


