by Tracy | Apr 3, 2026 | With Sincere Thanks
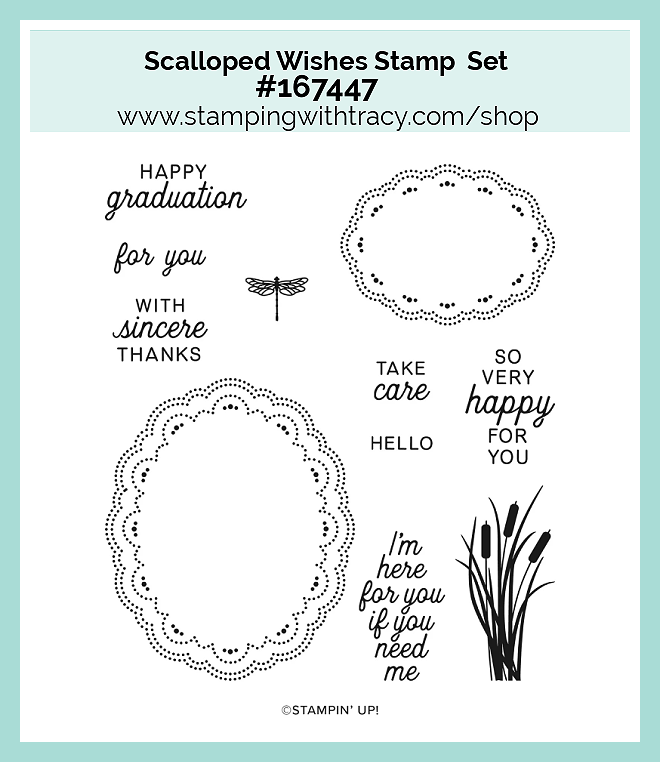
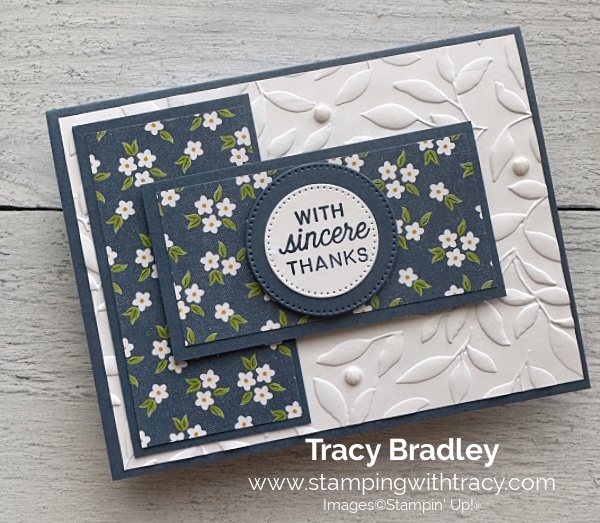
The card I’m sharing with you today was made with Homemade Sweetness Designer Series Paper (an Online Exclusive), Scalloped Wishes Stamp Set (an Online Exclusive), Paradise Garden Hybrid Embossing Folder (an Online Exclusive), Stylish Shapes Dies, and Pearls of Beauty (an Online Exclusive). You can see another variation of this card, here.
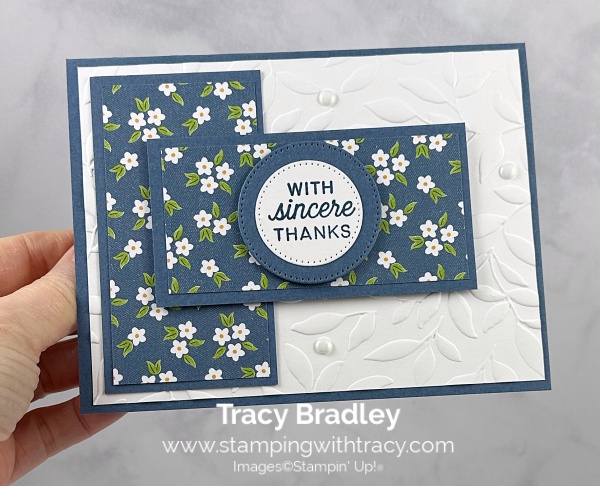

I started with a piece of Misty Moonlight cardstock for the base of my card. Next, I embossed a piece of Basic White cardstock using the Paradise Garden Hybrid Embossing Folder and my Stampin’ Cut & Emboss Machine. I then adhered the embossed cardstock to the front of the card.
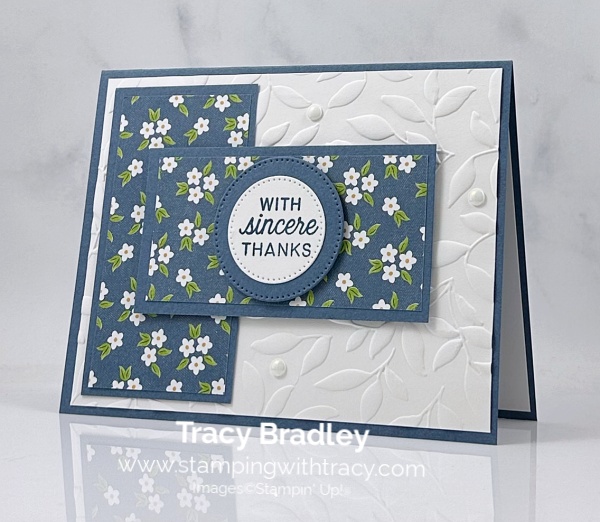
I layered two pieces of Misty Moonlight cardstock with Homemade Sweetness Designer Series Paper (just be sure the DSP design on the horizontal piece is going horizontal). I adhered the vertical piece down with Multipurpose Glue and with the horizontal piece, I added Stampin’ Dimensionals to the back and adhered it to the front of the card.
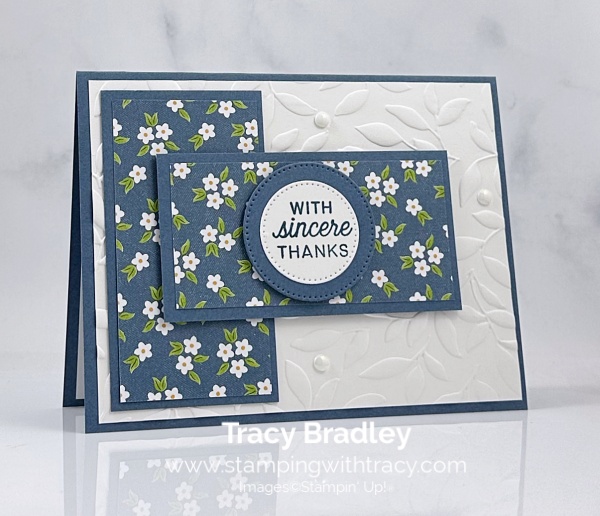


I stamped the sentiment onto Basic White cardstock using the Scalloped Wishes Stamp Set in Misty Moonlight ink. I cut it out using the Stylish Shapes Dies (the second smallest circle die). I cut a piece of Misty Moonlight cardstock and cut another circle out of Misty Moonlight cardstock (using the third smallest circle die). I added the sentiment to the Misty Moonlight circle die, I added Stampin’ Dimensionals to the back and adhered it to the horizontal piece.
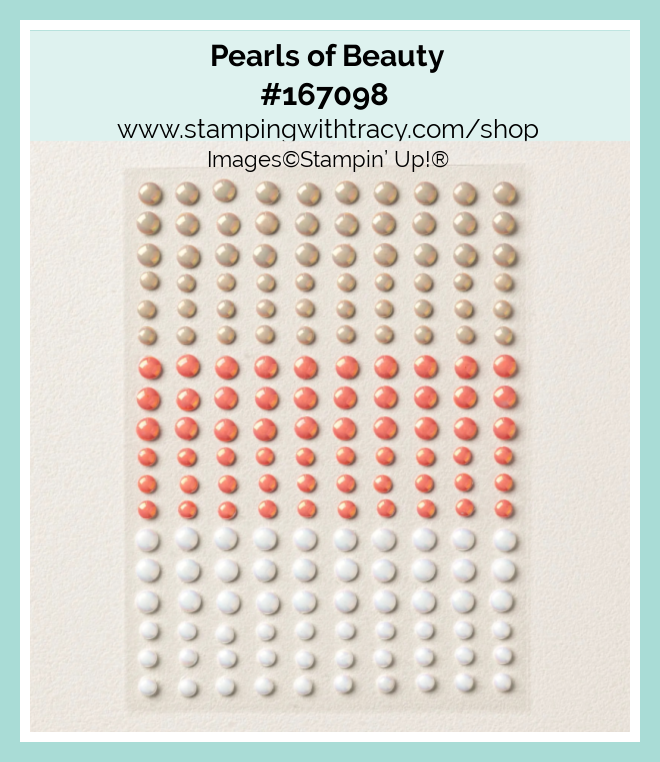
To complete my card, I added three large Pearls of Beauty in white to the embossed cardstock (the Pearls of Beauty are really shiny and they just pop when they are on the card). I added a piece of Basic White cardstock to the inside.
Supply List
Below you’ll find all the Stampin’ Up! supplies I used for today’s card. If you need any stamping supplies, I’d love to be your demonstrator! You can place an order by clicking any of the images below to go to my Stampin’ Up! online store. The Specialty Plate is used with 3D Embossing Folders and Hybrid Embossing Folders.
Bundle Alert: The Paradise Garden Bundle is available with a 10% discount rather than buying the products separately. You can get more information above or clicking the graphic below.

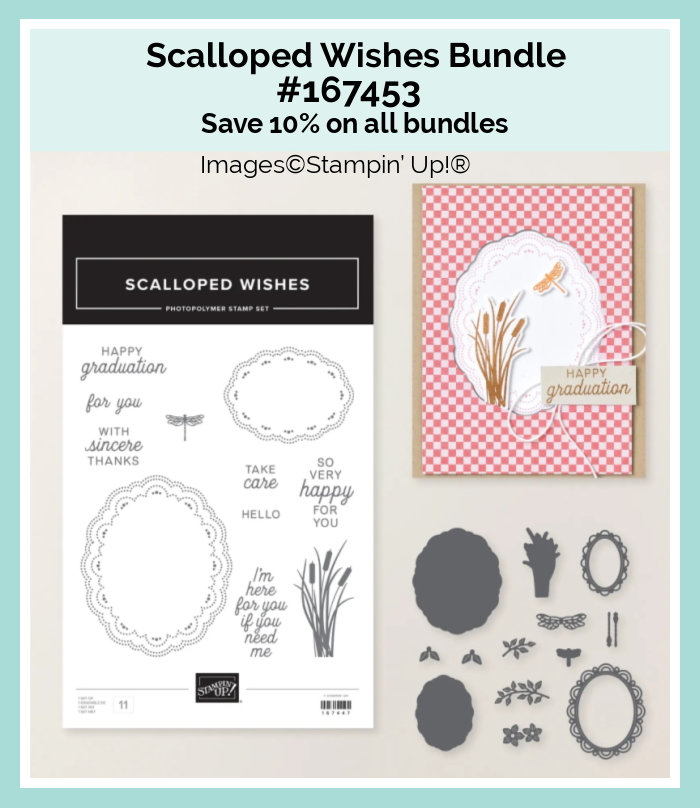
Bundle Alert: The Scalloped Wishes Bundle is available with a 10% discount rather than buying the products separately. You can get more information above or clicking the graphic below.
Measurements
- Misty Moonlight cardstock: 5-1/2″ x 8-1/2″ scored at 4-1/4″
- Misty Moonlight cardstock (horizontal piece and vertical piece): (2) 2 x 3-3/4″
- Misty Moonlight cardstock (under sentiment): approximately 2″ x 2″
- Homemade Sweetness Designer Series Paper (vertical piece): 1-3/4″ x 3-1/2″
- Homemade Sweetness Designer Series Paper (horizontal piece): 3-1/2″ x 1-3/4″
- Basic White cardstock (embossed and inside card): (2) 5-1/4″ x 4″
- Basic White cardstock (sentiment): approximately 1-1/2″ x 1-1/2″
Sneak Peek of New In Color Ink Pads 2026-2028

This design features a felt ink pad in a magnet-based, stackable case. This case is exclusive to the In- Colors 2026 -2028 only!
Retiring In Colors 2024-2026
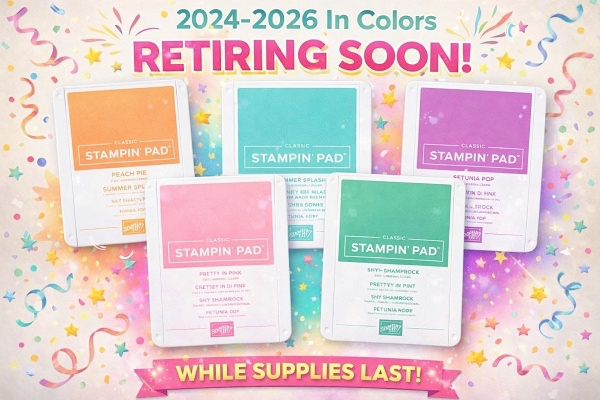
The colors that are retiring are: Pretty in Pink, Petunia Pop, Peach Pie, Shy Shamrock, and Summer Splash (I’m going to miss these colors). Some stamp pads and cardstock are in low inventory!
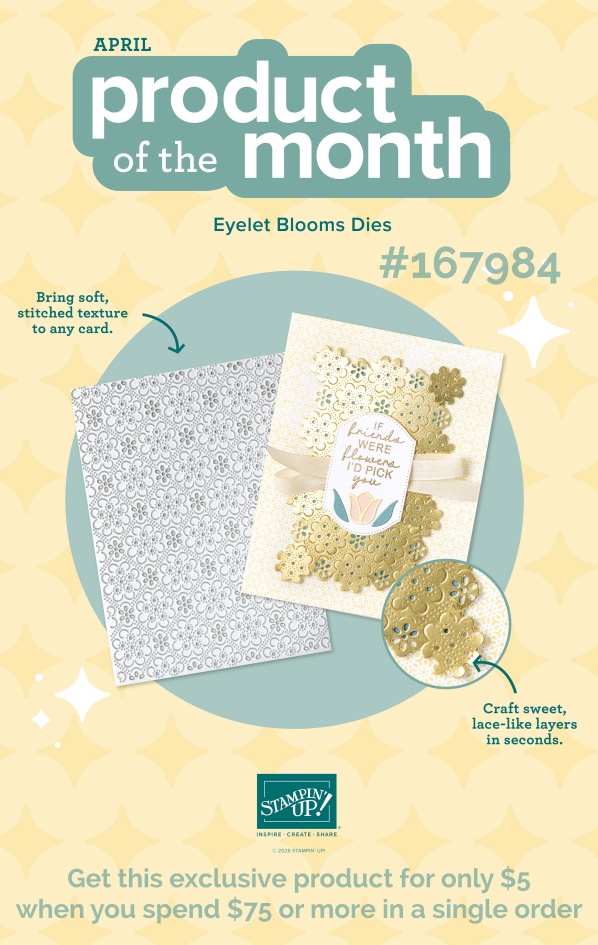
April Product of the Month

Each month, a single product of the month will be released. These items won’t be in any catalog or on the Online Exclusives page on the Stampin’ Up! website. Stock is limited, so once a Product of the Month sells out, it’s gone for good. Make sure if you like the Product of the Month, to snag your Product of the Month early!
Product of the Month Details
The Product of the Month for April
For more information about the Product of the Month, click here.
Online Exclusives – March 2026
Stampin’ Up! has made a printable flyer and they’ve made it much easier to shop the new products! You won’t find Online Exclusives in any catalog, they’ll be listed in the Online Store. Click here to shop Online Exclusives. Click here to download the March 2026 Online Exclusive Product List.

Last Chance Products
Click here to go straight to the Last Chance Products page on the Stampin’ Up! site! Some products are discounted! More products were added on April 1, 2026!
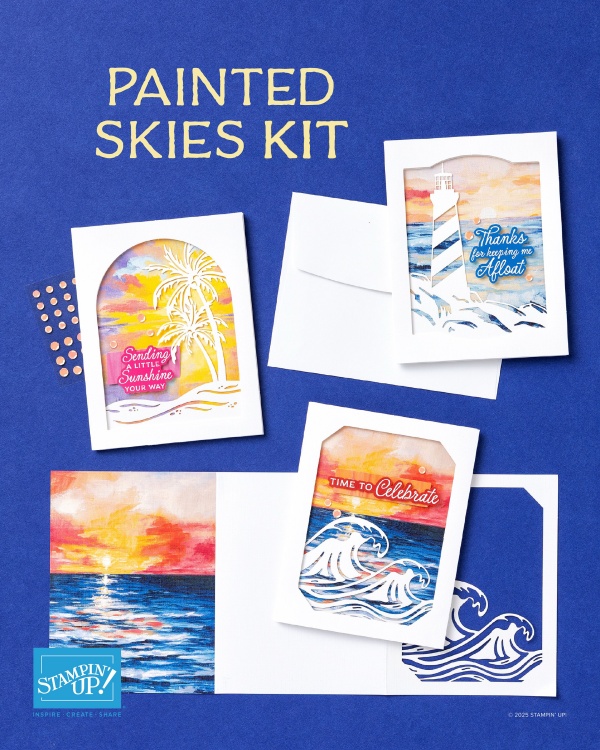
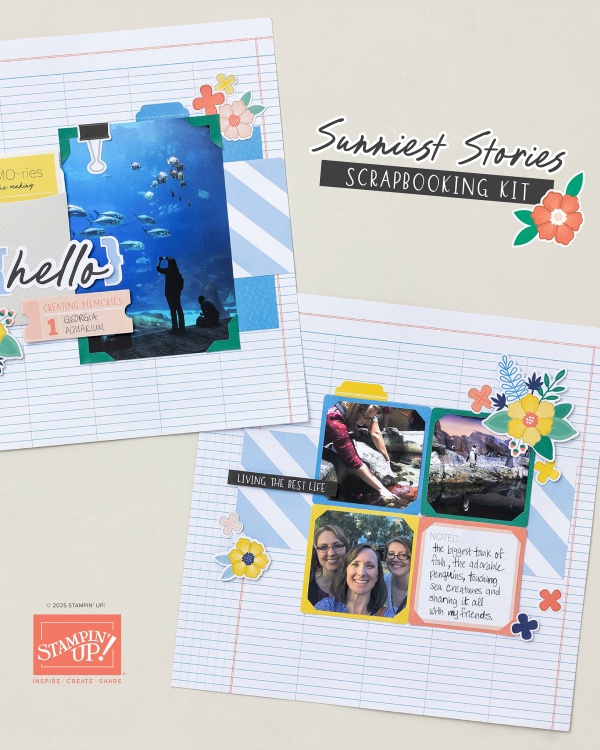
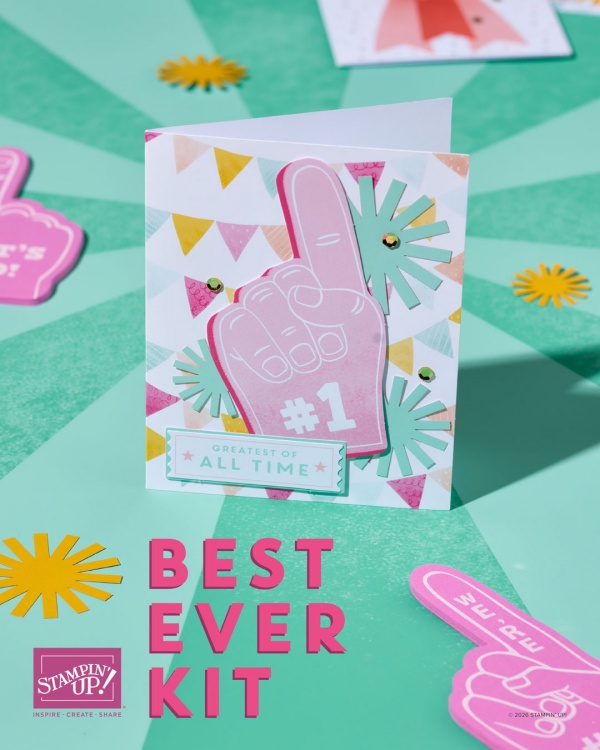
Stampin’ Up! Kits – We Have Two New Kits
Click the images for more information about the kits.
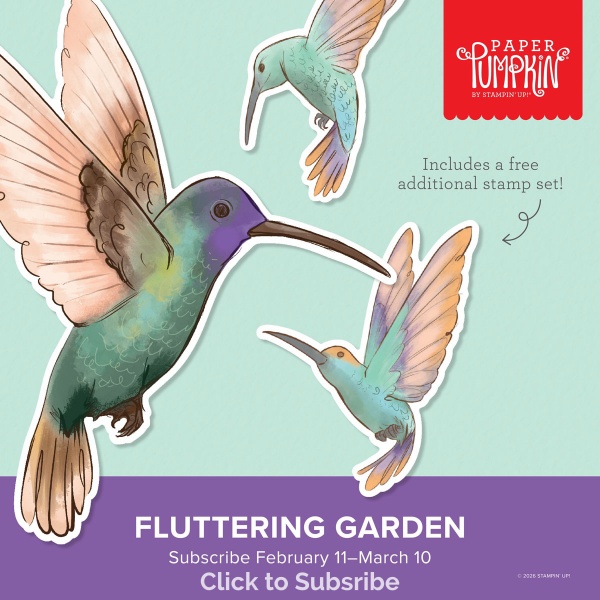
Paper Pumpkin for April- Subscribe by April 10th!
Click the graphic below to subscribe to Paper Pumpkin!

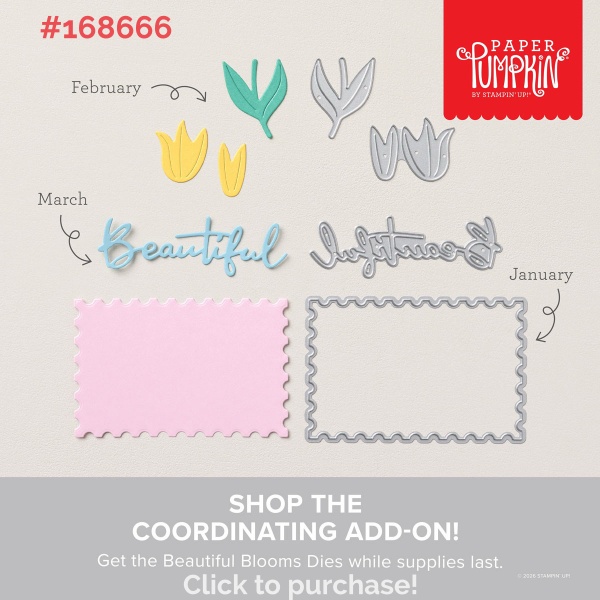
There’s coordinating ADD-ON, but only for Paper Pumpkin subscribers! Click here or the graphic below to learn more about the coordinating ADD-ON!

Mini Catalog January – April 2026
You can download the new Mini Catalog January – April 2026, please click here.
A lot of these products are the Last Chance List!!
Thanks for stopping by today! Enjoy your weekend!
by Tracy | Apr 1, 2026 | With Sincere Thanks
You may see that the Stampin’ Up! site is different. I’m learning to get around the site so, if some of my links don’t work, I’ll be back later to update them.
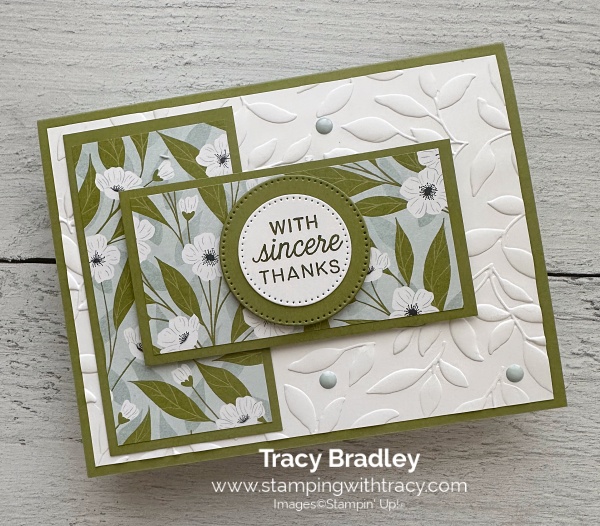
I made my card using the Scalloped Wishes Stamp Set (an Online Exclusive), Lovely Blossoms Designer Series Paper (an Online Exclusive), Paradise Garden Hybrid Embossing Folder (an Online Exclusive), Stylish Shapes Dies and Moody Palette Glossy Dots (an Online Exclusive). The Moody Palette Glossy Dots are on the Low Inventory List!
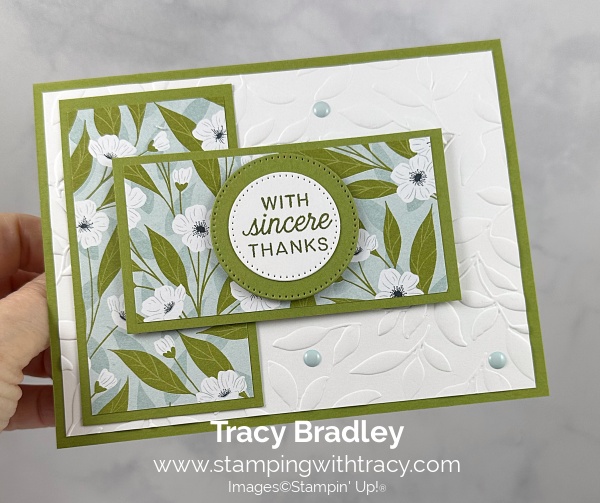
I started with a piece of Old Olive cardstock for the base of my card. Next, I embossed a piece of Basic White cardstock using the Paradise Garden Hybrid Embossing Folder and my Stampin’ Cut & Emboss Machine. I then adhered the embossed cardstock to the front of the card.
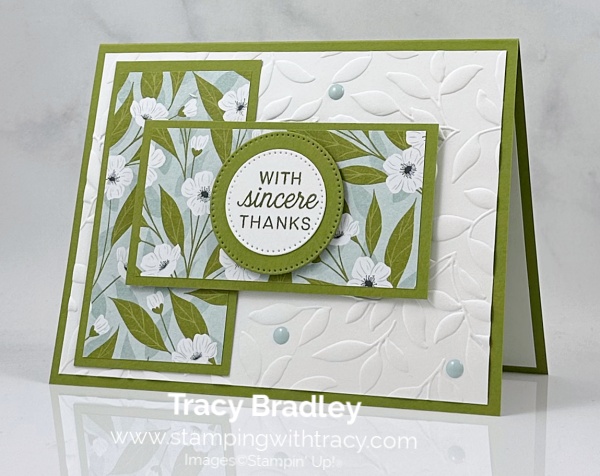

I layered two pieces of Old Olive cardstock with Lovely Blossoms Designer Series Paper (just be sure the DSP design on the horizontal piece is going horizontal). I adhered the vertical piece down with Multipurpose Glue and with the horizontal piece, I added Stampin’ Dimensionals to the back and adhered it to the front of the card.
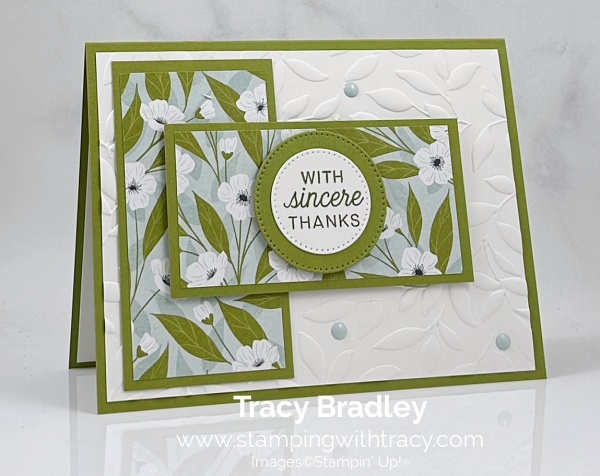
I stamped the sentiment onto Basic White cardstock using the Scalloped Wishes Stamp Set in Old Olive ink. I cut it out using the Stylish Shapes Dies (the second smallest circle die). I cut a piece of Old Olive cardstock and cut another circle out of Old Olive cardstock (using the third smallest circle die). I added the sentiment to the Old Olive circle shape, I added Stampin’ Dimensionals to the back and adhered it to the horizontal piece.
To complete my card, I added three large Moody Palette Glossy Dots in Cloud Cover to the embossed cardstock and added a piece of Basic White cardstock to the inside.

Supply List
Below you’ll find all the Stampin’ Up! supplies I used for today’s card. If you need any stamping supplies, I’d love to be your demonstrator! You can place an order by clicking any of the images below to go to my Stampin’ Up! online store. The Specialty Plate is used with 3D Embossing Folders and Hybrid Embossing Folders.
Bundle Alert: The Paradise Garden Bundle is available with a 10% discount rather than buying the products separately. You can get more information above or clicking the graphic below.
Bundle Alert: The Scalloped Wishes Bundle is available with a 10% discount rather than buying the products separately. You can get more information above or clicking the graphic below.
Measurements
- Old Olive cardstock: 5-1/2″ x 8-1/2″ scored at 4-1/4″
- Old Olive cardstock (horizontal piece and vertical piece): (2) 2 x 3-3/4″
- Old Olive cardstock (under sentiment): approximately 2″ x 2″
- Lovely Blossoms Designer Series Paper (vertical piece): 1-3/4″ x 3-1/2″
- Lovely Blossoms Designer Series Paper (horizontal piece): 3-1/2″ x 1-3/4″
- Basic White cardstock (embossed and inside card): (2) 5-1/4″ x 4″
- Basic White cardstock (sentiment): approximately 1-1/2″ x 1-1/2″
Sneak Peek of New In Color Ink Pads 2026-2028
This design features a felt ink pad in a magnet-based, stackable case. This case is exclusive to the In- Colors 2026 -2028 only!
Retiring In Colors 2024-2026
The colors that are retiring are: Pretty in Pink, Petunia Pop, Peach Pie, Shy Shamrock, and Summer Splash (I’m going to miss these colors). Some stamp pads and cardstock are in low inventory!
April Product of the Month
Each month, a single product of the month will be released. These items won’t be in any catalog or on the Online Exclusives page on the Stampin’ Up! website. Stock is limited, so once a Product of the Month sells out, it’s gone for good. Make sure if you like the Product of the Month, to snag your Product of the Month early!
Product of the Month Details
The Product of the Month for April
For more information about the Product of the Month, click here.
Online Exclusives – March 2026
Stampin’ Up! has made a printable flyer and they’ve made it much easier to shop the new products! You won’t find Online Exclusives in any catalog, they’ll be listed in the Online Store. Click here to shop Online Exclusives. Click here to download the March 2026 Online Exclusive Product List.
Last Chance Products
Click here to go straight to the Last Chance Products page on the Stampin’ Up! site! Some products are discounted! More products were added on April 1, 2026!
Stampin’ Up! Kits – We Have Two New Kits
Click the images for more information about the kits.
Paper Pumpkin for April- Subscribe by April 10th!
Click the graphic below to subscribe to Paper Pumpkin!
There’s coordinating ADD-ON, but only for Paper Pumpkin subscribers! Click here or the graphic below to learn more about the coordinating ADD-ON!
Mini Catalog January – April 2026
You can download the new Mini Catalog January – April 2026, please click here.
Thanks for stopping by today! Enjoy your day!!
by Tracy | Mar 4, 2026 | Kindness Card
I used two new products on my card today: Garden Poetry Designer Series Paper (it’s an Online Exclusive) and Lazy Daisy 3D Embossing Folder (an Online Exclusive. I also used The Right Words Stamp Set, Stylish Shapes Dies and Pearls of Beauty (an Online Exclusive). You can see a different version, here.


I started with a piece of Blackberry Bliss cardstock (you can find all the measurements I used below the Supply List). I then embossed a piece of Basic White cardstock using the Lazy Daisy 3D Embossing Folder (available yesterday) using my Stampin’ Cut & Emboss Machine. I adhered it to the Blackberry Bliss cardstock.


I cut another piece of Blackberry Bliss cardstock for the flap and scored it. I added a strong adhesive to the back (I used Tear & Tape) and adhered it to the card front (you can also used Stampin’ Seal+). I cut a piece of Garden Poetry Designer Series Paper and added it to the front of the Blackberry Bliss cardstock flap.


I stamped the sentiment using The Right Words Stamp Set, in Berry Burst ink onto Basic White cardstock. I cut it out using Stylish Shapes Dies (the second smallest circle die). I cut a second circle out of the Berry Burst cardstock (the third smallest circle die). I adhered the sentiment to the front of the Berry Burst circle. I added Stampin’ Dimensionals on the back and added it to the front of the card.
To complete my card, I added a piece of Basic White cardstock to the inside and three Pearls of Beauty in white to the Garden Poetry Designer Series Paper.

Supply List
Below you’ll find all the Stampin’ Up! supplies I used for today’s card. If you need any stamping supplies, I’d love to be your demonstrator! You can place an order by clicking any of the images below to go to my Stampin’ Up! online store. The Specialty Plate is used with 3D Embossing Folders and Hybrid Embossing Folders.
Measurements
- Blackberry Bliss cardstock: 5-1/2″ x 4-1/4″
- Blackberry Bliss cardstock: 2-3/4″ x 8-1/2″ scored at 4-1/4″
- Berry Burst cardstock (under sentiment): approximately 2″ x 2″
- Basic White cardstock (embossed): 4″ x 5-1/4″
- Basic White cardstock (inside card): 2-1/2″ x 4″
- Basic White cardstock (sentiment): approximately 1-1/2″ x 1-1/2″
- Garden Poetry Designer Series Paper: 2-1/2″ x 4″
Retiring In Colors 2024-2026
The colors that are retiring are: Pretty in Pink, Petunia Pop, Peach Pie, Shy Shamrock, and Summer Splash (I’m going to miss these colors). Some stamp pads and cardstock are in low inventory! Click here to see what’s still around. The link is only for the first page.
March Product of the Month
Each month, a single product of the month will be released. These items won’t be in any catalog or on the Online Exclusives page on the Stampin’ Up! website. Stock is limited, so once a Product of the Month sells out, it’s gone for good. Make sure if you like the Product of the Month, to snag your Product of the Month early!
Product of the Month Details
- You must have a Stampin’ Up online account to participate.
- Add the Product of the Month after your cart reaches $75. You can purchase the Product of the Month for just $5! The cart must be $75 (after Stampin’ Rewards).
- Limit 1 per Stampin’ Up! account.
- You must add the The Product of the Month to your cart after you reach $75
The Product of the Month for March
For more information about the Product of the Month, click here, or the graphic below.

Online Exclusives – March 2026
Click the graphic below to access the March Online Exclusives Product List! Stampin’ Up! has made a printable flyer and they’ve made it much easier to shop the new products! You won’t find Online Exclusives in any catalog, they’ll be listed in the Online Store. Click here to shop Online Exclusives. Click here to download the March 2026 Online Exclusive Product List.
Last Chance Products
Click here to go straight to the Last Chance Products page on the Stampin’ Up! site! Some products are discounted! More products were added on February 3, 2026!
Stampin’ Up! Kits – We Have Two New Kits
Click the images below for more information about the kits.


Paper Pumpkin for March – Subscribe by March 10th!
The additional coordinating add-on has sold out!
Mini Catalog January – April 2026
You can download the new Mini Catalog January – April 2026, here, or the graphic below
Thanks for stopping by today! Enjoy your day!
by Tracy | Mar 2, 2026 | Kindness Card
I used a new product on my card, coming out on March 3, 2026, the Lazy Daisy 3D Embossing Folder (it’s an Online Exclusive) #167196. I also used The Right Words Stamp Set, Brushed with Beauty Designer Series (an Online Exclusive), Stylish Shapes Dies and Pearls of Beauty (an Online Exclusive)

I started with a piece of Petal Pink cardstock (you can find all the measurements below the Supply List). I then embossed a piece of Basic White cardstock using the Lazy Daisy 3D Embossing Folder (available March 3, 2026) using my Stampin’ Cut & Emboss Machine. I adhered the embossed cardstock to the Petal Pink cardstock. The Lazy Daisy 3D Embossing Folder – I think it’s going to be really popular!

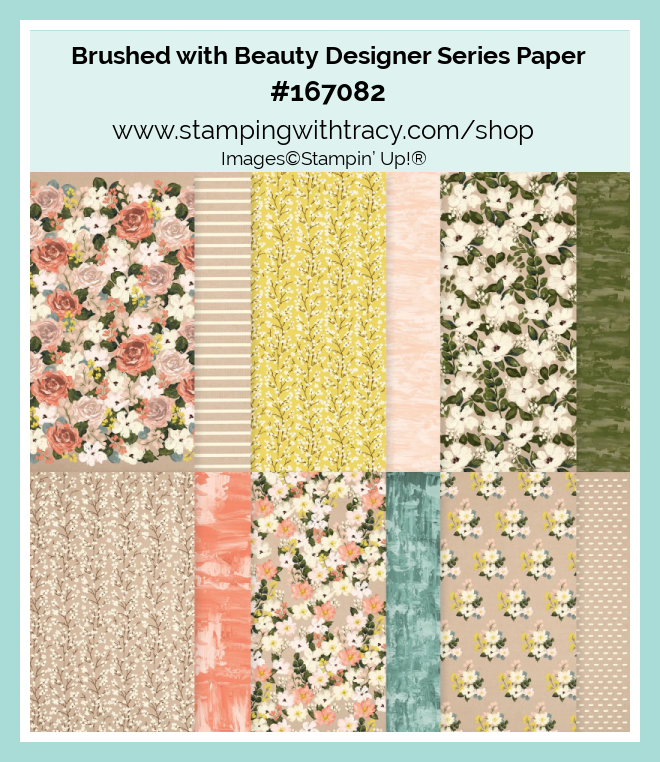
I cut another piece of Petal Pink cardstock for the flap and scored it. I added a strong adhesive to the back (I used Tear & Tape) and adhered it to the card front (you can also used Stampin’ Seal+). I cut a piece of Brushed with Beauty Designer Series Paper and added it to the front of the Petal Pink cardstock flap.

I stamped the sentiment using The Right Words Stamp Set, in Mossy Meadow ink onto Basic White cardstock. I cut it out using Stylish Shapes Dies (the second smallest circle die). I cut a second circle out of the Petal Pink (the third smallest circle die). I adhered the sentiment to the front of the Petal Pink circle. I added Stampin’ Dimensionals on the back and added to the front of the card.
To complete my card, I added a piece of Basic White cardstock to the inside and three Pearls of Beauty in white to the Brushed with Beauty Designer Series Paper.

Supply List
I also used the Lazy Daisy 3D Embossing Folder (available March 3, 2026), #167196.
Below you’ll find all the Stampin’ Up! supplies I used for today’s card. If you need any stamping supplies, I’d love to be your demonstrator! You can place an order by clicking any of the images below to go to my Stampin’ Up! online store. The Specialty Plate is used with 3D Embossing Folders and Hybrid Embossing Folder.
Measurements
- Petal Pink cardstock: 5-1/2″ x 4-1/4″
- Petal Pink cardstock: 2-3/4″ x 8-1/2″ scored at 4-1/4″
- Petal Pink cardstock (under sentiment): approximately 2″ x 2″
- Basic White cardstock (embossed): 4″ x 5-1/4″
- Basic White cardstock (inside card): 2-1/2″ x 4″
- Basic White cardstock (sentiment): approximately 1-1/2″ x 1-1/2″
- Brushed with Beauty Designer Series Paper: 2-1/2″ x 4″
Retiring In Colors 2024-2026
The colors that are retiring are: Pretty in Pink, Petunia Pop, Peach Pie, Shy Shamrock, and Summer Splash (I’m going to miss these colors). Some stamp pads and cardstock are in low inventory! Click here to see what’s still around. The link is only for the first page.
Join Offer – Today is the Last Day
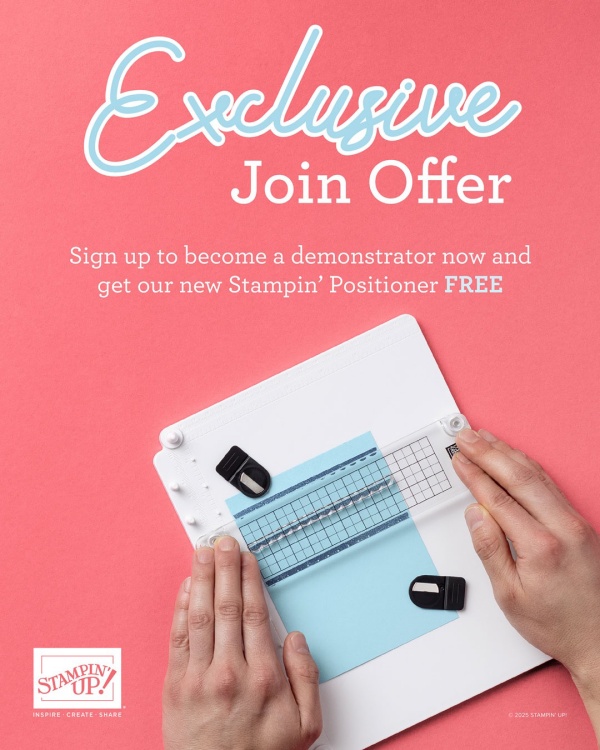
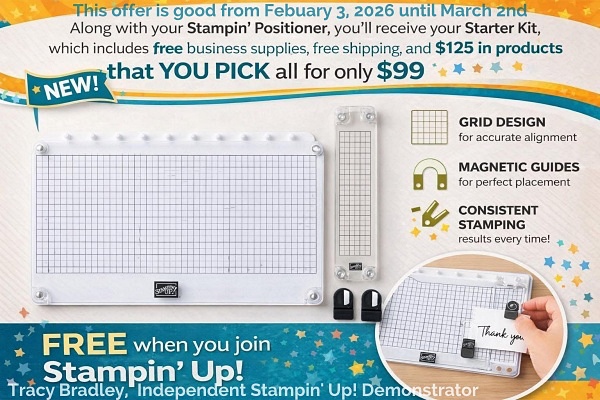
When you sign up to be a demonstrator beginning February 3, 2026, you will get a FREE Stampin’ Positioner!
What’s the Stampin’ Positioner?
It’s our new stamping alignment tool that makes stamping easier and more accurate. It allows you to stamp precisely aligned images, create repeating patterns and Two-Step Stampin’ images easily, and make multiple projects in minutes.
Stampin’ Positioner Grid Paper will also be available for but it isn’t available in the Starter Kit!
****If you’d like to see a flyer on this offer, click here.****
Join Offer Details
- New team members who purchase their Starter Kit February 3–March 2 will also receive our new Stampin’ Positioner.
- New demonstrators who submit their Independent Demonstrator Agreement (IDA) before February 3 or after March 2 will not be eligible for this offer.
- The Stampin’ Positioner is a $49 value!
When I purchased the Starter Kit in 2009, it was solely for the discount. I loved the products and would go through the catalog numerous times from cover to cover every chance I got! The Starter Kit is completely customizable and you can choose what you want. When I joined, the kit was preselected by Stampin’ Up! so I love that you can pick what you want now. I love being a Stampin’ Up! demonstrator!
The Stampin’ Up! Starter Kit is for someone who loves purchasing Stampin’ Up! products and also loves getting a 20%+ discount! But, it’s also for the person who would like to start their own business and share their love of paper crafting. You never have to sell or have a party (unless you want to). See below for frequently asked questions about the Starter Kit.
Commonly Asked Questions
- If I purchase the Starter Kit, do I have to sell Stampin’ Up! products to my family and friends? No, you are under NO obligation to sell. You can be your only customer. Of course once your friends see the cute cards you’re making, they’ll want to buy their stamping supplies from you.
- Will I receive a discount on any products I buy? Yes!! This is the best part! You’ll receive at least a 20% discount on all your purchases.
- Do I have to buy/sell a certain amount of product? The quarterly minimum is $300 in product (which is only $240 after your discount!) that can be from personal orders, online orders or ones from family and friends. The quarters are January – March, April – June, July – September, October – December. Once you join, your quarterly minimum begins during your first FULL quarter.
- What if I can’t make the quarterly minimum? You’ll simply be dropped. No one will hassle you. No one will bother you. It truly is risk free to purchase the Starter Kit!
Are there other perks to purchasing the Starter Kit? Yes! Here are just a few:
- The Starter Kit ships FREE!
- Approximately a month before new products are released, you’ll be able to participate in a preorder and purchase brand new products ahead of the public
- Attend Stampin’ Up! events like OnStage
- Personal purchases of $20 are eligible to receive Stampin’ Rewards. Yes, demonstrators can also receive Stampin’ Rewards!
- Complimentary copy of each current catalog from Stampin’ Up! Once the preorder begins, a complimentary copy will be included in your order. If no preorder is made, the catalog will be included in the first order placed during the catalog sales period.
- Free access to the tutorials I give to my customers!
- You wouldn’t have to have your quarterly minimum until July 2026!
If you have more questions, please reach out to me sending an email to me (you can send me an email on the sidebar of my blog).
March Product of the Month
Each month, a single product of the month will be released. These items won’t be in any catalog or on the Online Exclusives page on the Stampin’ Up! website. Stock is limited, so once a Product of the Month sells out, it’s gone for good. Make sure if you like the Product of the Month, to snag your Product of the Month early! The Product of the Month for March won’t be available “for purchase” until March 3, 2026!
Product of the Month Details
- You must have a Stampin’ Up online account to participate.
- Add the Product of the Month after your cart reaches $75. You can purchase the Product of the Month for just $5! The cart must be $75 (after Stampin’ Rewards).
- Limit 1 per Stampin’ Up! account.
- You must add the The Product of the Month to your cart after you reach $75
The Product of the Month for March
The Product of the Month for March won’t be available “for purchase” until March 3, 2026!
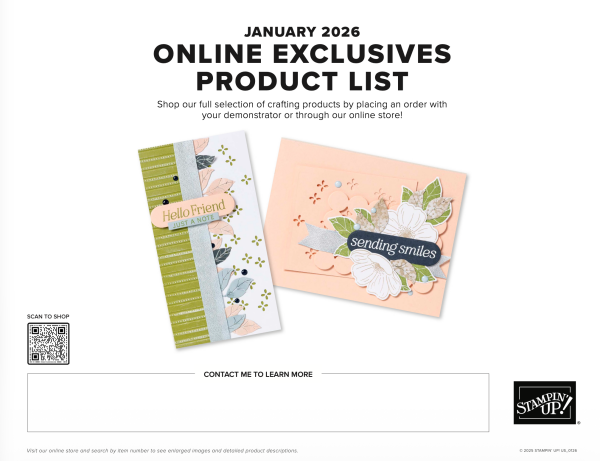
Online Exclusives – January 2026
Click the graphic below to access the January Online Exclusives Product List! Stampin’ Up! has made a printable flyer and they’ve made it much easier to shop the new products! You won’t find Online Exclusives in any catalog, they’ll be listed in the Online Store. Click here to shop Online Exclusives. Click here to download the January 2026 Online Exclusive Product List.
Last Chance Products
Click here to go straight to the Last Chance Products page on the Stampin’ Up! site! Some products are discounted! More products were added on February 3, 2026!
Stampin’ Up! Kits – We Have Two New Kits
Click the images below for more information about the kits.

Paper Pumpkin for March – Subscribe by March 10th!
An additional coordinating add-on is available but only for Paper Pumpkin subscribers. Click the image below for more information. The dies below coordinates with the upcoming February and March Paper Pumpkin Kits!
Mini Catalog January – April 2026
You can download the new Mini Catalog January – April 2026, here, or the graphic below
Thanks for stopping by today! Enjoy your day!
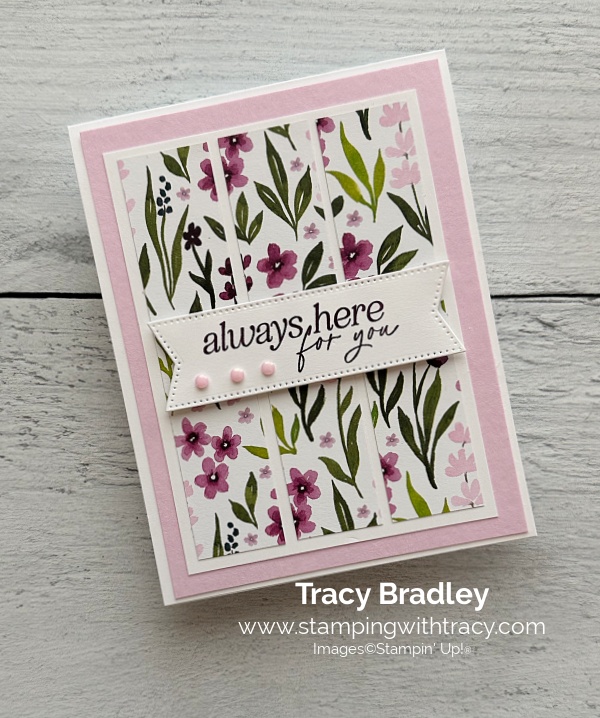
by Tracy | Feb 6, 2026 | Always Here For You
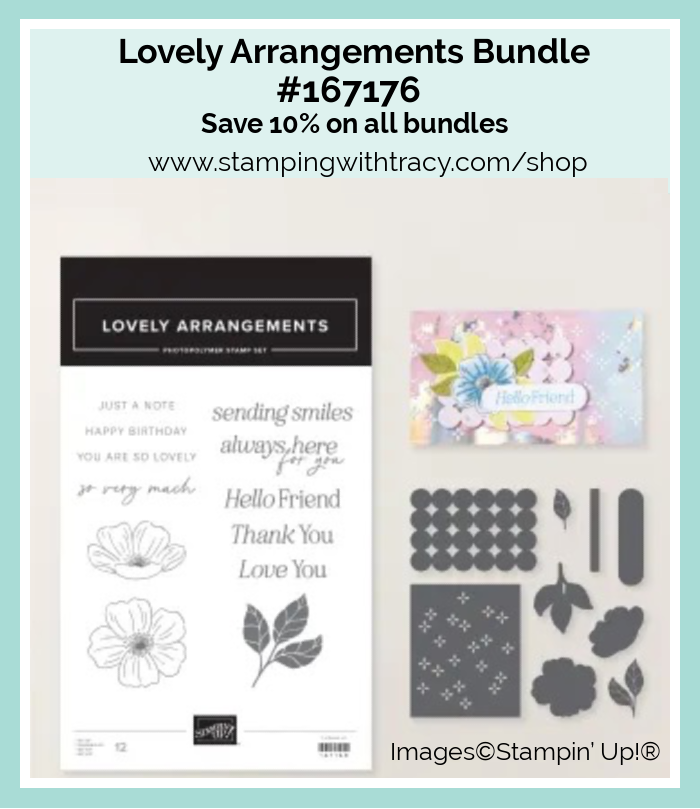
I was so sorry to hear that Celebratory Sips Designer Series Paper was on the Last Chance List. I adore this Designer Series Paper and this particular design. (I made my card with it and it’s also on sale). I also used the Lovely Arrangements Stamp Set, Stylish Shapes Dies (these dies get used all the time in my craft room) and 2024-2026 In Color Flat Pearls.
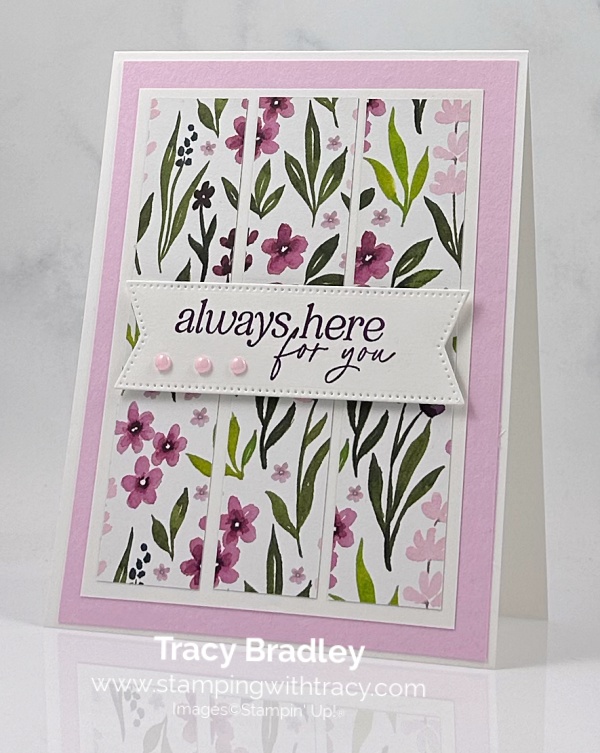

I started with a piece of Thick Basic White cardstock for the base of my card (an Online Exclusive). I cut a piece of Bubble Bath cardstock and adhered it to the front of my card (you can find all the measurements I used below the Supply List). I cut a piece of Basic White cardstock and then set it aside. I cut a piece of Celebratory Sips Designer Series Paper and then cut it into 1″ strips. Then, I adhered them to the Basic White cardstock that I set aside.
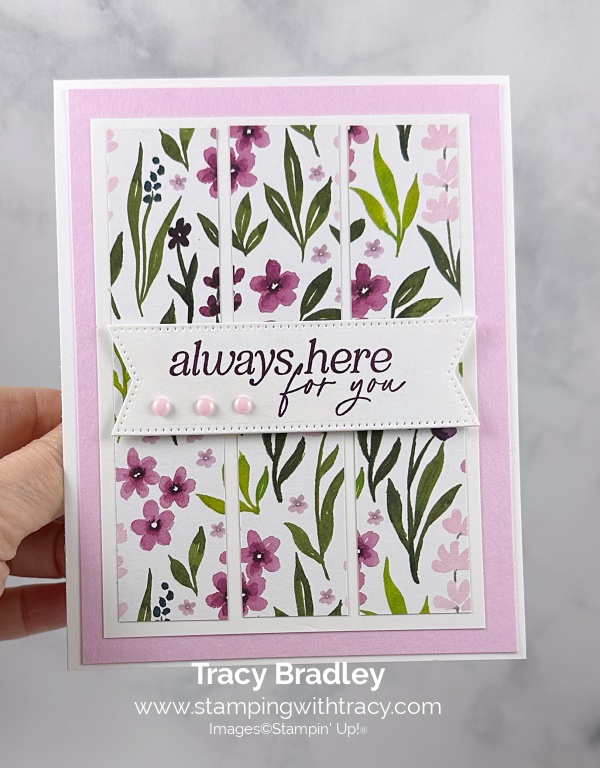
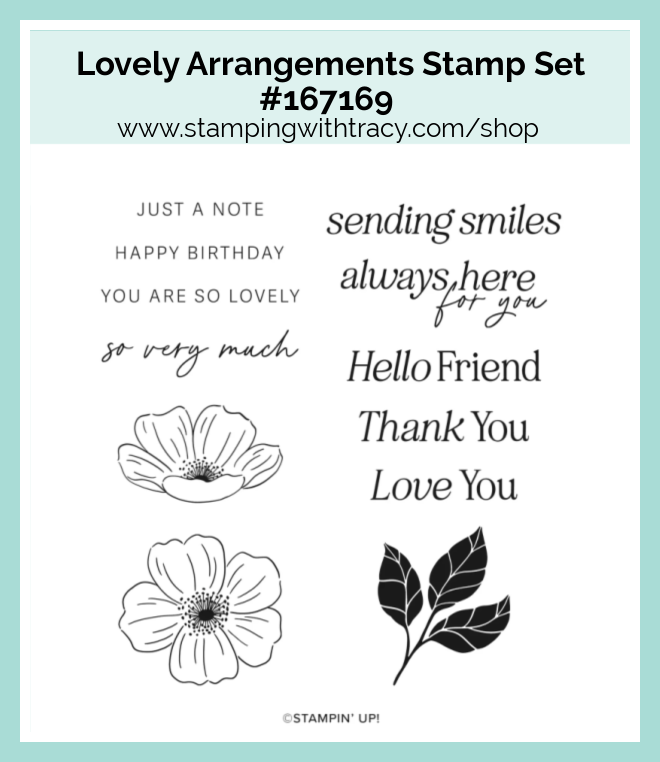
I stamped the sentiment onto Basic White cardstock using the Lovely Arrangements Stamp Set in Blackberry Bliss ink. Next, I cut the sentiment out using the Stylish Shapes Dies. I added Stampin’ Dimensionals to the back and adhered it to the front of the card.
I completed my card by adding three 2024-2026 In Color Flat Pearls in Pretty in Pink below the sentiment.
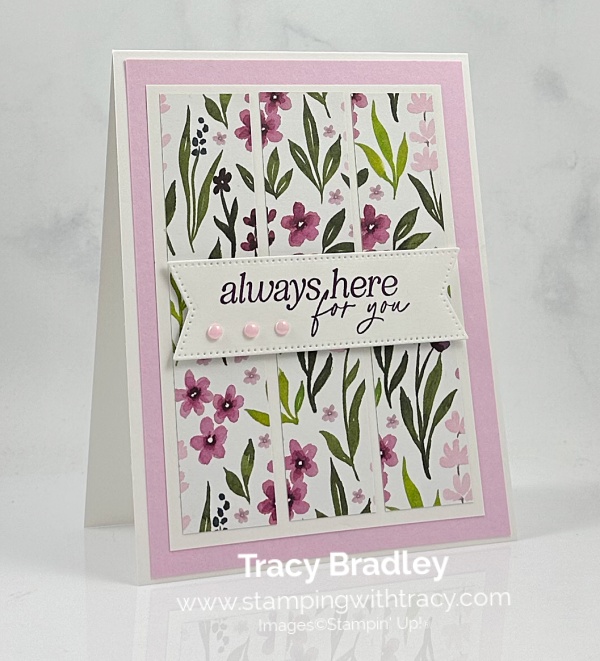
This was a quick and easy card to put together!

Supply List
Below you’ll find all the Stampin’ Up! supplies I used for today’s card. If you need any stamping supplies, I’d love to be your demonstrator! You can place an order by clicking any of the images below to go to my Stampin’ Up! online store.
Sale: $7.50
Price: $12.50
Bundle Alert: The Lovely Arrangements Bundle is available with a 10% discount rather than buying the products separately. You can get more information above or clicking the graphic below.
Measurements
- Thick Basic White cardstock: 4-1/4″ x 11″ score at 5-1/2″
- Bubble Bath cardstock: 4″ x 5-1/4″
- Basic White cardstock: 3-1/2″ x 4-3/4″
- Basic White cardstock (sentiment): approximately 4″ x 1-1/2″
- Celebratory Sips Designer Series Paper: 3″ x 4-1/2″, then cut into 1″ strips
Join Offer – February 3rd – March 2nd
When you sign up to be a demonstrator beginning February 3, 2026, you will get a FREE Stampin’ Positioner!
What’s the Stampin’ Positioner?
It’s our new stamping alignment tool that makes stamping easier and more accurate. It allows you to stamp precisely aligned images, create repeating patterns and Two-Step Stampin’ images easily, and make multiple projects in minutes.
Stampin’ Positioner Grid Paper will also be available for but it isn’t available in the Starter Kit!
****If you’d like to see a flyer on this offer, click here.****
Join Offer Details
- New team members who purchase their Starter Kit February 3–March 2 will also receive our new Stampin’ Positioner.
- New demonstrators who submit their Independent Demonstrator Agreement (IDA) before February 3 or after March 2 will not be eligible for this offer.
- The Stampin’ Positioner is a $49 value!
When I purchased the Starter Kit in 2009, it was solely for the discount. I loved the products and would go through the catalog numerous times from cover to cover every chance I got! The Starter Kit is completely customizable and you can choose what you want. When I joined, the kit was preselected by Stampin’ Up! so I love that you can pick what you want now. I love being a Stampin’ Up! demonstrator!
The Stampin’ Up! Starter Kit is for someone who loves purchasing Stampin’ Up! products and also loves getting a 20%+ discount! But, it’s also for the person who would like to start their own business and share their love of paper crafting. You never have to sell or have a party (unless you want to). See below for frequently asked questions about the Starter Kit.
Commonly Asked Questions
- If I purchase the Starter Kit, do I have to sell Stampin’ Up! products to my family and friends? No, you are under NO obligation to sell. You can be your only customer. Of course once your friends see the cute cards you’re making, they’ll want to buy their stamping supplies from you.
- Will I receive a discount on any products I buy? Yes!! This is the best part! You’ll receive at least a 20% discount on all your purchases.
- Do I have to buy/sell a certain amount of product? The quarterly minimum is $300 in product (which is only $240 after your discount!) that can be from personal orders, online orders or ones from family and friends. The quarters are January – March, April – June, July – September, October – December. Once you join, your quarterly minimum begins during your first FULL quarter.
- What if I can’t make the quarterly minimum? You’ll simply be dropped. No one will hassle you. No one will bother you. It truly is risk free to purchase the Starter Kit!
Are there other perks to purchasing the Starter Kit? Yes! Here are just a few:
- The Starter Kit ships FREE!
- Approximately a month before new products are released, you’ll be able to participate in a preorder and purchase brand new products ahead of the public
- Attend Stampin’ Up! events like OnStage
- Personal purchases of $20 are eligible to receive Stampin’ Rewards. Yes, demonstrators can also receive Stampin’ Rewards!
- Complimentary copy of each current catalog from Stampin’ Up! Once the preorder begins, a complimentary copy will be included in your order. If no preorder is made, the catalog will be included in the first order placed during the catalog sales period.
- Free access to the tutorials I give to my customers!
- You wouldn’t have to have your quarterly minimum until July 2026!
If you have more questions, please reach out to me sending an email to me (you can send me an email on the sidebar of my blog).
Bonus Days Redemption Began This Week!

If you don’t see my picture, click again, please
February Product of the Month
Each month, a single product of the month will be released. These items won’t be in any catalog or on the Online Exclusives page on the Stampin’ Up! website. Stock is limited, so once a Product of the Month sells out, it’s gone for good. Make sure if you like the Product of the Month, to snag your Product of the Month early!
Product of the Month Details
- You must have a Stampin’ Up online account to participate.
- Add the Product of the Month after your cart reaches $75. You can purchase the Product of the Month for just $5! The cart must be $75 (after Stampin’ Rewards).
- Limit 1 per Stampin’ Up! account.
- You must add the The Product of the Month to your cart after you reach $75
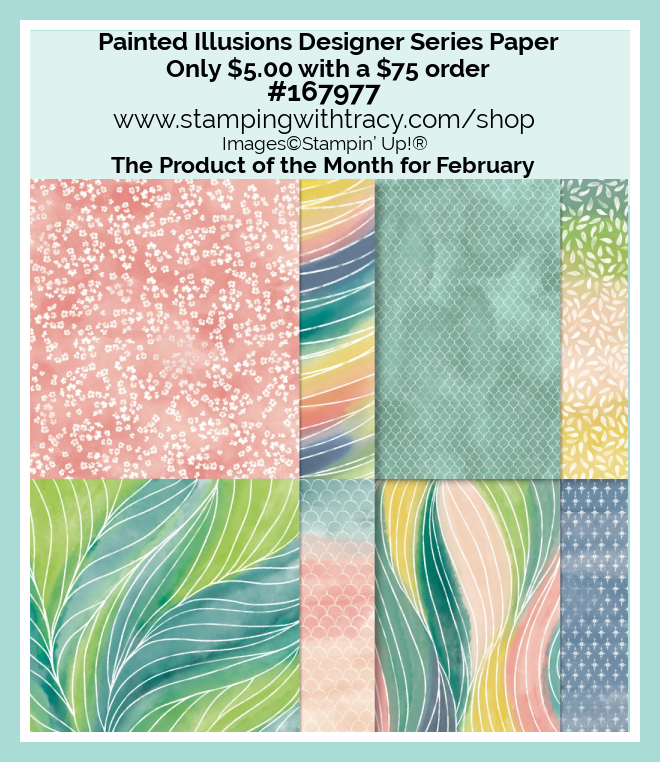
The Product of the Month for February
For more information about the Product of the Month, click here, or the graphic below.
Online Exclusives – January 2026
Click the graphic below to access the January Online Exclusives Product List! Stampin’ Up! has made a printable flyer and they’ve made it much easier to shop the new products! You won’t find Online Exclusives in any catalog, they’ll be listed in the Online Store. Click here to shop Online Exclusives. Click here to download the January 2025 Online Exclusive Product List.
Last Chance Products
Click here to go straight to the Last Chance Products page on the Stampin’ Up! site! Some products are discounted! More products were added on February 3, 2026!
Stampin’ Up! Kits – We Have Two New Kits
Click the images below for more information about the kits.
Paper Pumpkin for February Subscribe by February 10th!
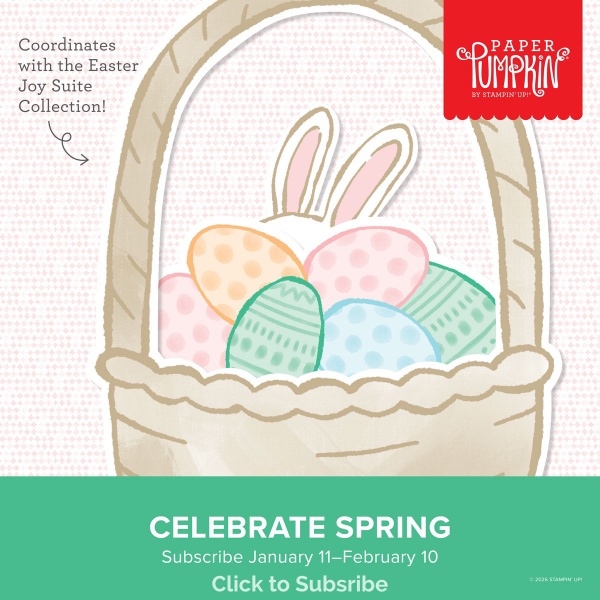
An additional coordinating add-on is available but only for Paper Pumpkin subscribers. Click the image below for more information. The dies below coordinates with the upcoming February and March Paper Pumpkin Kits!
Mini Catalog January – April 2026
You can download the new Mini Catalog January – April 2026, here, or the graphic below
Thanks for stopping by today! Enjoy your weekend