by Tracy | Mar 18, 2024 | Hello Card
Before sharing my card with you today . . . . .
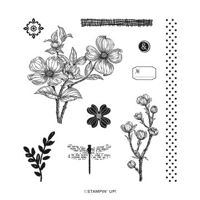
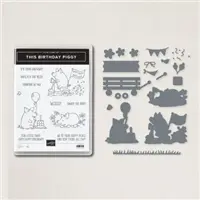
2024-2025 Stampin’ Up! Annual Catalog
The new 2024-2025 Annual Catalog will debut on May 1, 2024. I send complimentary catalogs to my customers so, if you are a current customer of mine (have ordered with me in the past six months), please fill out this form to request an Annual Catalog. Due to rising costs to purchase the catalogs and mail them, I won’t send a catalog unless you request that I send one to you, so please fill out the form. The deadline to fill out the form is March 30, 2024.
If you aren’t a current customer of mine, place an order choosing me as your demonstrator and then come back and fill out this form. I will have the link to the form on every blog post until March 30th. You can place an order with me here.
Quick Note: Today the retirement list will be posted to make room for 2024-2025 new products. I will post the retirement list here on my blog later today. If you get blog post notifications whenever I post to my blog, you won’t get the notification until tomorrow.

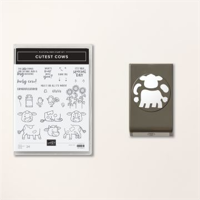
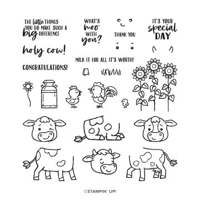
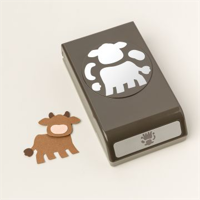
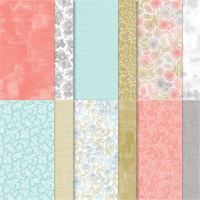
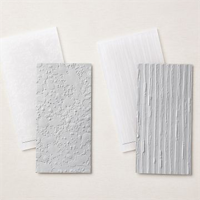
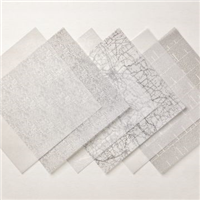
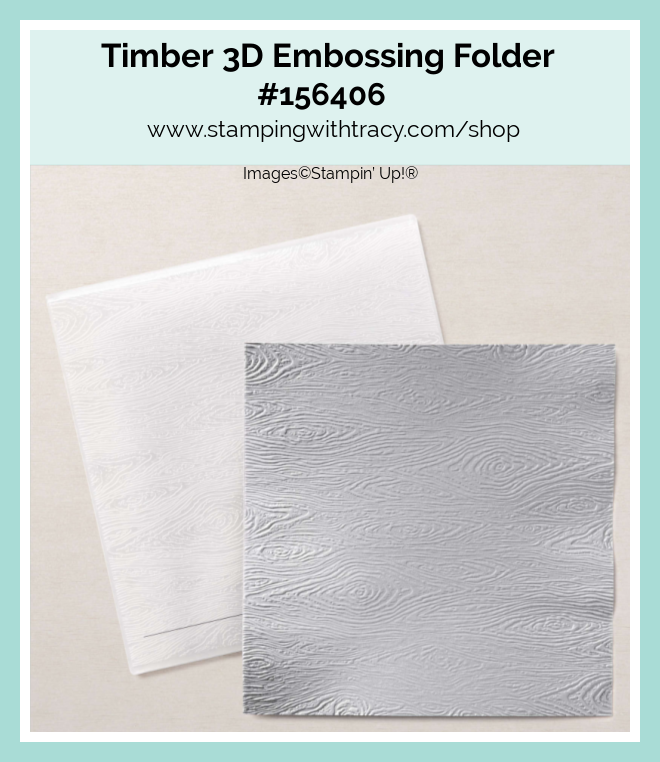
My card today was made using the Cutest Cows Bundle which includes the Cutest Cows stamp set and Cutest Cows Builder Punch. I also used the Nested Essentials Dies, Zoo Crew Designer Series Paper (DSP), and the Timber 3D Embossing Folder.

I started with a piece of Basic Black cardstock for the base of my card. Then I cut two pieces of Basic White cardstock and adhered one to the inside of the card. With the other one, I placed it inside the Timber 3D Embossing Folder and ran it through my Stampin’ Cut & Emboss Machine and then adhered it to the front of the card.


I layered a piece of Basic Black cardstock and Zoo Crew DSP and adhered it to the card front. Then, I stamped the cute cow in Memento Ink and then colored him with my Smoky Slate Stampin’ Blends. I punched him out using the Cutest Cows Builder Punch.

I used the Nested Essentials Dies to cut a rounded rectangle out of Basic Black cardstock and the next smaller size out of Basic White cardstock. I checked first to see where my cow would go before I stamped the sentiment in Memento Ink using the Cutest Cows stamp set. I attached the body of the cow to the Basic White cardstock using Glue Dots and then added two Dimensionals to his head and adhered both pieces to the front of the card.


Supply List
Below you’ll find all the Stampin’ Up! supplies I used for today’s card. If you need any stamping supplies, I’d love to be your demonstrator! You can place an order by clicking any of the images below to go to my Stampin’ Up! online store.
The Specialty Plate is used with 3D Embossing Folders.
Measurements
- Basic Black cardstock: 11″ x 4-1/4″ scored at 5-1/2″ OR 8-1/2″ x 5-1/2″ scored at 4-1/4″
- Basic Black cardstock: 5″ x 2″
- Basic Black cardstock: approx. 3-3/4″ x 3″
- Basic White cardstock: (2) 5-1/4″ x 4″
- Basic White cardstock: approx. 3″ x 2-1/2″
- Basic White cardstock: scraps for cow
- Zoo Crew Designer Series Paper: 4-3/4″ x 1-3/4″
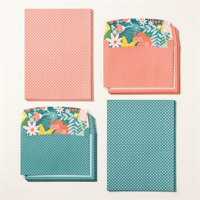
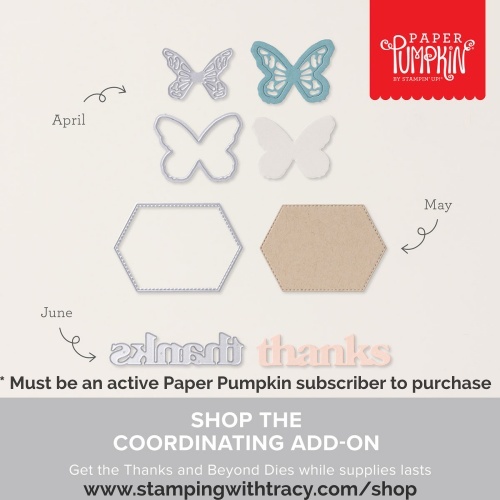
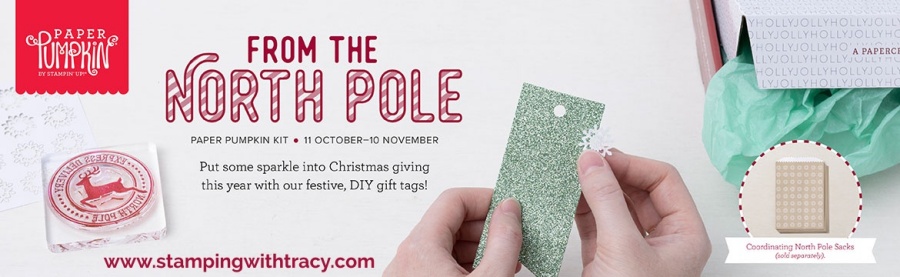
Delicate Wings Paper Pumpkin Kit

Purchase the coordinating Thanks & Beyond Dies (only available to active Paper Pumpkin subscribers).
Two New Kits by Stampin’ Up!


Click here to shop the new Online Exclusives
Thank you for stopping by today!
by Tracy | Feb 9, 2024 | Thank You Card
Today’s card was made using Flight & Airy Designer Series Paper (free with a $50 purchase during Sale-a-Bration), Throughout the Year stamp set, Stylish Shapes Dies and the Timber 3D Embossing Folder.


I started with a piece of Lost Lagoon cardstock for the base of my card. Then, I embossed a piece of Basic White cardstock using the Timber 3D Embossing Folder and my Cut & Emboss Machine and then adhered it to the front of the card.
I cut two pieces of Lost Lagoon cardstock and two pieces of Flight & Airy Designer Series Paper, adhered them together and then, adhered them to the front of the card.


I stamped the sentiment onto Basic White cardstock using Misty Moonlight ink and the stamp set, Throughout the Year. I then cut the sentiment out using the Stylish Shapes Dies, added Stampin’ Dimensionals to the back and adhered it to the front of the card.
To complete my card, I added Basic White cardstock to the inside. If you’d like the measurements I used to create today’s card, you can find them below the Supply List.

Supply List
Below you’ll find all the Stampin’ Up! supplies I used for today’s card. If you need any stamping supplies, I’d love to be your demonstrator! You can place an order by clicking any of the images below to go to my Stampin’ Up! online store.
The Specialty Plate is used with 3D Embossing Folders.
Measurements
- Lost Lagoon cardstock: 11″ x 4-1/4″ score at 5-1/2″ or 8-1/2″ x 5-1/2″ score at 4-1/4″
- Lost Lagoon cardstock: 5″ x 2-3/4″
- Lost Lagoon cardstock: 4″ x 3″
- Flight & Airy Designer Series Paper: 4-3/4″ x 2-1/2″
- Flight & Airy Designer Series Paper: 3-3/4″ x 2-3/4″
- Basic White cardstock: approx. 2-3/4″ x 1-1/4″
- Basic White cardstock: (2) 5-1/4″ x 4″
Sale-a-Bration!!

Sale-a- Bration is the best time of year! For every $50 in product you purchase (before shipping/tax), you can choose from free stamps, free paper and more. If your order total is $50, you can choose one of the items listed below. If your order total is $100, you can choose (2) products from the $50 category or choose one item from the $100 category and so on and so on. There’s no limit to the amount of free gifts you can earn!
Very Important: The products (below) from the Annual Catalog have special item numbers, just for Sale-a-Bration. Be sure to add them to your order during checkout where you can select the Sale-a-Bration items of your choice (don’t manually add them in with their regular item numbers).
Here are the products you can choose from with a $50 purchase (click the images for more information about each product).
Here are the products you can choose from with a $100 purchase.
Three Weeks Left to Purchase the Starter Kit with Two Options!
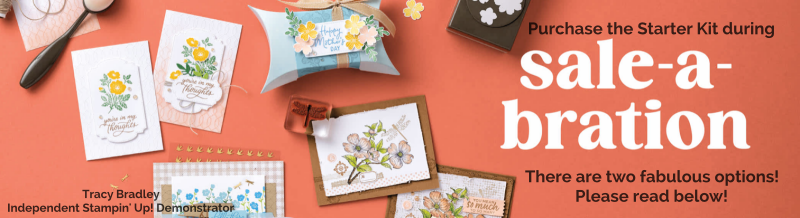
The best time to purchase the Starter Kit is during Sale-A-Bration!! The Starter Kit is $99 and you’ll receive $125 in Stampin’ Up! product (shipping is always free when you purchase the Starter Kit)! The Starter Kit is truly for anyone! It’s for the person who wants to receive a 20% (to start) discount when they buy their Stampin’ Up! products. It’s also for the business minded person. There’s no risk in purchasing the Starter Kit, only perks and you get to choose what you want to add to your Starter Kit. But wait, there’s more!
When I purchased the Starter Kit in 2009, I bought it just so I could get the discount. In 2009 you didn’t have the freedom to choose the products you wanted, it came with set products. I love that Stampin’ Up! gives you the chance to now customize your kit so that you pick the products you love and know you will use. For more information about the Starter Kit, you can take a look here for some frequently asked questions. You are also welcome to email me with any questions (click EMAIL ME on the sidebar).
You have two options during Sale-a-Bration:
Option 1: Choose the Stampin’ Glass Mat Studio (Retail Value $60). If you choose this option, Stampin’ Up! will send this to you, absolutely FREE!
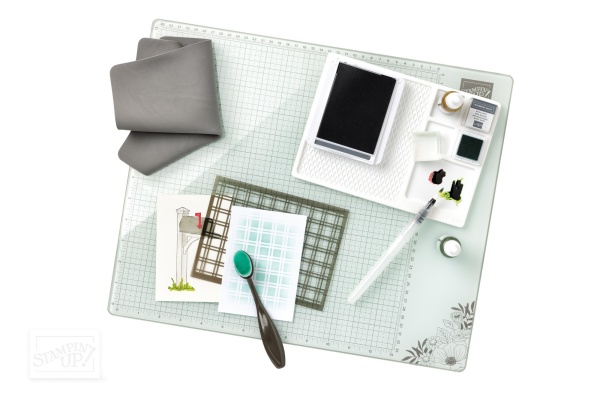
The heavy-duty glass mat comes printed with a ruler and grid lines for easy measuring, while the large surface space gives ample room for spreading out while paper crafting. The safety-tempered glass has a heat and scratch resistant surface that wipes clean with the included cloth and water—no chemicals needed. The reusable cloth also cleans ink off your stamps! The nonslip, heat resistant, waterproof silicone mat features four palette squares for mixing custom ink colors or for holding small ink spots in place while crafting. Each component can be used separately or you can use all three items together for a multipurpose paper crafting studio that’s both functional and elegant.
Option 2: Your choice of an additional $30 in FREE products to add to your Starter Kit!
Two New Stampin’ Up! Kits are Now Available!
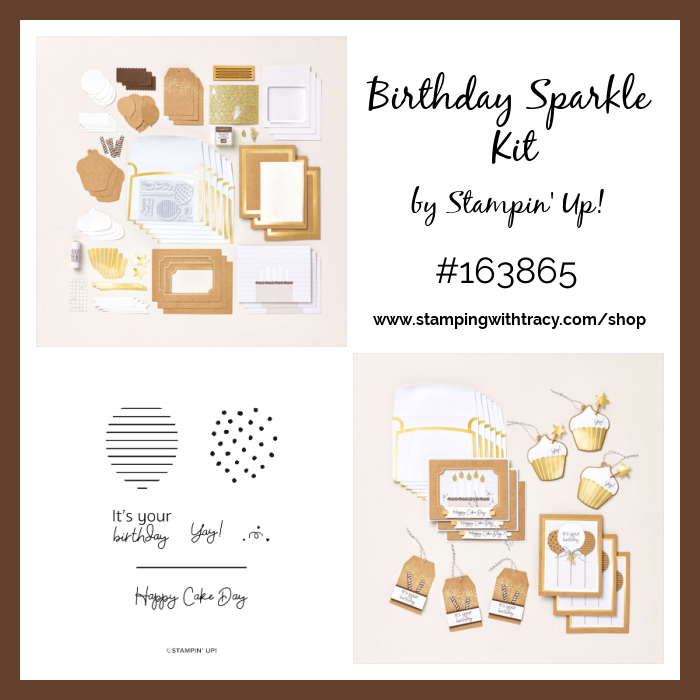
For more information or to purchase the Birthday Sparkle Kit click here.
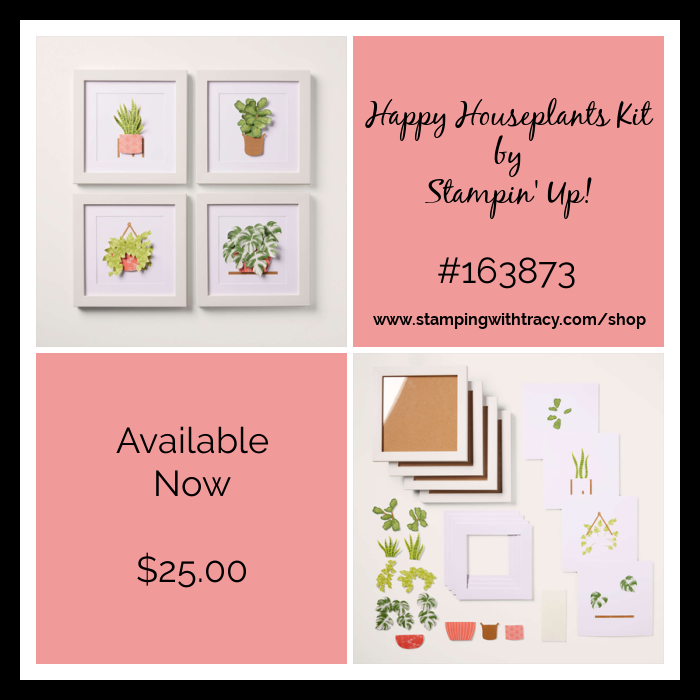
For more information or to purchase the Happy Houseplants Kits click here.
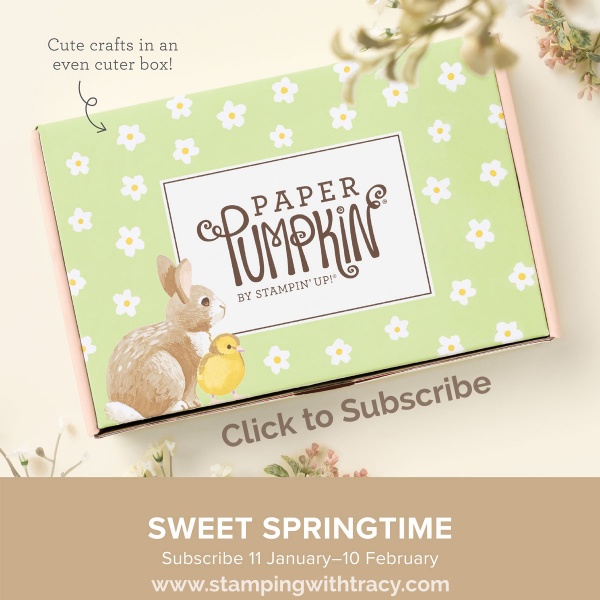
Sweet Springtime Paper Pumpkin Kit – Subscribe by tomorrow, February 10th
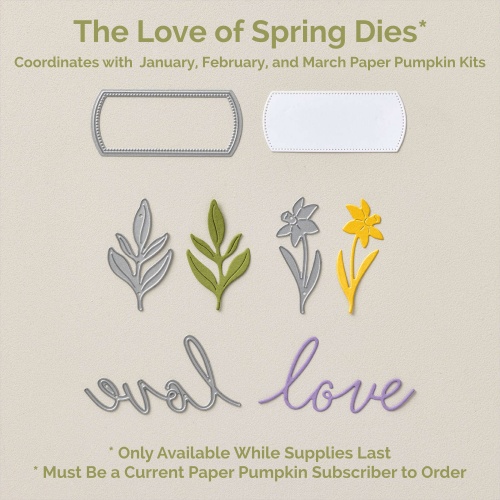
Click here to order The Love of Spring Dies
Host Code
Use the host code PGSZWAYV with your $50 or more Stampin’ Up! order and you’ll receive a package of Rainbow Adhesive-Backed Dots after the promotion has ended.To make sure you’re shopping with me, if you’re on a phone, click the three lines at the top of the page and you should see my name. If you’re on a computer, my name will be in the upper left-hand corner. Please read all the details below.
Please note: If your order is $150 or more, do NOT use the host code so you can receive the Stampin’ Rewards directly from Stampin’ Up! If you put my host code in, you will forfiet your rewards. If you’d like the Rainbow Dots, just send me an email (only if your order is $150 or more) letting me know you’d like the Rainbow Dotss.


Thanks for stopping by today!
by Tracy | Dec 8, 2023 | Christmas Card
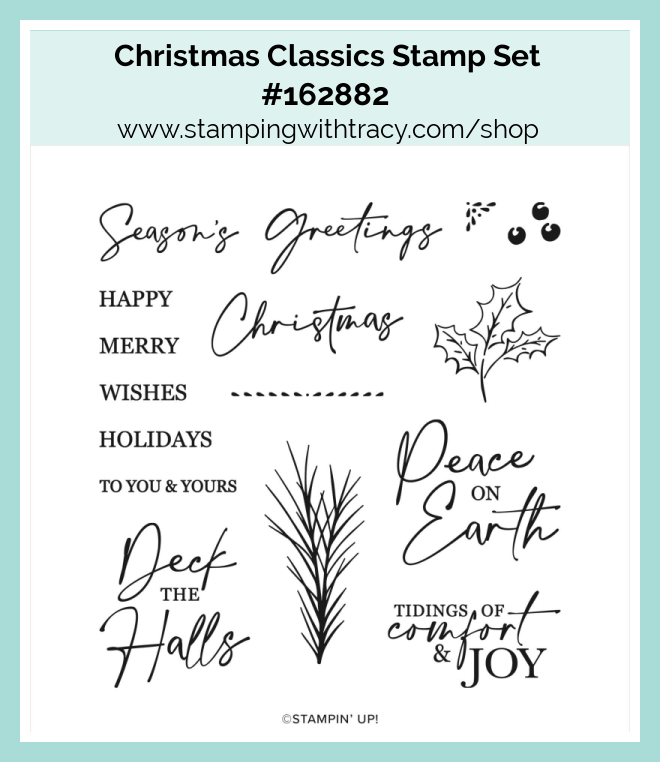
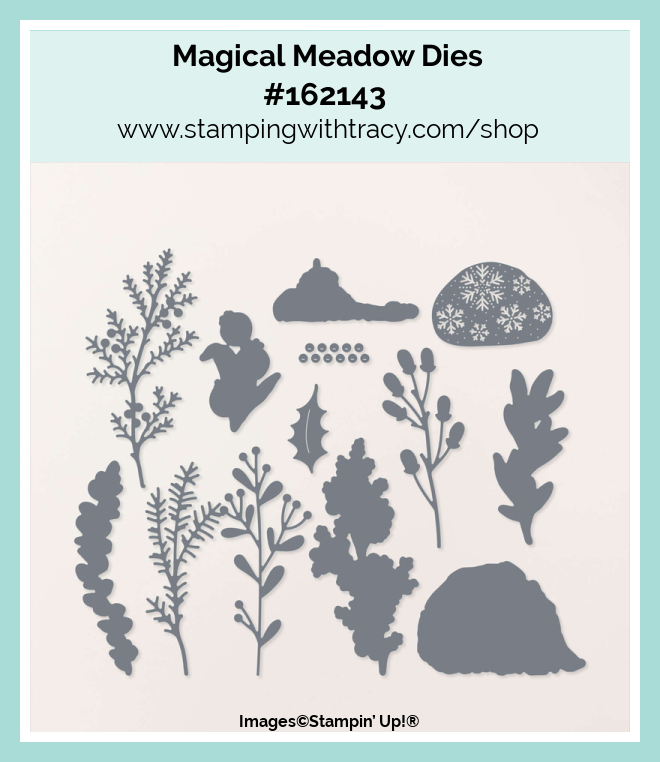
Today’s card was made using the Christmas Classics stamp set (available while supplies last), A Walk in the Forest Designer Series Paper (available while supplies last), Magical Meadow Dies (available while supplies last), Timber 3D Embossing Folder and the Stylish Shapes Dies.

I started with a piece of Cherry Cobbler cardstock for the base of my card. I cut two pieces of Basic White cardstock and adhered one to the inside. I embossed the other piece using the Timber 3D Embossing Folder and then set it aside.

I cut a piece of A Walk in the Forest Designer Series Paper (you can find all the measurements I used below the Supply List) and adhered it to the front of the Basic White embossed piece and then adhered it to the front of the card. I stamped the sentiment in Pretty Peacock ink onto a piece of Basic White cardstock using the stamp set, Christmas Classics, and cut it out using one of the square dies in the Stylish Shapes Dies. I then cut a larger square out of Cherry Cobbler cardstock and adhered the sentiment to the front.
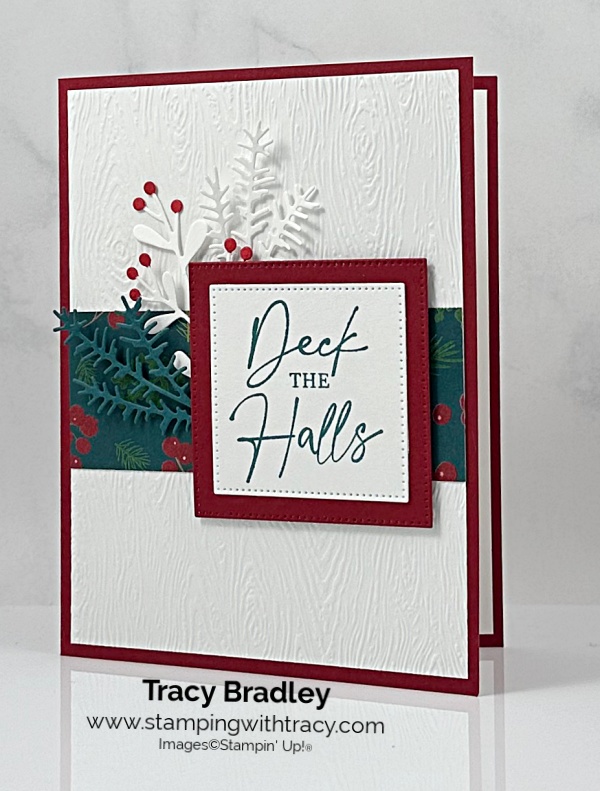

I used the Magical Meadow Dies to cut two sprigs out of Basic White cardstock and another out of Pretty Peacock cardstock. I used my Dark Real Red Stampin’ Blend to color the berries on the middle sprig (I colored them twice to make it even darker). I adhered the sprigs to the back of the Cherry Cobbler square using Stampin’ Dimensionals, added more to the rest of the square and adhered it to the front of the card.
Supply List
Below you’ll find all the Stampin’ Up! supplies I used for today’s card. If you need any stamping supplies, I’d love to be your demonstrator! You can place an order by clicking any of the images below to go to my Stampin’ Up! online store.
The Specialty Plate is used with 3D Embossing Folders.
Bundle Alert: The Christmas Classics Bundle includes the Christmas Classics stamp set and Christmas Classics Dies. You always save 10% when you purchase a bundle. This bundle is only available while supplies last.
Bundle Alert: The Magical Meadow Bundle includes the Magical Meadow stamp set and Magical Meadows Dies. You always save 10% when you purchase a bundle. This bundle is only available while supplies last.
Measurements
- Cherry Cobbler cardstock: 8-1/2″ x 5-1/2″ scored at 4-1/4″
- Cherry Cobbler cardstock (square): approx. 2-3/4″ x 2-3/4″
- Basic White cardstock: (2) 5-1/4″ x 4″
- Basic White cardstock (sentiment): approx. 2-1/4″ x 2-1/4″
- Basic White cardstock: (2) approx. 3-3/4″ x 1-1/2″
- Pretty Peacock cardstock: approx. 3-3/4″ x 1-1/2″
- A Walk in the Forest Designer Series Paper: 4″ x 1-1/2″
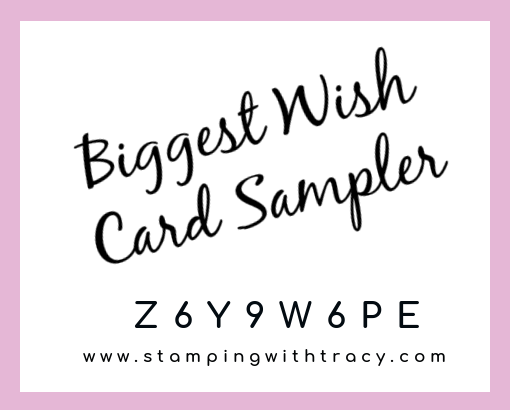
Biggest Wish Card Sampler
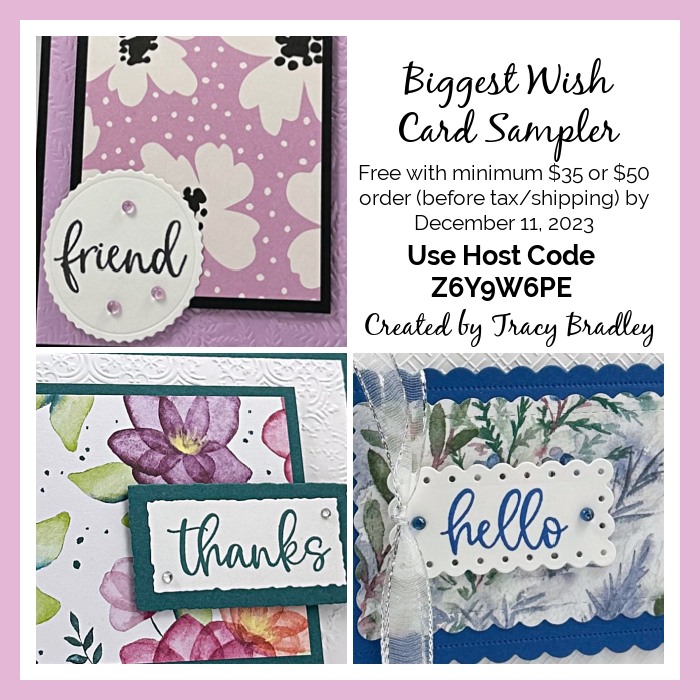
My Biggest Wish Card Sampler is now available but only until December 11, 2023.
To create this Sampler, I used the Biggest Wish stamp set, Winter Meadow Designer Series Paper, Delightful Floral Designer Series Paper and Delightfully Eclectic Designer Series Paper.
Place a minimum $35 or $50 order (before shipping/tax) using my special host code Z6Y9W6PE and my gift to you will be my Biggest Wish Card Sampler.
- Place a minimum $35 order (up to $49.99) and you’ll receive one each of three different cards for a total of three cards.
- Place a minimum $50 order and you’ll receive two each of three different cards for a total of six cards.
Here’s how you can earn it FREE!
- Place a minimum $35 or $50 order (before tax/shipping) at my Stampin’ Up! online store.
- Use my special Biggest Wish Card Sampler Host Code when placing your order (see below) BUT if your order reaches $150 or more, please DO NOT use the host code so you can receive Stampin’ Rewards (free product directly from Stampin’ Up!). Once you place your order, simply drop me an email (only necessary if your order is over $150) letting me know that you’d like the Biggest Wish Card Sampler.
- Place your order on or before December 11, 2023.
For more information about my Biggest Wish Card Sampler and the supplies you’ll need to complete it, please click here.
Clearance Rack
The Clearance Rack was updated on Monday! Click here to see what’s still available.
Retiring Products from the September-December Mini Catalog

Now’s the time to grab products from the September – December Catalog before they retire and they’re gone forever! Some products will be on sale up to 60% and once a product is out of stock, it’s gone! You can see what’s retiring and what’s on sale, here.
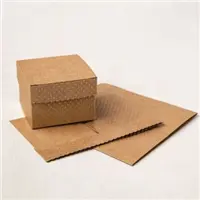
Painted Wishes Card Kit by Stampin’ Up!

This kit includes:
- Enough supplies to create 9 cards—3 each of 3 designs
- 9 coordinating envelopes
- Printed card bases, printed die cuts, adhesive, sequins, and gold cord
- Finished card size: 4-1/4″ x 5-1/2″ (10.8 x 14 cm)
- Coordinating colors: Garden Green, Lemon Lime Twist, Moody Mauve, Petal Pink, Pretty Peacock, Wild Wheat
Click here to purchase the Painted Wishes Card Kit
All the Best Paper Pumpkin Kit
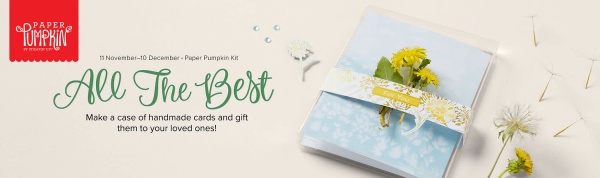
Kit includes:
9 cards; 3 each of 3 designs.
- 9 coordinating envelopes.
- 1 Acetate box to fit cards and envelopes from the kit.
- 1 Pebbled Path Stampin’ Spot.
- 1 photopolymer stamp set.
- Embellishments.
- Specialty gold foil die cuts.
- Enough adhesive to finish the project.
- Finished card size: 4-1/4″ x 5-1/2″ (10.8 x 14 cm)
- Coordinating Stampin’ Up! colors: Balmy Blue, Crushed Curry, gold foil, Old Olive, Pebbled Path
Click HERE to purchase the All the Best Paper Pumpkin Kit
This offer ends December 10th
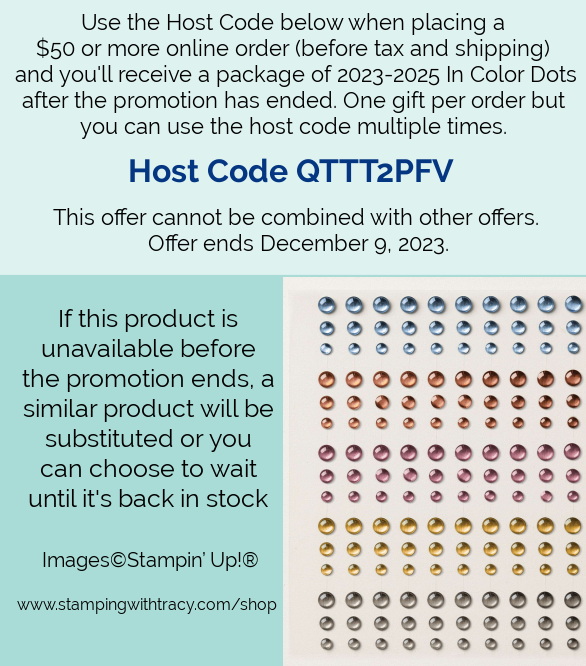
Host Code
Use the host code QTTT2PFV to receive a package of 2023-2025 In Color Dots with your $50 or more order BUT if your order is $150 or more do NOT use the host code so you can receive the Stampin’ Rewards. After you place your order, email me (only if your order is $150 or more) and let me know you’d like the 2023-2025 In Color Dots. Offer ends December 9, 2023.
Thanks for stopping by today!
by Tracy | Oct 28, 2022 | Uncategorized
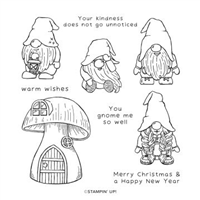
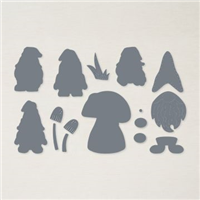
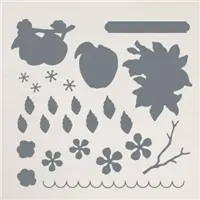
Today’s card features the Kindest Gnomes Bundle which includes the Kindest Gnomes stamp set and the Gnomes Dies. This was not a bundle I immediately purchased because I’m not really a “gnomes person”. But about a month ago my sister made the cutest gnomes to sell at a craft fair next month and after seeing her cute creations, I was hooked. Plus, I’ve seen so many cute gnome cards from fellow demonstrators. I’m hooked and had fun creating my first gnome card!
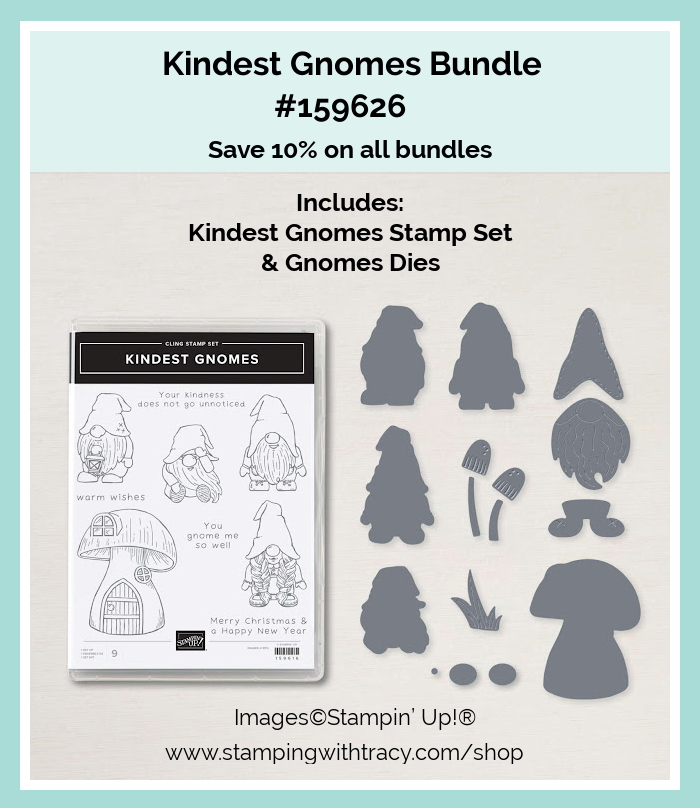
I started with a piece of Thick Basic White cardstock for the base of my card. Then I added a layer of Storybook Gnomes Designer Series Paper. Then I used that same design to cut a hat for my gnome using the Gnomes Dies.
Using the Scalloped Contours Dies, I cut a piece of Basic White cardstock and then ran it through the Stampin’ Cut & Emboss Machine using the Timber 3D Embossing Folder. I added Stampin’ Dimensionals to the back and adhered it to the front of the card.
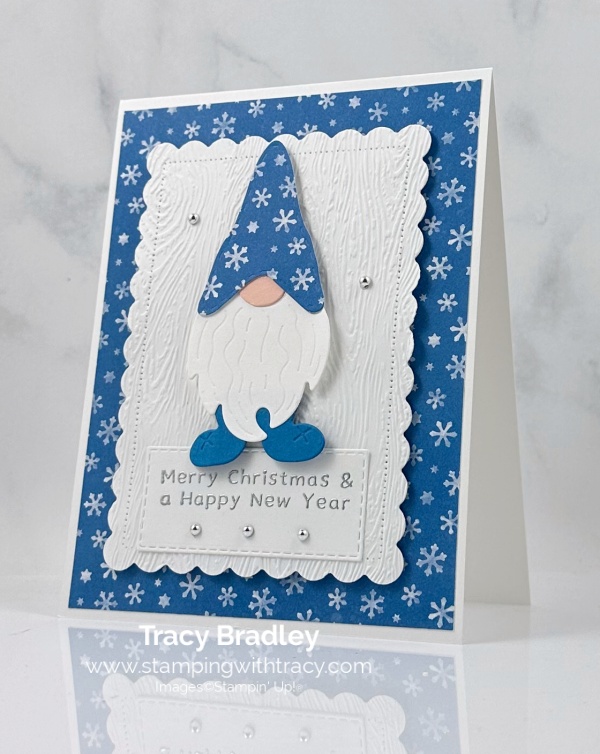

I used the Gnomes Dies to cut the beard out of Basic White cardstock, Petal Pink for the nose and Pacific Point for the feet. I adhered all those piece together, along with the hat and then added Stampin’ Dimensionals to the back and adhered my gnome to the front of the card.
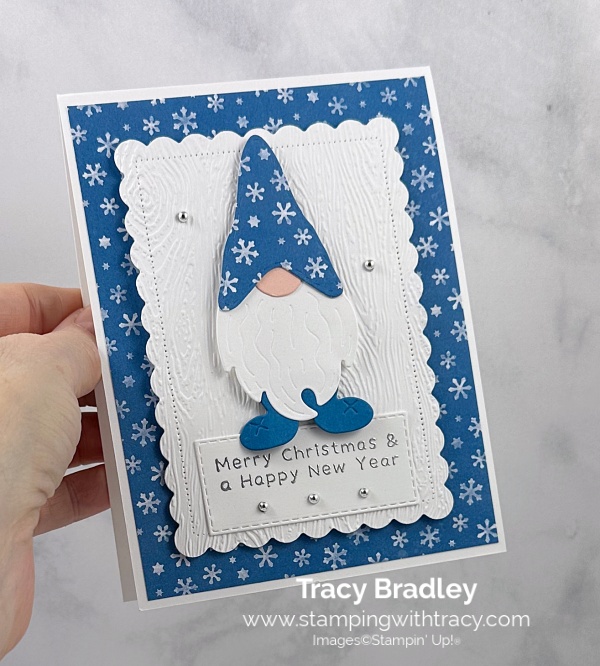
I heat embossed the sentiment onto Basic White cardstock using Silver Embossing Powder and then cut the sentiment out using the Stitched Rectangle Dies. I adhered it below the gnome and tucked it under his feet. To complete my card, I added three Festive Pearls below the sentiment and added two more on the embossed rectangle (unfortunately the Festive Pearls are not available at the moment but should be back in stock the week of November 21st).
How to Heat Emboss
Prepare your cardstock by rubbing the Embossing Buddy (an anti-static pouch that can be found in the Embossing Additions Tool Kit) over the surface of the paper as it helps keep away stray particles of embossing powder. Stamp your sentiment or image using a Versamark pad. This is very sticky ink and your embossing powder will stick right to it. Sprinkle embossing powder over the stamped image and then shake off any excess. Before applying heat to your paper, heat the Heat Tool first so your paper won’t warp (about 10 seconds). Direct the heat over your image and watch as your image becomes shiny and beautiful!
Supply List
Below you’ll find all the Stampin’ Up! supplies I used for today’s card. If you need any stamping supplies, I’d love to be your demonstrator! You can place an order by clicking any of the images below to go to my Stampin’ Up! online store.
Measurements
- Thick Basic White cardstock:11″ x 4-1/4″ score at 5-1/2″
- Basic White cardstock (rectangle): approx. 4-3/4″ x 3-1/2″
- Basic White cardstock (beard): approx. 2″ x 2″
- Basic White cardstock (sentiment): approx. 3″ x 1-3/4″
- Pacific Point cardstock (feet): approx. 1-3/4″ x 1″
- Petal Pink (nose): scrap
- Storybook Gnomes Designer Series Paper: 5-1/4″ x 4″
- Storybook Gnomes Designer Series Paper (hat): approx. 2″ x 2″
Card Kits – Only Available Until October 31st

Use the host code FWZ3BKN9 when placing your order at my Stampin’ Up! online store and you’ll receive my September – October PDF Tutorial with directions to make a featured card and fourteen more ideas using the same layout but with a variety of different colors of cardstock, embossing folders and Designer Series Paper.
All orders using the host code will receive the ten page PDF Tutorial and a thank you card.
If your order is $50 or more (before tax/shipping), you’ll also receive:
- At least six card kits* mailed to you via snail mail
- At least one Bradley Point (earn points and redeem them for free product)
*A card kit includes all the cardstock, Designer Series Paper and embellishments you’ll need to complete a card. I’ve cut, scored, die cut and embossed all the pieces for you! You’ll just need to supply your own stamp set, ink and adhesive. You can use the stamp set I used to create the cards (Soft Seedlings) or use what you already own.
- $50.00 – $99.99 = 6 card kits
- $100 – $149.99 = 7 card kits
- $150 or more = 8 card kits
If your order is $150 or more, do NOT use the host code so you can receive Stampin’ Rewards directly from Stampin’ Up! You will automatically receive 8 card kits from me.
You can use this host code multiple times. There are fifteen different card kits and I keep track of which card kits I’ve sent to you. Each time you’ll receive different kits unless you’ve earned all fifteen and then you’ll start to receive multiples. It’s a great way to have cards on hand to mail because who doesn’t love receiving happy mail!

Fitting Florets Collection Coming November 1, 2022

Click here for the Fitting Florets Collection flyer

Click here for more information about the Starter Kit!
The Starter Kit Special (an extra $30 in free product) is only available until October 31st!
Thanks for stopping by today! Enjoy your weekend!
by Tracy | Sep 20, 2022 | Uncategorized
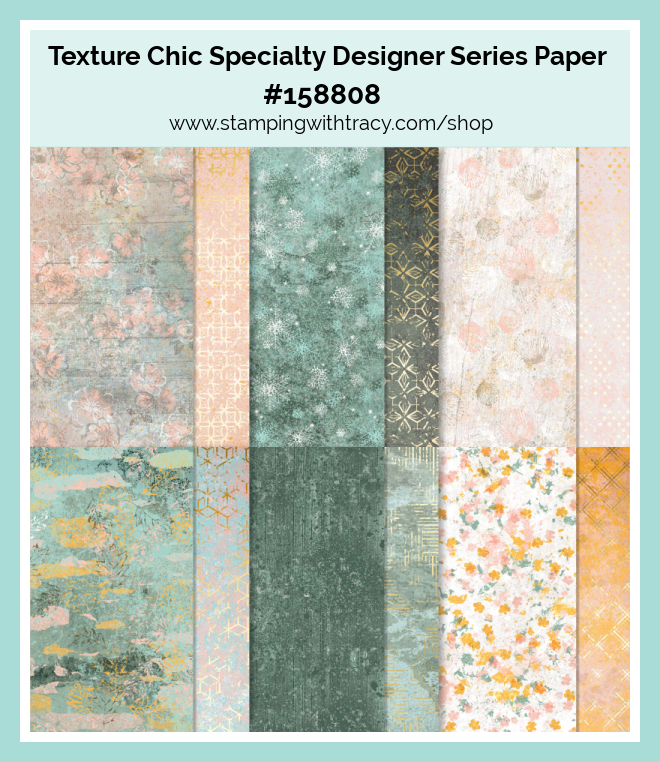
Today I have two cards that are variations of a card I shared last week. You can see that card HERE. You can refer to that post for directions on how to make the card and the measurements. For the versions today, I used Texture Chic Designer Series Paper, Hues of Happiness Designer Series Paper and the stamp set, Cup of Tea.
This first card was made using Hues of Happiness Designer Series Paper and the Fern 3D Embossing Folder. All the cards today were made using our Festive Pearls and I embossed the sentiments using gold embossing powder.


For these next cards I used Texture Chic Designer Series Paper and the Timber 3D Embossing Folder. Our Festive Pearls come in four colors: Cherry Cobbler, Soft Succulent, Silver and Gold. I used the gold pearls for all of the cards today except for the one below and I used the Soft Succulent pearls. The Festive Pearls have been very popular and keep going in and out of stock. If you’ve had your eye on them, I’d recommend getting them as soon as you can.

This only difference between the previous card and this one is that I used the gold pearls.
For this last one, instead of using Gold Foil for the decorative circle, I used Pool Party cardstock.

I find it really fun to take a card design I like and then try using different paper and cardstock and even a different sentiment. I hope you’ll give this card design a try!
Supply List
Below you’ll find all the Stampin’ Up! supplies I used for today’s card. If you need any stamping supplies, I’d love to be your demonstrator! You can place an order by clicking any of the images below to go to my Stampin’ Up! online store.
For the measurements I used, please refer to this post HERE. Scroll down below the Supply List.
September – October Card Kits

Use the host code RABT3URM when placing your order at my Stampin’ Up! online store and you’ll receive my September – October PDF Tutorial with directions to make a featured card and fourteen more ideas using the same layout but with a variety of different colors of cardstock, embossing folders and Designer Series Paper.
All orders using the host code will receive the ten page PDF Tutorial.
If your order is $50 or more, you’ll receive:
- The ten page PDF Tutorial
- At least six card kits* mailed to you via snail mail
- At least one Bradley Point (earn points and redeem them for free product)
- A thank you card you can send to someone!
*A card kit includes all the cardstock and Designer Series Paper you’ll need to complete a card. I’ve cut, scored, die cut and embossed all the pieces for you! You’ll just need to supply your own stamp set, ink and adhesive. You can use the stamp set I used to create the cards (Soft Seedlings) or use what you already own.
- $50.00 – $99.99 = 6 card kits
- $100 – $149.99 = 7 card kits
- $150 or more = 8 card kits
If your order is $150 or more, do NOT use the host code so you can receive Stampin’ Rewards directly from Stampin’ Up! You will automatically receive 8 card kits from me.
You can use this host code more than once. There are fifteen different card kits and I keep track of which card kits I’ve sent to you. Each time you’ll receive different kits unless you’ve earned all fifteen and then you’ll start to receive multiples. It’s a great way to have cards on hand to send to friends and loved ones!


These are the Weekly Deals for September 15th – 21st.
If a product becomes unavailable, it will no longer be on sale.
Sale: $13.50
Price: $15.00
Sale: $9.60
Price: $12.00
Sale: $8.00
Price: $10.00
Sale: $28.00
Price: $35.00
Sale: $8.00
Price: $10.00

Ho Ho Ho Paper Pumpkin Kit
This kit includes:
- Ho Ho Ho Photopolymer Stamp Set
- Early Espresso Classic Stampin’ Spot
- Printed card bases
- Printed envelopes
- Printed die cuts
- Die-cut labels
- Iridescent foil die-cut snowflakes
- Vellum
- Vanilla epoxy dots
- Adhesive dots
- Mini Dimensionals
Card size: 4-1/4″ x 5-1/2″ (10.8 x 14 cm)
Coordinating Stampin’ Up! colors: Bermuda Bay, Cherry Cobbler, Crumb Cake, Early Espresso, Shaded Spruce, Sweet Sorbet, Very Vanilla
Order must be placed by October 10, 202
You can cancel at any time or even skip a month. Click here to order the Ho Ho Ho Paper Pumpkin Kit

Thanks for stopping by today! Enjoy your day!