For the past several days I’ve been sharing some basic measurements that I use frequently. Basically it creates a foundation and then you build from there. My layers are:
Card Base: 11″ x 4-1/4″ score paper at 5-1/2″
1st Layer: 5-1/4″ x 4″
2nd Layer: 5″ x 3-3/4″
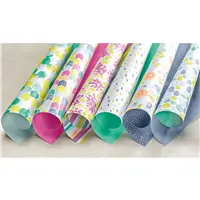
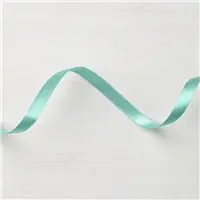
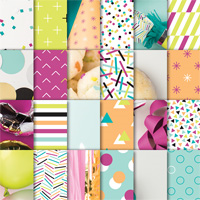
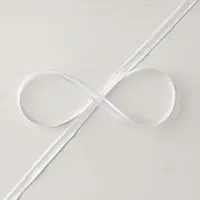
After making the layers using Naturally Eclectic Designer Series Paper, Soft Sky and Night of Navy cardstock, I wrapped Pool Party Shimmer Ribbon around the the top two layers and secured it with Snail on the back. Then, I added Snail to the center of a Delicate White Doily and attached it to the front of the card.
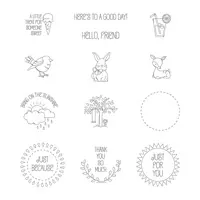
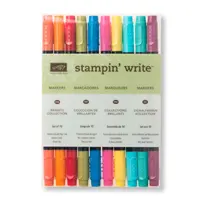
The cute tree and swing are from the stamp set A Good Day. It was stamped using Memento Ink and colored in with the Stampin’ Write markers in Crumb Cake, Lemon Lime Twist, Berry Burst and Daffodil Delight. It was cut out with the 1-3/8″ Scallop punch and sits on a Night of Navy circle using a 1-3/4″ Circle punch. I added Stampin’ Dimensionals to the back and attached it to the doily. The sentiment is also from this same stamp set and I punched it out with the Classic Label punch. It’s tucked under the tree and a Glitter Enamel Dot was added at the end for a little sparkle. Very easy to make but really cute!
Here’s another version but this time the stripes on the Designer Series paper are vertical. I used the same punches but also added the Starburst punch. The colors I used are Fresh Fig and Soft Sky. The sentiment and leaves underneath are also from the stamp set A Good Day. I colored the leaves in with a Lemon Lime Twist marker. I used 1/2″ Finely Woven Ribbon in Fresh Fig and wrapped it around the Soft Sky cardstock and Naturally Eclectic Designer Series Paper before attaching it to the card base.
All of the supplies I used for both cards are listed below.
The end of Sale-a-bration is fast approaching! There are so many free items to choose from for every $50 purchase you make! Stampin’ Up! has really knocked it out of the park with all the wonderful products available. Click here to see what you can choose from! If you have any questions, please don’t hesitate to ask!
Several days ago I shared my favorite card measurements (click here for that post) and for the next few days I’ll be sharing cards using these same measurements.
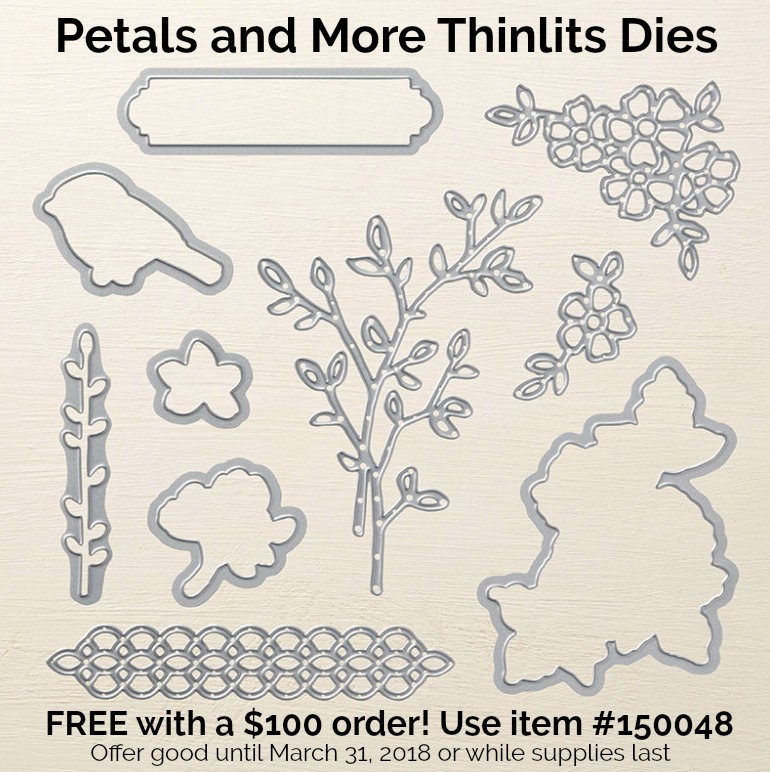
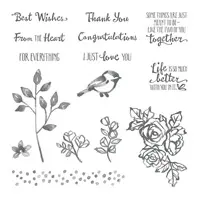
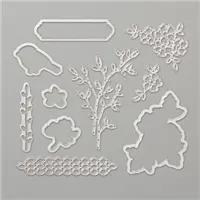
I used the very popular Petal Palettestamp set from the Occasions catalog for my sentiment and the cute little bird. This stamp set has matching Thinlits dies which make it easy to cut out the bird! Starting today you can earn Petals and More Thinlits dies FREE with a $100 purchase!!! If you choose these thinlits as your free item, do not use the catalog number because it won’t pop up as a Sale-a-bration gift. Use 150048 instead and it will be added as a free item!! I really like the die in the top left because it’s a great size for sentiments! Click here to see all of the FREE items available during Sale-A-Bration!
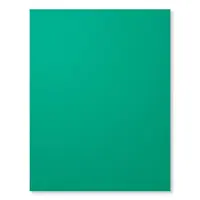
A beautiful paper makes it easy to create a quick card. I used Naturally Eclectic Designer Series Paper along with Lemon Lime Twist & Emerald Envy cardstock. Emerald Envy is one of the In Colors that will be retiring in just a few months. It’s such a pretty shade of green and I’m really going to miss it. If it’s a color that you really enjoy using, I recommend purchasing cardstock, ink refills, markers, etc. in this color now. The In Colors items always sell out way before the catalog ends, which this year is May 31, 2018.
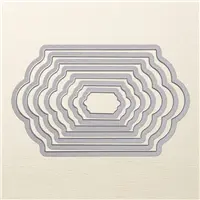
I also used the Lots of Labels Framelits for my sentiment and the layer underneath. I finished it off with a bow using Linen Thread which has a glue dot underneath to secure it.
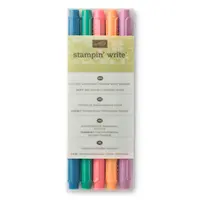
Here’s another version of the card using all the same paper and colors. I used a Lemon Lime Twist Stampin’ Write Marker from the In Color Stampin’ Write Markers pack to color in the little flower at the end of the sentiment and added a Metallic Enamel Shape.
The video from Monday’s post lists the measurements I’m using all week long but here they are:
Card Base: 11″ x 4-1/4″ scored at 5-1/2″
1st Layer: 5-1/4″ x 4″
2nd Layer; 5″ x 3-3/4″
I’ve listed the Petals & More Thinlits Dies in this list but to choose it as a Sale-a-Bration item, you must use the item number 150048, not the catalog number.To place an order, simply click any of the images below and you’ll head over to my Stampin’ Up! online store.
* Visit my online store here.
* Shop the Clearance Rack here.
* Look inside the Occasions catalog here.
* Earn a FREE stamp set! Read all about Bradley Points here.
* Not sure how to use the Host Code? Read all about it here.
* Purchase the $99 Starter Kit (and choose $125 worth of product) here. During Sale-a-bration, choose two ADDITIONAL stamp sets!!
Yay!!! I’m so excited!!! Fourteen more Sale-a-bration free gifts will be available tomorrow, March 15th! And, they are current catalog items!! Please click the image below to open the full size PDF.
PLEASE NOTE: The item numbers from the flyer MUST be used when choosing your free gift(s). If you use the regular catalog numbers, the system won’t know you’re choosing a FREE item. If you have any questions, please let me know!
What is Sale-a-bration?
Sale-a-bration comes around once a year and with each $50 purchase, you earn FREE gifts!
There’s no limit to how many FREE items you can earn!
For each and every $50 purchase (before shipping/tax), you can choose a free item! This year there are Level 2 items which means you can earn free items with a $100 purchase too! Place a $100 order (before shipping/tax) and choose (2) Level 1 gifts or (1) Level 2 gift.
When you place a $150 order, here’s what you’ll earn:
Choose (3) Level 1 gifts OR (1) Level 1 gift and (1) Level 2 gift
Earn 10% of your order in free gifts that you can choose from any current catalog (host codes are only for orders under $150 – not using the host code when placing an order of $150 or greater, allows you to earn free catalog items)
Receive 3 Bradley Points that go towards earning a free stamp set from me.
Receive a package of Stampin’ Dimensionals, your choice of a white, silver or copper embossing powder and a paper sampler as a free gift from me!
Sale-a-bration ends at the end of the month on March 31st!
Click here to see the first release of Sale-a-bration items.
Click here to see the second release of Sale-a-bration items.
Thethird release items will be available starting tomorrow! The item numbers from the flyer MUST be used when choosing your free gift(s). If you use the regular catalog numbers, the system won’t know you’re choosing a FREE item. If you have any questions, please let me know!
Today I’m featuring cards with measurements that I use over and over again and when using gorgeous Stampin’ Up! paper, it’s easy to create a beautiful card in just minutes. In the video below, I share the measurements I like to use and I make one of today’s cards!
I used the beautiful Painted with Love Designer Series Paper for all four cards that I’m featuring today. Did you know that on the back of each package of Stampin’ Up! paper you’ll find all the colors that coordinate (this info is also located in the catalog)? I wish I were good at knowing what colors coordinate with what, but I’m not. I really appreciate that the work is done for me and it’s one of the things I love about Stampin’ Up!
The supplies I used to make my cards are listed below. Click any of the images to place an order and if you have any questions, please let me know!
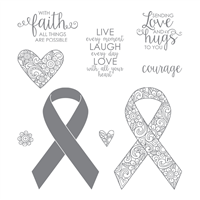
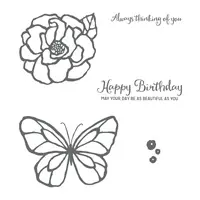
Today I’m sharing a card featuring the stamp set Beautiful Dayin the Occasions catalog. It comes with a huge butterfly and flower that are perfect for those of us who like to color! You can see a card I made with the flower image here.
I have many products from the Occasions Catalog on my card as well as one Sale-a-bration free gift. In addition to the Beautiful Day stamp set, here’s what else you can find in the Occasions Catalog:
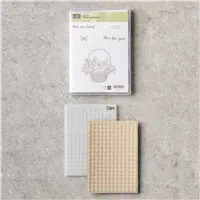
The Sale-a-bration FREE item I used was the embossing folder from the Blossoming Basket Bundle which also includes the Blossoming Basket stamp set. Both are FREE with a $100 purchase. Click here to read more about Sale-a-bration (which ends on March 31, 2018).
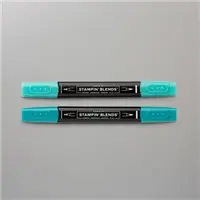
I started by stamping the butterfly image using Memento Ink on Thick Whisper White and colored it in with Bermuda Bay and Daffodil Delight Stampin’ Blends. THEN I went in search of paper to use on the card. Next time I’d choose my paper first and then color the butterfly to match! It would be a lot easier going that path! I used Daffodil Delight and Bermuda Bay cardstock. I ran the large layer of Daffodil Delight through the Big Shot with the Basket Weave Embossing Folder. As I mentioned above, this is a FREE Sale-a-bration item. Just the embossing folder (not the stamp set) will be available in the 2018-2019 Annual Catalog. Why not get it free now??
I used the stamp set A Good Day for the sentiment using Memento Ink. It was cut out with the 1″ Circle Punch and layered using the 1-1/8″ & 1-3/8″ Scallop Punches. All of the card dimensions are listed below!
Whisper White: 11″ x 4-1/4″ score at 5-1/2″ scrap for sentiment
Bermuda Bay: 5-1/4″ x 4″ 2-3/4″ x 2-3/4″ 2-3/4″ x 3-1/4″ scrap for scallop circle
Daffodil Delight: 3-3/4″ x 5″ scrap for scallop circle
Thick Whisper White (for butterfly): 2-1/2″ x 2-1/2″
Picture Perfect Party Designer Series Paper: 2-1/2″ x 3″