by Tracy | Sep 16, 2016 | Uncategorized
Hi Friends!
Last week I starting writing this post on the Layering Circles Framelits and yesterday the Layering Ovals Framelits went on sale for 25% off the regular price (this price is good until Wednesday, September 21st). The information in my post can also apply to the Ovals Framelits, which are at such a great price!

I will be always be honest with you and with that being said, I’ll mention that I was very disappointed that so many of our punches retired last spring. I’m still disappointed. Many of the ones that I’ve used for years, such as the Scallop Oval and Small Oval punch have retired. In June, four different sets of Framelits for the Big Shot debuted in the Annual Catalog and they were intended to take the place of many retired punches.
I love my Big Shot and use it every single time I’m in my craft room but I find it easier to stay seated while I’m crafting and just grab punches. I find that I’m jumping out of my seat more often, but, maybe that’s a good thing! You can’t deny that there are so many more layering options with these new Framelits and that is a definite plus. The set below comes with 16 dies! I’m not sure I’d want to store that many punches!

I bought the Layering Circle Framelits (as well as the Layering Squares and Layering Ovals Framelits) when they first came out but I finally used the Circle Framelits just a few weeks ago. Why? They were a bit intimidating! So many pieces, which ones layer with which . . . . . I just kept avoiding using them.
So, I came up with several ideas to make using them a breeze. As you can see below, I numbered the circles 1-8 and the scallops 1-8. I keep track of the measurements I use on all of my projects and this will make it so much easier to recreate them if I can just refer to the numbers I used.
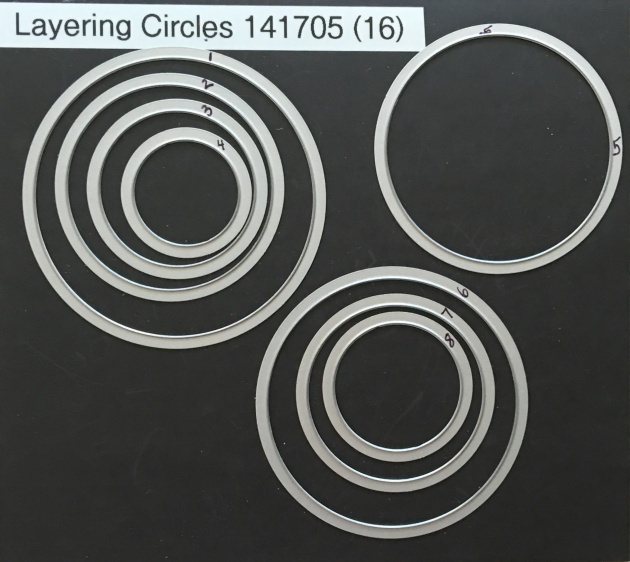

There’s one thing though that I wish I had done differently. In my head I thought that as long as they were numbered, it would be fine but I wish I had laid them all out in front of me from largest to smallest and THEN numbered them.
Next, I cut all of the pieces out using two different colors, one for the scallops and the other for the circles and I numbered each one according to how I numbered them above. Then I placed them on two different rings. I have the sizes in sequential order on the rings but the numbers are not in order. It really isn’t a big deal, but I would have preferred that they be in order.

Now it will be easy to see which pieces layer together! The rings kind of get in the way with the smaller circles and scallops but I think it will work. And I imagine that the more I work with them, it will become second nature as to which ones I need.


I hope this has helped you out if you’ve purchased any of the new Framelits or if you are considering this purchase. We have four different layering options and I’ll list all of those sets below. Remember, the Ovals are on sale but the sale price isn’t reflected in the product list below. If you click on it, you’ll be taken to my online store and you’ll see the sale price there (until September 21st)!
Product List
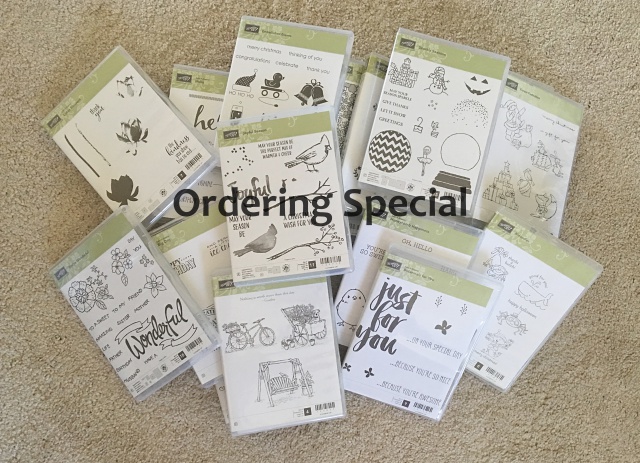
I currently have an ordering special! For every $50 purchase (before shipping/tax) at my Stampin’ Up! online store, you can choose a free stamp set. This offer is good until September 30th. Click here to read all the details!
To visit my Stampin’ Up! online store, click here!
by Tracy | Sep 15, 2016 | Uncategorized

Starting today and continuing until Friday, September 30, 2016, for every $50 purchase (before shipping/tax) at my Stampin’ Up! online store you will receive a free retired stamp set from me. Place a $100 order (before shipping/tax) and I’ll send you two stamp sets, etc.
Here’s how it will work:
Place an order at my Stampin’ Up! online store using the September Host Code: BZ6JNCNX
Your order can be a combination of Annual & Holiday catalog products as well as items on the Clearance Rack. Your order must be a minimum of $50 before tax/shipping. Be sure that you can see my name (Tracy Bradley) in the upper right hand corner of the ordering page. Remember to use the HOST CODE BZ6JNCNX Here’s an example where you will be prompted to enter the host code.

Below, I will list all of the stamp sets that are available. Immediately after you place your order, email me your top three stamp set choices. In order to be fair to everyone, please do not email me before you place your order. I will try to honor your first choice whenever possible but please understand that certain stamp sets may go more quickly. I’ll let you know via email which stamp set(s) you’ll be receiving. Once a stamp set has been spoken for, I will remove it from the list. I do have several of some stamp sets so you might notice that a set is still on the list even though I contacted you that you will be getting that particular one.
The stamps sets will either be clear mount or photopolymer (no requests please).
If you choose NO CONTACT when placing your order, I will be unable to send your free stamp set as Stampin’ Up! will not release your name and address to me.
Sorry, but this offer is only open to U.S. customers and only available through Tracy Bradley
If you are having trouble ordering online, I am happy to do it for you. I will need your credit card information.
If you have any questions, please don’t hesitate to ask!
Click here to place your order!
To view the Holiday Catalog online, click here!
To view the Annual Catalog online, click here!
*** Update: All of the stamp sets have been removed.
If you have any questions at all, please ask!
Click here to place an order!
by Tracy | Sep 15, 2016 | Uncategorized

This is the third and final week of Special Offers from Stampin’ Up! This week it’s all about Project Life and the Layering Ovals Framelits Dies AND they are all 25% off! I especially love when Big Shot accessories go on sale!
If you would like more information about any of these products, click HERE to visit my Stampin’ Up! online store.

 You are always welcome to contact me if you have any questions: tracy@stampingwithtracy.com
Ready to place an order? Click here to go to my Stampin’ Up! online store. My September Host Code is: BZ6JNCNX
At checkout, you will be asked to enter the Host Code. Use it and I will send you a small gift! At the end of the month I will close the code and split the Shopping Rewards with everyone who used it. If your order is $150, please do not use the code. You will receive your own Shopping Rewards from Stampin’ Up! Questions? Don’t hesitate to send me an email.
by Tracy | Sep 13, 2016 | Uncategorized

The Stampin’ Up! Clearance Rack has been updated. Lots of goodies, such as embossing folders, punches, Big Shot accessories, ribbon, embellishments, stamps . . . . . .
I don’t know how much inventory they have on hand so if you see something that appeals to you, I would grab it!
You can see the list here!
At checkout, you will be asked if you have a Host Code. My September Host Code is
Use it and I will send you a small gift! At the end of the month I will close the code and split the Shopping Rewards with everyone who used it. If your order is $150, please do not use the code. You will receive your own Shopping Rewards from Stampin’ Up! Questions? Don’t hesitate to send me an email.
by Tracy | Sep 13, 2016 | Uncategorized
Hi Friends!

Today’s card is one that I made weeks ago but am just now sharing. It started as an experiment to see the different looks I could get by stamping the flowers in different ways. I knew I wanted the flowers to have a watercolor effect but I wasn’t quite sure the best way to achieve that look. I tried putting ink from my stamp pad directly onto a large acrylic block and then spraying the block with a fine mist of water. I then tapped my stamp onto the block but by the time I stamped it onto my paper, it was too watery looking.
Here’s what I did to achieve the results I liked. First, I inked my stamp in the stamp pad and then sprayed my stamp three times with my water mister. If I did it more than that, it was too watery and I didn’t like the look I achieved with less than three spritzes. Of course, each water mister will perform differently. I found that if I then stamped my paper with a light touch, I liked the effect better than pressing down hard. If you decide to give this a try, I recommend experimenting as I did. You’ll find what you like best!

I fussy cut each flower out with my paper snips and then added a White Perfect Accents to the center of each one. The Pacific Point flowers were adhered to my paper with Snail and the Cucumber Crush one has a Stampin’ Dimensional on the back.
I’ve listed the supplies I used below. I did NOT use the Thinlit dies that go with the Flourishing Phrases stamp set. I’ve listed the bundles though in case you are interested in a 10% discount if you purchase them together.
Product List – Click on any of the products below for more information or to place an order at my Stampin’ Up! online store. Questions? Please feel free to send me an email: tracy@stampingwithtracy.com
Thanks for stopping by today!





