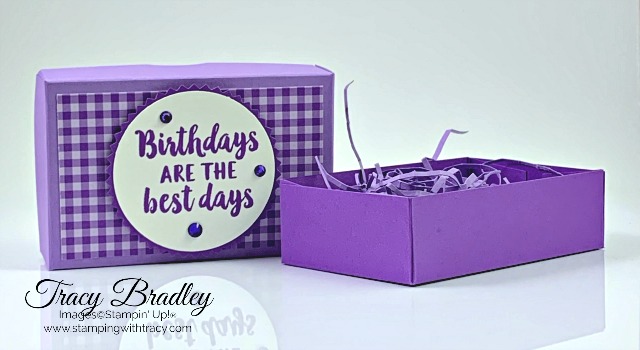
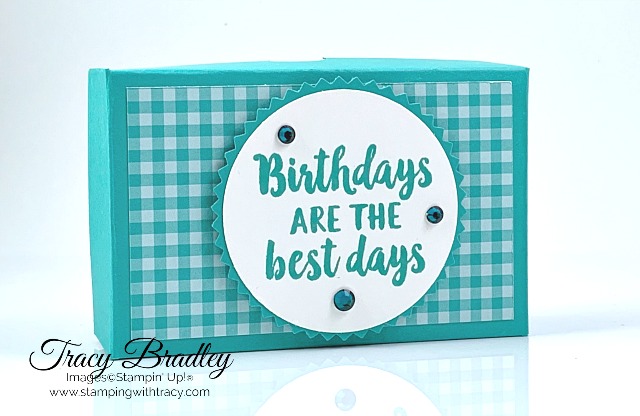
Today I have a little box that is just the perfect size for a gift card AND I have a video!
If making boxes seems intimidating, trust me, they are easy. Most boxes follow the same type of instructions and once you’ve made a few, you can whip right through them. The hardest part is figuring out the dimensions and I’ve done that for you!
It’s also quite easy to make your own shredded paper for the inside. Simply cut your cardstock very thin, scrunch it up and you have your own homemade filler for the box. How easy is that?
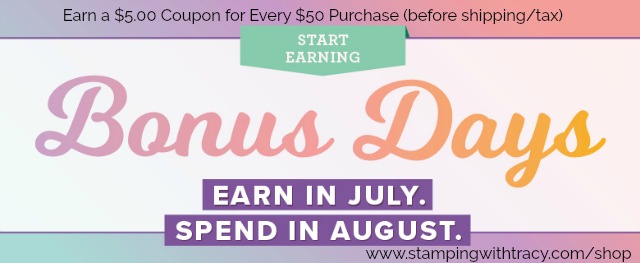
All of the supplies I used for both boxes can be found in the supply list below and can easily be ordered over at my online store. Don’t forget that Bonus Days are here until the end of July which means for every $50 purchase, you’ll receive a $5.00 Bonus Days coupon to spend in August.
Top of the box: 4-1/4″ x 5-1/2″ score at 1″ on all four sides
Bottom of the box: 4-1/8″ x 5-1/2″ score at 1″ on all four sides (don’t forget to cut a smidge off of two connecting sides)
Designer Series Paper: 3-1/4″ x 2″
Supply List
If you need any stamping supplies, I’d love to be your demonstrator! You can place an order by clicking any of the images below to go to the homepage of my Stampin’ Up! online store.If you have questions about products you’re considering purchasing or ones you’ve already purchased, I’m just an email away (click the Email Me button on the sidebar of my blog).
This is a layout you can use over and over again. Simply change the cardstock and designer series paper and you’ll have a completely different look! It’s so versatile!
Bundle Alert
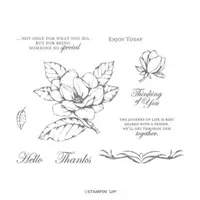
When you purchase the Good Morning Magnolia Bundle, which includes the Good Morning Magnolia stamp set and the coordinating Magnolia Memory Dies, you’ll save 10%! Be sure to use the special bundle item number 151087. Click the image below to order yours today!
Supply List
If you need any stamping supplies, I’d love to be your demonstrator! You can place an order by clicking any of the images below to go to the homepage of my Stampin’ Up! online store.If you have questions about products you’re considering purchasing or ones you’ve already purchased, I’m just an email away (click the Email Me button on the sidebar of my blog).
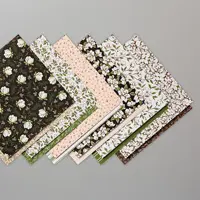
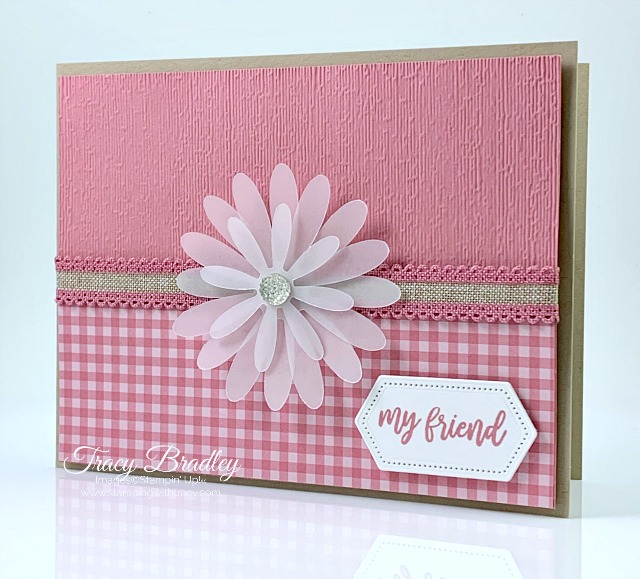
In the month of July and August, all orders placed at my online store will receive all the paper and embellishments to create the card below (the kit you receive will be in one of the five 2019-2021 In Colors). You’ll also receive a PDF Tutorial so you can recreate the card over and over again!
Place an order before the end of July and Stampin’ Up! will send you a $5 Bonus Coupon for every $50 purchase (before shipping/tax). You’ll be able to redeem the coupon in August. There’s no limit to how many coupons you earn! Click hereto place an order!
Today’s card is quick and easy! Look at those cute birds! The Bird Ballad Designer Series Paper is definitely the star of this card. It’s a shame to cover any of the paper with a sentiment but it definitely adds to the card.
Did you know that you can find the coordinating colors to all of our packages of paper right in the catalog as well as in the packaging? With Stampin’ Up! paper you never need to wonder or guess which colors will coordinate. I love that!
I used Calypso Coral for the base of my card and then added a layer of Daffodil Delight. The sentiment also sits on a scalloped oval of Calypso Coral. You can find all the measurements I used, farther down in the post.
If you’d like to purchase any of the products I used on my card, you’ll also find a Supply List farther down in the post. Simply click any of the products and you’ll be directed to my online store.
Measurements
Calypso Coral cardstock: 11″ x 4-1/4″
Daffodil Delight cardstock: 5-1/4″ x 4″
Bird Ballad Designer Series Paper: 5″ x 3-3/4″
Calypso Coral: scrap for scalloped oval
Whisper White: scrap for sentiment
Bundle Alert
When you purchase the Free as a Bird Bundle which includes the Free as a Bird stamp set and the Stitched Nested Labels Dies, you’ll save 10%!
Supply List
If you need any stamping supplies, I’d love to be your demonstrator! You can place an order by clicking any of the images below to go to the homepage of my Stampin’ Up! online store.If you have questions about products you’re considering purchasing or ones you’ve already purchased, I’m just an email away (click the Email Me button on the sidebar of my blog).
Bonus Days are almost over! For every $50 purchase you make at my Stampin’ Up! online store, you’ll receive a $5.00 Bonus Coupon from Stampin’ Up! You’ll be able to use the coupon in August and there’s no limit to how many you can earn! Plus, you’ll receive a FREE PDF Tutorial and a card kit from me!
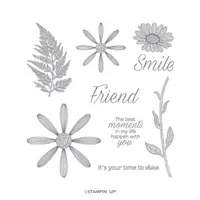
I love a stamp set that has many different sentiments to choose from and on today’s card I used the Well Said stamp set which includes 51 stamps! This set is jam packed with just about any sentiment you might need. It also coordinates with the Well Written Dies. For a clearer picture of the stamps, click here to go to my online store. Once there, click the “+” and you’ll see the stamps enlarged.
It’s a bit hard to see what the dies look like in the photo above (since they are backwards) but here a few examples that show the dies and stamp set used together.
Back to today’s card! I used the 6″ x 6″ Brights Designer Series Paper in Bermuda Bay and cut the squares using the Layering Squares Dies. The other squares were cut out of Bermuda Bay cardstock using the Stitched Shapes Dies. I used the same Brights DSP for the banner and used the Banner Triple punch. Glitter Enamel Dots were added as a finishing touch.
This card will be my FREE Tuesday Tutorial so be sure to come back on Tuesday to grab it!
Supply List
If you need any stamping supplies, I’d love to be your demonstrator! You can place an order by clicking any of the images below to go to the homepage of my Stampin’ Up! online store.If you have questions about products you’re considering purchasing or ones you’ve already purchased, I’m just an email away (click the Email Me button on the sidebar of my blog).
Bonus Days are here! For every $50 purchase you make at my Stampin’ Up! online store, you’ll receive a $5.00 Bonus Coupon from Stampin’ Up! You’ll be able to use the coupon in August and there’s no limit to how many you can earn! Plus, you’ll receive a FREE PDF Tutorial and a card kit from me!
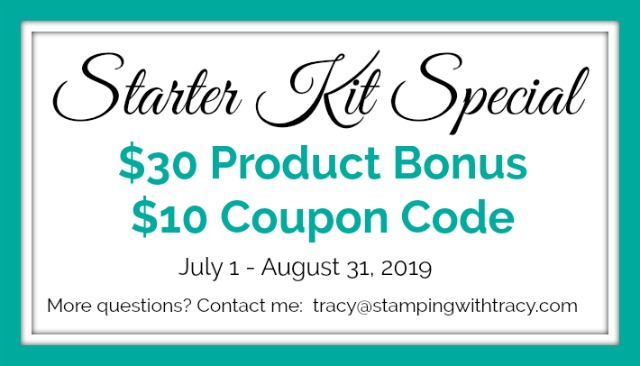
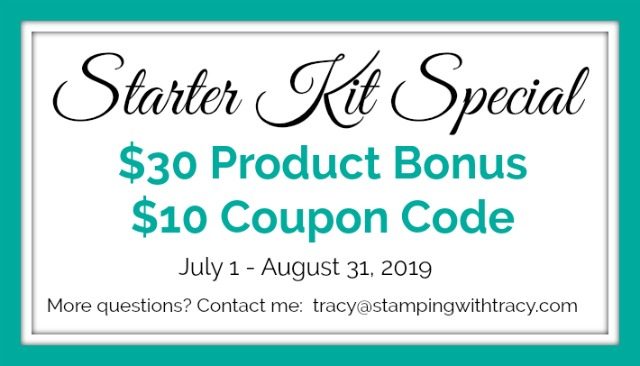
Purchase the Starter Kit for $99 and choose $155 in Stampin’ Up! product! This fantastic offer is only good until the end of August! As soon as you join, you’ll start earning a 20% discount on all your future Stampin’ Up! purchases. For more information, click here or if you’re ready to sign up, you can click here. Of course if you have questions, please don’t hesitate to contact me!
Does today’s card look a bit familiar? It’s actually the same card I posted last Thursday (see below) with a few minor changes.
I changed the direction of the card and used a different sentiment. For today’s card I used the Layering Ovals Dies and for the card last week, I used the Layering Squares Dies and our Stitched Shapes Dies.
You can find the directions for today’s card over on my post from last Thursday. The only change would be to stamp the sentiment in Old Olive ink and cut it out with the Layering Ovals Dies and to cut another, larger oval using Blackberry Bliss cardstock.
If you have any questions, feel free to contact me!
Supply List
If you need any stamping supplies, I’d love to be your demonstrator! You can place an order by clicking any of the images below to go to the homepage of my Stampin’ Up! online store.If you have questions about products you’re considering purchasing or ones you’ve already purchased, I’m just an email away (click the Email Me button on the sidebar of my blog).
Purchase the $99 Starter Kit and you’ll be able to choose $155 in Stampin’ Up! product!! It’s an amazing opportunity being offered in July & August and it’s an absolutely risk free offer. For more details, visit this page here. You are also more than welcome to contact me with any and all questions!
Today’s card is one of five free card kits you’ll receive when you place an order at my Stampin’ Up! online store. Each kit includes all the paper and embellishments you’ll need. Just supply your own stamp set (I used I Say Hello), ink (I used Rococo Rose) and adhesive.
I’ve made kits up in all the new In Colors – Rococo Rose, Terracotta Tile, Pretty Peacock, Seaside Spray and Purple Posy. In addition to the card kit, you’ll also receive a PDF tutorial with directions, pictures and a supply list. (more…)