by Tracy | Nov 6, 2020 | Designer Series Paper, Die-Cutting, Heat Embossing, Stitched Shapes Dies
In the last few months, I’ve received several No Contact orders which means that the customer would prefer I not contact them. Please know that I always send a thank you via email for any orders placed through me and that I’m very appreciative. If you’ve placed an order and have NOT received a thank you and didn’t realize you chose No Contact, please contact me. On to today’s card!
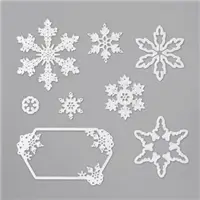
Today’s card features the stamp set, Wrapped in Christmas and the So Many Snowflakes Dies.


I started with a base of Pool Party cardstock with a layer of Whisper White cardstock that was cut using the So Many Snowflakes Dies and the Stampin’ Cut & Emboss Machine. I love how the die, cuts an opening in the paper with pretty stitching and snowflakes!

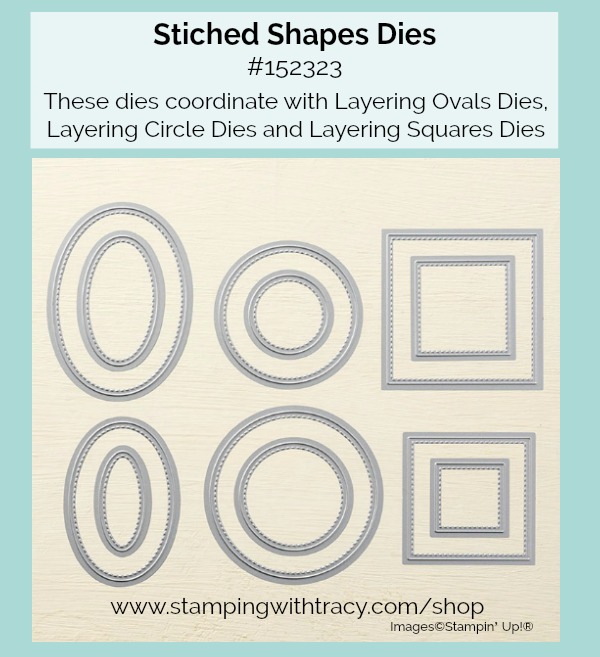
I added a piece of Snowflake Splendor Designer Series Paper behind the opening before adhering the Whisper White cardstock to the card base. The sentiment was stamped with Versamark ink using the stamp set Wrapped in Christmas and then embossed with Silver Embossing Powder (see directions for heat embossing below). I cut it out using the Stitched Shapes Dies and popped it up with Stampin’ Dimensionals.
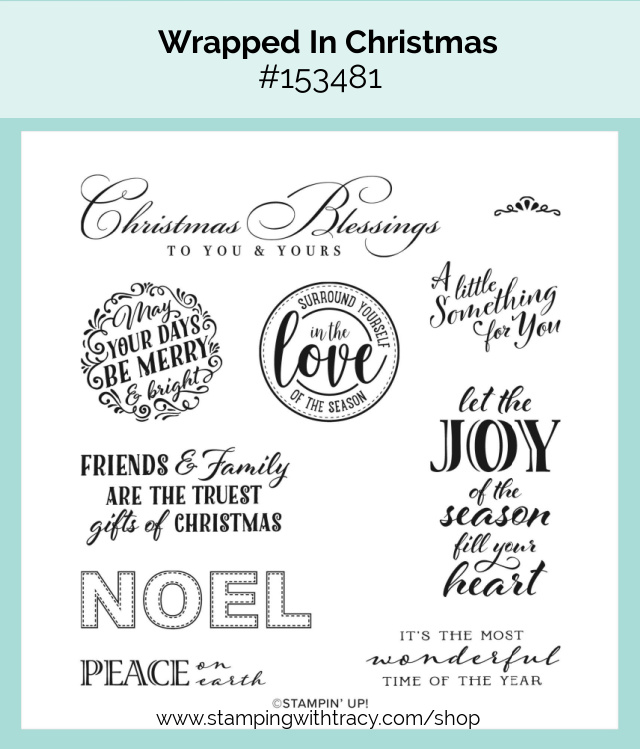
Using the So Many Snowflakes Dies, I cut two snowflakes out of Silver Foil (I rolled up several Mini Glue Dots into balls to attach them). It was a fun card to make and really quick and easy!

How to Heat Emboss
Prepare your cardstock by rubbing an anti-static pouch over the surface (this helps keep away stray particles of embossing powder). Stamp your sentiment or image using a Versamark pad. This is very sticky ink and your embossing powder will stick right to it. Sprinkle embossing powder over the stamped image. Shake off any excess. Before applying heat to your paper, heat the Heat Tool first so the paper won’t warp (about 10 seconds). Direct the heat over your image and watch as your sentiment is transformed!
Supply List
If you need any stamping supplies, I’d love to be your demonstrator! You can place an order by clicking any of the images below to go to my Stampin’ Up! online store. If you have questions about products you’re considering purchasing or ones you’ve already purchased, I’m just an email away (click the Email Me button on the sidebar of my blog).
Measurements
- Pool Party cardstock: 11″ x 4-1/4″
- Whisper White cardstock: (2) 5-1/4″ x 4″
- Whisper White cardstock: scrap for sentiment
- Snowflake Splendor Designer Series Paper: approx. 5″ x 3-1/4″
Tracy’s Quick Links
Place an Order
Clearance Rack
$99 Starter Kit
Paper Pumpkin
Tracy’s Customer Rewards
Bradley Points
by Tracy | Sep 24, 2020 | Designer Series Paper, Die-Cutting, Embossing Folders, Stampin' Cut & Emboss Machine, Stitched Shapes Dies
Several days ago I shared a box I made for a pack of gum and today I have three more boxes. Two of the boxes are decorated with Magic In This Night Designer Series Paper and the other one with one of our 3D Embossing Folders. If you’d like to watch the video showing how to make the box from last week, click here. To see the post for the Halloween box from last week along with the measurements I used, click here.


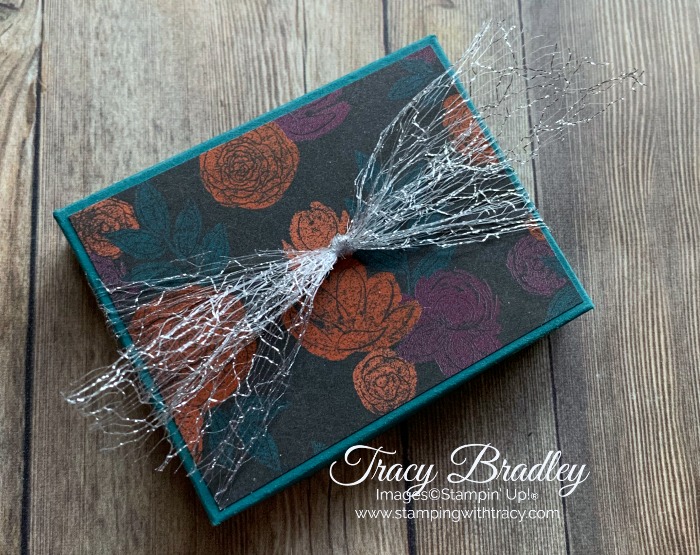
All three boxes were tied up with the GORGEOUS 1-1/2″ Metallic Mesh Ribbon in the August-December 2020 Mini Catalog. It’s part of the Magic In This Night Suite (Halloween products) but I think it can be used for any occasion! It’s very fancy looking!

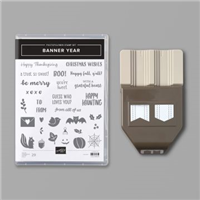
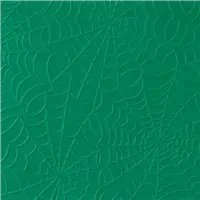
The first box was made using Basic Black cardstock and to decorate it, I used the Cobwebs 3D Embossing Folder with Gorgeous Grape cardstock. The spider was cut out using our Black Glitter Paper and the Little Treat Box Dies. The sentiment was stamped in Memento Ink using the stamp set, Banner Year, and was cut out using the Stitched Shapes Dies (I also used this stamp set and dies for the second box).

I used Basic Black cardstock to make the second box and Pretty Peacock cardstock for the third one. Both have a piece of Magic In This Night Designer Series Paper on the top.
These boxes are really easy to make and while I made them to fit a pack of gum, any small treat would fit inside!
Supply List
If you need any stamping supplies, I’d love to be your demonstrator! You can place an order by clicking any of the images below to go to my Stampin’ Up! online store. If you have questions about products you’re considering purchasing or ones you’ve already purchased, I’m just an email away (click the Email Me button on the sidebar of my blog).

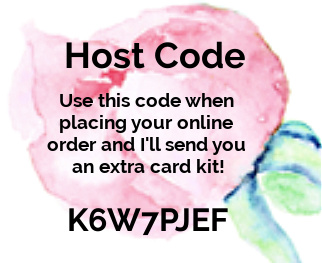
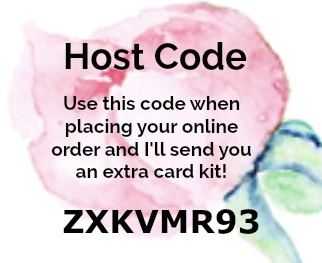
Place a minimum $50 order at my Stampin’ Up! online store using the host code DTNSJFJ2 and as a thank you, you’ll receive 6 card kits (2 each of three designs) with envelopes and a PDF Tutorial with instructions, pictures and a supply list. You’ll receive all the paper and embellishments needed to make the cards and all the paper will be cut, scored and die cut for you (you’ll need to supply your own adhesive, ink and stamp set). All the work is done for you! The last day to sign up for the Brightly Gleaming Card Sampler is Tuesday, September 29th. For all the details, please click here.


Purchase the No Risk Stampin’ Up! Starter Kit for $99 and you’ll have all the perks of being a demonstrator such as a 20% discount on everything you purchase! You’ll choose $125 worth of Stampin’ Up! products that YOU want (you can even include the Stampin’ Cut & Emboss Machine)! There’s absolutely no risk to purchasing the Starter Kit because if you purchase it JUST for the discount, that’s perfectly fine! Or you may want to start your own business. Your Starter Kit. Your Decision. Did I mention the Starter Kit ships FREE??!
During the month of September, Stampin’ Up! will also add to your Starter Kit:
- Queen’s Anne’s Lace stamp set
- So Much Love stamp set
- Package of rhinestones
- Cardstock to make 16 cards
Click here for more information or feel free to email me with any questions you might have. Ready to purchase the Starter Kit? Click here!

Tracy’s Quick Links
Place an Order
Clearance Rack
$99 Starter Kit
Paper Pumpkin
Tracy’s Customer Rewards
Bradley Points
by Tracy | Jun 25, 2020 | Card Sampler, Designer Series Paper, Die-Cutting, Embossing Folders, Stitched Shapes Dies
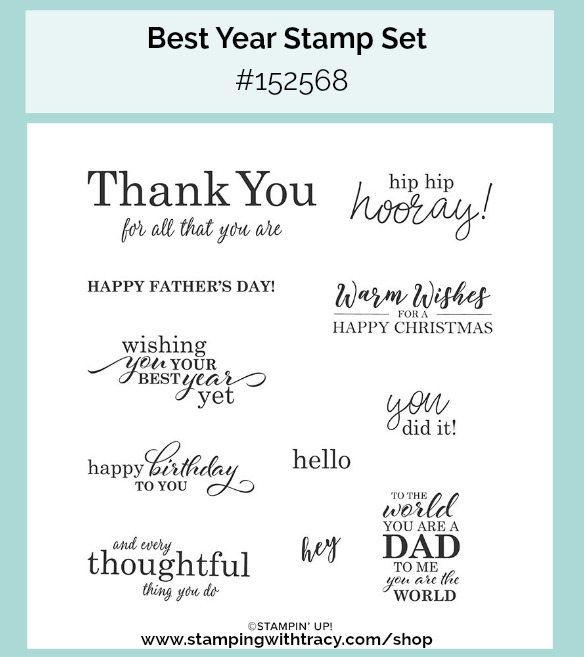
Today’s card features Peony Garden Designer Series Paper and the Best Year stamp set.

I used Thick Whisper White cardstock for the base of my card and then layered it with Pool Party and Basic Black cardstock. Some texture was added to the Pool Party by using the Tasteful Textile 3D Embossing Folder. Then there’s another layer of Basic Black with Peony Garden Designer Series Paper. This layer was popped up with Stampin’ Dimensionals.

The sentiment was stamped in Memento ink onto Whisper White cardstock, cut out using the Stitched Shapes Dies and popped up with Stampin’ Dimensionals. Three Holiday Rhinestones in Coastal Cabana were added to complete the card. If you’d like to make today’s card, you can find the measurements I used below the Supply List.


Supply List
If you need any stamping supplies, I’d love to be your demonstrator! You can place an order by clicking any of the images below to go to my Stampin’ Up! online store. If you have questions about products you’re considering purchasing or ones you’ve already purchased, I’m just an email away (click the Email Me button on the sidebar of my blog).
Measurements
- Thick Whisper White cardstock: 11″ x 4-1/4″
- Basic Black cardstock: 5-1/4″ x 4″
- Basic Black cardstock: 4-1/8″ x 2-7/8″
- Pool Party cardstock: 5″ x 3-3/4″
- Whisper White cardstock: scrap for sentiment
- Peony Garden Designer Series Paper: 3-7/8″ x 2-5/8″
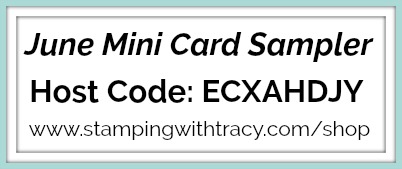
June Mini Card Sampler
Receive my FREE Mini Card Sampler when you place a minimum $35 order at my Stampin’ Up! online store using the host code ECXAHDJY and I’ll send you three card kits along with a PDF Tutorial. Click here for all the information. Offer valid until Monday, June 29, 2020.

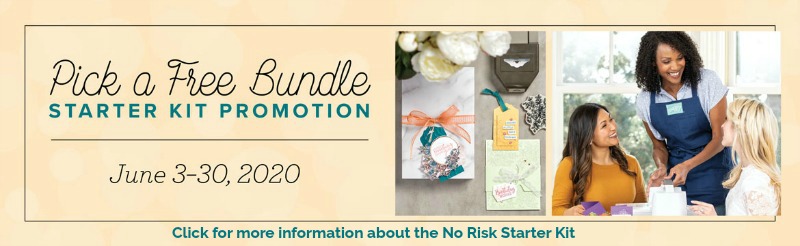
There are only a few days left to take advantage of the Starter Kit Promotion. Purchase the Starter Kit before June 30, 2020 and you’ll be able to add ANY bundle in the catalog, this is in addition to choosing $125 worth of products.The Starter Kit is risk free and such a great deal! If you’d like more information, click here!
Tracy’s Quick Links
Place an Order
My Customer Rewards
Bradley Points
$99 Starter Kit
Clearance Rack
2020-2021 Annual Catalog
Paper Pumpkin
by Tracy | May 6, 2020 | Designer Series Paper, Die-Cutting, Layering Squares Dies, Stitched Shapes Dies
Before sharing my card with you today, I wanted to let you know that the Stitched So Sweetly Dies are on the Low Inventory List again. Once they go into Backorder status, there’s no indication how long the wait will be before they are back in stock. Click here to see if they’re still in stock.
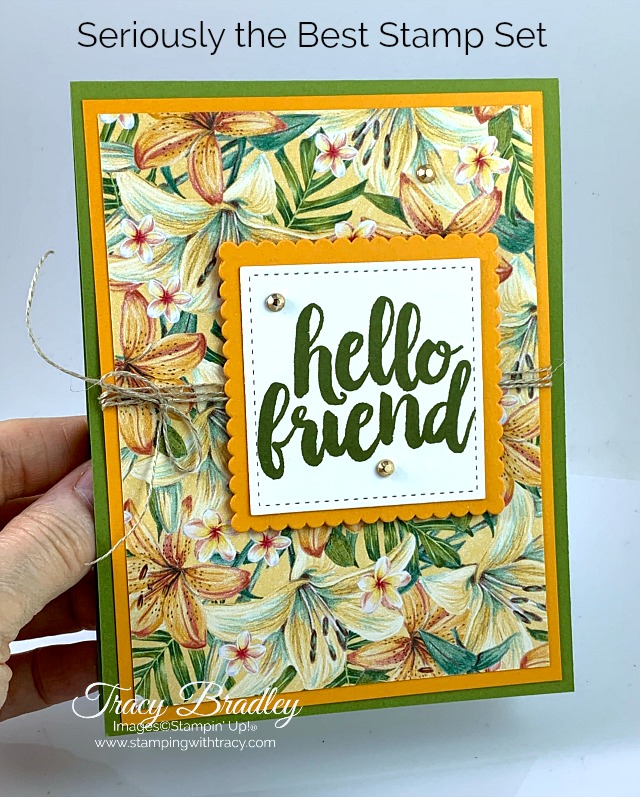
Today’s card features the stamp set, Seriously the Best. I love stamps with big bold sentiments and I was hoping this set would carry over into the new catalog but sadly, it isn’t. All retiring stamp sets will have guaranteed availability until May 22, 2020 and after that date, only while supplies last.


Doesn’t this paper get you into a tropical frame of mind? My card on Monday was also made using Tropical Oasis Designer Series Paper and if you missed it, you can see it here. This paper debuted in the Mini Catalog and is on the retiring list. The coordinating colors are: Mango Melody, Old Olive, Daffodil Delight, Early Espresso, Grapefruit Grove, Mint Macaron, Pear Pizzazz, Pool Party, Pretty Peacock, Real Red, Soft Sea Foam, Soft Suede, So Saffron and Whisper White. Stampin’ Up! takes the guesswork out of figuring out which colors to use with their papers!

After adhering the Tropical Oasis DSP to the Mango Melody cardstock, I wrapped Linen Thread around the paper three times, tied a knot and then made a bow. The sentiment was cut out using the Stitched Shapes Dies (also on the Low Inventory List) and then adhered to a piece of Mango Melody cardstock, cut out with the Layering Squares Dies. Stampin’ Dimensionals were added to the back to give it a nice pop. To complete the card, I added three Gilded Gems. All the measurements I used can be found below the Supply List.

Supply List
If you need any stamping supplies, I’d love to be your demonstrator! You can place an order by clicking any of the images below to go to my Stampin’ Up! online store. If you have questions about products you’re considering purchasing or ones you’ve already purchased, I’m just an email away (click the Email Me button on the sidebar of my blog).
Measurements
- Old Olive cardstock: 11″ x 4-1/4″
- Mango Melody cardstock; 5-1/4″ x 4″
- Mango Melody cardstock: scrap for scalloped square
- Tropical Oasis Designer Series Paper: 5″ x 3-3/4″
- Whisper White cardstock: scrap for sentiment
- Whisper White cardstock: 5-1/4″ x 4″ for inside of the card
Click here to see all retiring products!
Stamp sets have guaranteed availability until May 22, 2020 and after that date, only while supplies last. Everything else is available while supplies last or June 2, 2020.
Tracy’s Quick Links
Place an Order
My Customer Rewards
Bradley Points
$99 Starter Kit
Clearance Rack
Mini Catalog
by Tracy | Mar 25, 2020 | Designer Series Paper, Die-Cutting, Embossing Folders, Stitched Shapes Dies

Note from Tracy: Creating cards is a wonderful way to relieve stress and we’re all under so much of that right now. I’m spending time in my craft room creating cards to share with you and it’s my hope that you’ll be inspired to start creating. Brighten someone’s day by sending them your beautiful card! Take Care, my friends.
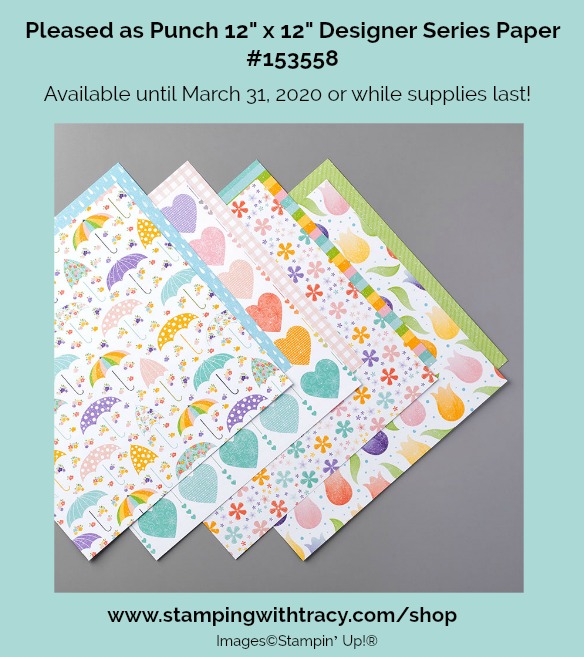
The card I’m sharing with you today was made using Pleased as Punch Designer Series Paper. This paper was released in early February to coordinate with Sale-a-Bration and Mini catalog products but will only be available until March 31, 2020 or while supplies last. These are the products it coordinates with:
The base of my card is Blushing Bride, not a color I use very often and I’m wondering why. It’s really pretty! I added an embossed layer of Blushing Bride using the Layered Leaves Embossing Folder. The banner was cut using using the Banner Triple Punch. You can make banners with this punch in three widths – 1″, 1-1/2″, and 2″ but here’s a little trick: when choosing the 2″ width, trim your paper about a sixteenth of an inch so it will slide into the punch easily.

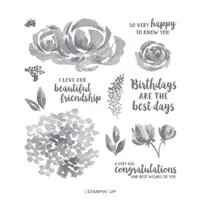
Using the Leaf Punch, I punched out two leaves in Vellum cardstock. The sentiment was stamped in Memento Ink onto Whisper White paper using the stamp set Beautiful Friendship and cut out with the Stitched Shapes Dies. I added Stampin’ Dimensionals to the back and also secured the leaves with the dimensionals. I completed the card by adding three Glitter Enamel Dots, in Granny Apple Green. You can find the measurements I used below the Supply List. Stay safe and healthy!

Supply List
If you need any stamping supplies, I’d love to be your demonstrator! You can place an order by clicking any of the images below to go to my Stampin’ Up! online store. If you have questions about products you’re considering purchasing or ones you’ve already purchased, I’m just an email away (click the Email Me button on the sidebar of my blog).
Measurements
- Blushing Bride cardstock: 11″ x 4-1/4″
- Blushing Bride cardstock: 5-1/4″ x 4″
- Pleased as Punch Designer Series Paper: 2″ x 5″
- Whisper White cardstock: scrap for sentiment
- Vellum cardstock: scraps for leaves


Tracy’s Quick Links
Place an Order
My Customer Rewards
Bradley Points
$99 Starter Kit
Clearance Rack
Mini Catalog
Sale-A-Bration Brochure
Sale-A-Bration 2nd Release Brochure
by Tracy | Mar 20, 2020 | Die-Cutting, Embossing Folders, Punches, Stitched Shapes Dies

I hope this card brightens your day!
To create today’s card, I used Pineapple Punch cardstock, one of our five 2018-2020 In Colors. Each year five new colors are introduced and five are retired so Pineapple Punch will be gone in a few months.

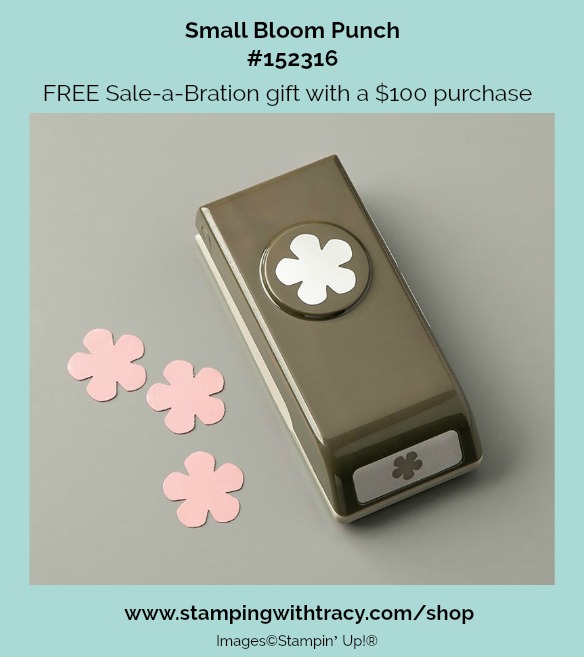
I used the Stitched Shapes Dies to create all the squares and to cut out the sentiment. The flowers were cut out using the Small Bloom Punch, a FREE Sale-a-Bration gift with a $100 purchase and available while supplies last. Each flower was attached to the stitched square using a Mini Stampin’ Dimensional and a Gold Faceted Gem was added to the center of each one for some sparkle!
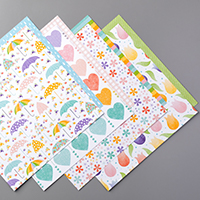
The sentiment is from the stamp set Under My Umbrella and was stamped with Memento ink. To give a little more dimension to the care, it was popped up with Stampin’ Dimensionals. With the help of the dies and punch, this card came together very quickly!
Bundle Alert: The Under My Umbrella Bundle includes the stamp set Under My Umbrella and the Umbrella Builder Punch. You can purchase these items separately but when you use the special bundle item #153786, you’ll save 10%!

Supply List
If you need any stamping supplies, I’d love to be your demonstrator! You can place an order by clicking any of the images below to go to my Stampin’ Up! online store. If you have questions about products you’re considering purchasing or ones you’ve already purchased, I’m just an email away (click the Email Me button on the sidebar of my blog).
Tracy’s Quick Links
Place an Order
My Customer Rewards
Bradley Points
$99 Starter Kit
Clearance Rack
Mini Catalog
Sale-A-Bration Brochure and Sale-A-Bration 2nd Release Brochure