On Tuesday I shared another card very similar to the one I’m sharing today. I used the same color combination of Blackberry Bliss, Highland Heather and Pool Party but as you can see from the photo below, I made just a few changes. You can read all about Tuesday’s card, here.
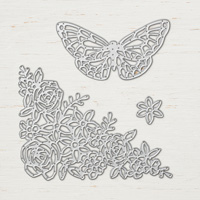
Today’s card starts with a base of Blackberry Bliss measuring 11″ x 4-1/4″. The next layer is Highland Heather that measures 5-1/4″ x 4″. Before adding the 5″ x 3-3/4″ piece of Whisper White cardstock to the top, I ran it through the Layered Leaves embossing folder using the Big Shot. I added Mini Stampin’ Dimensionals right down the middle of my Pool Party butterfly that was cut using the Springtime Impressions Thinlits. The butterfly is very secure on the card with just those two dimensionals and I love how it looks sitting on the card.
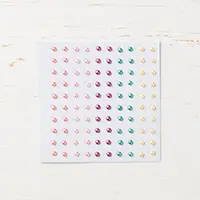
The sentiment is from the new stamp set, Detailed with Love and it was stamped using a Blackberry Bliss stamp pad. Both the sentiment and Highland Heather oval were cut out using the Big ShotLayering Ovals Framelits (these framelits are currently on the Low Inventory List and might go into backorder status soon so I wouldn’t delay if you’ve had your eye on them). I finished the card off with three pearls from the Share What You Love Artisan Pearls. They are so delicate and pretty!
All of the supplies I used to create today’s card are listed below. To place an order, click any of the images and you’ll be taken to my Stampin’ Up! online store. If you have any questions, don’t hesitate to ask!
I used the Abstract Impressions stamp set and the Garden Impressions Designer Series Paper to create today’s card. It’s so quick and easy to make!
I started with a base of Melon Mambo cardstock that measured 11″ x 4-1/4″ and I scored it at 5-1/2″. It isn’t necessary to score but I’m always much happier with the results than if I just folded. Next, I cut down a piece of Garden Impression DSP to 5″ x 3-3/4″ and layered it onto a piece of Basic Black cardstock that measured 5-1/4″ x 4″.
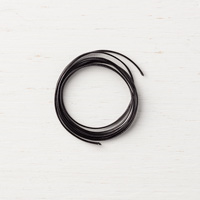
I took our 1/8″ Black Cord and wrapped it around the Basic Black, attaching it in two places on the back. At first I tried using Snail adhesive to attach the ends of the cord to the back but it just wouldn’t stay but our Multipurpose Liquid Glue did the trick. Then I attached Stampin’ Dimensionals to the back and attached it to the card base.
Using Memento Ink and Whisper White cardstock, I stamped the sentiment using the stamp set Abstract Impressions. Then I cut it out using the Stitched Shapes Framelits. If I can, I always prefer cutting AFTER stamping because it allows me to get the sentiment exactly where I want. I cut a Basic Black scalloped square using the Layering Squares Framelits, added the sentiment to the front, attached Stampin’ Dimensionals to the back and attached it all to the front of the card.
Want to make today’s card? Click any of the images below for more information or to place an order!
Have you heard about the Stampin’ Up! Color Revamp? Six returning In Colors have joined the core collection plus we have nine brand new colors. And on top of that, five new In Colors have joined the lineup! (To get a closer look at these colors, click the images).
My card today uses Blackberry Bliss, Highland Heather and Pool Party. I participated in a challenge using these three colors together and this is the card I came up with! Unfortunately Blackberry Bliss is looking a bit more like black in my photo but if you look at the collections photo above, you’ll get a better sense of the true color.
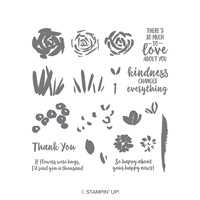
I layered Blackberry Bliss and Highland Heather together and added another layer of Whisper White that was embossed with the Layering Leaves embossing folder. I stamped the sentiment in Blackberry Bliss using the brand new stamp set, Accented Blooms (this stamp set coordinates with the Tailored Tag Punch). (more…)
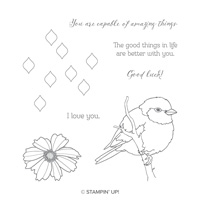
If you enjoy watercoloring, or you want to give it a try, I think you’ll like this video from Stampin’ Up! using the No Line Watercoloring technique. The trick is to faintly stamp an image so that once you color it in, it will look like you drew the image!
There are many new products used to create the card in the video including the stamp set, Better With You. This is a stamp set I ordered on June 1st when the catalog went live and I can’t wait to receive it! I’ve included a supply list below if you’d like to purchase any of the products mentioned.
Supplies Used to Create This Project
Want to make this project? Click any of the images and you’ll be directed to my Stampin’ Up! online store.
The 2018-2019 Annual Catalog is here!! Who doesn’t love lots of brand new products??? Want to take a look inside this beautiful new catalog? Click here to download a copy (it’s a large file so it may take a minute or two). Download my 2018-2019 Annual Catalog Shopping List so you can keep track of everything you like!
There are thirty-two bundles in the new catalog! Bundles include a stamp set and a coordinating tool such as a punch or a set of Big Shot dies and when you purchase a bundle, you save 10%. All of the bundles are tucked between the pages of the catalog but they can be easy to miss. I have a list of all the Stampin’ Up! Bundlesthat you can download and print!
I have a new host code this month! Use it and I’ll send you a Designer Series Paper sampler. If your order is over $50, you’ll also receive cardstock to match the paper in the sampler! If you aren’t sure what a host code is or how it works, click here for more information.
It’s the beginning of a new month and that means it’s time for the Glitter Queens Blog Hop! The new catalog is here, so we’re showcasing NEW products! Please note: ALL ordering will be unavailable from midnight to noon (Mountain Time) on June 1st while Stampin’ Up! transitions their ordering system to the new catalog.
My project for the hop this month is a treat holder. Several months ago I created this same project but it was much smaller. I wanted a treat holder that would fit Ghirardelli Squares so I made a few changes to the measurements and voila! a bigger treat holder. Be sure to check out the video below and follow along!
I used several new products to make all of my treat holders:
Nature’s Poem Designer Series Paper
Gorgeous Grape cardstock
Blackberry Bliss cardstock (a returning, much loved, In Color)