by Tracy | Oct 1, 2017 | Uncategorized

I love chocolate and I love macadamia nuts and the two combined are absolutely delicious! I saw this gem of a bag in the grocery store and knew I had to make a gift bag for it. Don’t you think the acorn paper is perfect for a “Happy Fall” gift bag? This paper is one of the sheets in the Painted Autumn Designer Series Paper and it’s currently my favorite package of paper in the two catalogs combined.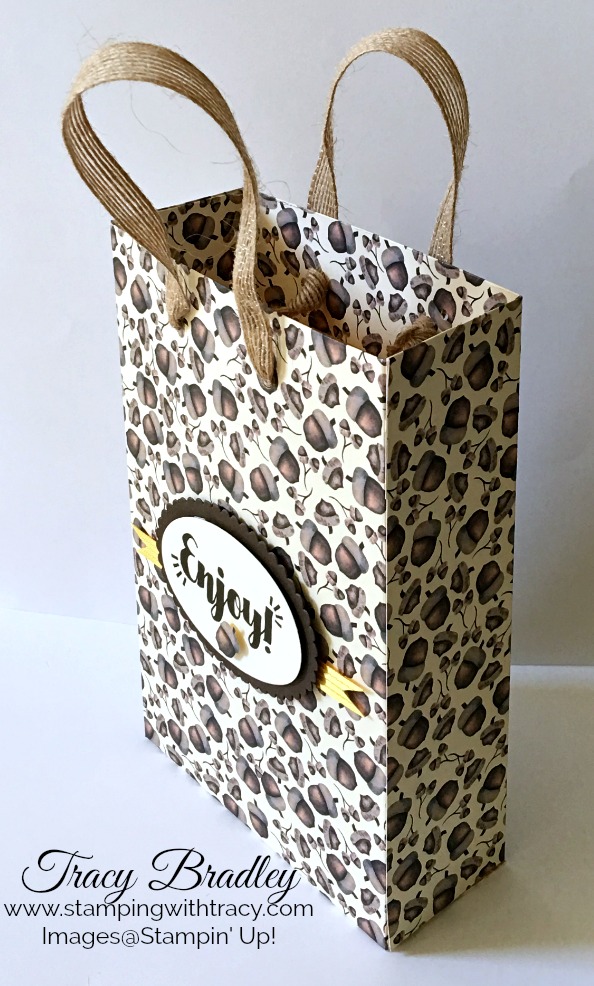
(more…)
by Tracy | Sep 30, 2017 | Uncategorized

I was so excited when I realized that the Ghirardelli Minis I bought fit inside our 2″ x 8″ Cellophane Bags! A perfect fit for four of them! It’s the little things that make me so happy!
To create today’s project I used the Seasonal Chums Bundle (available in wood and clear mount) as well as the stamp set, Spooky Cat. To save 10%, purchase the stamp set Seasonal Chums and the matching Seasonal Tags Framelits together! The bundle is also available in either wood or clear (see supplies list below).

Let’s Make This!
- Stamp the pumpkin in Memento Ink on Whisper White cardstock, cut him out with the Seasonal Tags Framelits and color him (I used Copic markers, a non-Stampin’ Up! product). What you might not realize is that the pumpkin also has a back side! The Seasonal Tags Framelits Dies cuts the front and back and they are attached at the top. There’s also a little piece near the top that allows you to thread Baker’s Twin through so that you could attach the tag to the package but I just snipped that part off.

- Cut a piece of Whisper White cardstock that measures 2-1/4″ x 4″ . Score it at 2″ and fold. This will be the topper for your bag.
- Stamp the sentiment on the topper using Memento Black ink.
- Place Tear and Tape on the front and back of the cellophane bag so when you place the Whisper White topper on it, it will adhere well. Attach the topper to the bag.

- Glue the pumpkin to the topper using Multipurpose glue. I used this adhesive so I’d have a little big of wiggle room when placing it on the topper.
- Cut two Basic Black bats using the Seasonal Tags Framelits Dies. Attach to the topper using Glue Dots or Multipurpose glue.
This really is a quick and easy project to make. By the way, the cellophane bags are food safe so you can fill them up with any type of unwrapped candy. Thanks so much for stopping by!

Non-Stampin’ Up! supplies: Copic Markers
Designer Series Paper Sale Starts Tomorrow!

New Host Code Effective Today! 
by Tracy | Sep 29, 2017 | Uncategorized

It’s Day 2 of my Treat/Gift Packaging series and today we’ll pull out the Envelope Punch Board to create a cute pouch for some delicious chocolate! The pouch will easily hold nine Dove Chocolates and so that it will be a little bit sturdier, I recommend adding a piece of cardstock on the inside.

I can’t tell you how excited I am that this paper, Painted Autumn, is included in the sale that starts on Sunday. Buy 3 packs and Get 1 Free. There are 13 different packages to choose from and you can mix and match!
Dove Chocolate Envelope/Pouch Details
- Start with a piece of paper that measures 6″ x 6″. Place it on the Envelope Punch Board and score and punch at 3″ on all sides. It is so quick and easy to make!!
- Cut a piece of Tangerine Tango for the inside that measures 3-1/2″ x 3-1/2″. This is for stability and optional. Use Fast Fuse to adhere it to the inside of the pouch.
- Use glue dots to assemble the pouch and wrap it up with Jute Twine. I think our 5/8″ Burlap Ribbon would also look very nice. When I made this several weeks ago, the Burlap Ribbon was on backorder so I didn’t want to use it if you couldn’t purchase it, but it’s now back in stock (I’ll also include it in the list of supplies).
- The sentiment is from the stamp set, Seasonal Chums and stamped using Memento Ink. I punched it out with the 1″ Circle Punch and layered it with the 1-1/4″ (Soft Sky) & 1-1/2″ (Cajun Craze) Circle Punches. The accents are the new Black Rhinestone Jewels.

A quick and easy way to package a little gift of candy to someone special!
If you’re interested in purchasing the stamp set, Seasonal Chums, I want you to be aware that it can be purchased separately or as part of a bundle with the Seasonal Tags Framelits Dies in either wood or clear mount. For more information on the bundle, click here. It’s an adorable bundle and I used it to make my project for tomorrow!
Thanks so much for stopping by! If you have any questions about today’s project, don’t hesitate to contact me!
by Tracy | Sep 28, 2017 | Uncategorized

It’s that time of year when many of us need ideas to package treats so today begins my Gift Packaging Series. This treat package comes together so quickly!

Let’s Make This! (more…)
by Tracy | Sep 27, 2017 | Uncategorized
There are several GREAT specials starting this Sunday, October 1st: Designer Series Paper, Fast Fuse, Stamp Sets, and Notecards! Read below for all of the details!
Designer Series Paper – Buy 3, Get 1 Free
The Annual and Holiday Catalogs are filled with beautiful Designer Series Paper. I think it’s the best selection we’ve had in a long time. For the entire month of October, thirteen packages of paper will be on sale! Buy 3 and Get 1 Free! There’s no limit to how many free packages you can earn!! To see the Stampin’ Up! flyer for this sale, click here!

Stamp Sets, Note Cards & Envelopes and Fast Fuse (more…)
by Tracy | Sep 26, 2017 | Uncategorized
It’s Tuesday so it’s time for another installment of Tool Time and this week we’ll be talking about the blender pen! 
Blender pens are dual-tipped, filled with a specialized solution to blend ink easily and come in a pack of three. It’s best to use them with Watercolor Paper or Shimmery White Cardstock. Regular Whisper White paper will pill.
I like using the blender pens with our Watercolor Pencils. After coloring an image with the pencils, going over it with a blender pen evens out the color. It really does make a difference! The tip cleans off easily with several strokes on scrap paper (I do it on my grid paper). Keep doing this until the ink is no longer coming off onto the grid paper.
You’ll find that sometimes you don’t want to use everything included on a stamp. For instance, on the stamp below, it says, “You make me smile.” If I’m using this as a sentiment on the front of my card, I prefer that the period not be there.


After stamping the sentiment in Memento Ink, just take your blender pen and “erase” the period away (see the after below). All the ink is transferred to the blender pen and no longer on your stamp! Sometimes it’s necessary to huff on the ink before stamping to reactivate the ink in case it started to dry out while you were “erasing.”


Once you add a blender pen to your stash of crafting supplies, you’ll wonder how you ever lived without it!
Products Mentioned in Today’s Post
Click here to view the Holiday Catalog online!

Thanks for stopping by today!
To place an order, click here! When placing your order online, please use the host code below.


