by Tracy | Apr 12, 2022 | Uncategorized
Today’s card was made with several retiring products:
All retiring products are available while supplies last!


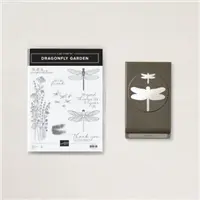
I started with a piece a Thick Basic White cardstock and then cut two pieces of Beauty of the Earth Designer Series Paper (you can find the measurements below the Supply List) and a piece of Night of Navy cardstock that I ran through the Ornate Floral 3D Embossing Folder. I adhered all three pieces to the card front.

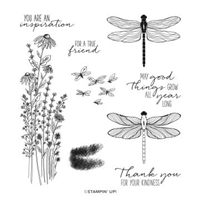
Next, I cut a scalloped rectangle out of Basic White cardstock using the Scalloped Contours Dies. I stamped the sentiment in Night of Navy ink using the stamp set, Dragonfly Garden. I added Stampin’ Dimensionals to the back and adhered it to the front of the card.

Using Memento Ink, I stamped a dragonfly from the stamp set, Dragonfly Garden onto Basic White cardstock. I colored it using our Watercolor Pencils Assortment 2 (don’t let the words watercolor scare you, I didn’t use any water). I colored the wings with the Night of Navy pencil and then used Garden Green around the edges. Then, I used a Blender Pen to blend the colors together. It’s amazing how nice it looks when you use the Blender Pen. I punched it out using the Dragonflies Punch, added Stampin’ Dimensionals to the back, and adhered it to the rectangle.

To complete the card, I added three Holiday Rhinestones to the front. As I mentioned earlier, these rhinestones are retiring. I love these rhinestones and they aren’t just for the holidays! I love that there’s a variety of colors to use. Grab them while you can!

Since you’ve read this far, I want to share a funny moment . When I went to photograph today’s card, I realized that I made a mistake and it’s one that I always try to check before adhering my pieces to the card front! Sheesh! I cut the panel off and put it on another base, correctly!! Ha, ha!! Has this happened to you before? If it hasn’t, just wait!

Supply List
Below you’ll find all the Stampin’ Up! supplies I used for today’s card. If you need any stamping supplies, I’d love to be your demonstrator! You can place an order by clicking any of the images below to go to my Stampin’ Up! online store.
The Specialty Plate is used with 3D Embossing Folders.
Measurements
- Thick Basic White cardstock: 11″ x 4-1/4″ score at 5-1/2″
- Night of Navy cardstock: 4″ x 2-1/2″
- Basi White cardstock: approx. 4-1/4″ x 2-3/4″
- Beauty of the Earth Designer Series Paper: (2) 4″ x 1-1/4″
Amazing Thanks Card Sampler

Place a minimum $50 order (before tax/shipping) at my Stampin’ Up! Online Store using my special host code U9HZATYX and I’ll send you my Amazing Thanks Card Sampler, absolutely FREE.
Please do not forget to use the host code when placing your order so I’ll know you want this sampler. When you use the host code, it allows me to continue to offer my Samplers for the low cost of free! EXCEPTION: if your order is $150 or more do not use the host code so you can receive Stampin’ Rewards directly from Stampin’ Up!. Contact me after you’ve placed the order to let me know that you’d like the Sampler – you only need to contact me if your order is $150 or more.
Orders must be placed by tomorrow, April 13, 2022 and the Card Samplers will be mailed approximately April 23, 2022. Please click HERE for all the details.


Thanks for stopping by today!
by Tracy | Apr 11, 2022 | Tailor Made Tags Dies, Uncategorized
Today’s card features Stampin’ Up! Abstract Beauty Designer Series Paper and the Tailor Made Tags Dies.

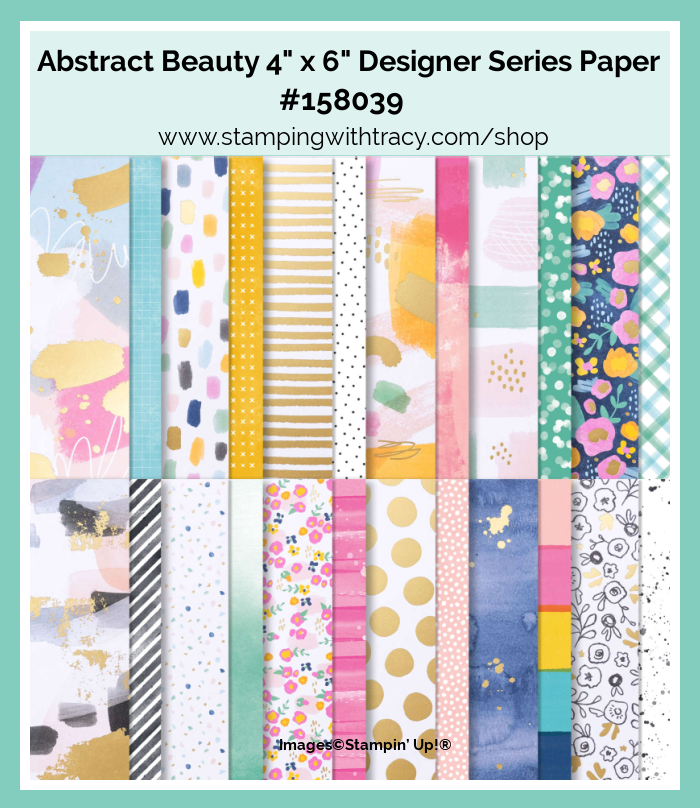
I started with a piece of Balmy Blue cardstock and then added a piece of Abstract Beauty Designer Series Paper (this paper comes in a new size: 4″ x 6″) to the card base. Then I adhered another Abstract Beauty design onto a piece of Balmy Blue cardstock. I wrapped a piece of Denim 3/8″ Ribbon around this piece, then added Stampin’ Dimensionals to the back and adhered it to the card base.


I stamped the sentiment onto a piece of Basic White cardstock using the stamp set, Lovely You and Night of Navy ink. Then I cut it out using the Tailor Made Tags Dies. I added Mini Glue Dots to the back and slipped it under the ribbon. I also added a Mini Glue Dot to the back of the ribbon, in the middle, so it would stay flat against the tag. To complete the card, I added three Iridescent Rhinestone Jewels.

Supply List
Below you’ll find all the Stampin’ Up! supplies I used for today’s card. If you need any stamping supplies, I’d love to be your demonstrator! You can place an order by clicking any of the images below to go to my Stampin’ Up! online store.
Measurements
- Balmy Blue cardstock: 11″ x 4-1/4″
- Balmy Blue cardstock: 4-1/2″ x 3-1/2″
- Abstract Beauty Designer Series Paper: 5-1/4″ x 4″
- Abstract Beauty Designer Series Paper: 4-1/4″ x 3-1/4″
- Basic White cardstock: 5-1/4″ x 4″
- Basic White cardstock: scrap for tag
Amazing Thanks Card Sampler
Place a minimum $50 order (before tax/shipping) at my Stampin’ Up! Online Store using my special host code U9HZATYX and I’ll send you my Amazing Thanks Card Sampler, absolutely FREE.
Please do not forget to use the host code when placing your order so I’ll know you want this sampler. When you use the host code, it allows me to continue to offer my Samplers for the low cost of free! EXCEPTION: if your order is $150 or more do not use the host code so you can receive Stampin’ Rewards directly from Stampin’ Up!. Contact me after you’ve placed the order to let me know that you’d like the Sampler – you only need to contact me if your order is $150 or more.
Orders must be placed by April 13, 2022 and the Card Samplers will be mailed approximately April 23, 2022. Please click HERE for all the details
Thanks for stopping by today!
by Tracy | Apr 7, 2022 | Uncategorized
My Amazing Thanks Card Sampler is now available but only for a limited time!
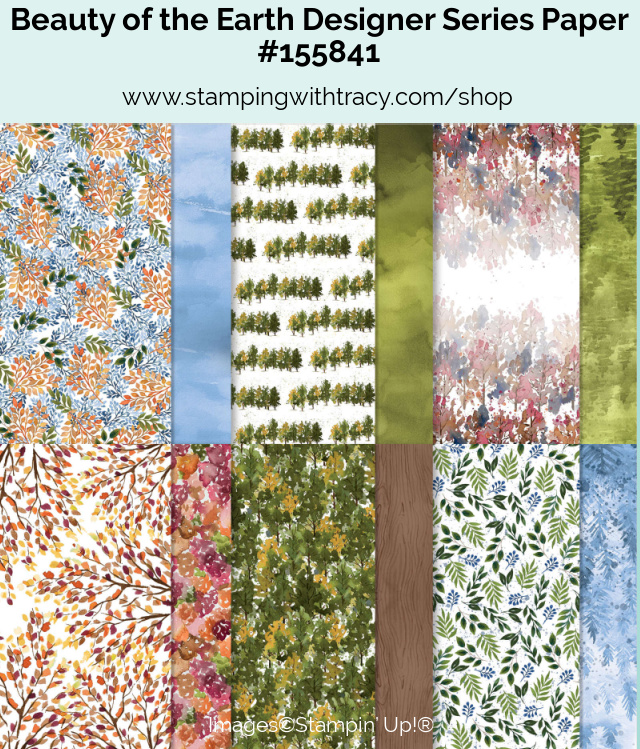
All of the cards in this Sampler were made using the Amazing Thanks Dies. I also used Flowering Fields 12″ x 12″ Designer Series Paper, New Horizons 6″ x 6″ Designer Series Paper and Pattern Party 12″ x 12″ Designer Series Paper (this is a host only Designer Series Paper and can be earned with a purchase of $150 or more). No stamps were used on all three cards so you’ll just need adhesive to assemble them!
You’ll receive all the materials to make six cards (two of each design) and each one is packaged separately in its own envelope.. You’ll quickly have a card that’s ready to be mailed out to someone special. Once you’ve made all the cards in the Sampler, you’ll be able to easily replicate each card by following the easy to follow directions in the PDF (pictures are included as well).
Here’s how you can earn it FREE!
- Place a minimum $50 order (before tax/shipping) at my Stampin’ Up! online store.
- You must use my special Amazing Thanks Card Sampler Host Code when placing your order (see below) BUT if your order reaches $150 or more, please DO NOT use the host code so you can receive Stampin’ Rewards (free product directly from Stampin’ Up!). Once you place your order, simply drop me an email (only necessary if your order is over $150) letting me know that you’d like the Pansy Patch Card Sampler.
- Place your order on or before March 13, 2022.
Here’s What You’ll Receive:
- All the paper and embellishments needed to make six cards (two each of three different designs). The paper will be cut, scored, and die cut for you! You’ll need to supply your own adhesive and envelopes will also be provided.
- A PDF Tutorial with instructions, pictures, cutting measurements and a complete supply list of all the products used.
- Earn at least one Bradley Point (earn ten Bradley Points and redeem them for free product).
All the Other Important Information:
- Your Amazing Thanks Card Sampler will ship first-class mail approximately April 23, 2022 and will be mailed to the address used on your online order.
- You’ll receive an email when I mail your Card Sampler and the PDF Tutorial will be included in that email.
- When using the Amazing Thanks Card Sampler Host Code to place your order, you will not qualify for other current host code rewards.
- Per Stampin’ Up! policy, Card Samplers can only be mailed within the United States.
The special Amazing Thanks Card Sampler HOST CODE will close on March 13, 2022 and after that date, the Card Sampler will no longer be available.
Approximate ship date of the Card Samplers is April 23, 2022.
Click here to place an order
Supplies Needed To Create the Card Sampler
Listed below are the supplies you’ll need to complete the cards exactly as shown (or you can use what you already own). Simply click any of the products and you’ll be taken to my Stampin’ Up! online store. When placing your order, don’t forget to use the special Card Sampler Host Code (please do not use host code if your order is over $150 – see above).
Click here to place an order
Kindness Cards Kit Now Available

There’s a new addition to the Stampin’ Up! Kits Collection: Kindness Cards Kit.
Kit includes:
- 8 small coaster cards, 2 each of 4 designs
- 8 envelopes
- Carrying Tin
- Stamp Set
- Finished card size: 3″ x 3″
- Coordinating Colors: Basic Gray, Bermuda Bay, Daffodil Delight, Flirty Flamingo, Pale Papaya, Pool Party, Soft Sea Foam
Click here for more information about the Kindness Cards Kit
Last Chance (Retiring) Products

Click HERE to shop Stampin’ Up! Last Chance (Retiring) Products from the Annual Catalog
All Last Chance Products are available while supplies last or May 2, 2022
by Tracy | Apr 6, 2022 | Uncategorized
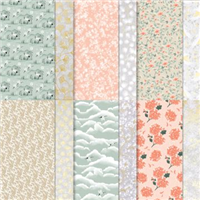
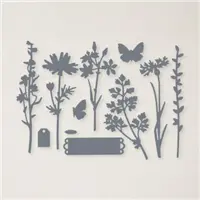
Today’s card was made using Symbols of Fortune 12″ x 12″ Designer Series Paper, the Inspired Thoughts stamp set, Meadow Dies and Soft Succulent Satin Shimmer Ribbon.


I started with a piece of Evening Evergreen cardstock for my card base. Then I adhered a piece of Symbols of Fortune Designer Series Paper to a piece of Soft Succulent cardstock. Before adhering this piece to the card base, I wrapped a piece of Soft Succulent 1/2″ Satin Shimmer Ribbon (this ribbon is beautiful!!) around the layers and tied a knot.

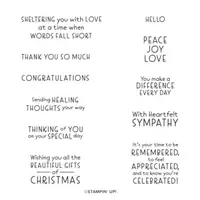
I stamped the sentiment in Evening Evergreen ink using the stamp set Inspired Thoughts and then cut it out with the Meadow Dies. I added Stampin’ Dimensionals to the back and placed it on the card. To complete the card, I added a piece of Basic White cardstock to the inside.


Supply List
Below you’ll find all the Stampin’ Up! supplies I used for today’s card. If you need any stamping supplies, I’d love to be your demonstrator! You can place an order by clicking any of the images below to go to my Stampin’ Up! online store.
Measurements
- Evening Evergreen cardstock: 11″ x 4-1/4″
- Soft Succulent cardstock: 5″ x 3-3/4″
- Symbols of Fortune Designer Series Paper: 4-3/4″ x 3-1/2″
- Basic White cardstock: approx. 3-1/4″ x 1-1/4″
- Basic White cardstock: 5-1/4″ x 4″
Click here to see what’s retiring and what’s still available!
All retiring products are available while supplies last!
Be sure to get your favorites before they are gone.
Thanks for stopping by today!
by Tracy | Apr 5, 2022 | Uncategorized
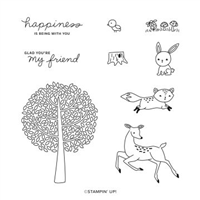
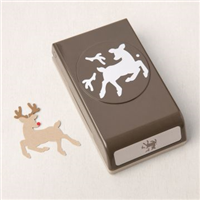
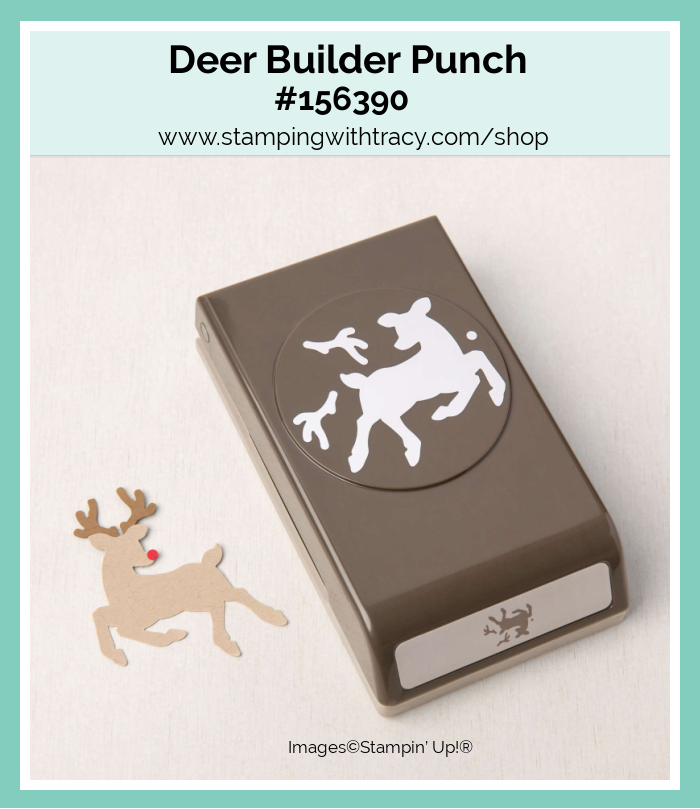
Today’s card features the adorable Friends of the Forest stamp set. I also used the Deer Builder Punch and the Scalloped Contours Dies.

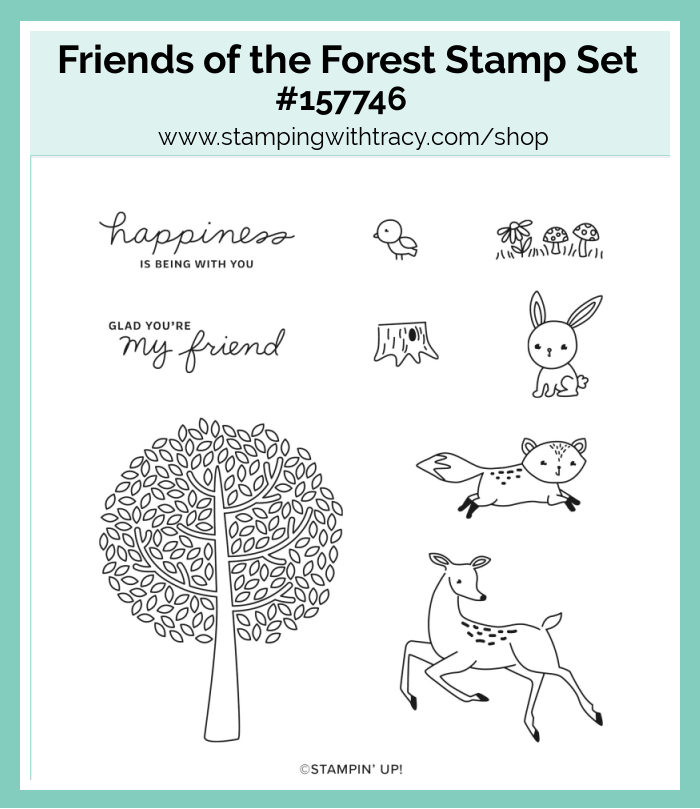
I started with a piece of Granny Apple Green cardstock for the base of my card. I then cut a piece of Basic White cardstock using the Scalloped Contours Dies. I stamped the tree, flowers, tree trunk, bunny and sentiment directly onto the scalloped rectangle using Memento Ink and the stamp set, Friends of the Forest. On another piece of Basic White cardstock, I stamped the deer and used my Crumb Cake Stampin’ Blends to color it in. I cut it out using the Deer Builder Punch.

Here are the Stampin’ Blends I used to color everything:
- Deer – Crumb Cake (Dark and Light)
- Tree: Dark Crumb Cake and Light Granny Apple Green
- Grass: Granny Apple Green (Light)
- Flowers: Daffodil Delight (Dark) and Flirty Flamingo (Dark)
- Mushrooms: Crumb Cake (Light) & Pool Party (Light)
- Tree trunk: Dark Crumb Cake
- Bunny: Petal Pink (Light & Dark)
After coloring everything, I added Stampin’ Dimensionals to the back of the scalloped rectangle and placed it on the card base. I added Mini Stampin’ Dimensionals to the back of the deer before placing it on the card.


To complete the card, I added a piece of Basic White cardstock to the inside.
Supply List
Below you’ll find all the Stampin’ Up! supplies I used for today’s card. If you need any stamping supplies, I’d love to be your demonstrator! You can place an order by clicking any of the images below to go to my Stampin’ Up! online store.
Measurements
- Granny Apple Green cardstock: 11″ x 4-1/4″
- Basic White cardstock (scalloped rectangle): approx 5-1/2″ x 4-1/4″
- Basic White cardstock: 5-1/4″ x 4″
- Basic White cardstock (deer): scrap
Click here to see what’s retiring and what’s still available!
All retiring products are available while supplies last!
April Paper Pumpkin

The Change is Beautiful Kit includes:
Number of projects: 9 cards; 3 each of 3 designs; 9 envelopes
- Change is Beautiful Photopolymer Stamp Set
- Melon Mambo Classic Stampin’ Spot®
- Printed card bases
- Printed envelopes
- Printed, shaped die cuts
- Iridescent sea glass
- Dimensionals
Card size: 4-1/4″ x 5-1/2″
Number of projects: 9 cards; 3 each of 3 designs; 9 envelopes
Coordinating Stampin’ Up! colors: Balmy Blue, Basic Black, Bermuda Bay, Crushed Curry, Evening Evergreen, Granny Apple Green, Melon Mambo
Click here to order the Change is Beautiful Paper Pumpkin Kit
You can cancel at any time or even skip a month
Have a wonderful day!
by Tracy | Apr 4, 2022 | Uncategorized
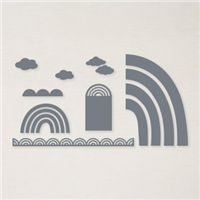
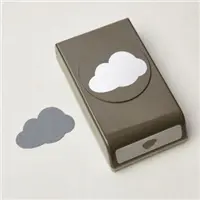
Today’s card was a fun one to make! I used the Brilliant Rainbow Dies, the new Cloud Punch and the stamp set, Friends of the Forest. I’ll be honest, I bought these dies several months ago and was a bit intimidated to use them. I don’t know why I waited so long because my card was really easy to make!
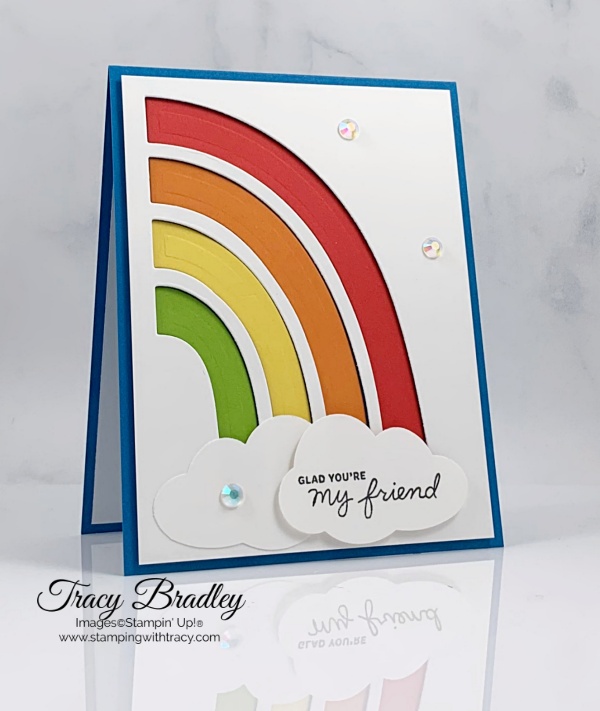
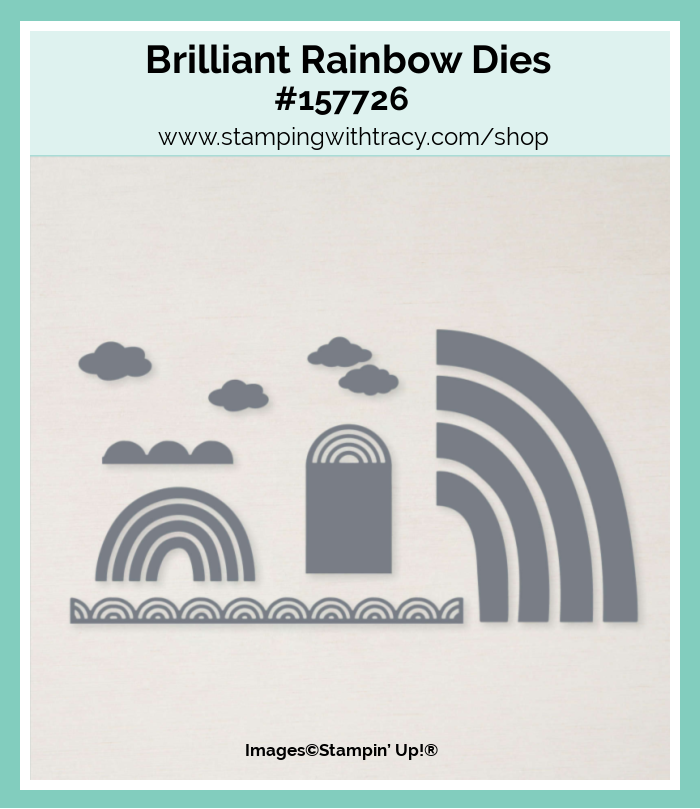
I started with a base of Pacific Point cardstock. Then I used the large rainbow die to cut a piece of Basic White cardstock. I added LOTS of Stampin’ Dimensionals to the back and placed it on the card base. I used the same die to cut the colors of the rainbow using scraps that I had since I only needed one piece of the rainbow for each color. I then glued each color of the rainbow into each section. Easy peasy!
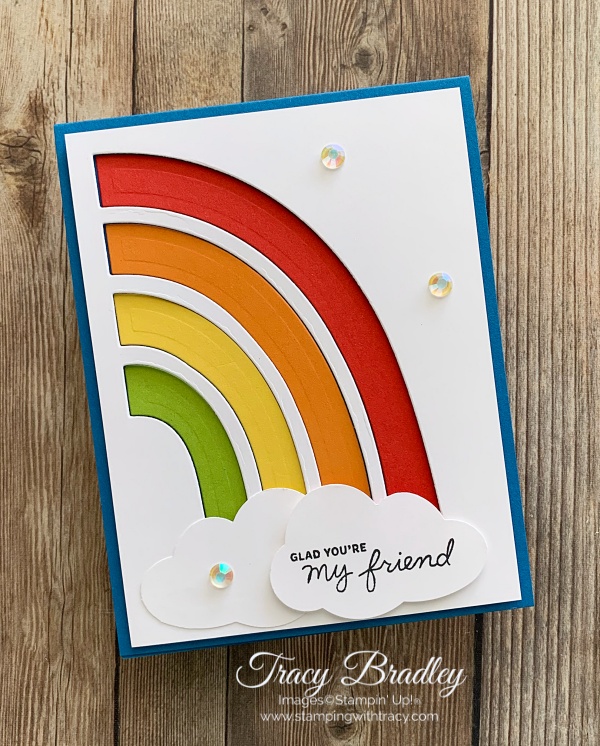

I used the Cloud Punch to cut two clouds out of Basic White cardstock. I stamped the sentiment on one of the clouds in Memento Ink using the stamp set, Friends of the Forest. I glued the other cloud to the bottom of the rainbow and added Stampin’ Dimensionals to the one with the sentiment and placed it beside the other cloud.

To complete the card, I added a piece of Basic White cardstock to the inside and added three Iridescent Rhinestones to the front of the card.
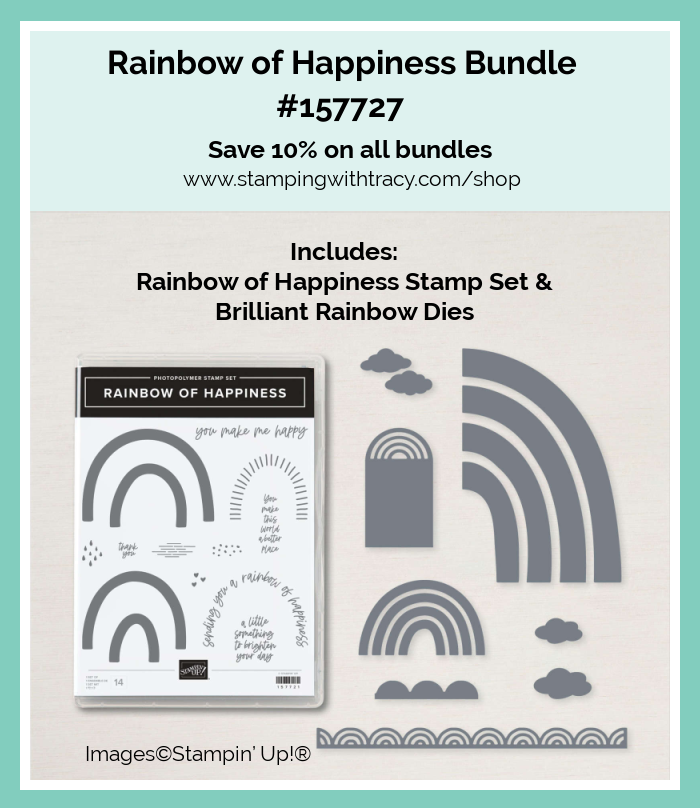
Bundle Alert: The Rainbow of Happiness Bundle includes the Brilliant Rainbow Dies and the Rainbow of Happiness stamp set.
Supply List
Below you’ll find all the Stampin’ Up! supplies I used for today’s card. If you need any stamping supplies, I’d love to be your demonstrator! You can place an order by clicking any of the images below to go to my Stampin’ Up! online store.
Measurements
- Pacific Point cardstock:11″ x 4-1/4″ score at 5-1/2″
- Basic White cardstock: (2) 5-1/4″ x 4″
- Basic White cardstock: scraps for clouds
- Poppy Parade, Pumpkin Pie, Daffodil Delight, Granny Apple Green cardstock: scraps for each section of the rainbow
Click here to see what’s retiring and what’s still available!
Thanks for stopping by today!