by Tracy | Nov 12, 2023 | Christmas Card
Before sharing today’s card with you, I want to let you know that Stampin’ Up! is having a Seasonal Sale of the Annual Catalog on Tuesday,November 14th through Thursday, November 16th. You can save:
- 10% off ribbons and trims.
- 15% off inks, including pads, refills, markers, and Blends. Bundles are not included.
- 20% off papers, including cardstock, specialty paper, and Designer Series Paper.
Please note: Some items may sell out due to high demand. The discount will automatically be applied to qualifying items that are in stock.

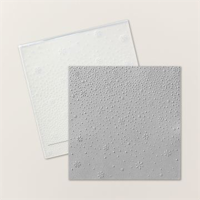
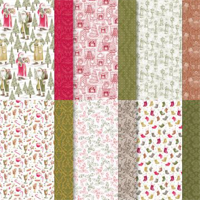
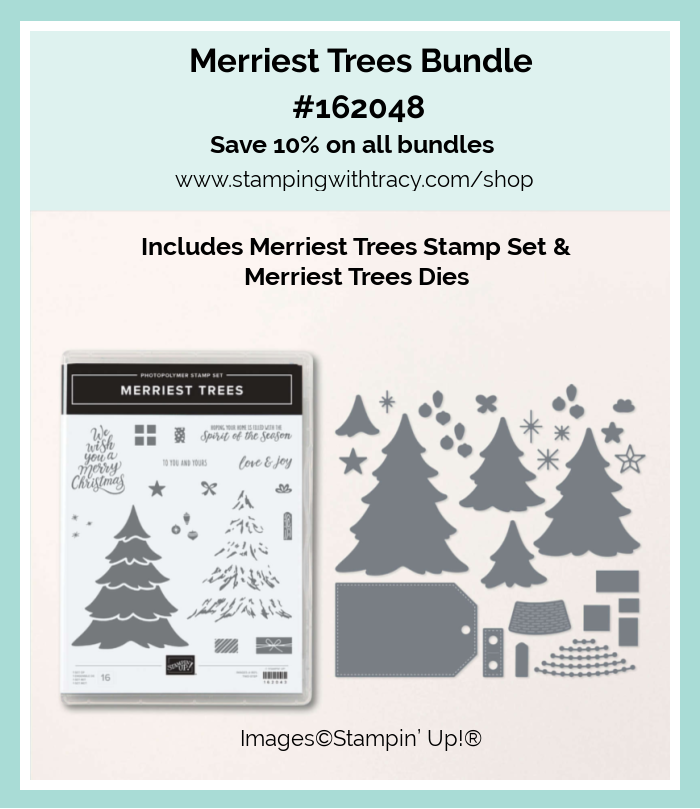
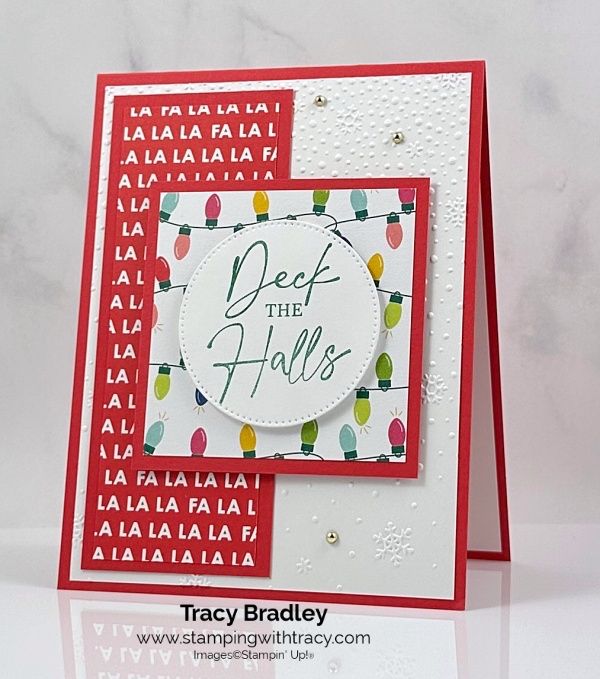
Today’s card was created using the Merriest Trees Bundle, Joy of Christmas Designer Series Paper, Snowflake Sky 3D Embossing Folder and Festive Pearls.

I started with Shaded Spruce cardstock for the base of my card. Then I added a layer of Basic White cardstock with a piece of Joy of Christmas Designer Series Paper (you can see all the measurements I used below the Supply List).


I then cut a tree using the Merriest Trees Dies and embossed it with the Snowflake Sky 3D Embossing Folder. I stamped the trunk in Early Espresso ink onto Basic White cardstock using the Merriest Trees stamp set. I then adhered the trunk and tree to the front of the card.
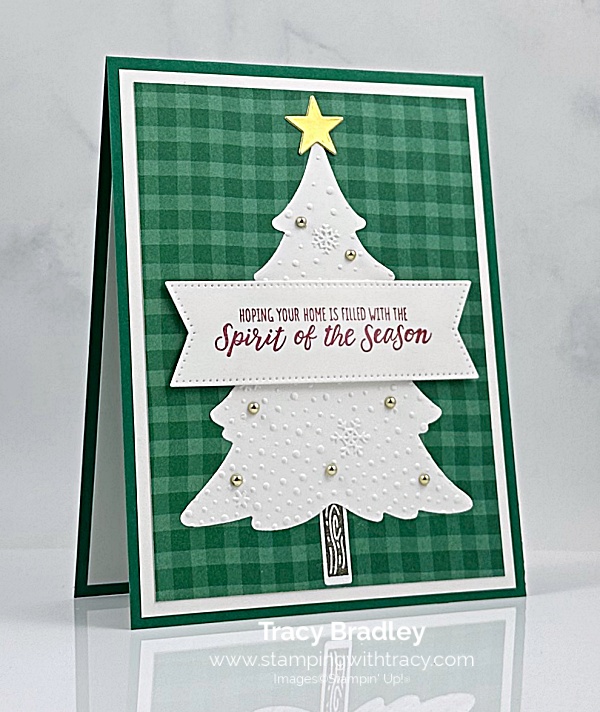

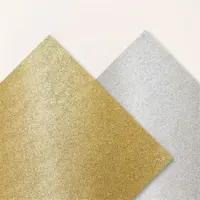
I used the Merriest Trees Dies to cut a star for the top of the tree out of our Gold Foil Sheets.
I stamped the sentiment in Cherry Cobbler ink to Basic White cardstock using the stamp set, Merriest Trees and cut it out using the Stylish Shapes Dies. I added Stampin’ Dimensionals to the back and adhered it to the front of the card.
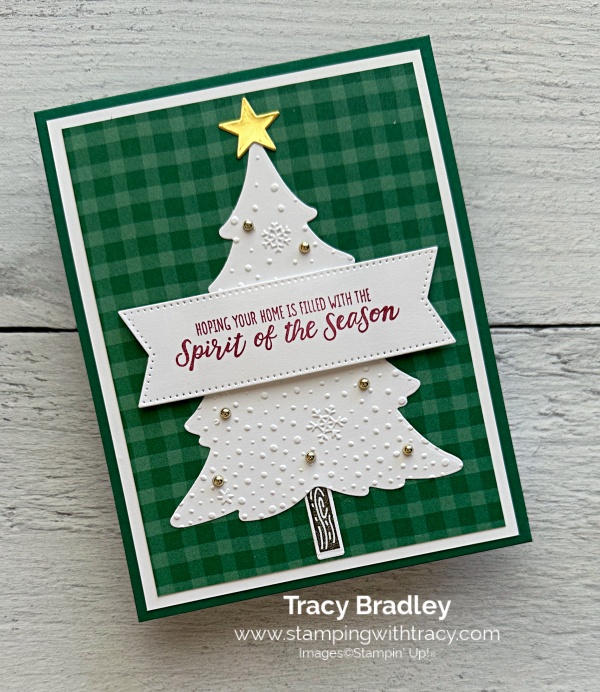
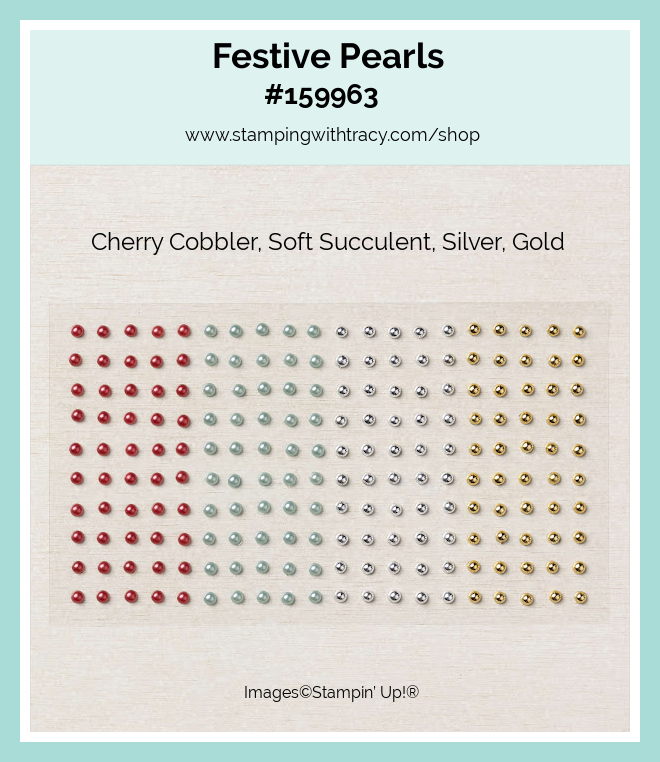
To complete my card, I added seven Festive Pearls in gold to my embossed tree and added a piece of Basic White to the inside.
Supply List
Below you’ll find all the Stampin’ Up! supplies I used for today’s card. If you need any stamping supplies, I’d love to be your demonstrator! You can place an order by clicking any of the images below to go to my Stampin’ Up! online store.
The Specialty Plate is used with 3D Embossing Folders.
Measurements
- Shaded Spruce cardstock: 11″ x 4-1/4″
- Basic White cardstock (tree): approx. 4-3/4″ x 3-3/4″
- Basic White cardstock (trunk): scrap
- Basic White cardstock (inside): 5-1/4″ x 4″
- Basic White cardstock (sentiment): approx. 4″ x 1-1/2″
- Gold Foil Sheet: scrap
- Joy of Christmas Designer Series Paper: 5″ x 3-3/4″

Delightful Floral Card Sampler
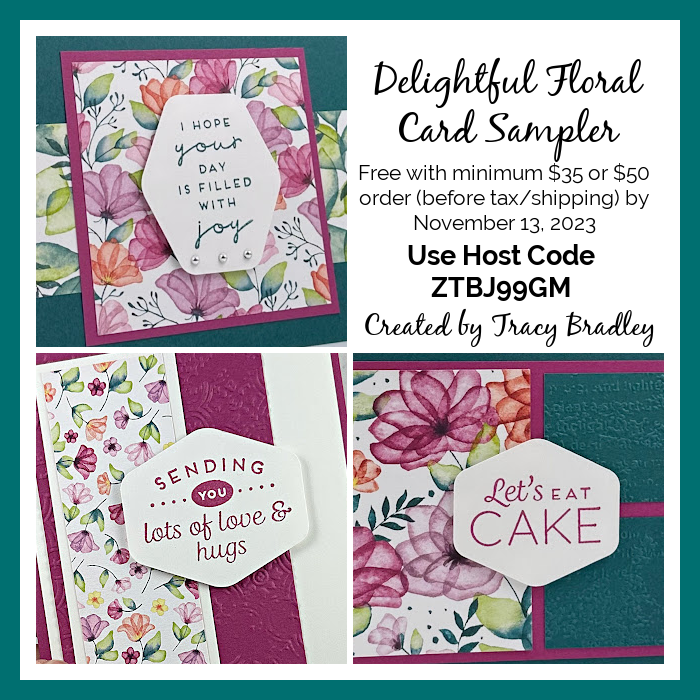
My Delightful Floral Card Sampler is now available but only for a limited time!
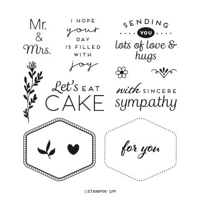
To create this Sampler, I used Delightful Floral Designer Series Paper and the Heartfelt Hexagon Bundle.
Place a minimum $35 or $50 order (before shipping/tax) using my special host code ZTBJ99GM and my gift to you will be my Delightful Floral Card Sampler.
- Place a minimum $35 order (up to $49.99) and you’ll receive one each of three different cards for a total of three cards.
- Place a minimum $50 order and you’ll receive two each of three different cards for a total of six cards.
Here’s how you can earn it FREE!
- Place a minimum $35 or $50 order (before tax/shipping) at my Stampin’ Up! online store.
- Use my special Delightful Floral Card Sampler Host Code when placing your order (see below) BUT if your order reaches $150 or more, please DO NOT use the host code so you can receive Stampin’ Rewards (free product directly from Stampin’ Up!). Once you place your order, simply drop me an email (only necessary if your order is over $150) letting me know that you’d like the Delightful Floral Card Sampler.
- Place your order on or before November 13, 2023.

Here’s What You’ll Receive:
- All the paper and embellishments needed to make three or six cards. If your order is $50 or more, you’ll receive two each of three different cards. The paper will be cut, scored, and punched for you! Envelopes will also be provided. For this Sampler you only need to provide a stamp set, ink and adhesive.
- A PDF Tutorial with instructions, pictures, cutting measurements and a complete supply list of all the products used.
- Earn at least one Bradley Point (earn ten Bradley Points and redeem them for free product).
All the Other Important Information:
- Your Delightful Floral Card Sampler will ship first-class mail approximately November 22, 2023 and will be mailed to the address used on your online order.
- You’ll receive an email when I mail your Card Sampler and the PDF Tutorial will be included in that email.
- When using the Delightful Floral Card Sampler Host Code to place your order, you will not qualify for other current host code rewards.
- Per Stampin’ Up! policy, Card Samplers can only be mailed within the United States.
You’ll receive all the materials to make three or six cards (one or two of each design). You’ll quickly have beautiful cards ready to be mailed out to someone special. If you can’t make the cards once they arrive, no worries, each card is labeled in its own clear envelope which makes it easy to come back to later. Once you’ve made all the cards in the Sampler, you’ll be able to easily replicate each card by following the easy to follow directions in the PDF (pictures are included as well).
The special Delightful Floral Card Sampler HOST CODE will close on November 13, 2023 and after that date, the Card Sampler will no longer be available.
Approximate ship date of the Card Sampler is November 22, 2023.
Click here to place an order
Supplies Needed To Create the Card Sampler
Listed below are the supplies you’ll need to complete the cards exactly as shown (or you can use what you already own). Simply click any of the products and you’ll be taken to my Stampin’ Up! online store. When placing your order, don’t forget to use the special Card Sampler Host Code (please do not use host code if your order is over $150 – see above).
Bundle Alert: The Heartfelt Hexagon Bundle is available which includes the Heartfelt Hexagon stamp set and the Heartfelt Hexagon Punch. You save 10% when you purchase a bundle rather than purchasing the items separately.
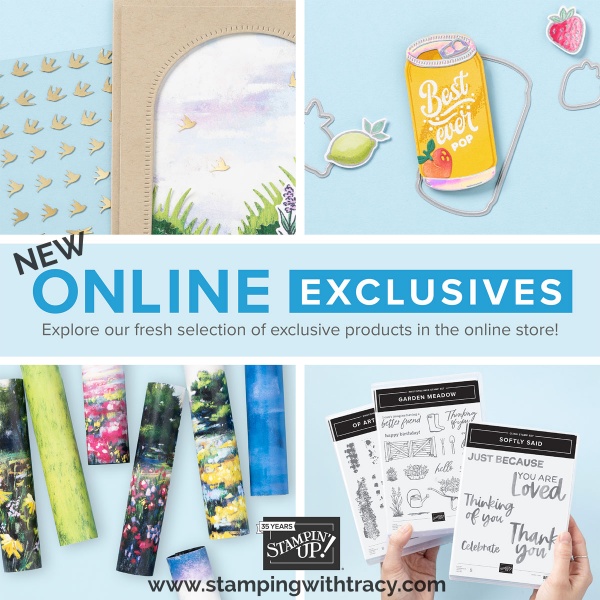
Online Exclusives
New Online Exclusives were added on November 7th. Click HERE to shop all Online Exclusives.
All the Best Paper Pumpkin Kit
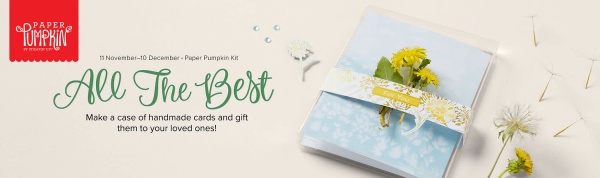
Kit includes:
9 cards; 3 each of 3 designs.
- 9 coordinating envelopes.
- 1 Acetate box to fit cards and envelopes from the kit.
- 1 Pebbled Path Stampin’ Spot.
- 1 photopolymer stamp set.
- Embellishments.
- Specialty gold foil die cuts.
- Enough adhesive to finish the project.
- Finished card size: 4-1/4″ x 5-1/2″ (10.8 x 14 cm)
- Coordinating Stampin’ Up! colors: Balmy Blue, Crushed Curry, gold foil, Old Olive, Pebbled Path
Click HERE to purchase the All the Best Paper Pumpkin Kit
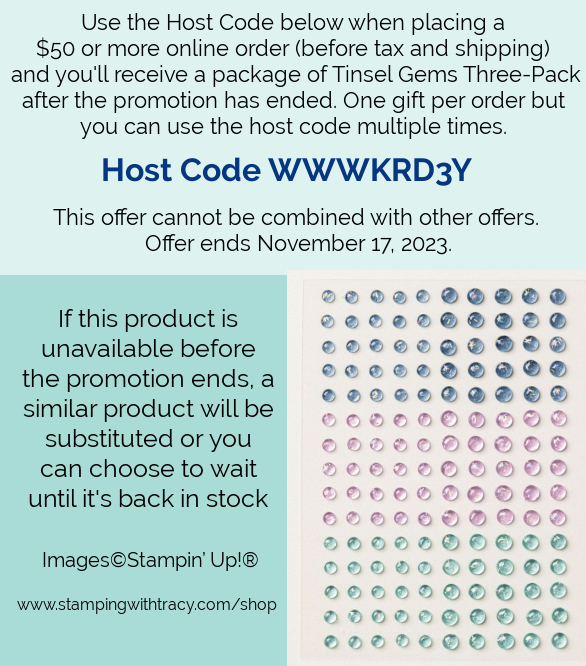
Host Code
Use the host code WWWKRD3Y to receive a package of Tinsel Gems Three-Pack with your $50 or more order BUT if your order is $150 or more do NOT use the host code so you can receive the Stampin’ Rewards. After you place your order, email me (only if your order is $150 or more) and let me know you’d like the Tinsel Gems Three-Pack. Offer ends November 17, 2023.
Thank you for stopping by!
by Tracy | Nov 9, 2023 | Christmas Card
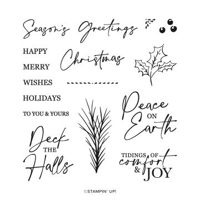
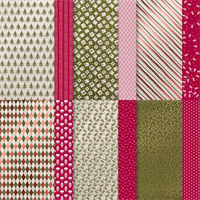
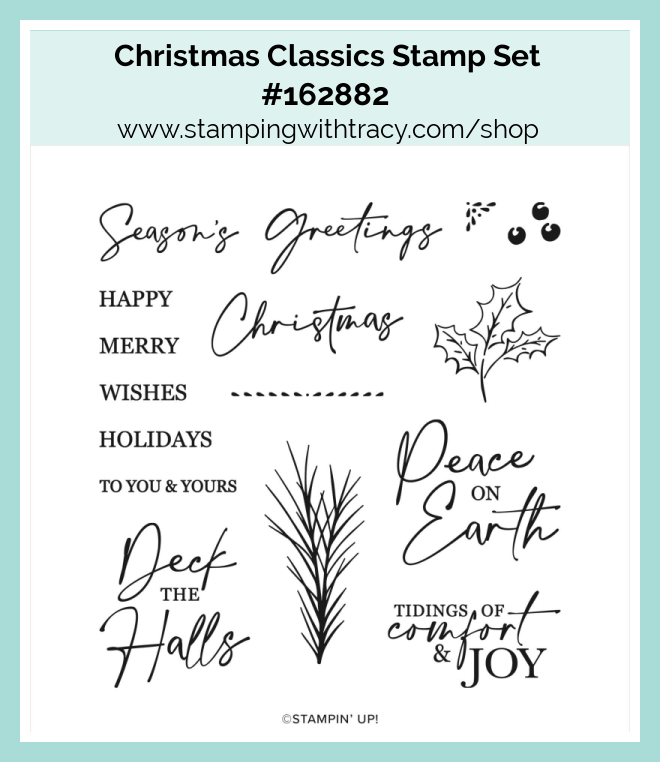
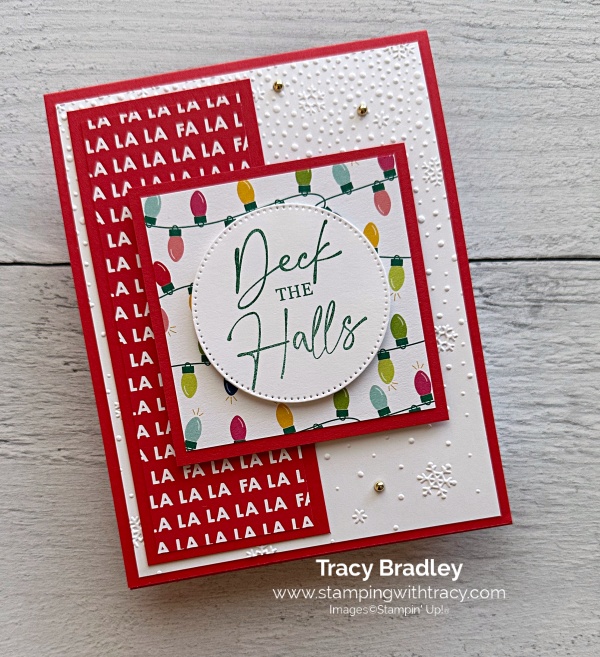
Today’s card was made using Merry Bold & Bright Designer Series Paper, the Christmas Classics stamp set, Snowflake Sky 3D Embossing Folder and Stylish Shapes Dies.


I started with a piece of Poppy Parade cardstock for the base of my card (you can find all the measurements I used below the Supply List). I then adhered a piece of Basic White to the inside of the card and then ran another piece through my Stampin’ Cit & Emboss Machine using the Snowflake Sky 3D Embossing Folder. I adhered this piece to the front of the card.
I cut two pieces of Poppy Parade cardstock and two pieces of Merry Bold & Bright Designer Series Paper and adhered the pieces together. I adhered the long skinny one to the front of the card and then added Stampin’ Dimensionals to the square and adhered it to the front of the card.

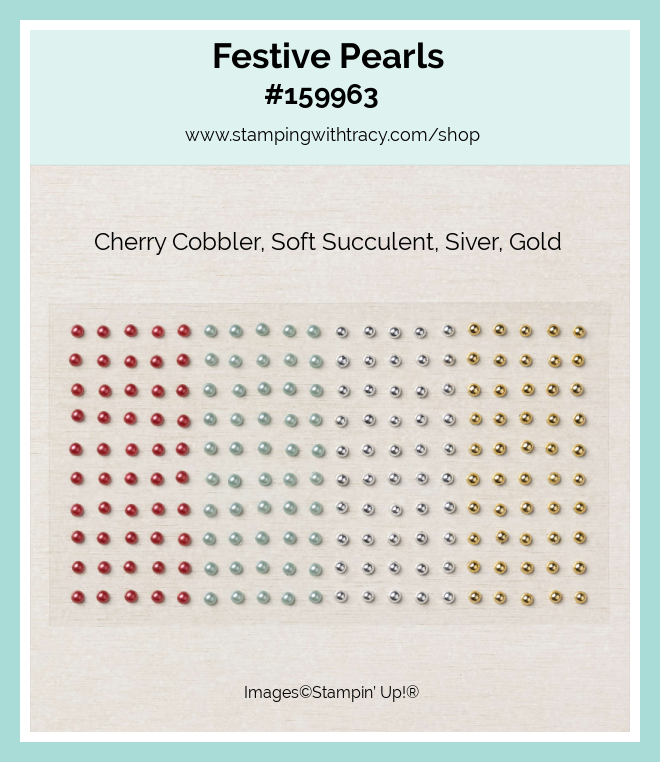
I stamped the sentiment onto Basic White cardstock using Shaded Spruce ink and the stamp set, Christmas Classics. I cut it out using the Stylish Shapes Dies, added Stampin’ Dimensionals to the back and adhered it the front of the card. To complete my card, I added three Festive Pearls in gold to the embossed Basic White cardstock.
Supply List
Below you’ll find all the Stampin’ Up! supplies I used for today’s card. If you need any stamping supplies, I’d love to be your demonstrator! You can place an order by clicking any of the images below to go to my Stampin’ Up! online store.
The Specialty Plate is used with 3D Embossing Folders.
Bundle Alert: The Christmas Classics Bundle includes the Christmas Classics stamp set and the Christmas Classics Dies. You save 10% when you purchase a bundle.
Measurements
- Poppy Parade cardstock: 11″ x 4-1/4″
- Poppy Parade cardstock: 5″ x 2″
- Poppy Parade cardstock: 3″ x 3″
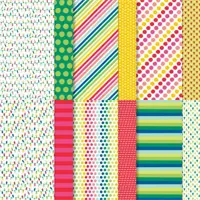
- Merry Bold & Bright Designer Series Paper: 4-3/4″ x 1-3/4″
- Merry Bold & Bright Designer Series Paper: 2-3/4″ x 2-3/4″
- Basic White cardstock: (2) 5-1/4″ x 4
- Basic White cardstock: approx. 2-1/2″ x 2-1/2″
Online Exclusives
New Online Exclusives were added on November 7th. Click HERE to shop all Online Exclusives.
Delightful Floral Card Sampler
My Delightful Floral Card Sampler is now available but only for a limited time!
To create this Sampler, I used Delightful Floral Designer Series Paper and the Heartfelt Hexagon Bundle.
Place a minimum $35 or $50 order (before shipping/tax) using my special host code ZTBJ99GM and my gift to you will be my Delightful Floral Card Sampler.
- Place a minimum $35 order (up to $49.99) and you’ll receive one each of three different cards for a total of three cards.
- Place a minimum $50 order and you’ll receive two each of three different cards for a total of six cards.
Here’s how you can earn it FREE!
- Place a minimum $35 or $50 order (before tax/shipping) at my Stampin’ Up! online store.
- Use my special Delightful Floral Card Sampler Host Code when placing your order (see below) BUT if your order reaches $150 or more, please DO NOT use the host code so you can receive Stampin’ Rewards (free product directly from Stampin’ Up!). Once you place your order, simply drop me an email (only necessary if your order is over $150) letting me know that you’d like the Delightful Floral Card Sampler.
- Place your order on or before November 13, 2023.
Here’s What You’ll Receive:
- All the paper and embellishments needed to make three or six cards. If your order is $50 or more, you’ll receive two each of three different cards. The paper will be cut, scored, and punched for you! Envelopes will also be provided. For this Sampler you only need to provide a stamp set, ink and adhesive.
- A PDF Tutorial with instructions, pictures, cutting measurements and a complete supply list of all the products used.
- Earn at least one Bradley Point (earn ten Bradley Points and redeem them for free product).
All the Other Important Information:
- Your Delightful Floral Card Sampler will ship first-class mail approximately November 22, 2023 and will be mailed to the address used on your online order.
- You’ll receive an email when I mail your Card Sampler and the PDF Tutorial will be included in that email.
- When using the Delightful Floral Card Sampler Host Code to place your order, you will not qualify for other current host code rewards.
- Per Stampin’ Up! policy, Card Samplers can only be mailed within the United States.
You’ll receive all the materials to make three or six cards (one or two of each design). You’ll quickly have beautiful cards ready to be mailed out to someone special. If you can’t make the cards once they arrive, no worries, each card is labeled in its own clear envelope which makes it easy to come back to later. Once you’ve made all the cards in the Sampler, you’ll be able to easily replicate each card by following the easy to follow directions in the PDF (pictures are included as well).
The special Delightful Floral Card Sampler HOST CODE will close on November 13, 2023 and after that date, the Card Sampler will no longer be available.
Approximate ship date of the Card Sampler is November 22, 2023.
Click here to place an order
Supplies Needed To Create the Card Sampler
Listed below are the supplies you’ll need to complete the cards exactly as shown (or you can use what you already own). Simply click any of the products and you’ll be taken to my Stampin’ Up! online store. When placing your order, don’t forget to use the special Card Sampler Host Code (please do not use host code if your order is over $150 – see above).
Bundle Alert: The Heartfelt Hexagon Bundle is available which includes the Heartfelt Hexagon stamp set and the Heartfelt Hexagon Punch. You save 10% when you purchase a bundle rather than purchasing the items separately.
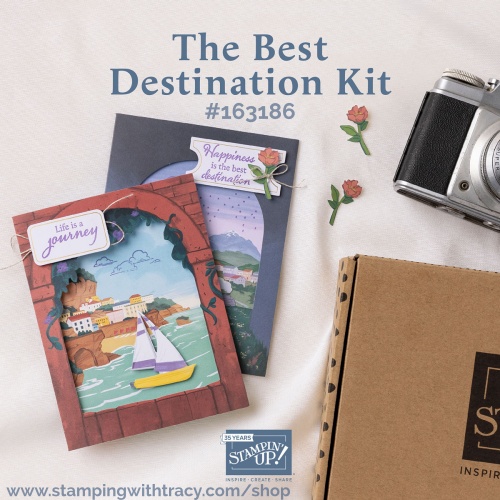
The Best Destination Kit
Kit includes:
*The Best Destination Photopolymer Stamp Set
*Clear Stamp Block
*Gorgeous Grape Ink Spot
*Predesigned projects with UV coating
*Step-by-step instructions
*Precut pieces (No prep work! Get right to crafting)
*Makes 9 cards: 3 each of 3 designs
*Folded card size: 5-1/2″ x 4-1/4″
*9 preprinted envelopes
*Enough adhesive to complete projects
*A 9-7/8″ x 6-1/2″ x 2-3/4″ printed designer box for storage or crafting on the go
Product colors: Balmy Blue, Boho Blue, Cajun Craze, Calypso Coral, Coastal Cabana, Crushed Curry, Daffodil Delight, Petal Pink, Early Espresso, Flirty Flamingo, Fresh Freesia, Gorgeous Grape, Granny Apple Green, Misty Moonlight, Pecan Pie, Pretty Peacock, Shaded Spruce
Click HERE to purchase the Best Destination Kit
Warm WishesPaper Pumpkin Kit

The Warm Wishes Paper Pumpkin Kit includes:
- 8 boxes; 4 each of 2 designs
- 1 Mossy Meadow Stampin’ Spot
- Iridescent glitter accents on paper
- Precut paper pieces
- Linen thread
- Treat bags
- Warm Wishes photopolymer stamp set
- Completed box size: 4-1/4″ x 4-1/2″ x 1-1/2″ and 4/1/4″ x 3-3/4″ x 1-1/2″
- Coordinating Stampin’ Up! colors: Balmy Blue, Blueberry Bushel, Cherry Cobbler, Crushed Curry, Daffodil Delight, Lemon Lolly, Mossy Meadow, Night of Navy, Old Olive, Pecan Pie, Real Red
Click to order the Warm Wishes Paper Pumpkin kit!
Add On Available for this Kit but you must be an active Paper Pumpkin Subscriber to order this product.
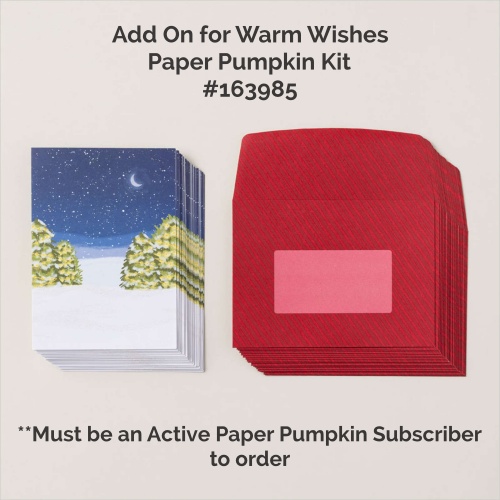
This add-on includes:
• 20 Cards & Envelopes
• Irisdescent glitter accents on paper
• Folded card size: 5″ x 7
Available While Supplies Last
Click here to order the Paper Pumpkin Add On
Host Code
Use the host code WWWKRD3Y to receive a package of Tinsel Gems Three-Pack with your $50 or more order BUT if your order is $150 or more do NOT use the host code so you can receive the Stampin’ Rewards. After you place your order, email me (only if your order is $150 or more) and let me know you’d like the Tinsel Gems Three-Pack. Offer ends November 17, 2023.
Thank you for stopping by!
by Tracy | Sep 13, 2023 | Uncategorized
Today’s card was created using Joy of Christmas Designer Series Paper, Christmas Classics stamp set, Snowflake 3D Embossing Folder and Stylish Shapes Dies.

I started with a base of Shaded Spruce cardstock. Then I embossed a piece of Basic White cardstock using the Snowflake Sky 3D Embossing Folder using my Cut & Emboss Machine. I adhered this piece to the front of the card and adhered a piece of plain Basic White to the inside (you can find the measurements I used below the Supply List).

I cut two pieces of Real Red cardstock and two pieces of Joy of Christmas Designer Series Paper and adhered the DSP to the cardstock. I adhered the long, skinny piece to the front of the card. I added Stampin’ Dimensionals to the square piece and then adhered it to the front,
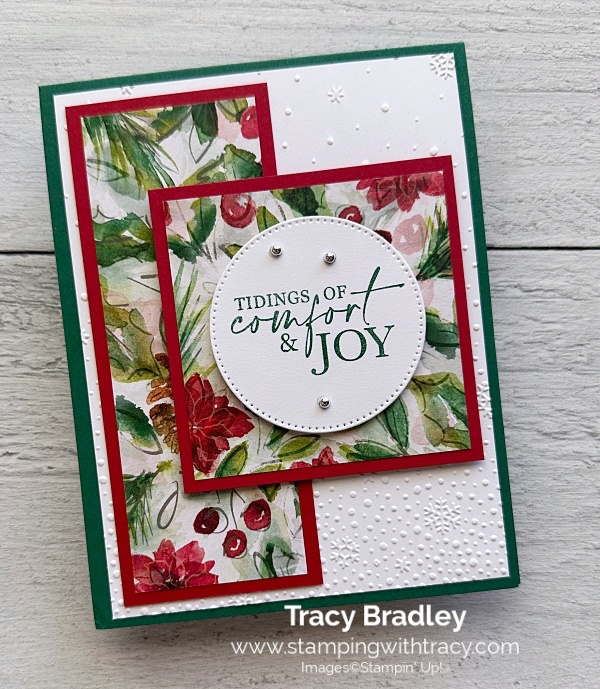
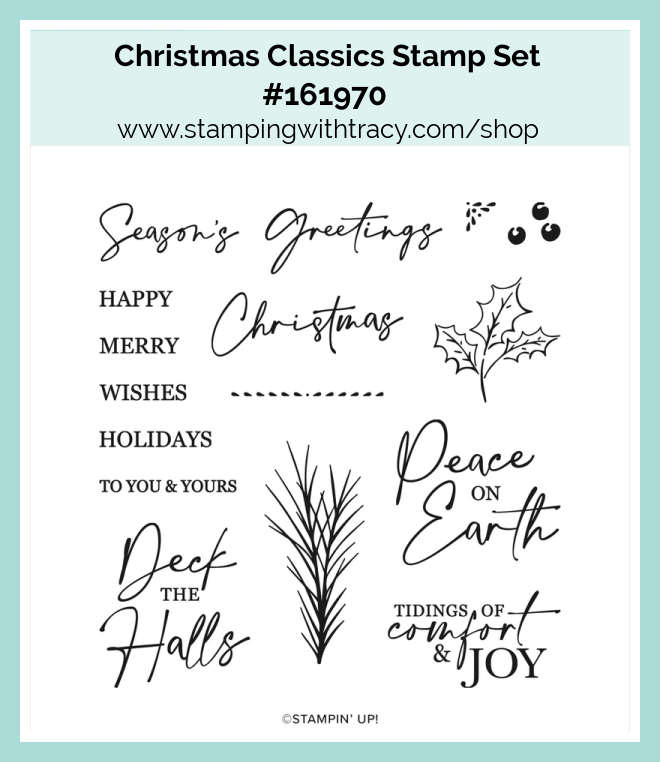
I stamped the sentiment using the stamp set, Christmas Classics, in Shaded Spruce ink and cut it out using the Stylish Shapes Dies. I added Stampin’ Dimensionals to the back and adhered it to the front of the card. To complete my card, I added three Festive Pearls in silver.
Supply List
Below you’ll find all the Stampin’ Up! supplies I used for today’s card. If you need any stamping supplies, I’d love to be your demonstrator! You can place an order by clicking any of the images below to go to my Stampin’ Up! online store.
The Specialty Plate is used with 3D Embossing Folders.
Measurements
- Shaded Spruce cardstock: 11″ x 4-1/4″. score at 5-1/2″
- Real Red cardstock: 5″ x 2″
- Real Red cardstock: 3″ x 3″
- Joy of Christmas Designer Series Paper: 4-3/4″ x 1-3/4″
- Joy of Christmas Designer Series Paper: 2-3/4″ x 2-3/4″
- Basic White cardstock: (2) 5-1/4″ x 4″
- Basic White cardstock (sentiment): approx. 2-1/2″ x 2-1/2″
Host Code
Use the host code WPWWQYXW to receive a package of Blooming Pearls (in the Mini Catalog) with your $50 or more order BUT if your order is $150 or more do NOT use the host code so you can receive the Stampin’ Rewards. After you place your order, email me (only if your order is $150 or more) and let me know you’d like the Blooming Pearls.

Newest Additions to the Online Exclusives
These papers are only available while supplies last!!
Christmas Everywhere Kit
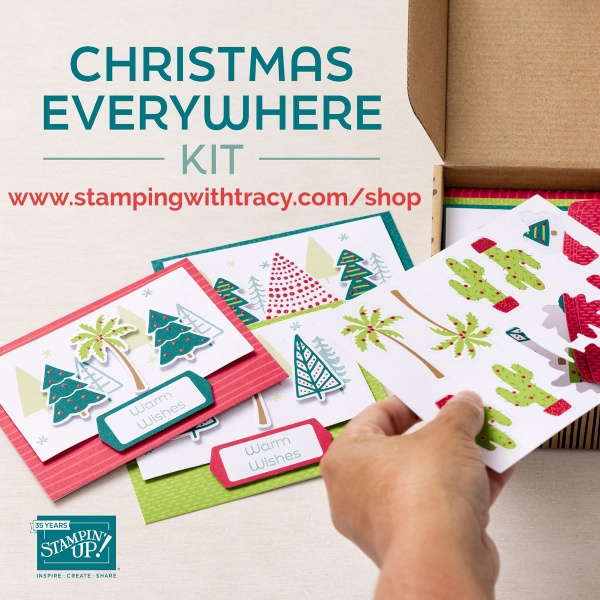
This kit includes:
- Enough supplies to create 9 cards—3 each of 3 designs
- 9 coordinating envelopes
- Christmas Everywhere photopolymer stamp set
- One Lost Lagoon Ink Spot
- Printed card bases, printed die-cut labels and images with red glitter, adhesive, and a clear block
- Finished card size: 5-1/2″ x 4-1/4″ (14 x 10.8 cm)
- Coordinating colors: Granny Apple Green, Lost Lagoon, Pecan Pie, Pretty Peacock, Real Red
Click here to purchase this new kit!
Home for the Holidays Paper Pumpkin Kit

This kit includes:
- All the supplies you’ll need to create 8 sparkly and dazzling Christmas cards—4 each of 2 designs—and eight coordinating envelopes.
- A coordinating photopolymer stamp set with endearing holiday sentiments and festive designs.
- A Real Red Stampin’ Spot
- A bottle of Glitter Glue
- Beautiful Christmasy-themed precut pieces
Finished folded card size: 4-1/4″ x 5-1/2″
Coordinating Stampin’ Up! colors: Balmy Blue, Blueberry Bushel, Cherry Cobbler, Crumb Cake, Crushed Curry, Daffodil Delight, Lemon Lolly, Mossy Meadow, Night of Navy, Old Olive, Pecan Pie, Real Red
Click here to purchase this month’s Paper Pumpkin kit.
Thank you for stopping by today!
by Tracy | Sep 5, 2023 | Uncategorized
The new Mini Catalog goes live tomorrow (YAY!!!) but today I have another sneak peek of the Autumn Leaves Bundle #162186, which includes the Autumn Leaves stamp set and Autumn Leaves Dies. Two other new products I used were the Distressed Tile 3D Embossing Folder #162189 and All About Autumn Designer Series Paper #162178.


I started with a piece of Cajun Craze cardstock for the base of my card. Then I embossed a piece of Very Vanilla cardstock using the Distressed Tile 3D Embossing Folder (available September 6th). I added a piece of All About Autumn Designer Series Paper (available September 6th) to the embossed cardstock and then adhered the entire piece to the front of the card.
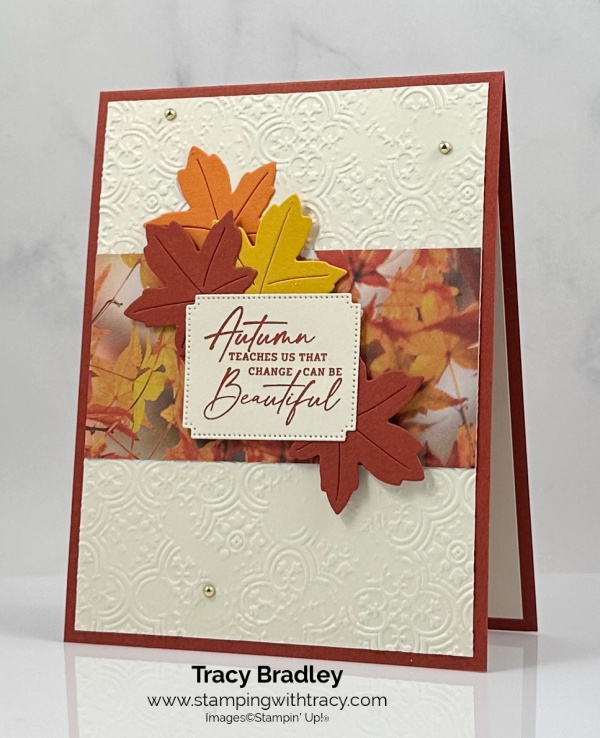
I used the Autumn Leaves Dies (available September 6th) to cut four leaves out of Cajun Craze cardstock, Pumpkin Pie and Crushed Curry. I stamped the sentiment onto Very Vanilla cardstock in Cajun Craze ink using the Autumn Leaves stamp set (available September 6th) and cut it out with the Autumn Leaves Dies (available September 6th). I adhered three of the leaves to the sentiment and then added Stampin’ Dimensionals to the back and adhered it to the front of the card. I added adhesive to the remaining leaf and then tucked it behind the other leaves.

To complete my card, I added three Festive Pearls in gold to the front of the card and added a piece of Very Vanilla cardstock to the inside.
Supply List
Below you’ll find all the Stampin’ Up! supplies I used for today’s card. If you need any stamping supplies, I’d love to be your demonstrator! You can place an order by clicking any of the images below to go to my Stampin’ Up! online store. The Specialty Plate is used with 3D Embossing Folders.
These products will be available tomorrow when the new Mini Catalog goes live:
- Autumn Leaves Bundle #162186, which includes the Autumn Leaves stamp set and Autumn Leaves Dies
- Distressed Tile 3D Embossing Folder #162189
- All About Autumn 6″ x 6″ Designer Series Paper #162178
Measurements
- Cajun Craze cardstock: 11″ x 4-1/4″ score at 5-1/2″
- Cajun Craze cardstock (leaves): (2) approximately 2″ x 1-3/4″
- Very Vanilla cardstock: (2) 5-1/4″ x 4″
- Pumpkin Pie cardstock (leaf): approximately 2″ x 1-3/4″
- Crushed Curry cardstock (leaf): approximately 2″ x 1-3/4
Retired Card Kits
A card kit is all the cardstock, Designer Series Paper and embellishments you’ll need to complete the card. You have to supply your own stamp set, ink and adhesive.
I still have card kits available (I found more in my craft room!) and all were made with RETIRED Designer Series Paper and possibly the cardstock is no longer available or the stamp set I’ve used or the dies. If you place a minimum $50 order using the host code AEGYH3UT, I’ll send you eight card kits along with the corresponding PDF tutorial(s). Please read below for all the details.

Details – PLEASE READ
- All of the Designer Series Paper used on the card kits has retired and is no longer available.
- The stamp set I’ve used on the cards, may or may not have retired. If it has retired, use what you already own!
- If any of the cards you receive have an embellishment or ribbon, it may have retired and is no longer available.
- It’s possible that any dies used on the cards have also retired.
- My card kit PDFs feature one card as an example. You may or may not receive the featured card but the directions will be the same for all the cards in the PDF.
- You may receive a mixture of different card kits or they’ll be all from the same set (but using different cardstock, DSP, etc.).
- You’ll receive a PDF for each different kit you receive.
- The cards are all packaged up and ready to go so I’m unable to take requests for certain card kits.
- I make samples of each card and if I still have one for one of the kits you’re receiving, I’ll include it in your package.
- I have a limited number of card kits. Once they’re gone, they’re gone.
- If you want to know if I have card kits available before placing your order, you are welcome to email me and ask if there are any left.
You must use the host code AEGYH3UT to receive the card kits BUT if your order is $150 or more do NOT use the host code so you can receive the Stampin’ Rewards. After you place your order, email me (only if your order is $150 or more) and let me know you’d like the Retired Card Kits.
Host Code
Use the host code 79232HBF to receive a package of 2023-2023 In Color Dots with your $50 or more order BUT if your order is $150 or more do NOT use the host code so you can receive the Stampin’ Rewards. After you place your order, email me (only if your order is $150 or more) and let me know you’d like the In Color Dots.

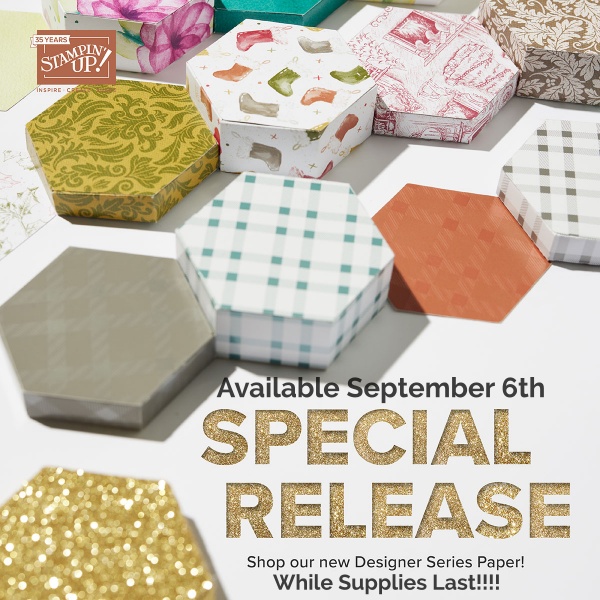
Special Release on September 6th
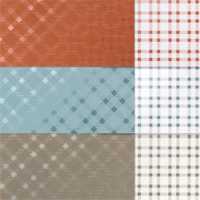
On September 6th, five new Designer Series Papers will be available for purchase!
- The special release paper options will be available in the Online Exclusives category in the online store.
- Products will only be available while supplies last. Once products run out, they will no longer be available.
Click here to see a video by Stampin’ Up! about these new papers (it will open in YouTube)!
Christmas Everywhere Kit – Available September 6th
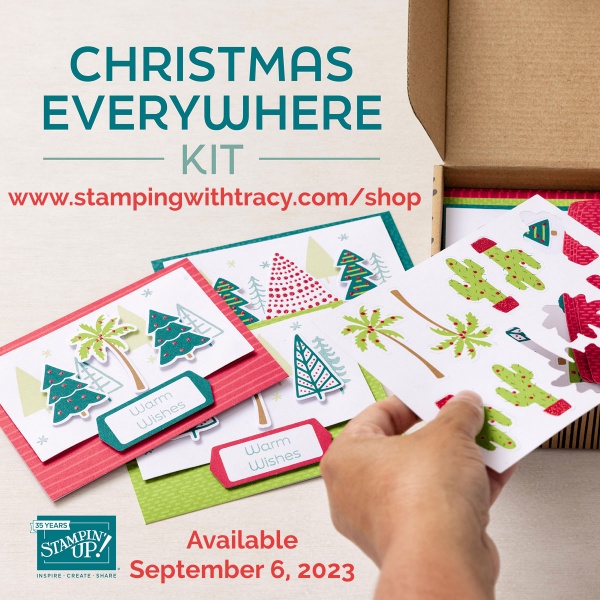
This kit includes:
- Enough supplies to create 9 cards—3 each of 3 designs
- 9 coordinating envelopes
- Christmas Everywhere photopolymer stamp set
- One Lost Lagoon Ink Spot
- Printed card bases, printed die-cut labels and images with red glitter, adhesive, and a clear block
- Finished card size: 5-1/2″ x 4-1/4″ (14 x 10.8 cm)
- Coordinating colors: Granny Apple Green, Lost Lagoon, Pecan Pie, Pretty Peacock, Real Red
Click here tomorrow to purchase this new kit!
With Love & Gratitude Paper Pumpkin Kit – Available until September 10th

This kit includes:
- 8 treat packages
- 8 note cards
- 8 coordinating envelopes
- 1 photopolymer stamp set
- 1 Lost Lagoon Ink Spot
- Specialty gold foil, precut embellishments
- Adhesives
- Finished treat packaging: 3-1/2″ x 5″ x 2″ (8.9 x 12.7 x 5.1 cm)
- Final card size: 3-1/2″ x 3-1/2″ (8.9 x 8.9 cm)
- Coordinating Stampin’ Up! colors: Copper Clay, Crumb Cake, gold foil, Lost Lagoon, Mossy Meadow, Pebbled Path
Click HERE to order this month’s Paper Pumpkin Kit!
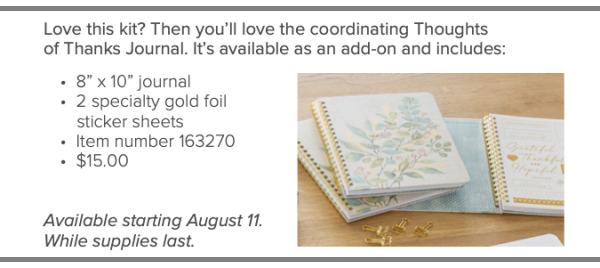
You must be an active Paper Pumpkin subscriber to order the Thoughts of Thanks Journal.
Click here to order the Thoughts of Thanks Journal
Thanks for stopping by today!
by Tracy | Nov 23, 2022 | Uncategorized
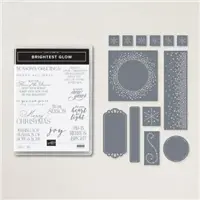
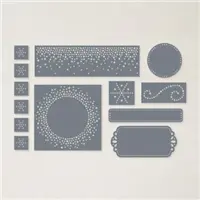
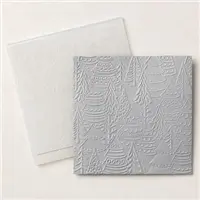
Today I have two Christmas cards to share with you that were made using the same design. One was made using Painted Christmas Designer Series Paper and the other was made with Storybook Gnomes Designer Series Paper. Both cards were made using the Brightest Glow Bundle which includes the Brightest Glow stamp set and the Labels Aglow Dies. I also used the Whimsical Woodland 3D Embossing Folder.


For this first card I used Night of Navy cardstock for the base of my card. Then I embossed a piece of Basic White cardstock using the Whimsical Woodland 3D Embossing Folder and adhered it to the base of the card. I also adhered a piece of Basic White to the inside. I cut two pieces of Night of Navy cardstock (the measurements I used are below the Supply List) and layered them with two pieces of Storybook Gnomes Designer Series Paper. I adhered the vertical piece to the front of the card but added Stampin’ Dimensionals to the other before adhering it to the card.


I heat embossed the sentiment with silver embossing powder and cut it out using the Labels Aglow Dies. If you aren’t sure how to emboss, you’ll find directions below. I added Stampin’ Dimensionals to the sentiment and adhered it to the horizontal piece. To complete the card, I added three silver Festive Pearls.


For this next card, I used Real Red cardstock and Painted Christmas Designer Series Paper. I also heat embossed the sentiment with silver embossing powder and used Rhinestone Basic Jewels.


How to Heat Emboss
Prepare your cardstock by rubbing the Embossing Buddy (an anti-static pouch that can be found in the Embossing Additions Tool Kit) over the surface of the paper as it helps keep away stray particles of embossing powder. Stamp your sentiment or image using a Versamark pad. This is very sticky ink and your embossing powder will stick right to it. Sprinkle embossing powder over the stamped image and then shake off any excess. Before applying heat to your paper, heat the Heat Tool first so your paper won’t warp (about 10 seconds). Direct the heat over your image and watch as your image becomes shiny and beautiful!
Supply List
Below you’ll find all the Stampin’ Up! supplies I used for today’s card. If you need any stamping supplies, I’d love to be your demonstrator! You can place an order by clicking any of the images below to go to my Stampin’ Up! online store.
Measurements
- Night of Navy or Real Red cardstock: 11″ x 4-1/4″ scored at 5-1/2″
- Night of Navy or Real Red cardstock: (2) 3-3/4″ x 2″
- Storybook Gnomes or Painted Christmas Designer Series Paper: (2) 3-1/2″ x 1-3/4″
- Basic White cardstock: (2) 5-1/4″ x 4″
- Basic White cardstock: approx. 2″ x 2″


Thank you for stopping by today! For those of you in the U.S., have a wonderful Thanksgiving!