by Tracy | Mar 22, 2023 | Get Well Card
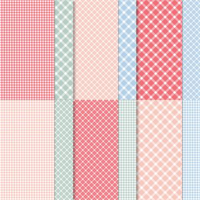
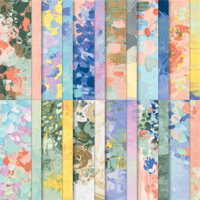
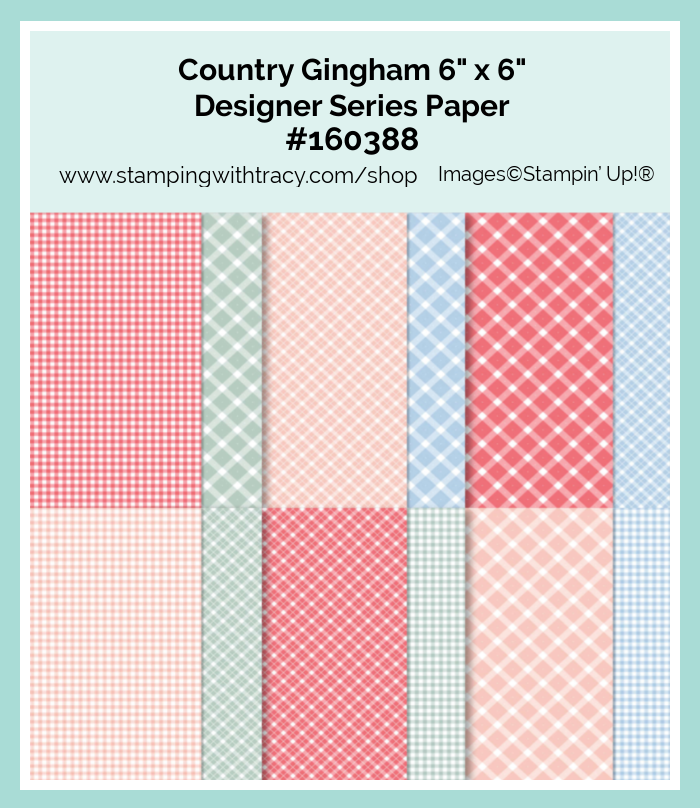
Today’s card was created using Country Gingham 6″ x 6″ Designer Series Paper, Painted Texture Embossing Folder, Rectangular Postage Stamp Punch and the stamp set, Cottage Rose.


I started with a piece of Thick Basic White cardstock for the base of my card and then added a piece of Mint Macaron cardstock. I then embossed a piece of Basic White cardstock using the Painted Texture Embossing Folder and adhered it to the Mint Macaron cardstock.

I used the Rectangular Postage Stamp Punch to cut two pieces of Country Gingham Designer Series Paper and two pieces of Mint Macaron cardstock. I embossed the Mini Macaron pieces using the Painted Texture Embossing Folder. I added Stampin’ Dimensionals to the back of each rectangle and then placed them on the front of the card.
I stamped the sentiment in Evening Evergreen ink onto Basic White using the stamp set, Cottage Rose. I cut it out using the Rectangular Postage Stamp Punch then added Stampin’ Dimensionals to the back and adhered it to the card. To complete my card, I added three Basic Rhinestones below the sentiment.

Here’s another version of today’s card. This is actually the card I made first. I decided it was a bit flat for my taste (but it’s flatter to mail) so I carefully took the pieces off and added Stampin’ Dimensionals to the back of each rectangle. This card is also vertical rather than horizontal.

Supply List
Below you’ll find all the Stampin’ Up! supplies I used for today’s card. If you need any stamping supplies, I’d love to be your demonstrator! You can place an order by clicking any of the images below to go to my Stampin’ Up! online store.
Measurements
- Thick Basic White cardstock: 11″ x 4-1/4″ score at 5-1/2″
- Mint Macaron cardstock: 5-1/4″ x 4″
- Mint Macaron cardstock: scraps for 2 rectangles
- Basic White cardstock (embossed): 5″ x 3-3/4″
- Basic White cardstock (sentiment): scrap
- Country Gingham Designer Series Paper: scraps for 2 rectangles
Low Inventory List
Several packages of Designer Series Paper are on the Low Inventory List. I’m just guessing but once stock is depleted, I’m pretty sure they won’t be reordered. These are the papers are on the Low Inventory List:

Color Refresh

Stampin’ Up! is doing a color refresh for the new Annual Catalog that debuts on May 2nd. Some basic colors will be retiring and new ones will be added. No one knows which colors are going and which are staying but if you have a favorite color, be sure to pick up ink pads, ink refills, cardstock, Stampin’ Blends and more, NOW! Several ink pads are on the Low Inventory list!
Request an Annual Catalog

If you aren’t a current customer of mine, place an order at my Stampin’ Up! online store and then fill out the 2023-2024 Annual Catalog Request Form here.
If you don’t want to place an order but would like a catalog, I can send you a PayPal invoice. Simply send me an email (click the “Email Me” button on the sidebar) with your name and address. The PayPal invoice will be sent in early April when I know the cost of the catalog and postage.
I’ve had a few forms filled out by people who are not current customers of mine. Unfortunately, I will not be able to honor those requests. Complimentary copies of the catalog are a perk for those that order from me. Thanks for your understanding!
Host Code

Not sure how to use a host code? It’s easy!

All the Little Things Paper Pumpkin Kit

When you subscribe to this month’s kit, you’ll get a FREE box organizer! The organizer can be customized to different sizes of compartments, depending on what you want to store. It’s a great way to keep track of products from past kits. Subscribe today to get the April kit and the free box organizer!
This kit includes:
- 9 cards, 3 each of 3 designs, and 9 coordinating envelopes.
- 1 photopolymer stamp set with celebratory sentiments.
- 1 Shaded Spruce Stampin’ Spot.
- Precut cherry blossom paper pieces with iridescent foil.
- Unique embellishments and twine.
- Adhesives to complete the projects.
- Final card size: 5-1/2” x 4-1/4”
- Coordinating Stampin’ Up! colors: Balmy Blue, Basic Black, Calypso Coral, Granny Apple Green, Petal Pink, Poppy Parade, Shaded Spruce.
- FREE box organizer
Order must be placed by April, 10, 2023
You can cancel at any time or even skip a month
Click here to order this month’s Paper Pumpkin kit!
Online Exclusives

Click here for a flyer of all the New Online Exclusives
Click here to shop the Online Exclusives
Thanks for stopping by! Enjoy your day!
by Tracy | Feb 10, 2023 | Uncategorized
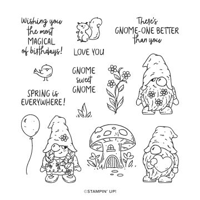
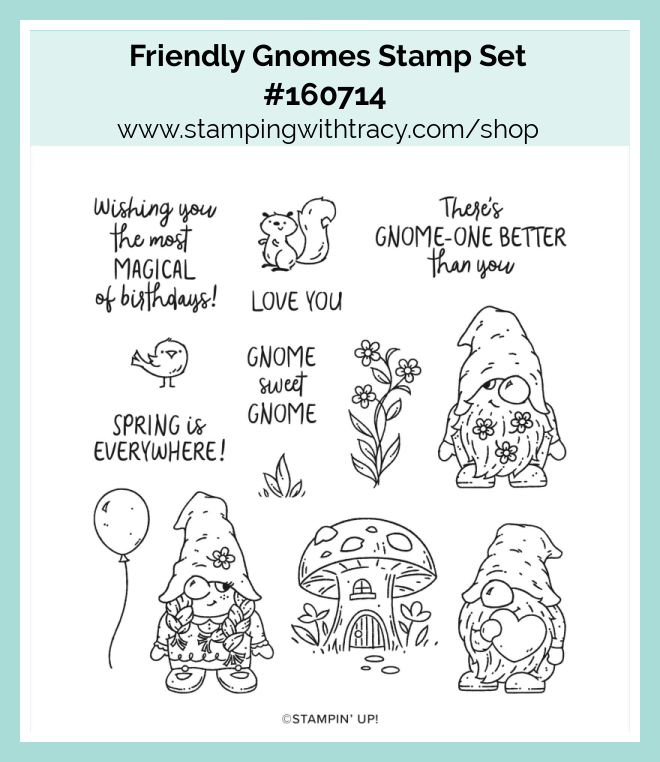
Today’s card features the Friendly Gnomes stamp set and the Gnomes Dies.The Gnomes Dies debuted in the July- December Holiday Catalog but are currently out of stock (they should be available again the week of March 27th). These are the same dies that coordinated with the Kindest Gnomes stamp set (also in the Holiday Catalog but has retired) but now coordinate with the Friendly Gnomes stamp set that was used on my card today!

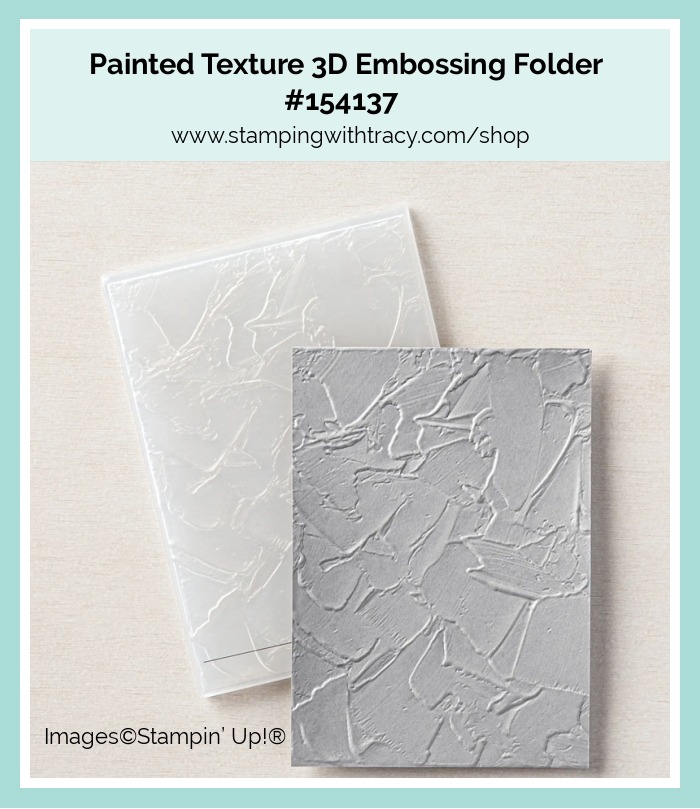
I started with a piece of Sweet Sorbet cardstock for the base of my card. Then I added a piece of Basic White cardstock that I embossed using the Painted Texture Embossing Folder and my Stampin’ Cut & Emboss Machine.

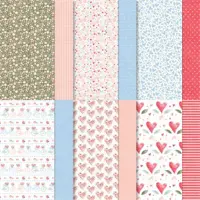
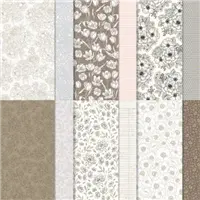
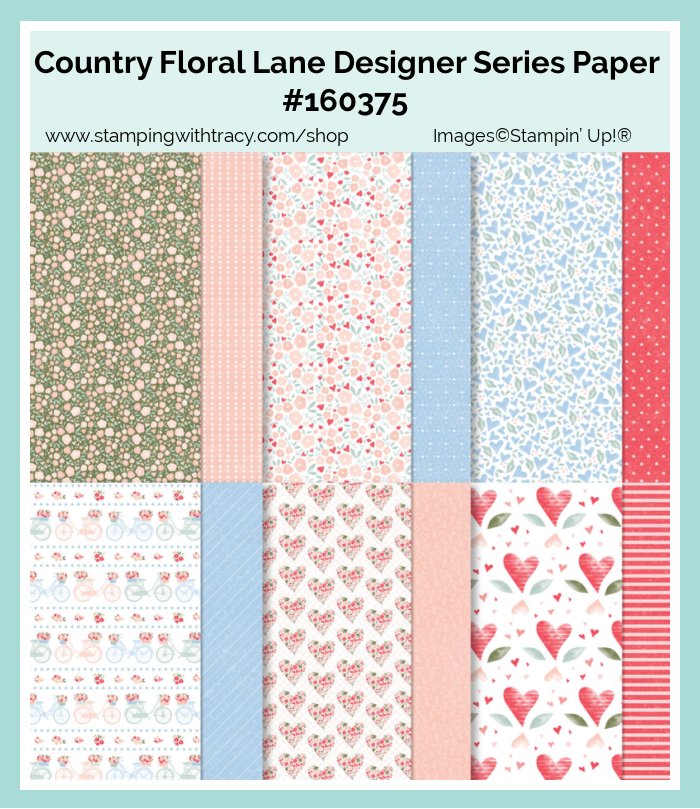
Next, I cut a piece of Country Floral Lane Designer Series Paper and layered it with a piece of Sweet Sorbet cardstock (you can find the measurements I used below the Supply List). After adhering it to the front of the card, I used the Layering Circles Dies to cut a scalloped circle out of Sweet Sorbet cardstock and a circle out of Basic White cardstock. I adhered the two pieces together and then set it aside.

I stamped the gnome from the stamp set, Friendly Gnomes, in Memento ink onto a piece of Basic White cardstock. I colored the gnome in using these Stampin’ Blends:
- Sweet Sorbet Light – I went over these areas several times to get the shade I wanted
- Petal Pink Light
- Balmy Blue Light
- Soft Suede Light
I cut the gnome out using the Gnomes Dies. Next, I stamped the sentiment, also from the Friendly Gnomes stamp set, in Sweet Sorbet Ink and cut it out using the Stylish Shapes Dies. I adhered the sentiment behind the gnome and then adhered both to the Basic White circle. I added Stampin’ Dimensionals to the back of the Sweet Sorbet scalloped circle and adhered it to the front of the card. I then placed three 2022-2024 In Color Matte Decorative Dots around the gnome.

To complete my card, I added a piece of Basic White cardstock to the inside.
Supply List
Below you’ll find all the Stampin’ Up! supplies I used for today’s card. If you need any stamping supplies, I’d love to be your demonstrator! You can place an order by clicking any of the images below to go to my Stampin’ Up! online store.
The Specialty Plate is used with 3D Embossing Folders.
Measurements
- Sweet Sorbet cardstock: 11″ x 4-1/4″ score at 5-1/2″
- Sweet Sorbet cardstock (square): 3″ x 3″
- Sweet Sorbet cardstock (scalloped circle): approx. 3-1/2″ x 3-1/2″
- Country Floral Lane Designer Series Paper: 2-3/4″ x 2-3/4″
- Basic White cardstock (embossed): 5-1/4″ x 4″
- Basic White cardstock (inside): 5-1/4″ x 4″
- Basic White cardstock: scrap for gnome
- Basic White cardstock (sentiment): approx. 3-1/4″ x 1-1/4″


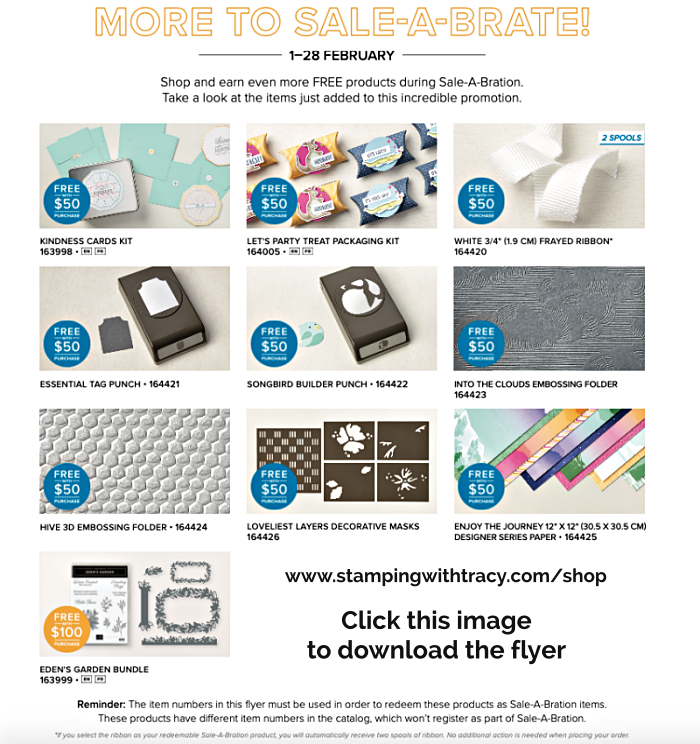
Shop and earn even more FREE products during Sale-A-Bration. Take a look at the items just added to this incredible promotion by clicking here to download the flyer. Please note: You must use the special product numbers as indicated on the flyer, to receive the second wave of products, FREE!

Click here to see the FREE gifts you can earn with a $50 purchase
Click here to see the FREE gifts you can earn with a $100 purchase
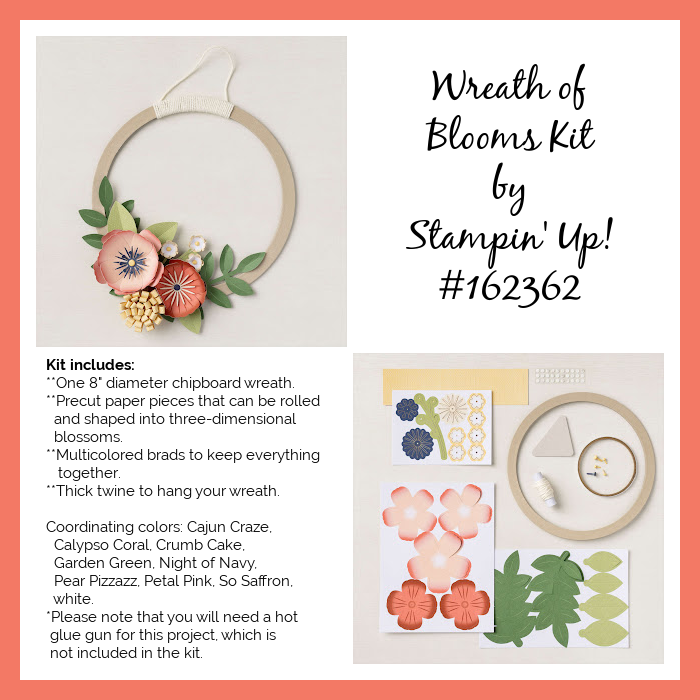
Newest Kit by Stampin’ Up! – Wreath of Blooms
Starter Kit Special

The best deal of all with Stampin’ Up! is the Starter Kit and it’s okay to purchase the Starter Kit if you just want a discount on all your future Stampin’ Up! products! It’s just like having a discount card at your favorite store because once you purchase the Starter Kit, you’ll receive a discount on all your crafting supplies! Another perk is that the Starter Kit ships free! This promotion ends on February 28, 2023! Don’t miss out on this great deal!
Click here for more information about the Starter Kit
Sunshine & Smiles Paper Pumpkin Kit

- This kit includes:
- Everything you need to create 9 cards—3 each of 3 designs—and 9 coordinating envelopes.
- A sweet springtime photopolymer stamp set.
- A Mango Melody Stampin’ Spot
- A fun peek-through window scene on each card!
- Cute precut critters and labels, fun raindrop embellishments, and more!
- Finished card size: 5-1/2″ x 4-1/4″
- Coordinating Stampin’ Up! colors: Balmy Blue, Cajun Craze, Coastal Cabana, Daffodil Delight, Flirty Flamingo, Mango Melody, Old Olive, Shaded Spruce
- This kit perfectly coordinates with the Rain or Shine Suite Collection (item number: 160556).
Order must be placed by TODAY, February 10, 2023
You can cancel at any time or even skip a month
Click here to order!
The Add On for the Sunshine & Smiles Paper Pumpkin Kit, the Sunshine & Smiles Dies, have sold out.
Thanks for stopping by today and have a wonderful weekend!
by Tracy | Jan 25, 2023 | Thank You Card
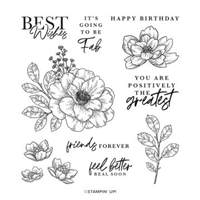
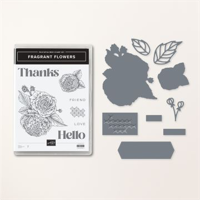
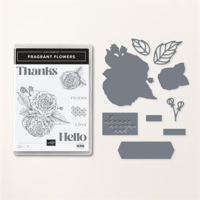
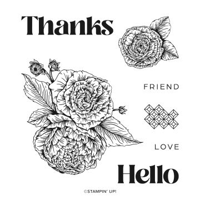
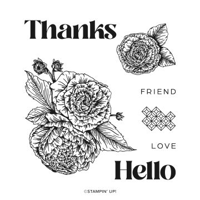
Today’s card features the Fragrant Flowers Bundle, Fancy Flora 6″ x 6″ Designer Series Paper and the Painted Texture Embossing Folder. The Fragrant Flowers Bundle is one of five bundles in the Mini Catalog where you have the option to purchase it (and the individual stamp set) in either photopolymer or cling. You can find all the options in the Supply List.


I started with a a piece of Highland Heather cardstock for the base of my card. Then, I cut another piece of Highland Heather cardstock, placed it inside the Painted Texture 3D Embossing Folder, ran it through my Stampin’ Cut & Emboss Machine and then adhered it to the card front. I layered a piece of Balmy Blue cardstock with a piece of Fancy Flora Designer Series Paper, added Stampin’ Dimensionals to the back and adhere it to the embossed cardstock.


I stamped the sentiment in Gorgeous Grape ink using the stamp set, Fragrant Flowers. Then, I cut it out using the Fragrant Flowers Dies, added Stampin’ Dimensionals to the back and adhered it to the center of the card.

To complete my card, I added a piece of Basic White cardstock to the inside of the card and added five Pastel Adhesive Backed Sequins to the the front. These sequins come in Balmy Blue, pink and gold (it’s a little hard to see the true colors from the image below).


Supply List
Below you’ll find all the Stampin’ Up! supplies I used for today’s card. If you need any stamping supplies, I’d love to be your demonstrator! You can place an order by clicking any of the images below to go to my Stampin’ Up! online store.
The Specialty Plate is used with 3D Embossing Folders.
Measurements
- Highland Heather cardstock: 8-1/2″ x 5-1/2″ score at 4-1/4″
- Highland Heather cardstock (embossed): 5-1/4″ x 4″
- Balmy Blue cardstock: 4-3/4″ x 3-1/2″
- Fancy Flora Designer Series Paper: 4-1/2″ x 3-1/4″
- Basic White (inside): 5-1/4″ x 4″
- Basic White (sentiment): approx. 3-3/4″ x 1-1/2″
Click here to see the FREE gifts you can earn with a $50 purchase
Click here to see the FREE gifts you can earn with a $100 purchase
Starter Kit Special
Click here for more information about the Starter Kit
Sunshine & Smiles Paper Pumpkin Kit
- This kit includes:
- Everything you need to create 9 cards—3 each of 3 designs—and 9 coordinating envelopes.
- A sweet springtime photopolymer stamp set.
- A Mango Melody Stampin’ Spot
- A fun peek-through window scene on each card!
- Cute precut critters and labels, fun raindrop embellishments, and more!
- Finished card size: 5-1/2″ x 4-1/4″
- Coordinating Stampin’ Up! colors: Balmy Blue, Cajun Craze, Coastal Cabana, Daffodil Delight, Flirty Flamingo, Mango Melody, Old Olive, Shaded Spruce
- This kit perfectly coordinates with the Rain or Shine Suite Collection (item number: 160556).
Order must be placed by February 10, 2023
You can cancel at any time or even skip a month
Click here to order!
An add On for the Sunshine & Smiles Paper Pumpkin Kit is the Sunshine & Smiles Dies. Must be an active Paper Pumpkin subscriber to purchase the dies. Click here for more information about the Sunshine & Smiles Dies.

Thanks for stopping by today!
by Tracy | Nov 29, 2022 | Uncategorized
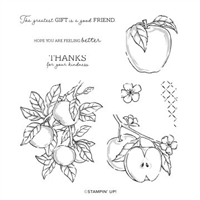
All three of today’s cards were created using Abigail Rose Designer Series Paper, Stylish Shapes Dies and the Apple Harvest stamp set. Using this same design, I created two other versions of this card with a Christmas theme that you can see here.


I started with a piece of Early Espresso cardstock for the base of my card. Next, I embossed a piece of Crumb Cake cardstock using the Painted Texture 3D Embossing Folder and then adhered it to the base of the card.

I cut two pieces of Abigail Rose Designer Series Paper and layered them onto two pieces of Early Espresso cardstock. I adhered the vertical one with Multipurpose Glue but added Stampin’ Dimensional to the back of the horizontal one before placing it on the card.

I stamped the sentiment onto a piece of Very Vanilla cardstock using Early Espresso ink and the stamp set, Apple Harvest. I cut it out using the Stylish Shapes Dies, added Stampin’ Dimensionals to the back and adhered it to the front of the card. To complete the card, I added three Elegant Faceted Gems to the front and a piece of Very Vanilla cardstock to the inside.
For this next card, I used Smoky Slate and Basic White cardstock, the Timeworn Type 3D Embossing Folder and Iridescent Pearls.

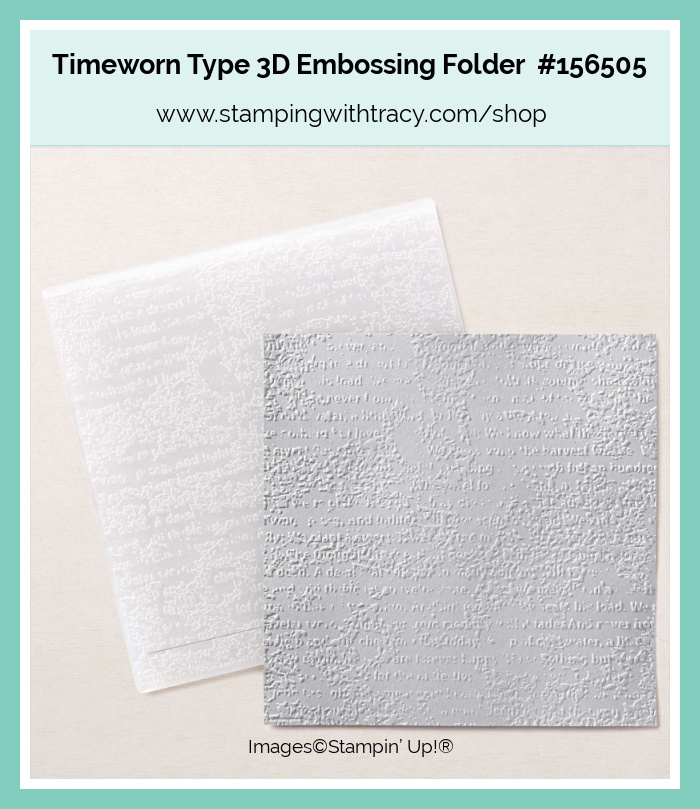
For this last card, I used Early Espresso cardstock, the Timeworn Type 3D Embossing Folder and Elegant Faceted Gems.

Supply List
Below you’ll find all the Stampin’ Up! supplies I used for all three of today’s cards. If you need any stamping supplies, I’d love to be your demonstrator! You can place an order by clicking any of the images below to go to my Stampin’ Up! online store.
Measurements
- Early Espresso or Smoky Slate (base): 11″ x 4-1/4″ scored at 5-1/2″
- Early Espresso or Smoky Slate: (2) 3-3/4″ x 2″
- Abigail Rose Designer Series Paper: (2) 3-1/2″ x 1-3/4″
- Crumb Cake, Basic White or Very Vanilla cardstock (embossed and inside): (2) 5-1/4″ x 4″
- Very Vanilla or Basic White cardstock (sentiment): approx. 2-3/4″ x 1-1/4″

Click here for the Last Chance List
Click here for the Carry Over List (items from the Mini Catalog that aren’t retiring)


Thanks for stopping by today!
by Tracy | Oct 14, 2022 | Uncategorized
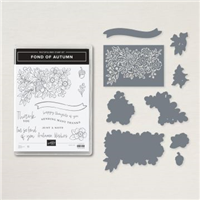
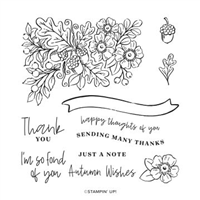
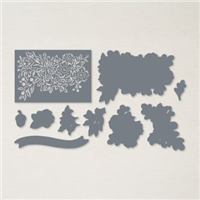
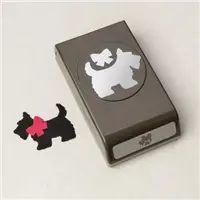
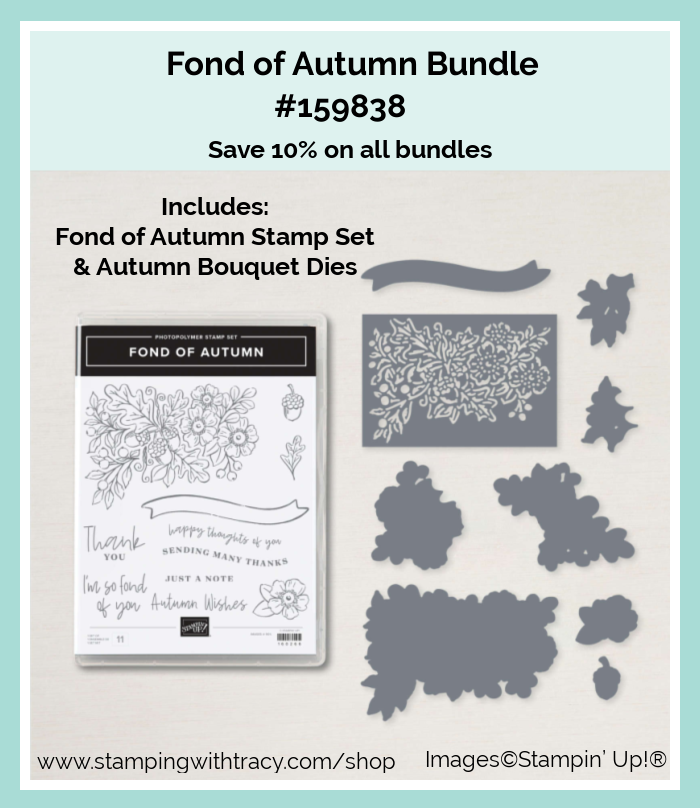
I have one more card using the Scottie Dog Punch and it’s a thank you card. If you missed my last two cards using this punch you can see the Autumn card HERE and the Christmas card HERE. I also used the Fond of Autumn Bundle which includes the Fond of Autumn stamp set and the Autumn Bouquet Dies.


I started with a piece of Orchid Oasis cardstock and then added a layer of Basic White cardstock that I embossed using the Painted Texture 3D Embossing Folder. Then I added a layer of Orchid Oasis cardstock with a piece of 2022-2024 In Color 6″ x 6″ Designer Series Paper, also in Orchid Oasis. I added Stampin’ Dimensionals to the back of this layer and adhered it to my card front.


I used Basic Black cardstock and the Scottie Dog Punch to cut out the dog and used a piece of Orchid Oasis cardstock to cut the bow. I used a Mini Stampin’ Dimensional to attach the bow to the dog and then added Stampin’ Dimensionals to the back and adhered the dog to the front of the card.
The Scottie Dog Punch is also available in the Christmas Scottie Bundle which also includes the Christmas Scottie stamp set.

I used the Fond of Autumn stamp set to stamp the sentiment in Orchid Oasis ink onto Basic White cardstock. I used the Autumn Bouquet Dies to cut it out, added Stampin’ Dimensionals to the back and adhered it below the dog. The Fond of Autumn Bundle includes both the Fond of Autumn stamp set and the Autumn Bouquet Dies.
To complete my card, I added a piece of Basic White cardstock to the inside of the card.

Supply List
Below you’ll find all the Stampin’ Up! supplies I used for today’s card. If you need any stamping supplies, I’d love to be your demonstrator! You can place an order by clicking any of the images below to go to my Stampin’ Up! online store.
Measurements
- Orchid Oasis cardstock: 11″ x 4-1/4″ scored at 5-1/2″
- Orchid Oasis cardstock: 3-1/4″ x 3-1/4″
- Orchid Oasis cardstock (bow): scrap
- Basic White cardstock (embossed): 5″ x 3-3/4″
- Basic White cardstock (inside): 5-1/4″ x 4″
- Basic White cardstock (sentiment): approx. 4-1/2″ x 1-1/4″
- Designer Series Paper: 3″ x 3″
- Basic Black cardstock (dog): scrap
September – October Card Kits

This is a different host code from last month. Host codes are only good for 30 days so it’s been changed.
Use the host code FWZ3BKN9 when placing your order at my Stampin’ Up! online store and you’ll receive my September – October PDF Tutorial with directions to make a featured card and fourteen more ideas using the same layout but with a variety of different colors of cardstock, embossing folders and Designer Series Paper.
All orders using the host code will receive the ten page PDF Tutorial and a thank you card.
If your order is $50 or more (before tax/shipping), you’ll also receive:
- At least six card kits* mailed to you via snail mail
- At least one Bradley Point (earn points and redeem them for free product)
*A card kit includes all the cardstock, Designer Series Paper and embellishments you’ll need to complete a card. I’ve cut, scored, die cut and embossed all the pieces for you! You’ll just need to supply your own stamp set, ink and adhesive. You can use the stamp set I used to create the cards (Soft Seedlings) or use what you already own.
- $50.00 – $99.99 = 6 card kits
- $100 – $149.99 = 7 card kits
- $150 or more = 8 card kits
If your order is $150 or more, do NOT use the host code so you can receive Stampin’ Rewards directly from Stampin’ Up! You will automatically receive 8 card kits from me.
You can use this host code multiple times. There are fifteen different card kits and I keep track of which card kits I’ve sent to you. Each time you’ll receive different kits unless you’ve earned all fifteen and then you’ll start to receive multiples. It’s a great way to have cards on hand to send to friends and loved ones!


Thanks for stopping by today! Enjoy your weekend!