by Tracy | Apr 30, 2025 | Thank You Card
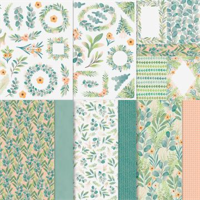
For my card today, I used two new products coming May 6th. The two products on my card that are new is Florals in Bloom Designer Series Paper #165175, which is in the new Annual Catalog and the Impressions Abloom Bundle #165611 which is an Online Exclusive and both of these products are available on May 6th.
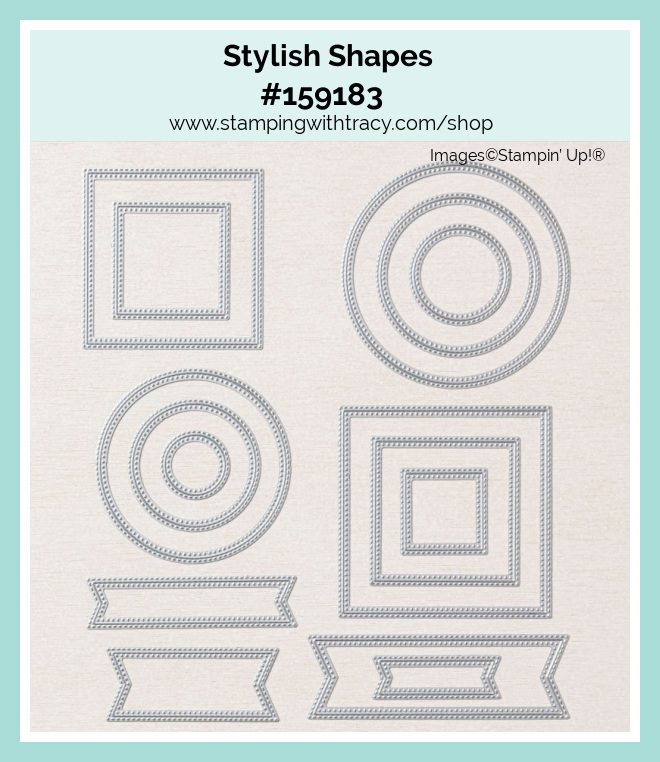
The current product I used on my card today are the Perennial Postage Dies and the Stylish Shapes Dies.


I started with a piece of Bubble Bath cardstock for the base of my card. I added a piece of Basic White cardstock to the front of my card. I used the Perennial Postage Dies to cut a large rectangle out of Bubble Bath cardstock (I used the largest die). Then, I cut (the second largest die) a rectangle out of Florals in Bloom Designer Series Paper (DSP). I attached the DSP to the Bubble Bath cardstock and then adhered the entire piece to the front of the card.

The Impressions Abloom Bundle includes the Impressions Abloom stamp set and Impressions Abloom dies. I used the dies to cut the three flowers and their centers. I used Berry Burst cardstock and Bubble Bath cardstock. I then set the flowers aside.
I stamped the sentiment on Basic White cardstock in Berry Burst ink using the Impressions Abloom stamp set. I cut it out using the Stylish Shapes Dies and made sure the sentiment was over to the far right.

Next, I figured out where I wanted my flowers to go in relation to the sentiment. I adhered the sentiment down and then adhered both of the Bubble Bath flowers. I added a Stampin’ Dimensional to the middle of the Berry Burst flower and adhered it to the card front.
To complete my card, I added a piece of Basic White cardstock to the inside of the card.

Supply List
Below you’ll find all the Stampin’ Up! supplies I used for today’s card. If you need any stamping supplies, I’d love to be your demonstrator! You can place an order by clicking any of the images below to go to my Stampin’ Up! online store.
I also used Florals in Bloom Designer Series Paper #165175 and Impressions Abloom Bundle #165611. Both of these products are available on May 6th.
Measurements
- Bubble Bath cardstock: 5-1/2″ x 8-1/2″ scored at 4-1/4″
- Bubble Bath cardstock (rectangle): approx. 4-1/4″ x 5-1/2″
- Bubble Bath cardstock (flowers): (2) approx. 2-1/4″ x 2-1/4″
- Bubble Bath or Berry Burst cardstock (center of flowers): scraps
- Berry Burst cardstock (flower): approx. 2-1/4″ x 2-1/4″
- Florals in Bloom Designer Series Paper: approx. 5″ x 3-3/4″
- Basic White cardstock (front and inside card): (2) 5-1/4″ x 4″
- Basic White cardstock (sentiment): approx. 4″ x 1-1/2″
The New Stampin’ Rewards Program

The New Stampin’ Rewards Program was rolled out on April 15th. You will receive 10% in rewards when your order is $20 or more but you have to opt in to get the rewards. The more you shop, the more you earn!
Last Chance Products

Click here to go straight to the Last Chance Products page on the Stampin’ Up! site!
Three New Stampin’ Up! Kits
Click each graphic below for more information about the kit.


Mountain Majesties Paper Pumpkin Kit
Did you know that Paper Pumpkin has moved to the Stampin’ Up! website? You can now order subscriptions and manage your subscription on the Stampin’ Up! website! If you’d like to subscribe, please click the graphic below.

An additional coordinating add-on is available but only for Paper Pumpkin subscribers. Click the image below for more information.

Thanks for stopping by today!
by Tracy | Apr 23, 2025 | Thinking of You Card
The card I’m sharing with you today was made using these Stampin’ Up! products: Pattern of Friendship Stamp Set, Mixed Media Florals Designer Series Paper, Stylish Shapes Dies, Soft Waves 3D Embossing Folder and White 1/2″ Woven Ribbon. Please check below for two promotions that start today!


I started with a piece of Thick Basic White cardstock for the base of my card. I added a piece of Calypso Coral to the base of the card, that I embossed using the Soft Waves 3D Embossing Folder and my Stampin’ Cut & Emboss Machine.


I then cut a piece of Basic Black cardstock and layered it with a piece of Mixed Media Florals Designer Series Paper. Next, I wrapped a piece of White 1/2″ Woven Ribbon around the card and tied a knot. I added Stampin’ Dimensionals to the back and adhered it to the front of the card.


I stamped the sentiment onto Basic White cardstock using the Pattern of Friendship Stamp Set in Calypso Coral ink and then cut it out using the Stylish Shapes Dies. I cut a larger circle out of Calypso Coral cardstock and then adhered the sentiment to the front. I added two Stampin’ Dimensionals to the top and two to the bottom and then place it on the card over the ribbon. Optional: You can add piece of Basic White cardstock to the inside of the card.


Supply List
Below you’ll find all the Stampin’ Up! supplies I used for today’s card. If you need any stamping supplies, I’d love to be your demonstrator! You can place an order by clicking any of the images below to go to my Stampin’ Up! online store. The Specialty Plate is used with 3D Embossing Folders and Hybrid Embossing Folders.
Bundle Alert: The Pattern of Friendship Bundle is available with a 10% discount rather than buying the products separately. It includes the Pattern of Friendship Stamp Set and the Pattern of Friendship Die.

Measurements
- Thick Basic White cardstock: 8-1/2″ x 5-1/2″
- Calypso Coral cardstock (embossed): 5-1/4″ x 4″
- Calypso Coral cardstock (circle): approximately 2-1/2″ x 2-1/2″
- Basic White cardstock (sentiment): approximately 2″ x 2″
- Basic Black cardstock: 4-1/4″ x 3-1/4″
- Mixed Media Florals Designer Series Paper: 4 x 3″
- Optional: Basic White cardstock (inside card): 5-1/4″ x 4″
Free Shipping on Orders $75 or More Starts Today!!
Free shipping is for three days only. Free shipping ends on Friday April 25th! Some restrictions apply (see below):
- Free shipping is for three days only. Orders must be opened and closed April 23–25.
- Free shipping automatically applies to your cart after the qualifying amount has been met, which is $75 (before tax).


Current Paper Pumpkin Subscribers
If you are a current Paper Pumpkin subscriber, you can received up to 75% off on refills, past kits and add-ons!! This sale starts today and ends tomorrow, April 24th. If your order is $75 or more (before tax) you will qualify for free shipping! Click here to start shopping!

The New Stampin’ Rewards Program
The New Stampin’ Rewards Program was rolled out on April 15th. You will receive 10% in rewards when your order is $20 or more but you have to opt in to get the rewards. The more you shop, the more you earn!
Last Chance Products
Click here to go straight to the Last Chance Products page on the Stampin’ Up! site!
Three New Stampin’ Up! Kits
Click each graphic below for more information about the kit.
Mountain Majesties Paper Pumpkin Kit
Did you know that Paper Pumpkin has moved to the Stampin’ Up! website? You can now order subscriptions and manage your subscription on the Stampin’ Up! website! If you’d like to subscribe, please click the graphic below.
An additional coordinating add-on is available but only for Paper Pumpkin subscribers. Click the image below for more information.
Thanks for stopping by today!
by Tracy | Apr 14, 2025 | Birthday Card
Changes Are Coming to the Stampin’ Up! Website
Stampin’ Up! will be offline on Tuesday, April 15th at 8:00 am (Mountain Time) for six hours. Visitors to the site will be redirected to a message about the planned downtime. Once the transition is complete the website will be available with the new Stampin’ Rewards program. The new Stampin’ Rewards program will reward customers with an order of $20 or more and you will now receive 10% in rewards. This new Rewards program will begin on April 15th once the Stampin’ Up! website is back up.
Changes to the ordering system are also coming on Tuesday, April 15th. All customers will need an online account that they must set up and must opt in to participate in the new Stampin’ Rewards Program. This won’t go into effect until April 15th, after the Stampin’ Up! website is back up.
Some customers have me place the orders for them. I will no longer be able to enter your credit card number for you. As my understanding is, I can place the order for you and then send it off to you where you can enter your credit card information. This change won’t go into effect until Tuesday, April 15, 2025
Now Onto My Card
The card I’m sharing with you today was created using the Forever Plaid 3D Embossing Folder, Beautiful Butterflies stamp set, Lovely Garden Designer Series Paper, Stylish Shapes Dies and Starburst Sequins.

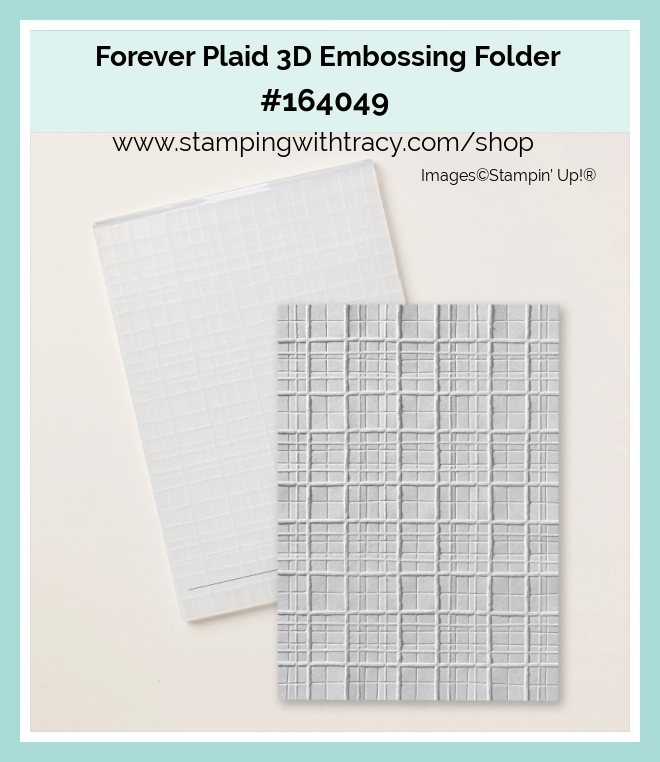
I started with a piece of Fresh Freesia cardstock for the base of my card. Next, I embossed a piece of Basic White cardstock using the Forever Plaid 3D Emossing Folder and my Stampin’ Cut & Emboss Machine. I then adhered the embossed cardstock to the front of the card.


I layered two pieces of Fresh Freesia cardstock with Lovely Garden Designer Series Paper (just be sure the DSP design on the horizontal piece is going horizontal). I adhered the vertical piece down with Multipurpose Glue and with the horizontal piece, I added Stampin’ Dimensionals to the the back and adhered it to the front of the card.


I stamped the sentiment onto Basic White cardstock using the Beautiful Butterflies stamp set in Fresh Freesia ink. I cut it out using the Stylish Shapes Dies. I added Stampin’ Dimensionals to the back and adhered it to the horizontal piece.
To complete my card, I added three large Starburst Sequins in Fresh Freesia to the card front and added a piece of Basic White cardstock to the inside.


Supply List
Below you’ll find all the Stampin’ Up! supplies I used for today’s card. If you need any stamping supplies, I’d love to be your demonstrator! You can place an order by clicking any of the images below to go to my Stampin’ Up! online store. The Specialty Plate is used with 3D Embossing Folders and Hybrid Embossing Folders.
Bundle Alert: The Beautiful Butterflies Bundle is available with a 10% discount. It includes the Beautiful Butterflies stamp set and the Beautiful Butterflies Hybrid Embossing Folder.

Measurements
- Fresh Freesia cardstock: 5-1/2″ x 8-1/2″ score at 4-1/4″
- Fresh Freesia cardstock: (2) 2″ x 3-3/4″
- Lovely Garden Designer Series Paper: 1-3/4″ x 3-1/2″
- Lovely Garden Designer Series Paper: 3-1/2″ x 1-3/4″
- Basic White cardstock (sentiment): approximately 3-1/4″ x 1″
- Basic White cardstock (embossed & inside card): (2) 4″ x 5-1/4″
Retiring In Colors 2023-2025
These colors are retiring. Some products have already sold out in these colors.

Last Chance Products
Click here to go straight to the Last Chance Products page on the Stampin’ Up! site!
Three New Stampin’ Up! Kits
Click each graphic below for more information about the kit.
Mountain Majesties Paper Pumpkin Kit
Did you know that Paper Pumpkin has moved to the Stampin’ Up! website? You can now order subscriptions and manage your subscription on the Stampin’ Up! website! If you’d like to subscribe, please click the graphic below.
An additional coordinating add-on is available but only for Paper Pumpkin subscribers. Click the image below for more information.
Thanks for stopping by today!
by Tracy | Mar 24, 2025 | Thank You Card
Before I share my cards with you today, if you are a current customer of mine, you will need to fill this form out, to receive a 2025-2026 Annual Catalog. I will be ordering the catalogs on March 30, 2025.

Now on to my cards for today! I’ve made six different cards using the same layout. You can see another version here. I used the Memorable Blooms stamp set for all of the cards as well as the Stylish Shapes Dies. I used different embossing folders and the colors I used were changed. For this first card, I used the Forever Plaid 3D Embossing Folder and Botanical Textures Designer Series Paper.


I started with Basic Black cardstock for the base of my card. Then, I embossed a piece of Basic White cardstock using the Forever Plaid 3D Embossing Folder and my Stampin’ Cut & Emboss Machine. Next, I adhered the embossed cardstock to the front of my card.


Next, I layered a piece of Botanical Textures DSP to a piece of Basic Black cardstock and adhered it to the front of the card.

Then, I stamped the sentiment onto a piece of Basic White cardstock using the Memorable Blooms stamp set and Memento Ink. I cut it out using the Stylish Shapes dies. I cut a larger circle (the next largest size) out of Basic Black cardstock. Then, I adhered the sentiment to the Basic Black circle, added Stampin’ Dimensionals to the back and adhered it to the card.
To complete my card, I added a piece of Basic White cardstock to the inside of the card.

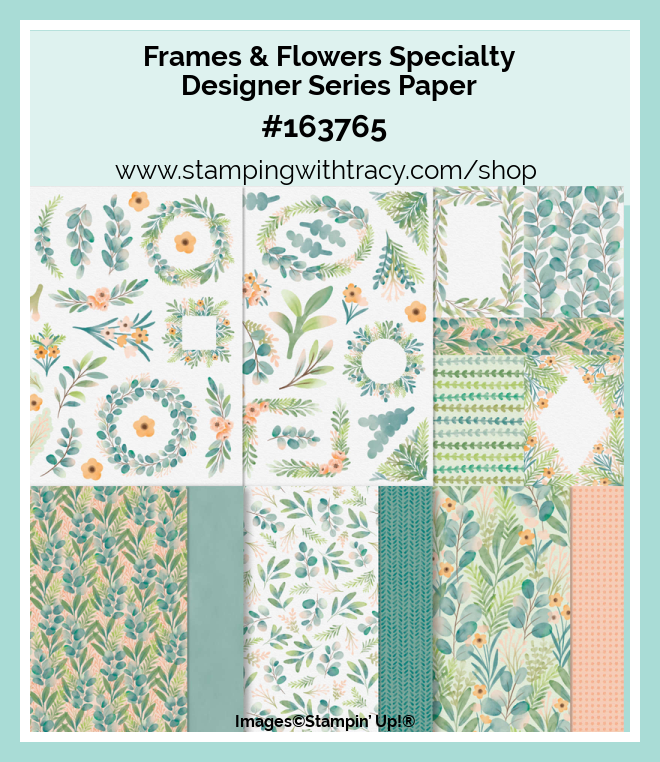
For this next card I used Frames & Flowers Specialty Designer Series Paper, Soft Waves 3D Embossing Folder and Pretty Peacock cardstock and Pretty Peacock ink.


For this next card I used Perennial Lavender Designer Series Paper, the Eyelet 3D Embossing Folder, and Highland Heather cardstock and ink.


For this next card, I used Floral Delight Designer Series Paper, the Fern 3D Embossing Folder and Pool Party cardstock and ink.


For these next two cards, I used Wildflower Birthday Specialty Designer Series Paper and the Forever Plaid 3D Embossing Folder.
For this first card, I used Blueberry Bushel cardstock and ink and for the embossed part, I used Very Vanilla cardstock, which I forgot to put in the supply list. For the second card, I used Pretty in Pink cardstock and ink.


Supply List
Below you’ll find all the Stampin’ Up! supplies I used for today’s card. If you need any stamping supplies, I’d love to be your demonstrator! You can place an order by clicking any of the images below to go to my Stampin’ Up! online store. The Specialty Plate is used with 3D Embossing Folders and Hybrid Embossing Folders.
I forgot to add Very Vanilla cardstock #101650 in to the supply list. So here’s a direct link to it.
I also forgot to add Basic White cardstock to the Supply List. Here’s a direct link to it.
Bundle Alert: The Memorable Blooms Bundle is available with a discount of 10%. It includes the Memorable Blooms stamp set and Memorable Blooms Dies.

Measurements
- Base of card: 5-1/2″ x 8-1/2″ score at 4-1/4″
- Same color as the base: 3″ x 3-3/4″
- Stylish Shapes die cut (same color as the base): approx. 2-1/2″ x 2-1/2″
- Basic White cardstock (embossed and inside card): (2) 4″ x 5-1/4″
- Basic White cardstock (sentiment): approx. 2″ x 2″
- Designer Series Paper: 2-3/4″ x 3-1/2″
Last Chance Products
Click here to go straight to the Last Chance Products page on the Stampin’ Up! site!
Two New Stampin’ Up! Kits
Click each graphic below for more information about the kit.


Inked Occasions Paper Pumpkin Kit
Did you know that Paper Pumpkin has moved to the Stampin’ Up! website? You can now order subscriptions and manage your subscription on the Stampin’ Up! website! If you’d like to subscribe, please click the graphic below.
If you have a current subscription to Paper Pumpkin, you will need to claim your subscription. You can follow written directions, here or you can watch a video, here.

An additional coordinating add-on is available but only for Paper Pumpkin subscribers. Click the image below for more information.
Thanks for stopping by today!
by Tracy | Mar 19, 2025 | Thank You Card
The card I’m sharing with you today was created using a new Online Exclusive, Lovely Garden Designer Series Paper (DSP). I also used Memorable Blooms stamp set, Stylish Shapes Dies and the Distressed Tile 3D Embossing Folder. You can see another version, of this card, here.

I started with a piece of Fresh Freesia cardstock for the base of my card. Then, I added a piece of Basic White cardstock to the inside and embossed another piece using the Distressed Tile 3D Embossing Folder and my Stampin’ Cut & Emboss Machine. Next, I adhered the embossed cardstock to the front of the card.

I cut another piece of Fresh Freesia cardstock and layered it with a piece of Lovely Garden DSP. Then, I adhered the piece to the front of the card.


I stamped onto a piece of Basic White cardstock using the Memorable Blooms stamp set in Fresh Freesia ink. Next, I cut the sentiment out using the Stylish Shapes Dies (the third smallest die). Then, I used the next largest size of the Stylish Shapes Dies and cut a circle out of Fresh Freesia cardstock. I adhered the sentiment to the Fresh Freesia cardstock, added Stampin’ Dimensionals to the back and adhered it to the front of the card.

Supply List
Below you’ll find all the Stampin’ Up! supplies I used for today’s card. If you need any stamping supplies, I’d love to be your demonstrator! You can place an order by clicking any of the images below to go to my Stampin’ Up! online store. The Specialty Plate is used with 3D Embossing Folders and Hybrid Embossing Folders.
Bundle Alert: The Memorable Blooms Bundle is available with a discount of 10%. It includes the Memorable Blooms Stamp Set and Memorable Blooms Dies.
Measurements
- Fresh Freesia cardstock (base): 5-1/2″ x 8-1/2″ score at 4-1/4″
- Fresh Freesia cardstock (rectangle): 3″ x 3-3/4″
- Fresh Freesia cardstock (circle): approximately 2-1/2″ x 2-1/2″
- Basic White cardstock (embossed & inside card): (2) 5-1/4″ x 4″
- Basic White cardstock (sentiment): approximately 2″ x 2″
- Lovely Garden Designer Series Paper: 2-3/4″ x 3-1/2″
Last Chance Products
Click here to go straight to the Last Chance Products page on the Stampin’ Up! site!
Two New Stampin’ Up! Kits
Click each graphic below for more information about the kit.
Inked Occasions Paper Pumpkin Kit
Did you know that Paper Pumpkin has moved to the Stampin’ Up! website? You can now order subscriptions and manage your subscription on the Stampin’ Up! website! If you’d like to subscribe, please click the graphic below.
If you have a current subscription to Paper Pumpkin, you will need to claim your subscription. You can follow written directions, here or you can watch a video, here.
An additional coordinating add-on is available but only for Paper Pumpkin subscribers. Click the image below for more information.
Thanks for stopping by today!