by Tracy | Feb 23, 2022 | Card Sampler, Layering Circles Dies
Happy Wednesday!
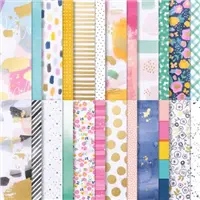
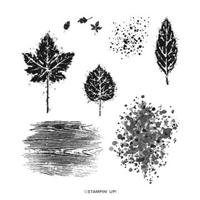
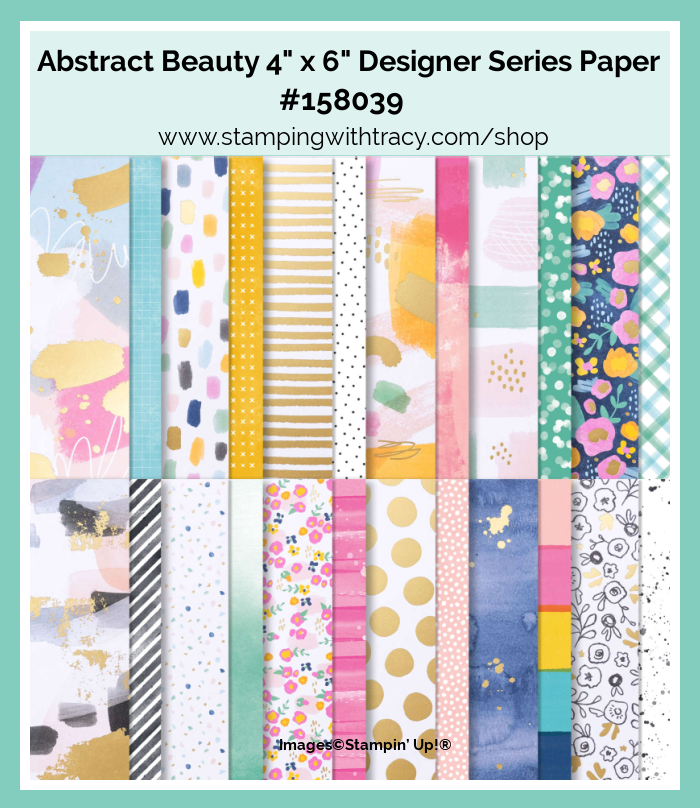
Today’s cards were made using Stampin’ Up! Abstract Beauty Designer Series Paper and the Peaceful Moments stamp set.This paper is a different size than we’ve carried before (4″ x 6″) and one side of this double-sided paper has gold accents so I used our Gold Foil Sheets on both cards.

I started with a piece of Polished Pink cardstock and then added a layer of Gold Foil and another piece of Polished Pink that I embossed using the Hammered Metal Embossing Folder.

Then I layered a piece of Abstract Beauty Designer Series Paper with a piece of Basic White cardstock. I wrapped a piece of white ribbon (from the Flowers for Every Season Ribbon Combo Pack) around the two layers and tied a knot. I placed Stampin’ Dimensionals on the back and adhered it to the front of the card. The sentiment was stamped in Polished Pink and cut out with the Layering Circles Dies. I cut a larger scalloped circle out of Gold Foil, adhered the two together, added Stampin’ Dimensionals to the top and bottom (I didn’t put any in the middle so they weren’t sitting on the ribbon) and placed it on the card. To complete the card, I added three Brushed Brass Butterflies.

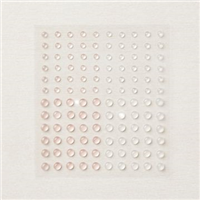
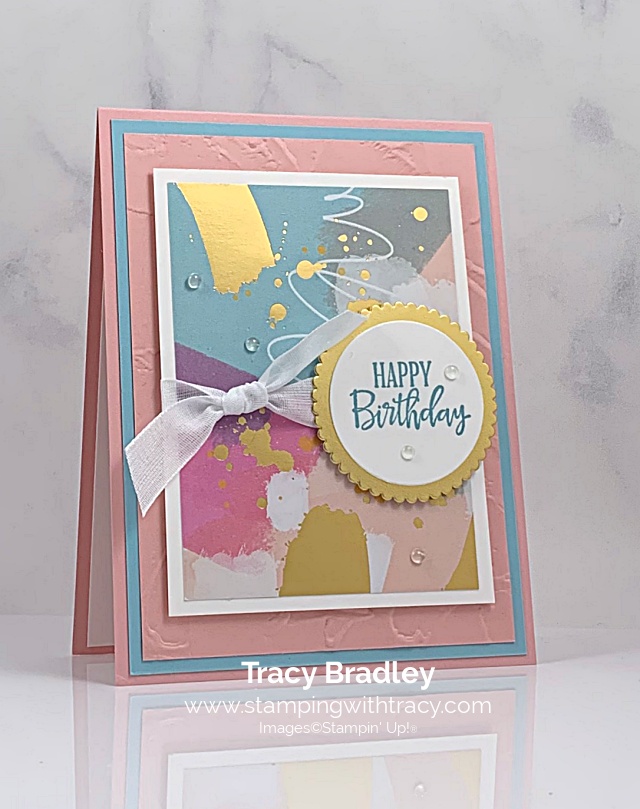
I created this next card first and afterwards decided I wanted a piece of Gold Foil for the second layer. I used Blushing Bride and Balmy Blue cardstock and the sentiment was stamped in Balmy Blue. The Blushing Bride cardstock was embossed using the Painted Texture Embossing Folder and I placed five Polished Dots on the front of the card. You can find the measurements I used below the Supply List.
Supply List
Below you’ll find all the Stampin’ Up! supplies I used for today’s card. If you need any stamping supplies, I’d love to be your demonstrator! You can place an order by clicking any of the images below to go to my Stampin’ Up! online store.
The Specialty Plate is used with 3D Embossing Folders.
Measurements
- Base of card: 11″ x 4-1/4″
- Second layer (same color as base): 5″ x 3 3/4″
- Gold Foil (first card): 5-1/4″ x 4″
- Gold Foil (scalloped circle): approx. 2-1/2″ x 2-1/2″
- Basic White cardstock: 4-1/4″ x 3-1/4″
- Basic White cardstock (sentiment): approx 2-1/4″ x 2-1/4″
- Basic White cardstock (inside card): 5-1/4″ x 4″
- Abstract Beauty Designer Series Paper: 4″ x 3″
Hand- Penned Card Sampler

Place a minimum $50 order (before tax/shipping) at my Stampin’ Up! Online Store using this special host code 2BVUBSKJ and I’ll send you my Hand-Penned Card Sampler. It’s very important that the host code is used when placing your order EXCEPT if your order is $150 or more. Do not use the host code for an order $150 or more so you can receive Stampin’ Rewards from Stampin’ Up!. Contact me after you’ve placed the order to let me know that you’d like the Sampler – you only need to contact me if your order is $150 or more.
With your order, you’ll also receive at least one free Sale-a-Bration gift directly from Stampin’ Up! Orders must be placed by February 24, 2022 and the Card Samplers will be mailed approximately March 7, 2022. Please click HERE for all the details.


Have a wonderful day!
by Tracy | Nov 5, 2021 | Card Sampler, Free Tutorial, Layering Circles Dies

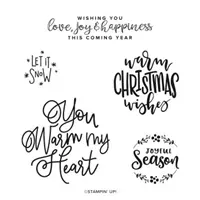
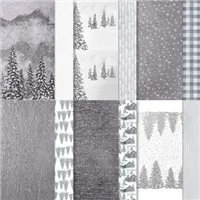
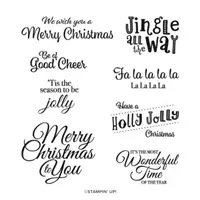
I have a FREE Christmas card tutorial for you today but you could certainly change up the cardstock and paper and make it an any occasion card! My card features the stamp set, Tidings & Trimmings, Painted Christmas Designer Series Paper (my favorite design in the package), Layering Circles Dies, Hammered Metal 3D Embossing Folder and Wonderful Gems. You can find your free tutorial below the Supply List.

Supply List
Below you’ll find all the Stampin’ Up! supplies I used for today’s card. If you need any stamping supplies, I’d love to be your demonstrator! You can place an order by clicking any of the images below to go to my Stampin’ Up! online store.
The Specialty Plate is used with 3D Embossing Folders.

Holly Jolly Card Sampler
Place a minimum $50 order (before tax/shipping) at my Stampin’ Up! Online Store using the host code RG3C2JDJ and I’ll send you my Holly Jolly Card Sampler. Orders must be placed by Tuesday, November 9, 2021 and the Card Samplers will be mailed on November 18, 2021. Please click HERE for all the details.


Starter Kit Special
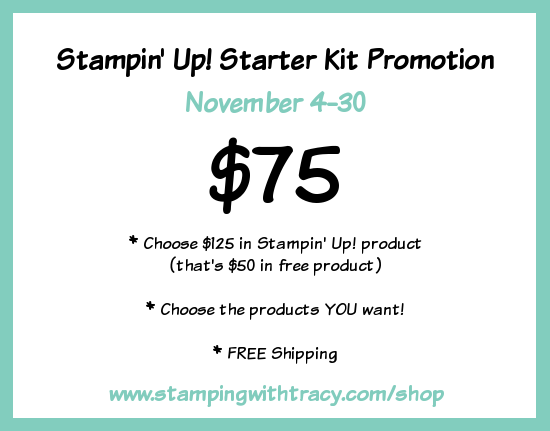
Normally the Starter Kit is $99 but Stampin’ Up! has lowered it to $75 for the rest of November! When you purchase the Starter Kit you’ll choose $125 worth of Stampin’ Up! product – that’s $50 in free Stampin’ Up! product!!! Then you’ll enjoy the perks of being a demonstrator with access to products early, a discount on all your purchases (think of it as a discount card to your favorite place to shop) and so much more. You never have to run a class or sell to others but you certainly have that option if you’d like to start your own business. If you have questions, please ask! If you’d like to purchase the Starter Kit, click here!
Have a wonderful weekend!
by Tracy | Oct 29, 2021 | Designer Series Paper, Die-Cutting, Embossing Folders, Free Tutorial, Heat Embossing, Layering Circles Dies
Today’s free PDF tutorial features Peaceful Place Designer Series Paper, Layering Circles Dies and one of the Wintry 3D Embossing Folders. I heat embossed the sentiment using the stamp set, Encircled in Warmth. If you’d rather not emboss the sentiment, you could use Smoky Slate ink but the silver embossing really gives this card a wow factor! You can find the tutorial below the Supply List.


Supply List
Below you’ll find all the Stampin’ Up! supplies I used for today’s card. If you need any stamping supplies, I’d love to be your demonstrator! You can place an order by clicking any of the images below to go to my Stampin’ Up! online store.
The Specialty Plate is used with 3D Embossing Folders.

Eden’s Garden – Available on November 2, 2021

November Paper Pumpkin

Gifts Galore Paper Pumpkin Kit
- Kit contains enough supplies to create nine treat packages—three each of three designs—and nine food-safe bags.
- This all-inclusive kit includes printed die cuts, die-cut boxes, cellophane treat bags, adhesive, and more!
- Includes an exclusive stamp set and a Classic Stampin’ Spot
- Coordinating colors: Evening Evergreen, Flirty Flamingo, Old Olive, Pool Party, Poppy Parade
- Subscribe by November 10, 2021
Click here to order Paper Pumpkin
You can cancel at any time or even skip a month
Thanks for stopping by today! Have a wonderful weekend!
by Tracy | Oct 25, 2021 | Card Sampler, Designer Series Paper, Die-Cutting, Fun Fold Card, Heat Embossing, Layering Circles Dies
I always love when a card opens in a different way and my book binding card today is super easy to make!


I started with a piece of Thick Basic White cardstock (you can find the measurements I used below the Supply List) and scored it in two places. Then I folded the card in half and then folded the other piece back (see the picture below).

I put Tear & Tape on the small section (I like using Tear & Tape but any strong adhesive will work). I then folded the piece over towards the right and this creates the book biding look.


I added Whimsy & Wonder Designer Series Paper to the large front panel and the panel on the left. I used our 1-1/2″ Metallic Mesh Ribbon and tied it around the left side. Since I used a heavy duty adhesive, the ribbon is purely decorative. This mesh ribbon is gorgeous with all the silver running through it .You could even use this to wrap presents!

I used the Layering Circles Dies to cut a piece of Basic White cardstock and a larger, scalloped circle out of Silver Foil. On the Basic White cardstock, I embossed the sentiment using the Holly Jolly Wishes stamp set, Versamark ink, Silver Embossing Powder and a Heat Tool. Embossing is so easy to do and I really think it makes a card look so elegant. If you’ve never embossed before, I have directions below. I adhered the sentiment to the Silver Foil and then added Stampin’ Dimensionals to the back of the Silver Foil circle and adhered it to the front of the card.

How to Heat Emboss
Prepare your cardstock by rubbing an anti-static pouch over the surface of the paper as it helps keep away stray particles of embossing powder (Stampin’ Up! no longer carries this product but it’s a must when embossing). Stamp your sentiment or image using a Versamark pad. This is very sticky ink and your embossing powder will stick right to it. Sprinkle embossing powder over the stamped image and then shake off any excess. Before applying heat to your paper, heat the Heat Tool first so the paper won’t warp (about 10 seconds). Direct the heat over your image and watch as your image is transformed!
Supply List
Below you’ll find all the Stampin’ Up! supplies I used for today’s card. If you need any stamping supplies, I’d love to be your demonstrator! You can place an order by clicking any of the images below to go to my Stampin’ Up! online store.
Measurements
- Thick Basic White cardstock: 11″ x 4-1/4″ score at 4″ and 5-1/2″
- Whimsy & Wonder Designer Series Paper: 4″ x 3-3/4″
- Whimsy & Wonder Designer Series Paper: 4″ x 1-1/4″
- Silver Foil: approx. 3″ x 3″
- Basic White cardstock: approx 2-5/8″ x 2-5/8″
Words of Cheer Card Sampler

Place a minimum $50 order at my Stampin’ Up! Online Store using the host code WDQ6WW6N and I’ll send you my Words of Cheer Card Sampler. Orders must be placed by tomorrow, October 26, 2021 and the Card Samplers will be mailed on November 4, 2021. For all the details, please click HERE.

Enjoy your day!
by Tracy | Sep 2, 2021 | Layering Circles Dies, Memories & More
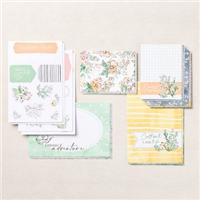
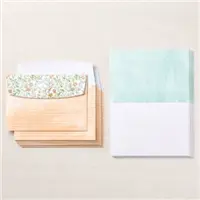
Today’s card features Hand-Penned Memories & More Card Pack and Hand-Penned Memories & More Cards & Envelopes. All of our card packs can be used to make cards or for use in a scrapbook or both!


I started with one of the scored card bases in the Hand-Penned Memories & More Cards & Envelopes Pack (each package contains enough card bases & envelopes to make 20 cards). Then I chose one of the 4″ x 3″ cards and adhered it to a piece of Highland Heather cardstock (not included). I added Stampin’ Dimensionals to the back and placed it on the card front.
Using the Layering Circles Dies, I cut a circle out of Highland Heather cardstock using the Mini Stampin’ Cut & Emboss Machine. I placed one of the stickers included in the Card Pack in the center of the circle, added Stampin’ Dimensionals to the back and placed it in the lower left-hand corner.
To complete the card, I added three Elegant Faceted Gems (not included in the Card pack) to the front of the card. This was a very quick and easy card to make!
Supply List
Below you’ll find all the Stampin’ Up! supplies I used for today’s card. If you need any stamping supplies, I’d love to be your demonstrator! You can place an order by clicking any of the images below to go to my Stampin’ Up! online store.
Measurements
Highland Heather cardstock: 4-1/4″ x 3-1/4″
Highland Heather cardstock: approx. 2-1/4″ x 2-1/4″
New Host Code

September Paper Pumpkin

Thanks for stopping by today!
by Tracy | Aug 26, 2021 | Blending Brushes, Die-Cutting, Embossing Folders, Layering Circles Dies, Uncategorized
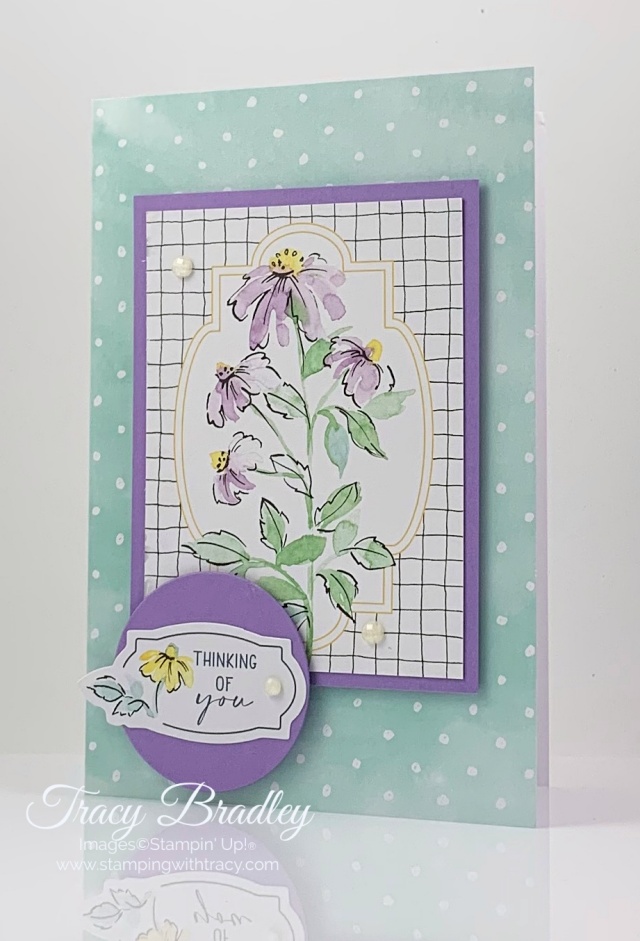
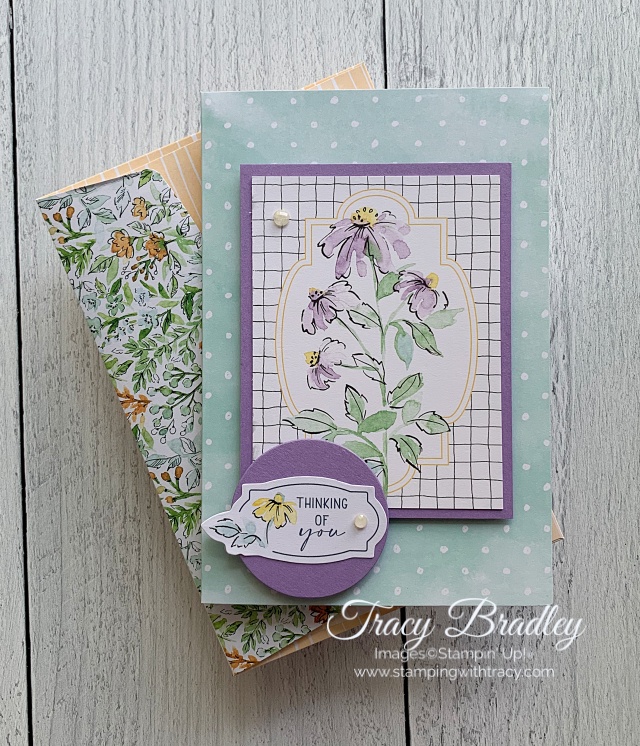
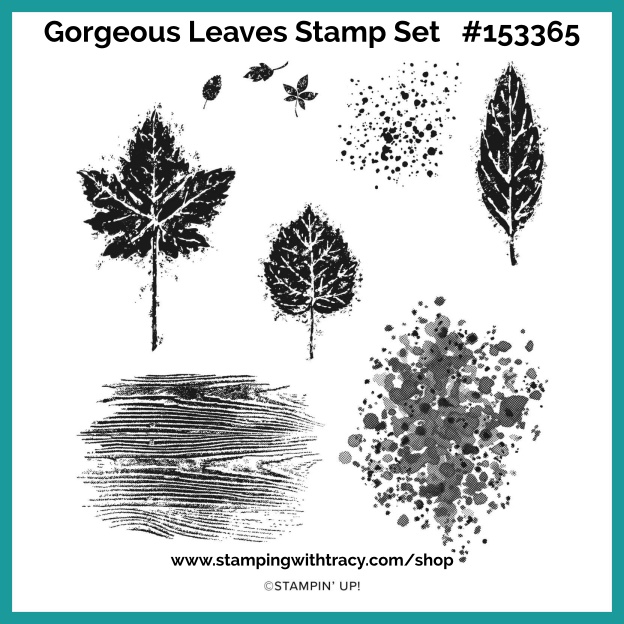
Today’s card is another version of the one I shared on Monday and it features the Stampin’ Up! Gorgeous Leaves stamp set and our Blending Brushes.

I started with a piece of Coastal Cabana cardstock for the base of my card and then added a layer of Basic White cardstock that I embossed using the Timber 3D Embossing Folder.
Then, using Basic White cardstock and our Blending Brushes, I covered my paper with Just Jade ink. When I had the shade I wanted, I blended Pool Party ink and then a small amount of Pacific Point ink. As I mentioned in Monday’s post, after getting ink on my Blending Brush, I start by moving the brush in a circular motion on my grid paper and then without lifting the brush, continue on to my Basic White cardstock. This will help to prevent blotches of color.

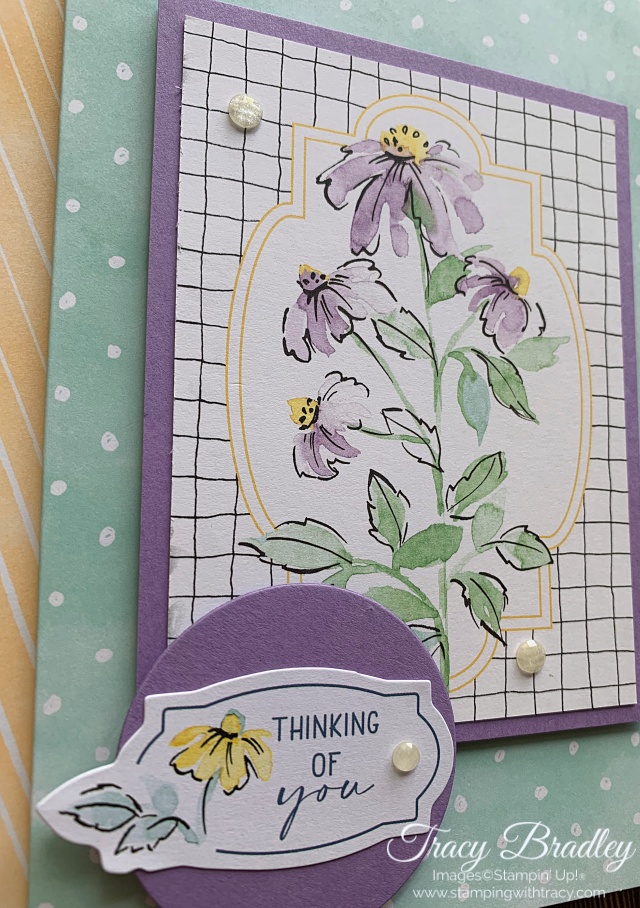
I cut the paper down to 4-3/4″ x 2″ and then using Memento Ink, stamped leaves using the Gorgeous Leaves stamp set. Then I adhered it to a piece of Coastal Cabana cardstock, added Stampin’ Dimensionals to the back and adhered it to the front of the card.

I used the stamp set Pansy Patch to stamp the sentiment in Memento Ink onto a piece of Basic White cardstock. This is a photopolymer stamp set and I CUT the stamp in half so it would fit on my circle. Now my stamp is more versatile and it was easy to cut with our Paper Snips. I cut the sentiment out using our Tasteful Labels Dies. I used the Layering Circles Dies to cut a larger circle out of Coastal Cabana and then layered the two pieces together. On the back, I added Stampin’ Dimensionals to the right side only and then adhered it to the card front. To complete the card, I added three Holiday Rhinestones.
Supply List
Below you’ll find all the Stampin’ Up! supplies I used for today’s card. If you need any stamping supplies, I’d love to be your demonstrator! You can place an order by clicking any of the images below to go to my Stampin’ Up! online store.
The Specialty Plate is used with 3D Embossing Folders.
Measurements
- Coastal Cabana cardstock: 11″ x 4-1/4″ score at 5-1/2″
- Coastal Cabana cardstock: 5″ x 2-1/4″
- Coastal Cabana cardstock: scrap for circle
- Basic White cardstock: (3) 5-1/4″ x 4″ (one piece for the inside, one piece for the front of the card, one piece for blending and it will be cut down to 4-3/4″ x 2″
- Basic White cardstock: scrap for sentiment
Fun Folds Card Sampler
My Card Samplers give you the chance to “sample” different products. You are able to see our Designer Series Paper, cardstock, embossed paper, die cuts and embellishments “in person” as you assemble the cards.
Place a minimum $50 order (before shipping/tax) at my Stampin’ Up! online store using the host code 6QQTDKMY and as a thank you, you’ll receive my Fun Folds Card Sampler which includes 6 card kits (2 each of three different designs) with envelopes and a PDF Tutorial with instructions, pictures and a supply list. You’ll receive all the paper and embellishments needed to make the cards and all the paper will be cut, scored and die cut for you (you’ll need to supply your own adhesive, ink and stamp set). If your order is $150 or more, please do not use the host code so you can earn Stampin’ Rewards (free product) directly from Stampin’ Up! After placing your order, please contact me to let me know you’d like the Fun Folds Card Sampler (you only need to contact me if your order is $150 or more). If I don’t hear from you, I’ll assume you’d like my regular card kits. The last day this offer will be available is Monday, August 30, 2021. For all the details, please click here.
You’ll also earn at least one Sale-a-Bration gift from Stampin’ Up!


Choose one of twelve bundles to add to your Starter Kit, absolutely FREE! If you’re planning to make a $99 Stampin’ Up! purchase, you may want to consider the Starter Kit. When you purchase the $99 Starter Kit you can then choose $125 worth of Stampin’ Up! product from any current catalog PLUS, during Sale-a-Bration you can choose a FREE bundle from those listed below. The Starter Kit always ships FREE and once you purchase it you will start receiving a 20% discount on your future purchases. You can purchase just for yourself or start your own business, it’s totally up to you. Purchasing the Starter Kit is absolutely risk free! If you’d like more information, please click here. If you’re ready right now to purchase the Starter Kit, click here! As always, if you have questions, don’t hesitate to contact me!

Thanks for stopping by today!