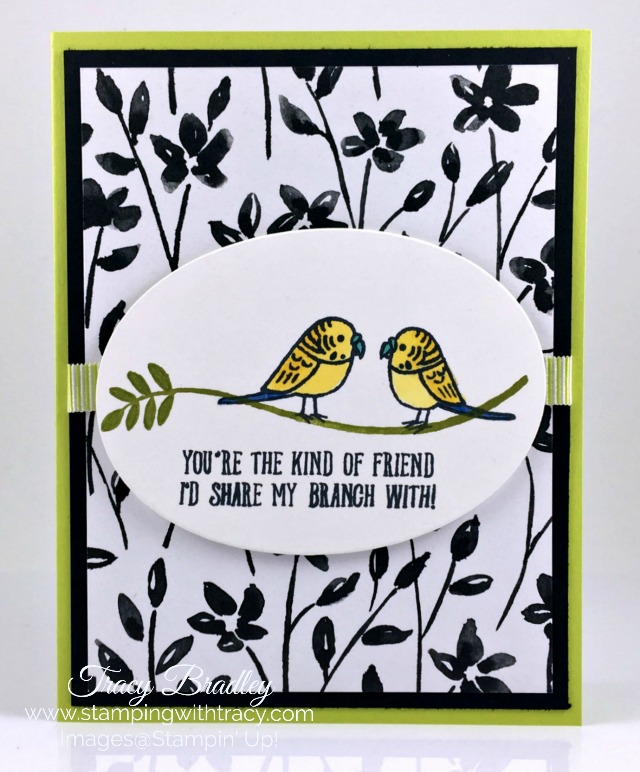
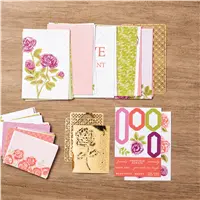
I am really going to miss the Petal Passion Designer Series Paper. I tend to go for lots of color but this paper is one of my favorites. The stamp set Flying Home is a great one if you love to color. Add a bird in a set and I’m sold.
The stamp set Remarkable You has been around for a few years but sadly, it’s leaving. It comes with three different flowers and a leaf stamp too. It’s another great set if you enjoy coloring.
All stamp sets are guaranteed available until May 25th and then while supplies last. All Designer Series Paper is while supplies last! Whole Lot of Lovely & Delightful Daisy Designer Series Papers have already SOLD OUT, so if you have any favorites, now is the time to place your order!
If you’d like to see everything retiring, here are some links to my online store:
Use the host code when placing your online order of $150 or less and receive an extra surprise in your Thank You package from me! Orders over $150 (please do not use the host code) will receive Stampin’ Rewards directly from Stampin’ Up! (free product) and will automatically receive my extra surprise.
Today I’m sharing past projects I’ve made that use products currently on the Retiring List!
Stamp sets are guaranteed until May 25th, 2018 and then while supplies last
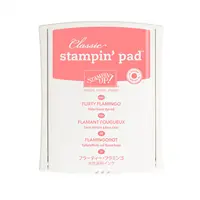
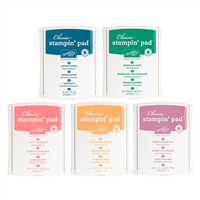
Classic Stamp Pads and Classic Ink Refills are guaranteed until May 7, 2018 and then while supplies last
Everything else is while supplies last!
This card uses one of my favorite stamp sets, Birthday Blooms. It’s a great set for coloring with Watercolor Pencils or Stampin’ Blends and I really love the sentiments. I’m really, really going to miss the Glitter Enamel Dots!
I’m going to miss the big bold Hello sentiment in the stamp set Hello Friend. The next card also uses this sentiment.
The stamp set Lots of Love makes it so easy to make a quick and easy card that really conveys the fact that you care!
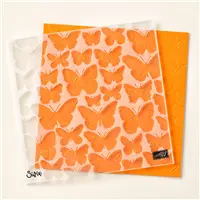
I love butterflies and the next two cards use the Butterflies Thinlits. The sentiment on this first card (the paper retired last year)is from the stamp set Birthday Blooms which is the set I mentioned on the first card.
Butterfly Basicsis a great set for coloring! The sentiment I used is also included in the set.
And one more project using the Butterflies Thinlits(the paper has already retired). Another retiring product are the Gold Binder Clips.These are great for closing up a bag when you don’t want anyone to peek inside!
Want to see everything retiring? Click on the lists below:
Use the Host Code when placing your online order of $150 or less to receive a surprise in your thank you package from me. Orders over $150 will automatically receive the surprise and by not using the host code, you’ll be able to choose Stampin’ Rewards (free product, yay!!).
Today’s card is one that I made way back in September but forgot to post! A Little Wild is the perfect stamp set for a spinner card because each animal in the set is two-sided PLUS the stamp set has the coordinating Little Loves Framelits Dies . The stamp set and dies can be purchased separately but if you purchase them together you’ll save 10%, This bundle is on the retirement list! A Little Wild and the Little Loves Framelits Dies are NOT retiring but once the new catalog begins, this bundle will be gone. So, if you love it as much as I do, be sure to pick it up before May 31st and save 10%! In my supply list at the end of the post, I’ll include both the stamp set and dies individually as well as the bundles. Here’s how to make the card: (more…)
Yesterday the Retiring Lists came out as well as a lot more information about the Color Revamp and the redesign of our ink pads. It was confusing, even to me! So let’s do a quick recap and talk about how it relates to the Retiring Lists. If you have any questions, please contact me!
Retiring Colors
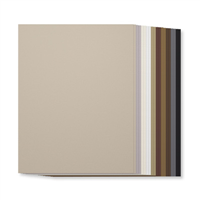
Seventeen current Stampin’ Up! colors are retiring (four are current In Colors). That means that anything related to these products (stamp pads, markers, ink refills, cardstock, embellishments) will be retiring as well. My recommendation is to get what you want as soon as possible although Stampin’ Up! has released some information about availability of these RETIRING products.
Classic Stamp Pads: Guaranteed stock of old ink pad design through May 7, 2018. After this date, it will be while supplies last.
Classic Stamp Pad Collections (all of the colors of a family): While supplies last
Classic Stampin’ Ink Refills: Guaranteed stock until May 7, 2018. After this date, while supplies last.
Single packages of cardstock: While supplies last
Cardstock Packs Collections: While supplies last
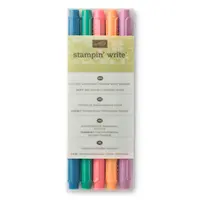
Stampin’ Write Markers: While supplies last
Color Caddy: While supplies last
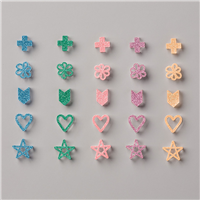
Color Embellishments: While supplies last
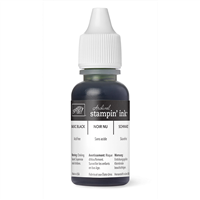
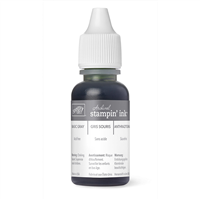
Archival Inks Retiring
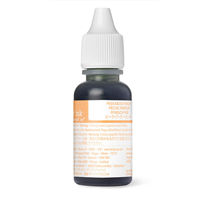
Stampin’ Up! will no longer be carrying Archival Ink so the Basic Black and Basic Gray Archival Inks and Refills are on the the retirement list. If you’re worried about what to use when you watercolor, Staz-On is returning (YAY!!) and it’s perfect for watercoloring while Memento Ink works with our Stampin’ Blends. Basic Gray will return as part of the Classic Stampin’ Ink Family but it won’t be archival.
We will have an updated ink pad case in the new catalog. The actual foam of the pad has NOT changed but the formulation of the ink has. A defoamer has been added to the ink which will prevent bubbling, help get an even coating of the ink on the stamp and help the stamped image have a smoother, solid look.
You CAN use the the new ink refills on old stamp pads (the new ink refills and stamp pads will be available on June 1, 2018 when the new catalog goes live)! The only exception is that the Basic Gray Archival ink cannot be used with the Basic Gray Classic Stamp pad. These are two separate inks.
Returning In Colors
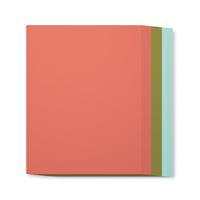
Six previous In Colors are returning. Yesterday I left Mossy Meadow out of the lineup but I think it was because I was so excited about Blackberry Bliss and Coastal Cabana coming back! Here are all six:
Mossy Meadow
Poppy Parade
Flirty Flamingo
Coastal Cabana
Mint Macaron
Blackberry Bliss
Already On the Low Inventory List
I do have a few updates on retiring items that are already on the low inventory list as of this posting. This list changes minute by minute. Click on any of the images and you’ll head over to my Stampin’ Up! online store.
If you have any questions at all, please contact me!!
If you want to be able to preorder new Stampin’ Up! products now, consider joining my team! Getting new products early is just one of the perks of being a demonstrator. The kit is $99 and you can pick out $125 worth of Stampin’ Up! products. There’s no obligation to joining and no penalty for dropping if you decide it isn’t for you. I love being a demonstrator! Contact me if you have questions! For more information, click here!
Every few years Stampin’ Up! has a Color Refresh or Revamp! This year we’re having a complete Revamp! Colors are leaving and some are returning! Color Families are also changing.
Some favorites are leaving but Stampin’ Up! is always committed to being on trend so I know you’ll fall in love with our new colors in the 2018-2019 Catalog.
Returning Favorites
We have six returning colors in the 2018-2019 Catalog:
Poppy Parade
Flirty Flamingo
Coastal Cabana
Mint Macaron
Blackberry Bliss
Mossy Meadow
More Big News
Our ink pads are getting a new look which is why all of our current ink pads are on the retirement list! With the new design comes an improved foam pad! The new pads will give even better coverage! Edited to Add: The foam pad hasn’t changed in design but defoamer has been added to the ink ingredients. Stamped images will have a smoother, solid look.
Bundle Prices
All of the bundle prices in the Occasions and Annual Catalogs will go away on May 31st. Some of the products in the bundles are not retiring but the bundle prices are. So if there are any current bundles you have been thinking about, be sure to get them now and save 10%.
All products on the retiring lists, except stamp sets, are while supplies last! Once they’re gone, they’re gone!! Stamp sets can be ordered up to May 25th and then will be while supplies last. If you have any questions, please let me know!
The lists are out! Many, many products are retiring from the Annual & Occasions Catalogs. I have both lists for you to download but please keep this in mind:
These products are available until May 31, 2018 or WHILE SUPPLIES LAST
Some products will fly off the shelves such as ink refills and stamp pads in the In Colors 2016-2018. (Edited to Add: Flirty Flamingo, one of the 2016-2018 In Colors is not retiring but will be in the new catalog)
Retiring stamp sets will be available until May 25th and after that point, they will be while supplies last.
Once items are gone, they’re gone so get what you want just as soon as you can!
This past weekend I was in Las Vegas attending OnStage, a Stampin’ Up!, one day event. My husband and I arrived a day early before I headed to the convention early Saturday morning. Stampin’ Up! really knows how to put on a good show and it was so much fun meeting new people, seeing upcoming new products and getting my hands on the new catalog (months before it’s released to the public)! If this sounds fun, considering joining Stampin’ Up! The Starter Kit is $99 and you can choose $125 in product. Once you join, you’ll enjoy all the perks that I enjoy and you’ll start out with a 20% discount on everything you purchase! You’ll even be able to preorder new products, a month before the catalog goes live.
It’s Stampin’ Up!s 30th Anniversary this year so they’re celebrating in a big way. My friend, Rita, and I took a picture together to remember the fun we had. Look at the delicious cupcakes we were treated to in the afternoon with a 30th anniversary white chocolate decoration on top! (more…)
It’s time for the Glitter Queens Blog Hop and today it’s all about birthdays! I hope you’ll hop around and visit everyone’s blog!
My birthday card is very similar to one I posted on Monday but this one has a little twist – inside there’s an envelope for a gift card! I have to credit Caro Van Der Straaten from the Netherlands for this cute idea to put an envelope inside the card using the Envelope Punch Board.
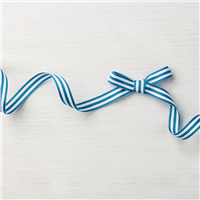
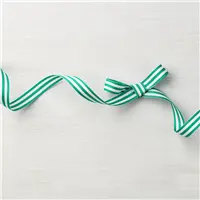
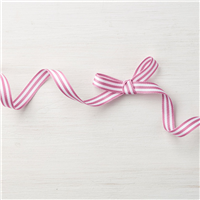
The video below will show how easy it is to create this type of card. When I showed the card to my husband, his first comment was that it looked hard to make but it really isn’t, honest!! I used Picture Perfect Party 6″ x 6″ Designer Series Paper, Berry Burst, Whisper White & Basic Black cardstock as well as Berry Burst Crinkled Seam Binding ribbon. For the version below, I used the same products but switched out the Berry Burst for Bermuda Bay and added Bermuda Bay Stitched Satin Ribbon. The sentiment is from the stamp set Picture Perfect Birthday. (more…)
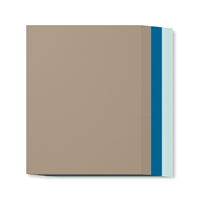
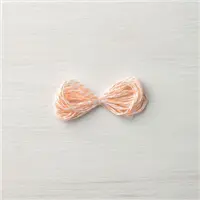
Every year Stampin’ Up! releases five new colors called In Colors. The In Color collection lasts for two years and then all five colors retire. The 2016-2018 In Colors (Dapper Denim, Emerald Envy, Peekaboo Peach, Flirty Flamingo and Sweet Sugarplum) will be retiring at the end of May.
If history repeats itself, and I’m sure it will, most of the products in these colors will be gone very soon!!Early next week, the Last Chance List will be published and everything retiring from the Annual & Occasions catalogs will be listed and the In Colors products are always while supplies last. Ink refills for the stamp pads are always the first to go and in some years, they’ve been gone in a matter of days. Yes, hard to believe, but days!
If you love any of these colors, I highly recommend purchasing what you want today! If you already have the ink pads, be sure to stock up on the ink refills. Once in a blue moon, some retiring In Colors make it back into one of the regular collections, but it isn’t often. Speaking of blue moons, did you know we had one last week? A blue moon is a second full moon in a calendar month. My husband loves this stuff which is the only reason I know this trivia fact!
Listed below are the 2016-2018 In Color Products. Click on any of the images and you’ll head over to my Stampin’ Up! online store.
Today’s card uses the beautiful Petal Passion Designer Series Paper and the stamp set, Fruit Basket. It was inspired by a card sketch from my team leader, Dawn Griffith. She gives us a sketch and measurements and then we can create a card exactly like the card sketch or change it up a bit. Sometimes the sketches are really difficult for me but other times, like with this sketch, I can quickly create a card I love.
I did change the measurements up just a bit and you can find them below.
Berry Burst
11″ x 4-1/4″ Score at 5-1/2″
1″ x 4-1/2″
(4) 1-1/4″ x 1-1/4″
scrap for scalloped oval
Basic Black: 4″ x 5-1/4″ scrap for scalloped oval
Whisper White: 3-1/2″ x 4-3/4″ scrap for sentiment
Petal Passion Designer Series Paper: 3/4″ x 4-1/4″ (4) 1-1/8″ x 1-1/8″
After gluing Designer Series Paper to each square, add Stampin’ Dimensionals to the back.
Attach the Berry Burst scallop to the front of the card using Stampin’ Dimensionals.
Use the Banner Triple punch to easily create the two banners.
Use the Layering Ovals Framelits to create a Berry Burst and Basic Black scalloped oval and the Stitched Shapes Framelits for the sentiment.
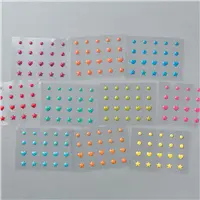
Add several Glitter Enamel Shapes for some extra sparkle!
Because of the added dimension to the card, if you decide to send it, it will cost more in postage but I think it makes a big difference in the overall look of the card.
All of the Stampin’ Up! supplies I used to create today’s card are listed below. For easy online shopping, click on any of the images and you’ll be taken to my Stampin’ Up! online store. If you have any questions, don’t hesitate to ask!
Use the Host Code when placing your online order of $150 or less to receive an extra surprise in your thank you package (orders over $150 will automatically receive it)! If you aren’t sure how to use the host code, click here, for easy directions!
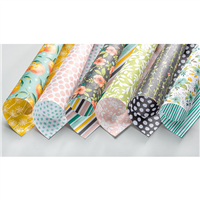
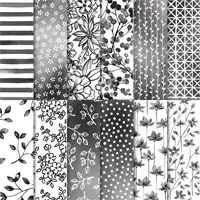
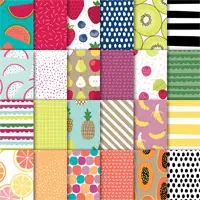
Today’s card is quick & easy and the star is the Tutti Frutti 6″ x 6″Designer Series Paper. Each package of paper comes with 48 sheets with 4 each of 12 double sided designs. Every time I look at this paper I get more excited for summertime fruit!
I used the stamp set Fruit Basketfor the sentiment and cut it out with the Classic Label Punch. After punching it out, I cut one end off, added our Mini Stampin’ Dimensionals to the back and placed it at the edge of the Tutti Frutti paper. A Brights Enamel Shape in red, finished off the card.
Bermuda Bay: 11″ x 4-1/4″ score at 5-1/2″
Whisper White: 3-1/2″ x 4-3/4″ scrap for sentiment
Tutti Frutti Designer Series Paper: 3-1/4″ x 4-1/2″
Here’s another version of the card using the opposite side of the watermelon paper. This time, after punching out the sentiment, I didn’t cut an end off and instead put an enamel shape on both ends.
Thanks for stopping by! If you have any questions, please let me know. When placing a online order under $150, use the host code below and you’ll receive a little extra surprise in your thank you package (orders over $150 will also receive the surprise)!
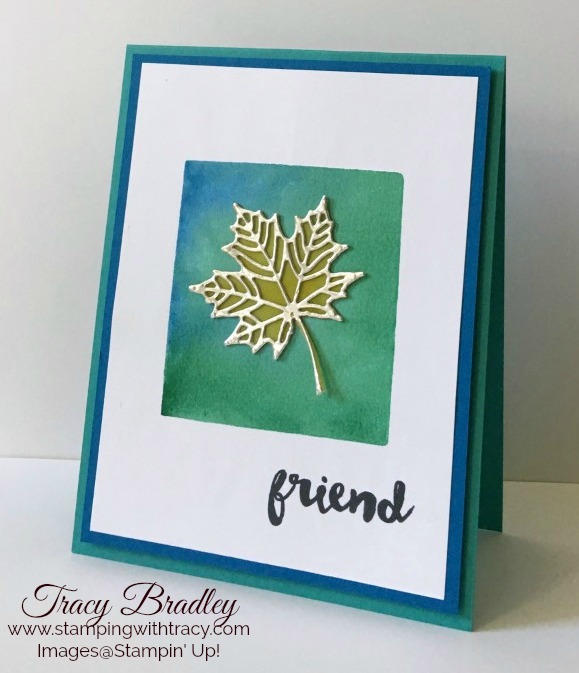
Today’s card is a Joy Fold card and I have a video too! This card is fun because it opens differently than a regular card.
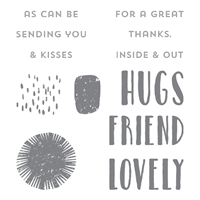
The ribbon helps the card stay closed but it also adds a bit of sparkle! I used Petal Passion Designer Series Paper and the sentiments are from the stamp set Lovely Inside and Out. I used my Stamparatus to line up the word “friend” on my paper. The Stamparatus is the new Stampin’ Up! positioning tool, due out in June, unless you were one of the lucky ones and preordered it last year. I love mine!
Berry Burst: 8-1/2″ x 4-1/4″ (base) 3″ x 8″ score at 4″ (inside panel) scrap for scalloped oval
Basic Black: 2-3/4″ x 3-3/4″ (front piece on small panel) scrap for scalloped oval
Whisper White: 3-3/4″ x 2-3/4″ (inside small panel) 2-1/2″ x 3-1/2″ (sentiment on front panel scrap for sentiment
Designer Series Paper:
2-3/4″ x 4 (left panel)
3-3/4″ x 5″ (inside on the right side of the base)
3-3/4″ x 2-3/4″ (inside on small panel)
All of the supplies I used are listed below. For easy shopping, click on any of the images and you’ll head over to my Stampin’ Up! online store. If you have any questions, don’t hesitate to ask!


