by Tracy | Aug 19, 2025 | Halloween Card, Stampin' Blends
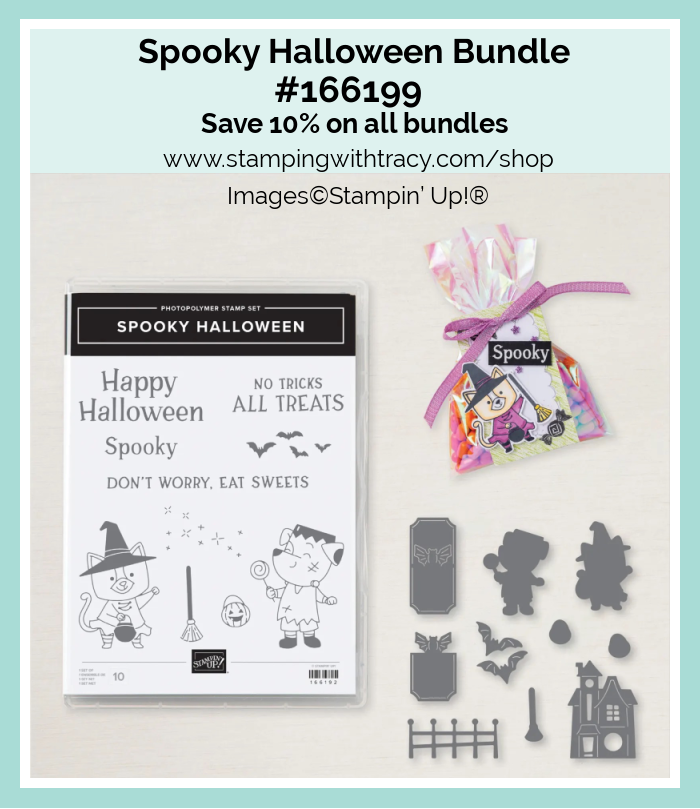
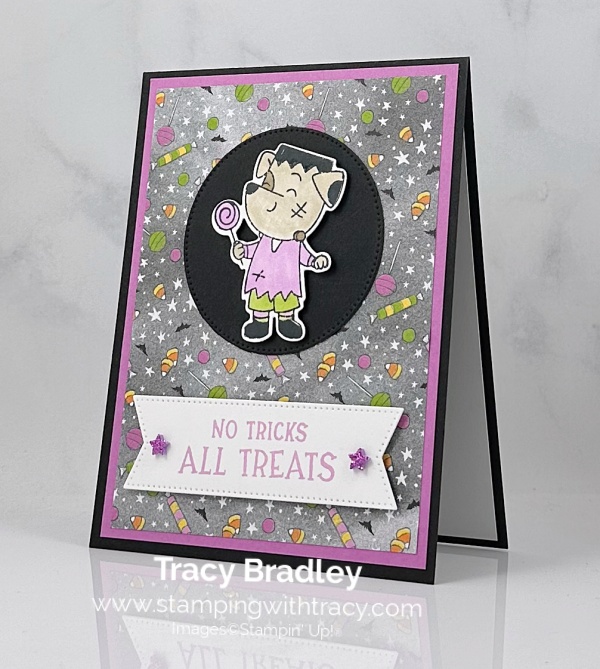
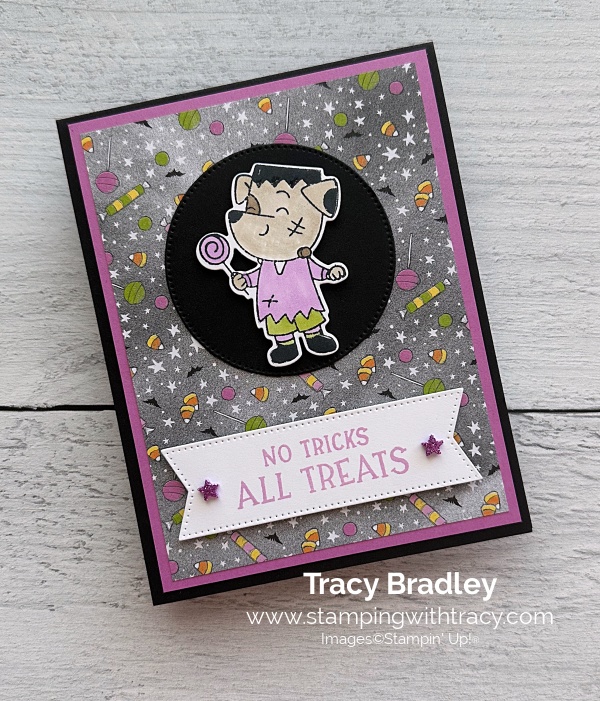
The card I’m sharing with you today was made using the Spooky Halloween Bundle, Spooky Sweet Specialty Designer Series Paper, Stylish Shapes Dies and Shimmer Star Foam Stickers. I also used Stampin’ Blends to color in the cute dog!
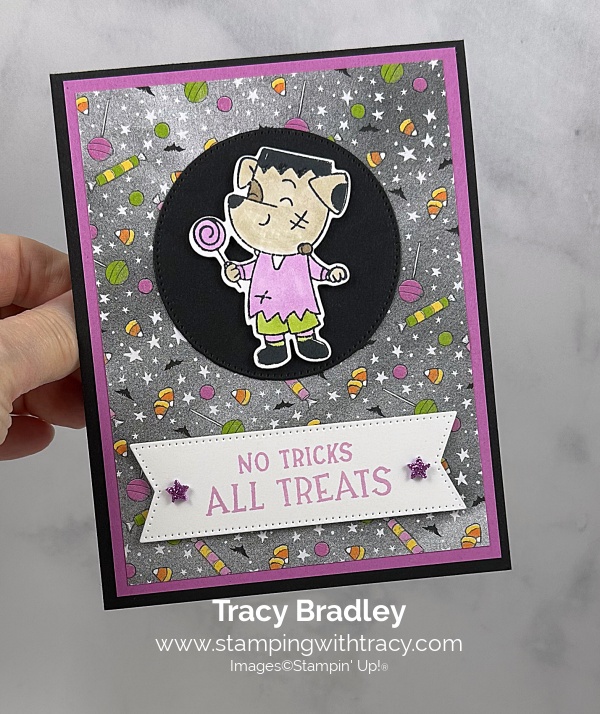
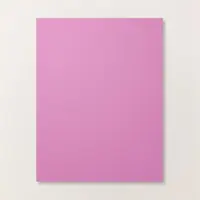
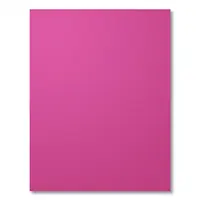
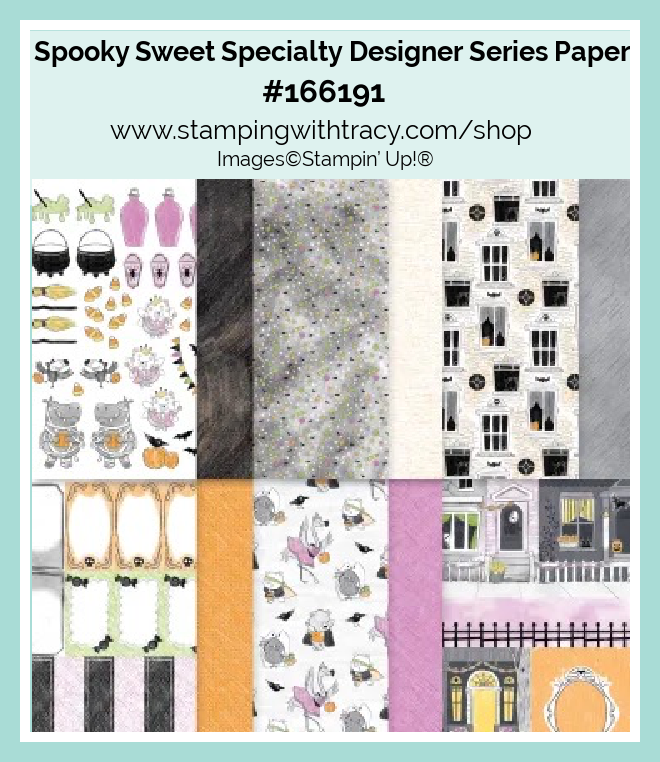
I started with Basic Black cardstock for the base of my card. I layered a piece of Spooky Sweet Specialty Designer Series Paper onto a piece of Petunia Pop cardstock and then adhered it to the card front.
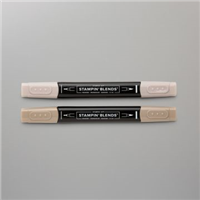
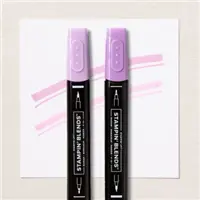
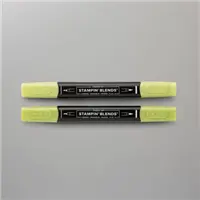
I stamped the dog onto a piece of Basic White cardstock using Memento ink and the Spooky Halloween stamp set. I colored the dog using these Stampin’ Blends: Light & Dark Crumb Cake, Light Petunia Pop and Light Granny Apple Green. I cut the dog out using the Spooky Halloween Dies. Then, I added Stampin’ Dimensionals to the back of the dog.
I used the Stylish Shapes Dies to cut a circle out of Basic Black cardstock (2nd largest circle die). I added the dog to the front of the circle.
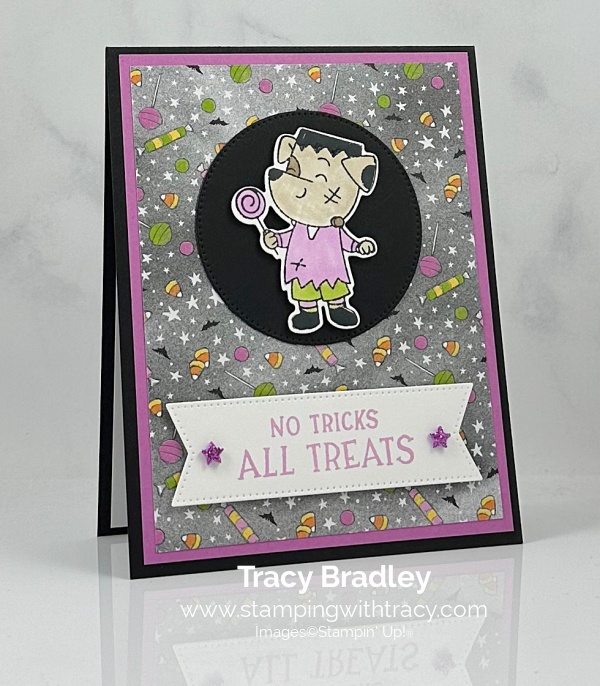

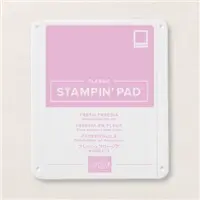
I stamped the sentiment onto Basic White cardstock using the Spooky Halloween stamp set in Fresh Freesia ink. I cut it out using the Stylish Shapes Dies. Then, I added Stampin’ Dimensionals to the back and adhered it to the card front.
To finish my card, I added two Shimmer Star Foam Stickers to each end of the sentiment and I added a piece of Basic White cardstock to the inside of the card.

Supply List
Below you’ll find all the Stampin’ Up! supplies I used for today’s card. If you need any stamping supplies, I’d love to be your demonstrator! You can place an order by clicking any of the images below to go to my Stampin’ Up! online store.
Measurements
- Basic Black cardstock: 4-1/4″ x 11″ scored at 5-1/2″
- Basic Black cardstock (circle): approximately 3″ x 3″
- Petunia Pop cardstock: 4″ x 5-1/4″
- Basic White cardstock (inside card): 4″ x 5-1/4″
- Basic White cardstock (sentiment): approximately 1-1/2″ x 4″
- Basic White cardstock (dog): approximately 2-1/4″ x 2-3/4″
- Spooky Sweet Specialty Designer Series Paper: 3-3/4″ x 5″
In Color Sale

Promotion Details:
- Sale includes 2025-2027 select inks, cardstock, Designer Series Paper, embellishments, and other products that include these new In Colors. The select products will be 15% off!
- Some products are excluded from the sale, including the Month by Month Album Retreat 2025 kit (167338).
- Products are only available while supplies last!
- This sale will end on August 31, 2025.
- Shop the sale here!
Sale-a-Bration To End
We bid a fond farewell to Sale-a-Bration but something is in the works to replace it!
Stampin’ Up! will be offering some of the 2025 Sale-A-Bration items as Last Chance Products!!
- Available Sale-A-Bration items will be sold in the Last Chance Products category and will show a discounted price of the retail value of the item.
- As with all Last Chance products, once the inventory is gone the product will be removed from the online store.
- This sale ends when supplies run out or by September 4, 2025.

Click here to go straight to the Last Chance Products page on the Stampin’ Up! site! Some products are discounted! Many items were added the to the Last Chance Products last week!
Three New Stampin’ Up! Kits
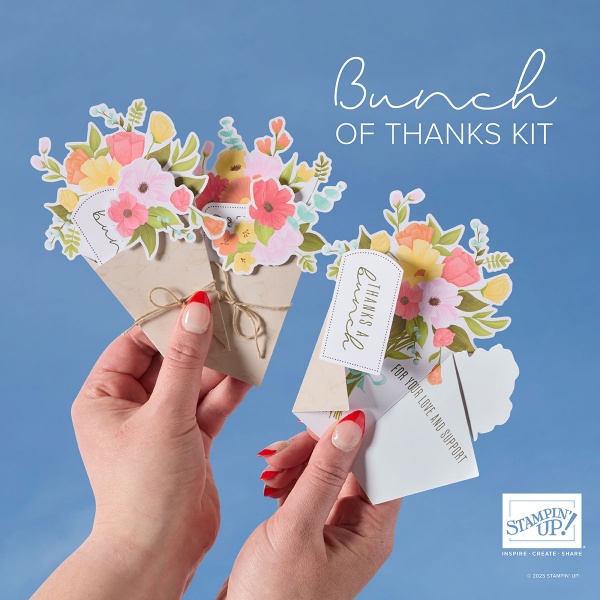
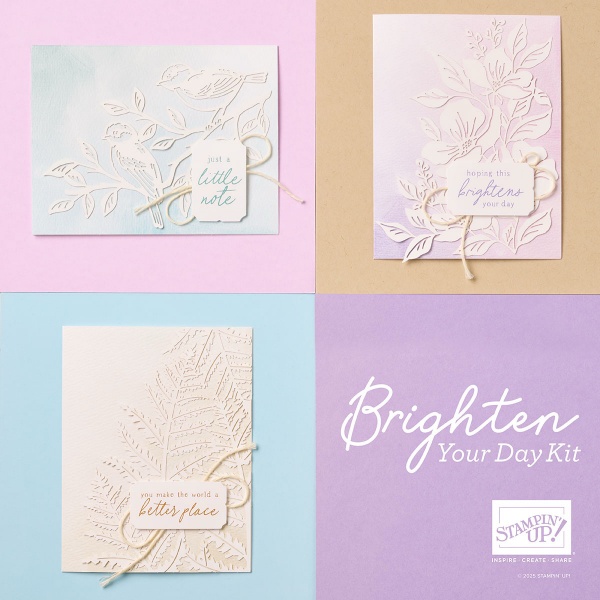
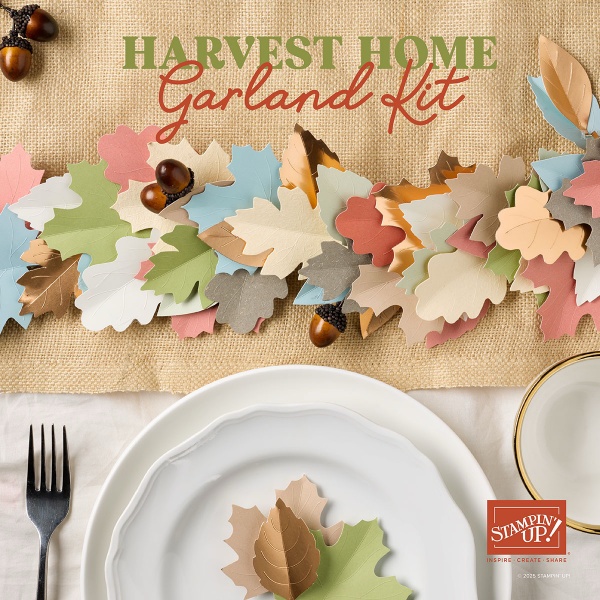
Click each graphic below for more information about the kit. These kits can be found in the Online Exclusives part of the Stampin’ Up! website. The Bunch of Thanks Kit is on sale the month of August!
Fall For Toile Paper Pumpkin Kit – Last Day to Order: September 10th
You can now order subscriptions and manage your Paper Pumpkin subscription on the Stampin’ Up! website! You can cancel your Paper Pumpkin subscription at any time. If you want to skip the next kit, you can do that! You also receive Stampin’ Rewards when you order a single kit or purchase a 3-month, 6-month or 12-month subscription to Paper Pumpkin. If you’d like to subscribe, please click the graphic below.

An additional coordinating add-on is available but only for Paper Pumpkin subscribers. Click the image below for more information.

Thanks for stopping by today!
by Tracy | Aug 15, 2025 | Appreciation Card
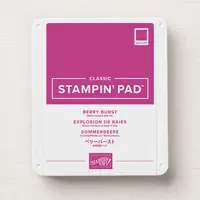
The card I’m sharing with you today was made using Floral Charm Designer Series Paper (this is an Online Exclusive and on sale in the month of August), The Right Words Stamp Set, Stylish Shapes Dies, Eyelet 3D Embossing Folder and Charming Shimmer Faceted Gems (an Online Exclusive).


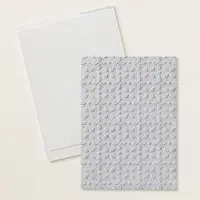
I started with Berry Burst cardstock for the base of my card. Then, I embossed a piece of Basic White cardstock using the Eyelet 3D Embossing Folder and my Stampin’ Cut & Emboss Machine. I adhered the embossed cardstock to the front of my card.


I layered a piece of Floral Charm Designer Series Paper onto a piece of Berry Burst cardstock (you can find the measurements I used below the Supply List). Then, I adhered this piece to the front of the card.
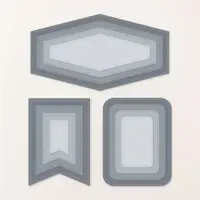
I used the Stylish Shapes Dies to cut another piece of Berry Burst cardstock (the largest square) and layered it with another piece of Floral Charm Designer Series Paper. I used the Stylish Shapes Dies to cut the square ( second largest square) and adhered them together. I added Stampin’ Dimensionals to the back and adhered it to the front of the card.


I stamped the sentiment onto a piece of Basic White cardstock using The Right Words Stamp Set in Berry Burst ink. I cut it out using the 3rd smallest circle in the Stylish Shapes Dies. I added Stampin’ Dimensionals only at the top of the sentiment and adhered it the square.
To complete my card, I added three Charming Shimmer Faceted Dots to the front of the card, and also added a piece of Basic White cardstock to the inside of the card.


Supply List
Below you’ll find all the Stampin’ Up! supplies I used for today’s card. If you need any stamping supplies, I’d love to be your demonstrator! You can place an order by clicking any of the images below to go to my Stampin’ Up! online store.
The Specialty Plate is used with 3D Embossing Folders and Hybrid Embossing Folders.
Sale: $10.63
Price: $12.50
Measurements
- Berry Burst cardstock: 4-1/4” x 11” scored at 5-1/2” OR 8-1/2” x 5-1/2” scored at 4-1/4” – the only difference is how the card opens
- Berry Burst cardstock: 4-1/2″ x 1-1/2″
- Berry Burst cardstock (square): approximately 3-1/4″ x 3-1/4″
- Basic White cardstock (embossed and inside card): (2) 4″ x 5-1/4″
- Basic White cardstock (sentiment): approximately 2″ x 2″
- Floral Charm Designer Series Paper: 1-1/4″ x 4-1/4″
- Floral Charm Designer Series Paper (square): approximately 2-3/4″ x 2-3/4″

Promotion Details:
- Sale includes 2025-2027 select inks, cardstock, Designer Series Paper, embellishments, and other products that include these new In Colors. The select products will be 15% off!
- Some products are excluded from the sale, including the Month by Month Album Retreat 2025 kit (167338).
- Products are only available while supplies last!
- This sale will end on August 31, 2025.
- Shop the sale here!
Sale-a-Bration To End
We bid a fond farewell to Sale-a-Bration but something is in the works to replace it!
Stampin’ Up! will be offering some of the 2025 Sale-A-Bration items as Last Chance Products!!
- Available Sale-A-Bration items will be sold in the Last Chance Products category and will show a discounted price of the retail value of the item.
- As with all Last Chance products, once the inventory is gone the product will be removed from the online store.
- This sale ends when supplies run out or by September 4, 2025.

Click here to go straight to the Last Chance Products page on the Stampin’ Up! site! Some products are discounted! Many items were added the to the Last Chance Products last week!
Three New Stampin’ Up! Kits
Click each graphic below for more information about the kit. These kits can be found in the Online Exclusives part of the Stampin’ Up! website. The Bunch of Thanks Kit is on sale the month of August!


Fall For Toile Paper Pumpkin Kit – Last Day to Order: September 10th
You can now order subscriptions and manage your Paper Pumpkin subscription on the Stampin’ Up! website! You can cancel your Paper Pumpkin subscription at any time. If you want to skip the next kit, you can do that! You also receive Stampin’ Rewards when you order a single kit or purchase a 3-month, 6-month or 12-month subscription to Paper Pumpkin. If you’d like to subscribe, please click the graphic below.

An additional coordinating add-on is available but only for Paper Pumpkin subscribers. Click the image below for more information.

Thanks for stopping by today! Enjoy your weekend!
by Tracy | Aug 14, 2025 | Friend Card
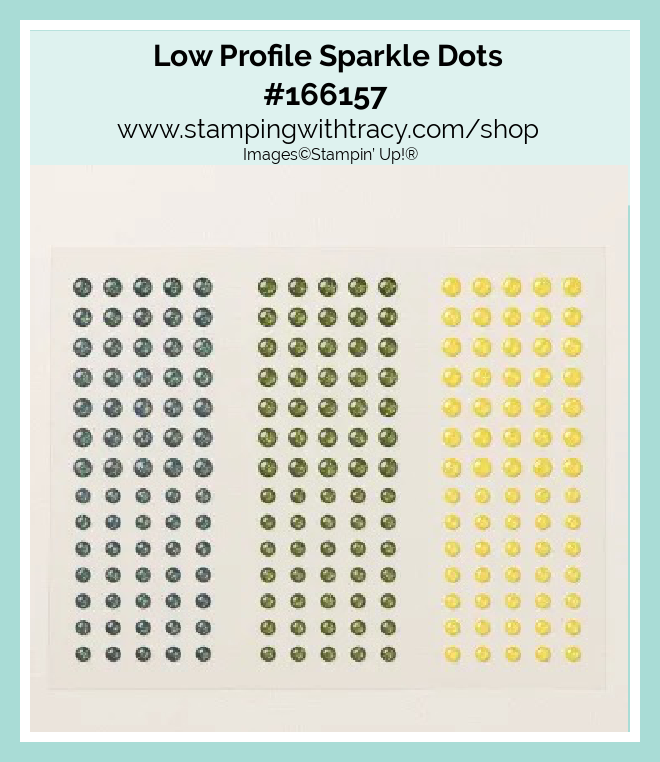
The card I’m sharing with you today is a fun fold card. It’s the same layout of Monday’s card, but I made one tweak. You can see Monday’s card, here. I used Painterly Pears Designer Series Paper (an Online Exclusive and on sale for the month of August), Perfectly Pears Stamp Set (an Online Exclusive), Nested Essentials Dies, Low Profile Sparkle Dots (an Online Exclusive and on sale for the month of August but they are in Low Inventory status).


I started with a base of Darling Duckling cardstock (on sale this month). Then, I scored it (you can find all the measurements I used below the Supply List). I added a piece of Painterly Pears Designer Series Paper to the back panel and one to the front panel.


I cut a piece of Old Olive cardstock and added a panel of Painterly Pears Designer Series Paper to the front (you’ll need to look at the picture to see how it goes on the card). I also added a piece of Basic White cardstock to the inside of the Old Olive panel.
I then used Multipurpose Glue to adhered the Old Olive piece to the inside of the card (the front flap will go in the front).


I stamped the sentiment onto Basic White cardstock using the Perfectly Pears Stamp Set in Old Olive ink. I cut it out using the Nested Essentials Dies using the smallest rectangular die in the set. I cut the next larger size rectangle in Old Olive cardstock and adhered the sentiment to the front. I added Stampin’ Dimensionals to the back and adhered it to the bottom right of the Old Olive flap. I did the sentiment there because I didn’t want to cover up the beautiful paper. To complete my card I added three Low Profile Sparkle Dots in Mossy Meadow to the front panel.

Supply List
Below you’ll find all the Stampin’ Up! supplies I used for today’s card. If you need any stamping supplies, I’d love to be your demonstrator! You can place an order by clicking any of the images below to go to my Stampin’ Up! online store.
Sale: $10.63
Price: $12.50
Sale: $11.90
Price: $14.00
Bundle Alert: The Perfectly Pears Bundle is available with a 10% discount rather than buying the products separately. This bundle is an Online Exclusive.

Measurements
- Darling Duckling cardstock: 8-1/2″ x 4-1/4″ score at 3″
- Old Olive cardstock: 8″ x 3″ score at 4″
- Old Olive cardstock (under sentiment): approximately 2-5/8″ x 1-7/8″
- Basic White cardstock (sentiment): approximately 2-1/4″ x 1-1/2″
- Basic White cardstock (inside front flap): 3-3/4″ x 2-3/4″
- Painterly Pears Designer Series Paper (left panel): 2-3/4″ x 4″
- Painterly Pears Designer Series Paper (front of Old Olive cardstock): 3-3/4″ x 2-3/4″
- Painterly Pears Designer Series Paper (back panel): 5-1/4″ x 4″

Promotion Details:
- Sale includes 2025-2027 select inks, cardstock, Designer Series Paper, embellishments, and other products that include these new In Colors. The select products will be 15% off!
- Some products are excluded from the sale, including the Month by Month Album Retreat 2025 kit (167338).
- Products are only available while supplies last!
- This sale will end on August 31, 2025.
- Shop the sale here!
Sale-a-Bration To End
We bid a fond farewell to Sale-a-Bration but something is in the works to replace it!
Stampin’ Up! will be offering some of the 2025 Sale-A-Bration items as Last Chance Products!!
- Available Sale-A-Bration items will be sold in the Last Chance Products category and will show a discounted price of the retail value of the item.
- As with all Last Chance products, once the inventory is gone the product will be removed from the online store.
- This sale ends when supplies run out or by September 4, 2025.

Click here to go straight to the Last Chance Products page on the Stampin’ Up! site! Some products are discounted! Many items were added the to the Last Chance Products last week!
Three New Stampin’ Up! Kits
Click each graphic below for more information about the kit. These kits can be found in the Online Exclusives part of the Stampin’ Up! website. The Bunch of Thanks Kit is on sale the month of August!


Fall For Toile Paper Pumpkin Kit – Last Day to Order: September 10th
You can now order subscriptions and manage your Paper Pumpkin subscription on the Stampin’ Up! website! You can cancel your Paper Pumpkin subscription at any time. If you want to skip the next kit, you can do that! You also receive Stampin’ Rewards when you order a single kit or purchase a 3-month, 6-month or 12-month subscription to Paper Pumpkin. If you’d like to subscribe, please click the graphic below.

An additional coordinating add-on is available but only for Paper Pumpkin subscribers. Click the image below for more information.

Thanks for stopping by today!
by Tracy | Aug 11, 2025 | Birthday Card
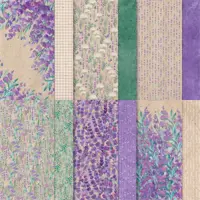
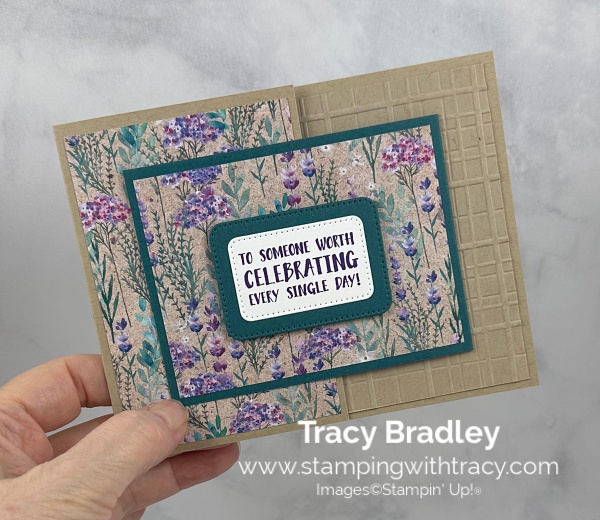
The fun fold card I’m sharing with you today was made using the Right Words Stamp Set, Perennial Lavender Designer Series Paper, Nested Essentials Dies and the Forever Plaid 3D Embossing Folder. Purple is my favorite color so you can imagine I love Perennial Lavender Designer Series Paper!
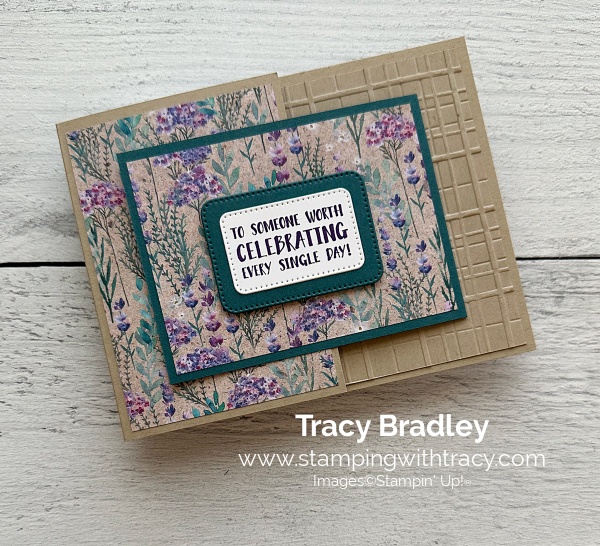

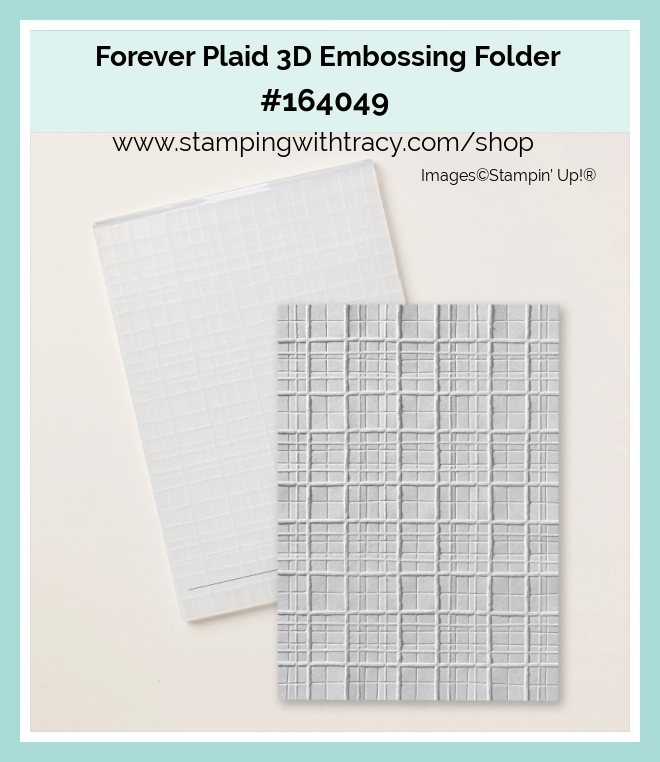
I started off with a Crumb Cake cardstock base (you can find the measurements I used below the Supply List). I embossed another piece of Crumb Cake cardstock using the Forever Plaid 3D Embossing Folder and my Stampin’ Cut & Emboss Machine. I adhered it to the back panel.
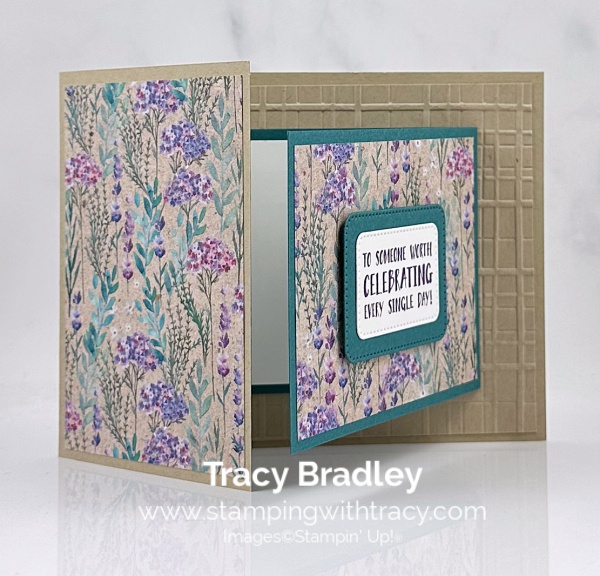
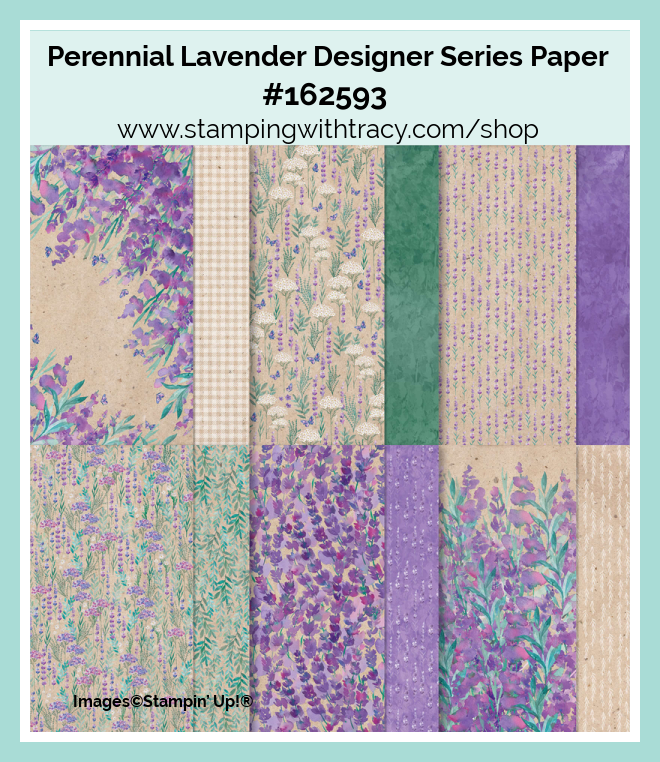
I cut a piece of Pretty Peacock cardstock and scored it in the middle. I cut two pieces of Perennial Lavender Designer Series Paper and adhered one to the outside panel and another one to the front of Pretty Peacock cardstock (when you have the Pretty Peacock cardstock laid out, it will go on the left side). I then adhered the Pretty Peacock cardstock to the inside of the card making sure the flap is on the outside of the card.
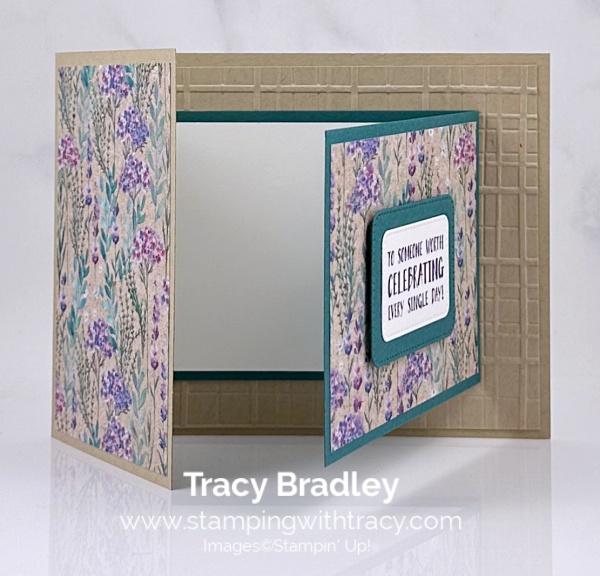

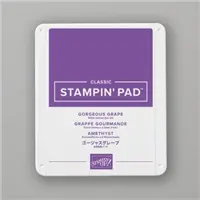
I stamped the sentiment onto Basic White cardstock using The Right Words stamp set in Gorgeous Grape ink. I cut it out using the smallest rectangle in the Nested Essentials Dies. I used the next larger one to cut a piece of Pretty Peacock cardstock. I adhered the sentiment to the front of the Pretty Peacock rectangle, added Stampin’ Dimensionals to the back and adhered it to the front flap.
To complete my card, I added a piece of Basic White cardstock to the inside.
Supply List
Below you’ll find all the Stampin’ Up! supplies I used for today’s card. If you need any stamping supplies, I’d love to be your demonstrator! You can place an order by clicking any of the images below to go to my Stampin’ Up! online store.
The Specialty Plate is used with 3D Embossing Folders and Hybrid Embossing Folders.
Measurements
- Crumb Cake cardstock: 8-1/2″ x 4-1/4″ score at 3″
- Crumb Cake cardstock (embossed): 5-1/4″ x 4″
- Pretty Peacock cardstock: 8″ x 3″ score at 4″
- Pretty Peacock cardstock (under sentiment): approximately 2-5/8″ x 1-7/8″
- Basic White cardstock (sentiment): approximately 2-1/4″ x 1-1/2″
- Basic White cardstock (inside front flap): 3-3/4″ x 2-3/4″
- Perennial Lavender Designer Series Paper (left panel): 2-3/4″ x 4″
- Perennial Lavender Designer Series Paper (front of Pretty Peacock cardstock): 3-3/4″ x 2-3/4″

Promotion Details:
- Sale includes 2025-2027 select inks, cardstock, Designer Series Paper, embellishments, and other products that include these new In Colors. The select products will be 15% off!
- Some products are excluded from the sale, including the Month by Month Album Retreat 2025 kit (167338).
- Products are only available while supplies last!
- This sale will end on August 31, 2025.
- Shop the sale here!
Sale-a-Bration To End
We bid a fond farewell to Sale-a-Bration but something is in the works to replace it!
Stampin’ Up! will be offering some of the 2025 Sale-A-Bration items as Last Chance Products!!
- Available Sale-A-Bration items will be sold in the Last Chance Products category and will show a discounted price of the retail value of the item.
- As with all Last Chance products, once the inventory is gone the product will be removed from the online store.
- This sale ends when supplies run out or by September 4, 2025.

Click here to go straight to the Last Chance Products page on the Stampin’ Up! site! Some products are discounted! Many items were added the to the Last Chance Products last week!
Three New Stampin’ Up! Kits
Click each graphic below for more information about the kit. These kits can be found in the Online Exclusives part of the Stampin’ Up! website.


Fall For Toile Paper Pumpkin Kit – Last Day to Order: September 10th
You can now order subscriptions and manage your Paper Pumpkin subscription on the Stampin’ Up! website! You can cancel your Paper Pumpkin subscription at any time. If you want to skip the next kit, you can do that! You also receive Stampin’ Rewards when you order a single kit or purchase a 3-month, 6-month or 12-month subscription to Paper Pumpkin. If you’d like to subscribe, please click the graphic below.

An additional coordinating add-on is available but only for Paper Pumpkin subscribers. Click the image below for more information.

Thanks for stopping by today!
by Tracy | Aug 8, 2025 | Appreciation Card
The card I’m sharing with you today was made using the Pattern of Friendship Stamp Set (on the Last Chance List), Floral Charm Designer Series Paper (which is part of the In Color Sale), Sentimental Framing Dies, Eyelet 3D Embossing Folder, and 2025-2027 In Color Pearls (part of the In Color Sale).
I did this layout several weeks ago but I had to get a Timid Tiger stamp pad to complete today’s card (which is on sale for the month of August). You can see the two cards HERE and HERE.


I started with a piece of Timid Tiger cardstock for the base of my card. Then, I embossed a piece of Basic White cardstock using the Eyelet 3D Embossing Folder and my Stampin’ Cut & Emboss Machine. Next, I adhered the embossed Basic White cardstock to the front of the card.


I layered a piece of Timid Tiger cardstock with Floral Charm Designer Series Paper and then adhered it to the front of the card. I stamped the sentiment onto Basic White cardstock using the Pattern of Friendship stamp set in Timid Tiger ink. I cut it out using the Sentimental Framing Dies, added Stampin’ Dimensionals to the back and adhered it to the front of the card.


To complete my card, I added three 2025-2027 In Color Flat Pearls in Timid Tiger to the front of the card and I added a piece of Basic White cardstock to the inside.


Supply List
Below you’ll find all the Stampin’ Up! supplies I used for today’s card. If you need any stamping supplies, I’d love to be your demonstrator! You can place an order by clicking any of the images below to go to my Stampin’ Up! online store.
The Specialty Plate is used with 3D Embossing Folders and Hybrid Embossing Folders.
Sale: $16.20
Price: $18.00
Sale: $10.63
Price: $12.50
Sale: $11.90
Price: $14.00
Bundle Alert: The Sentimental Framing Bundle is available with a 10% discount rather than buying the products separately.

Measurements
- Timid Tiger cardstock: 5-1/2″ x 8-1/2″
- Timid Tiger cardstock: 3″ x 3-3/4″
- Basic White cardstock (embossed and inside card): (2) 5-1/4″ x 4″
- Basic White cardstock (sentiment): approximately 1-1/2″ x 2-3/4″
- Floral Charm Designer Series Paper: 2-3/4″ x 3-1/2″

Promotion Details:
- Sale includes 2025-2027 select inks, cardstock, Designer Series Paper, embellishments, and other products that include these new In Colors. The select products will be 15% off!
- Some products are excluded from the sale, including the Month by Month Album Retreat 2025 kit (167338).
- Products are only available while supplies last!
- This sale will end on August 31, 2025.
- Shop the sale here!
Sale-a-Bration To End
We bid a fond farewell to Sale-a-Bration but something is in the works to replace it!
Stampin’ Up! will be offering some of the 2025 Sale-A-Bration items as Last Chance Products!!
- Available Sale-A-Bration items will be sold in the Last Chance Products category and will show a discounted price of the retail value of the item.
- As with all Last Chance products, once the inventory is gone the product will be removed from the online store.
- This sale ends when supplies run out or by September 4, 2025.
Last Chance Products

Click here to go straight to the Last Chance Products page on the Stampin’ Up! site! Some products are discounted!
Three New Stampin’ Up! Kits
Click each graphic below for more information about the kit. These kits can be found in the Online Exclusives part of the Stampin’ Up! website.


Farmhouse Florals Paper Pumpkin Kit – Last Day to Order: August 10th
You can now order subscriptions and manage your Paper Pumpkin subscription on the Stampin’ Up! website! You can cancel your Paper Pumpkin subscription at any time. If you want to skip the next kit, you can do that! You also receive Stampin’ Rewards when you order a single kit or purchase a 3-month, 6-month or 12-month subscription to Paper Pumpkin. If you’d like to subscribe, please click the graphic below.

An additional coordinating add-on is available but only for Paper Pumpkin subscribers. Click the image below for more information.

Thanks for stopping by today! Enjoy your weekend!
by Tracy | Aug 6, 2025 | Appreciation Card
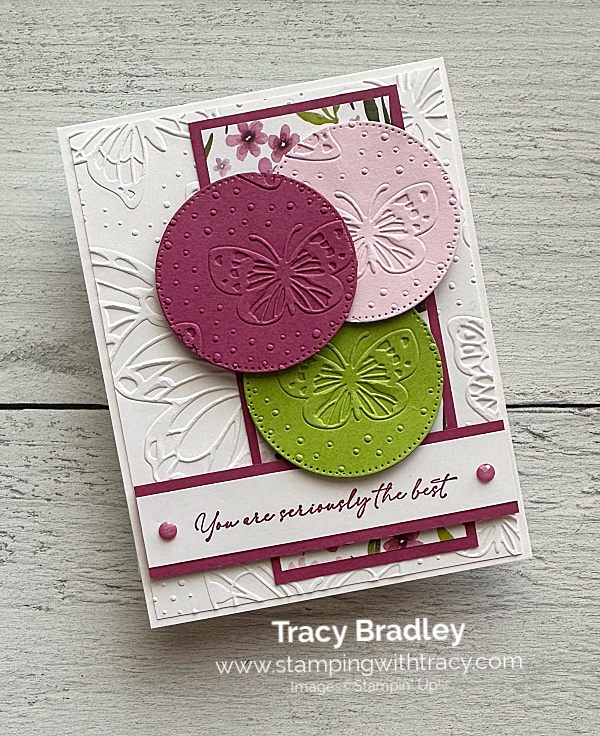
The card I’m sharing with you today was made using the Textured Notes Stamp Set (an Online Exclusive), Celebratory Sips Designer Series Paper (an Online Exclusive), Stylish Shapes Dies, Beautiful Butterflies Hybrid Embossing Folder (an Online Exclusive) and Charming Shimmer Faceted Dots (an Online Exclusive).

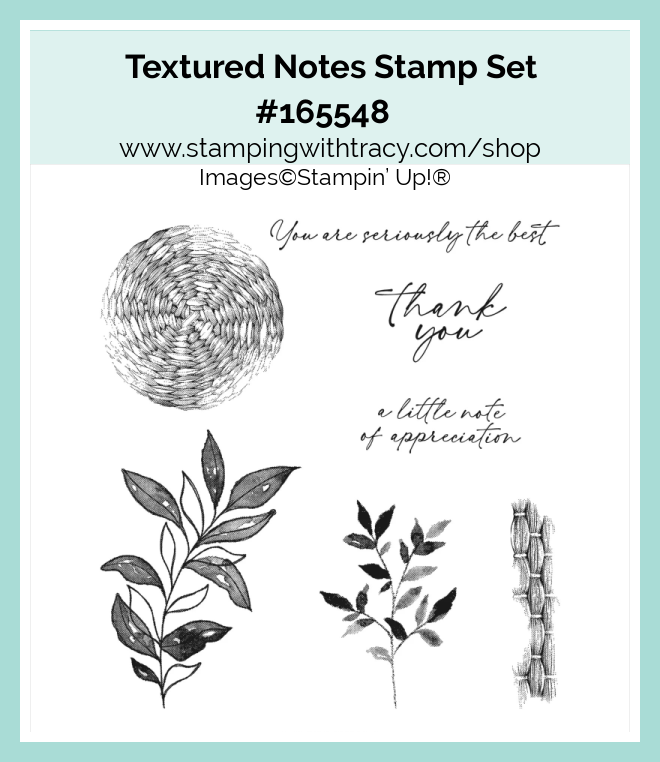
I started with a piece of Thick Basic White cardstock (can be found in Online Exclusives) for the base of my card. Then, I embossed a piece of Basic White cardstock using the Beautiful Butterflies Hybrid Embossing Folder and my Stampin’ Cut & Emboss Machine. Next, I adhered it to the front of the card.
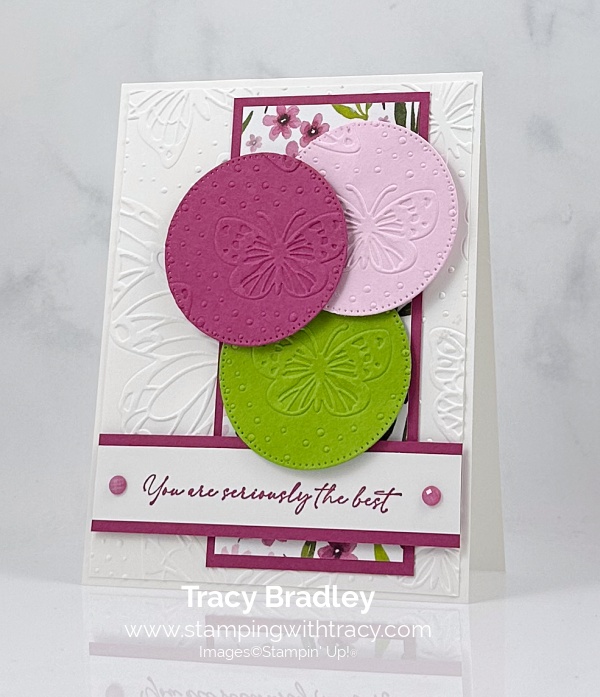
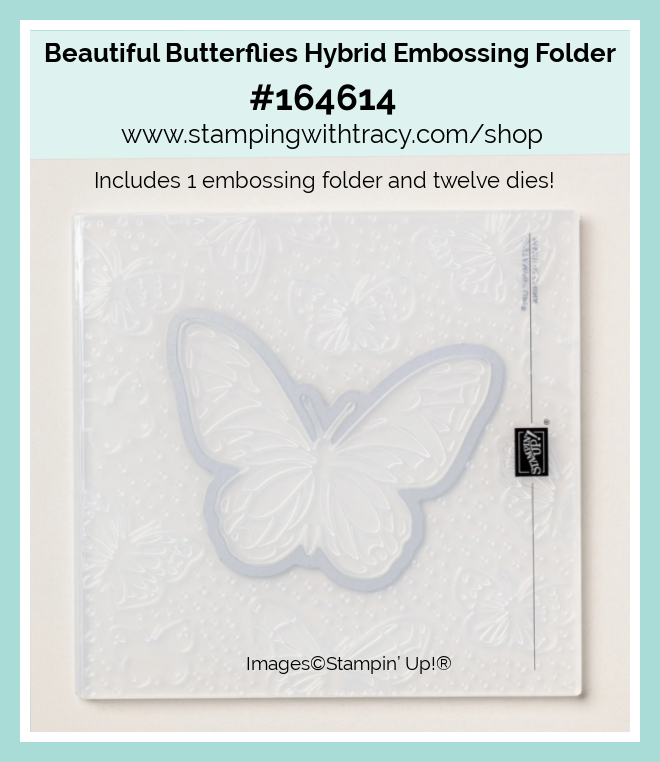

I layered a piece of Berry Burst cardstock with Celebratory Sips Designer Series Paper and adhered it to the front of the card. I cut three circles (using the third largest die in the Stylish Shapes Dies) out of Berry Burst, Bubble Bath and Granny Apple Green cardstock. I then embossed them using the Beautiful Butterflies Hybrid Embossing Folder. I popped the circles up using Stampin’ Dimensionals.
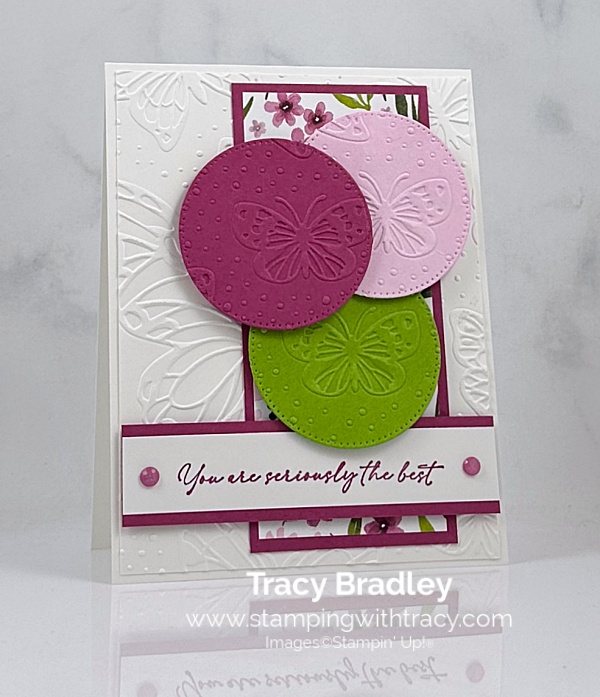

I stamped the sentiment onto Basic White cardstock using the Textured Notes stamp set in Berry Burst ink. I layered the sentiment onto a piece of Berry Burst cardstock. Then, I added Stampin’ Dimensionals on to the back and adhered it to the front of the card.
To complete my card, I added two Berry Burst Charming Shimmer Faceted Dots to each end of the sentiment.

Supply List
Below you’ll find all the Stampin’ Up! supplies I used for today’s card. If you need any stamping supplies, I’d love to be your demonstrator! You can place an order by clicking any of the images below to go to my Stampin’ Up! online store.
The Specialty Plate is used with 3D Embossing Folders and Hybrid Embossing Folders.
Sale: $10.63
Price: $12.50
Bundle Alert: The Beautiful Butterflies Bundle is available with a 10% discount rather than buying the products separately.

Bundle Alert: The Textured Notes Bundle is available with a 10% discount rather than buying the products separately.

Measurements
- Thick Basic White cardstock: 11″ x 4-1/4″ score at 5-1/2″
- Basic White cardstock: 4″ x 5-1/4″
- Basic White cardstock (sentiment): 4″ x 3/4″
- Berry Burst cardstock: 2-1/4″ x 5″
- Berry Burst cardstock (under sentiment): 4″ x 1″
- Berry Burst, Bubble Bath & Granny Apple Green cardstock (circles): approximately 2-1/2″ x 2-1/2″
- Celebratory Sips Designer Series Paper: 2″ x 4-3/4″

Select In Color products will be on sale running through August 31st!
Promotion Details:
- Sale includes 2025-2027 select inks, cardstock, Designer Series Paper, embellishments, and other products that include these new In Colors. The select products will be 15% off!
- Some products are excluded from the sale, including the Month by Month Album Retreat 2025 kit (167338).
- Products are only available while supplies last!
- This sale will end on August 31, 2025.
- Shop the sale here!
Sale-a-Bration To End
We bid a fond farewell to Sale-a-Bration but something is in the works to replace it!
Stampin’ Up! will be offering some of the 2025 Sale-A-Bration items as Last Chance Products!
- Available Sale-A-Bration items will be sold in the Last Chance Products category and will show a discounted price of the retail value of the item.
- As with all Last Chance products, once the inventory is gone the product will be removed from the online store.
- This sale ends when supplies run out or by September 4, 2025.
BACK-TO-SCHOOL SALES TAX HOLIDAY
The 2025 back-to-school sales tax holiday season begins this weekend and there are thirteen states and Puerto Rico offering a sales tax holiday for school supplies during the months of July and August. Products that are eligible according to the statute include “items normally used by students in a standard classroom for educational purposes.” To see the names of participating states, products exempted from tax, and sales tax holiday dates, click here.
Please note: you must place your order with Stampin’ Up! during the tax holiday period to receive these items tax-free (which is midnight on the first day to midnight on the last day of the tax holiday). Also, keep in mind that this is a state sales tax holiday; the state statute may not apply to county, city, and special jurisdiction taxes.
Please note that Georgia, Illinois, Louisiana, New Jersey, and Wisconsin have suspended the sales tax holiday this year.
Last Chance Products

Click here to go straight to the Last Chance Products page on the Stampin’ Up! site! Some products are discounted!
Three New Stampin’ Up! Kits
Click each graphic below for more information about the kit. These kits can be found in the Online Exclusives part of the Stampin’ Up! website.


Farmhouse Florals Paper Pumpkin Kit – Last Day to Order: August 10th
You can now order subscriptions and manage your Paper Pumpkin subscription on the Stampin’ Up! website! You can cancel your Paper Pumpkin subscription at any time. If you want to skip the next kit, you can do that! You also receive Stampin’ Rewards when you order a single kit or purchase a 3-month, 6-month or 12-month subscription to Paper Pumpkin. If you’d like to subscribe, please click the graphic below.

An additional coordinating add-on is available but only for Paper Pumpkin subscribers. Click the image below for more information.

Thanks for stopping by today!
by Tracy | Aug 5, 2025 | Sale Today
Two sales start today! Yahoo!!!

Today, select In Color products will be on sale running through August 31st!
Promotion Details:
- Sale includes 2025-2027 select inks, cardstock, Designer Series Paper, embellishments, and other products that include these new In Colors. The select products will be 15% off!
- Some products are excluded from the sale, including the Month by Month Album Retreat 2025 kit (167338).
- Products are only available while supplies last!
- This sale will end on August 31, 2025.
- Shop the sale here!
Sale-a-Bration To End
We bid a fond farewell to Sale-a-Bration but something is in the works to replace it!
Stampin’ Up! will be offering some of the 2025 Sale-A-Bration items as Last Chance Products beginning today, August 5th! The Last Chance Products will be updated today, too!
- Available Sale-A-Bration items will be sold in the Last Chance Products category and will show a discounted price of the retail value of the item.
- As with all Last Chance products, once the inventory is gone the product will be removed from the online store.
- This sale ends when supplies run out or by September 4, 2025.
BACK-TO-SCHOOL SALES TAX HOLIDAY
The 2025 back-to-school sales tax holiday season begins this weekend and there are thirteen states and Puerto Rico offering a sales tax holiday for school supplies during the months of July and August. Products that are eligible according to the statute include “items normally used by students in a standard classroom for educational purposes.” To see the names of participating states, products exempted from tax, and sales tax holiday dates, click here.
Please note: you must place your order with Stampin’ Up! during the tax holiday period to receive these items tax-free (which is midnight on the first day to midnight on the last day of the tax holiday). Also, keep in mind that this is a state sales tax holiday; the state statute may not apply to county, city, and special jurisdiction taxes.
Please note that Georgia, Illinois, Louisiana, New Jersey, and Wisconsin have suspended the sales tax holiday this year.
Last Chance Products

Click here to go straight to the Last Chance Products page on the Stampin’ Up! site! Some products are discounted!
Three New Stampin’ Up! Kits
Click each graphic below for more information about the kit. These kits can be found in the Online Exclusives part of the Stampin’ Up! website.


Farmhouse Florals Paper Pumpkin Kit – Last Day to Order: August 10th
You can now order subscriptions and manage your Paper Pumpkin subscription on the Stampin’ Up! website! You can cancel your Paper Pumpkin subscription at any time. If you want to skip the next kit, you can do that! You also receive Stampin’ Rewards when you order a single kit or purchase a 3-month, 6-month or 12-month subscription to Paper Pumpkin. If you’d like to subscribe, please click the graphic below.

An additional coordinating add-on is available but only for Paper Pumpkin subscribers. Click the image below for more information.

Thanks for stopping by today!
by Tracy | Aug 4, 2025 | Encouraging Card
Be sure to look farther down in the post for two sales that begin on Tuesday, August 5th!
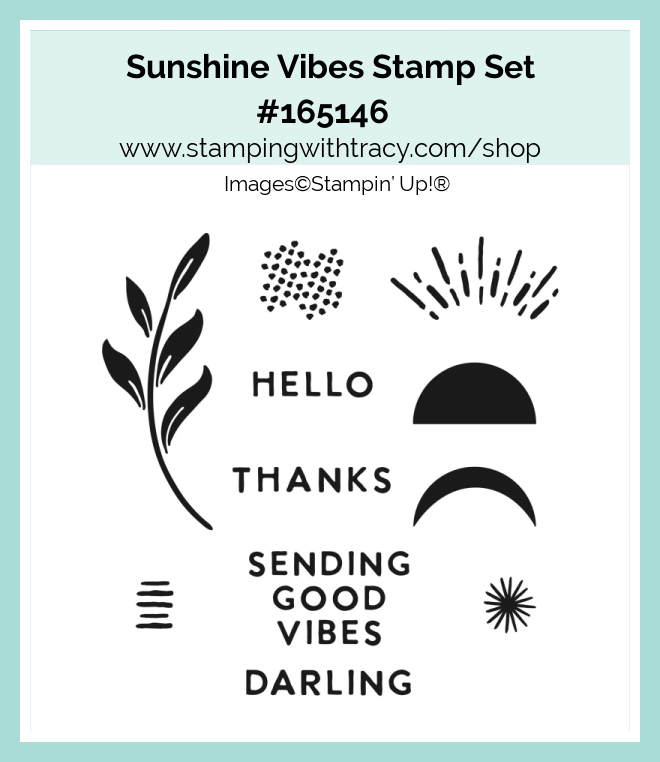
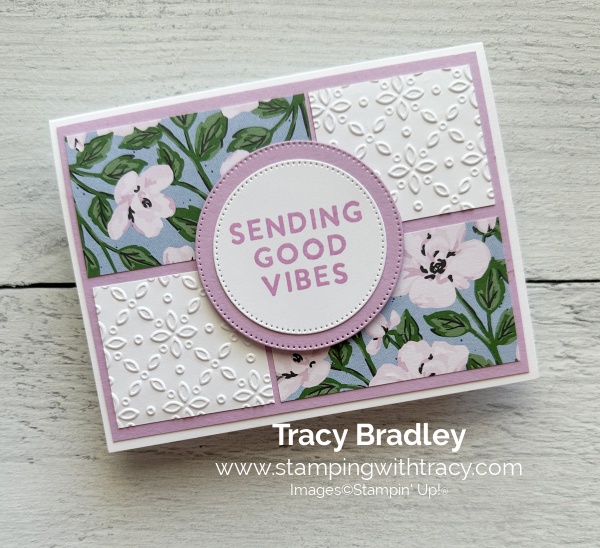
The card I’m sharing with you today was made using the same layout as Friday’s card. You can see Friday’s card here. But I did make one tweak to the embossed Basic White squares (I made them a bit larger). I used the Sunshine Vibes stamp set, Lovely Garden Designer Series Paper (an Online Exclusive), Stylish Shapes Dies and the Eyelet 3D Embossing Folder.
If the links don’t work, please try again!
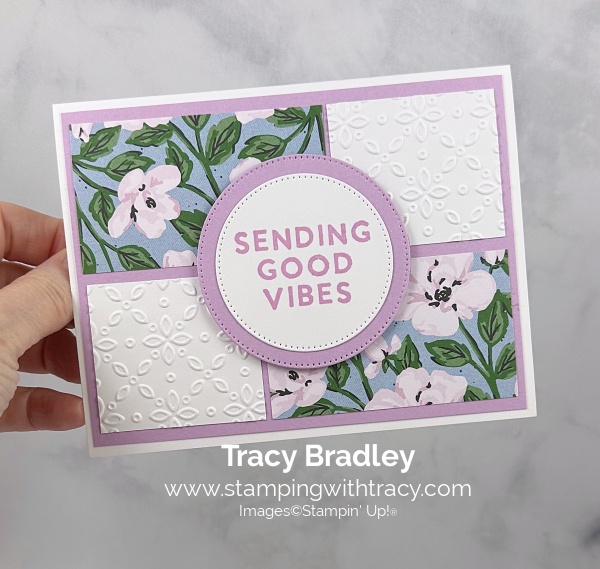
I started with a piece of Thick Basic White cardstock (an Online Exclusive) for the base of my card.
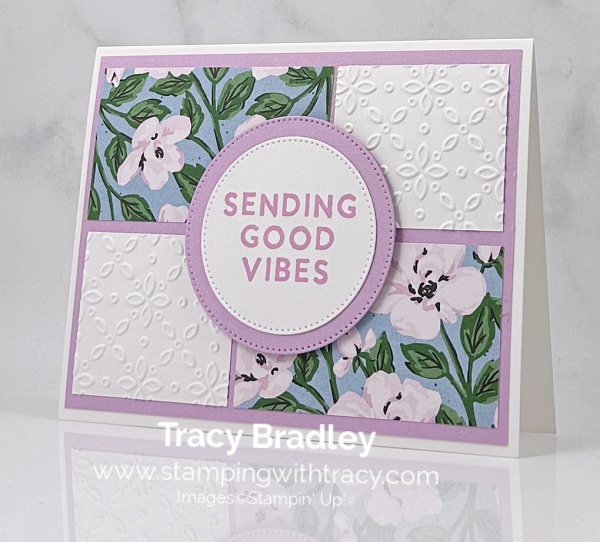

I cut a piece of Fresh Freesia cardstock and set it aside. I cut two pieces of Lovely Garden Designer Series Paper and two pieces of Basic White cardstock (if you didn’t notice at the top of the post, I changed the measurements for the Basic White cardstock from Friday’s card). I embossed the Basic White cardstock using the Eyelet 3D Embossing Folder and my Stampin’ Cut & Emboss Machine. I adhered the four pieces to the front of the Fresh Freesia cardstock.
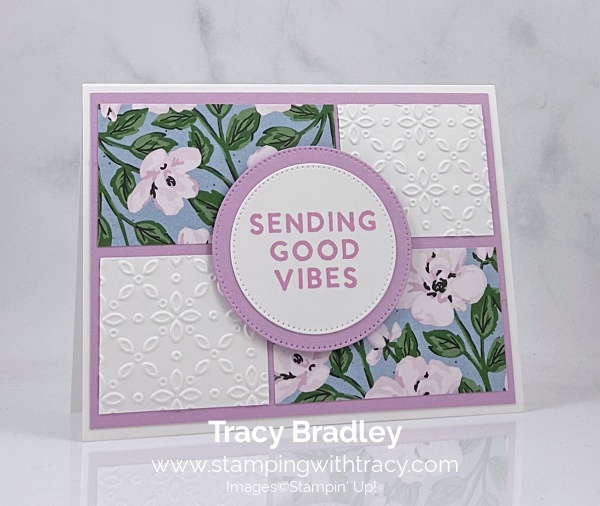

Next, I stamped the sentiment onto Basic White cardstock using the Sunshine Vibes stamp set in Fresh Freesia ink. I cut it out using the Stylish Shapes Dies using the third largest circle die. Then, I cut a Fresh Freesia circle using the second largest circle die. I adhered the sentiment to the front of the Fresh Freesia circle, added Stampin’ Dimensionals to the back and adhered it to the front of the card.

Supply List
Below you’ll find all the Stampin’ Up! supplies I used for today’s card. If you need any stamping supplies, I’d love to be your demonstrator! You can place an order by clicking any of the images below to go to my Stampin’ Up! online store.
The Specialty Plate is used with 3D Embossing Folders and Hybrid Embossing Folders.
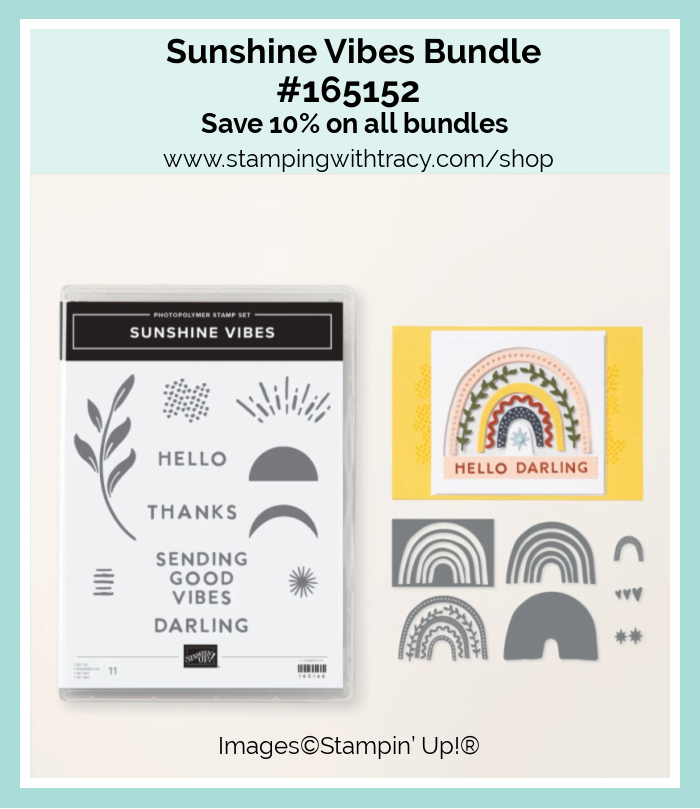
Bundle Alert: The Sunshine Vibes Bundle is available with a 10% discount rather than buying the products separately.
Measurements
- Thick Basic White cardstock: 8-1/2″ x 5-1/2″ score at 4-1/4″
- Fresh Freesia cardstock: 5-1/4″ x 4″
- Fresh Freesia cardstock (under sentiment): approximately 3″ x 3″
- Basic White cardstock (embossed): (2) 2″ x 1-3/4″
- Basic White cardstock (sentiment): approximately 2-1/2″ x 2-1/2″
- Lovely Garden Designer Series Paper: (2) 3″ x 1-3/4″

Starting tomorrow, August 5th, select In Color 2025-2027 products will be on sale!
Promotion Details:
- Sale includes 2025-2027 select inks, cardstock, Designer Series Paper, embellishments, and other products that include these new In Colors. The select products will be 15% off!
- Some products are excluded from the sale, including the Month by Month Album Retreat 2025 kit (167338).
- Products are only available while supplies last!
- This sale will end on August 31, 2025.
Sale-a-Bration To End
We bid a fond farewell to Sale-a-Bration but something is in the works to replace it! Stampin’ Up! will be offering some of the 2025 Sale-A-Bration items as Last Chance Products beginning August 5, 2025
- Available Sale-A-Bration items will be sold in the Last Chance Products category and will show a discounted price of the retail value of the item.
- As with all Last Chance products, once the inventory is gone the product will be removed from the online store.
- This begins on August 5, 2025!
Hurry to get your hands on part of this Stampin’ Up! legacy. The retirement party will end when supplies run out or by September 4, 2025.
BACK-TO-SCHOOL SALES TAX HOLIDAY
The 2025 back-to-school sales tax holiday season begins this weekend and there are thirteen states and Puerto Rico offering a sales tax holiday for school supplies during the months of July and August. Products that are eligible according to the statute include “items normally used by students in a standard classroom for educational purposes.” To see the names of participating states, products exempted from tax, and sales tax holiday dates, click here.
Please note: you must place your order with Stampin’ Up! during the tax holiday period to receive these items tax-free (which is midnight on the first day to midnight on the last day of the tax holiday). Also, keep in mind that this is a state sales tax holiday; the state statute may not apply to county, city, and special jurisdiction taxes.
Please note that Georgia, Illinois, Louisiana, New Jersey, and Wisconsin have suspended the sales tax holiday this year.
Last Chance Products

Click here to go straight to the Last Chance Products page on the Stampin’ Up! site! Some products are discounted!
Two New Stampin’ Up! Kits
Click each graphic below for more information about the kit. These kits can be found in the Online Exclusives part of the Stampin’ Up! website.


Farmhouse Florals Paper Pumpkin Kit – Last Day to Order: August 10th
You can now order subscriptions and manage your Paper Pumpkin subscription on the Stampin’ Up! website! You can cancel your Paper Pumpkin subscription at any time. If you want to skip the next kit, you can do that! You also receive Stampin’ Rewards when you order a single kit or purchase a 3-month, 6-month or 12-month subscription to Paper Pumpkin. If you’d like to subscribe, please click the graphic below.

An additional coordinating add-on is available but only for Paper Pumpkin subscribers. Click the image below for more information.

Thanks for stopping by today!
by Tracy | Aug 1, 2025 | Thinking of You Card

Before I share my card with you today, I wanted to let you know that starting August 5, select products that feature the new 2025–2027 In Colors™ are 15% off! This is a great opportunity to purchase new In Color products at a discount, so grab products you love—like ink, two-tone cardstock, and Designer Series Paper—and get everything you need to create projects that showcase Stampin’ Up!’s amazing color coordination!
Promotion Details:
- Sale includes select inks, cardstock, Designer Series Paper, embellishments, and other products that include these new In Colors.
- Some products are excluded from the sale, including the Month by Month Album Retreat 2025 kit (167338).
- Products are only available while supplies last!
- This sale will end on August 31, 2025.
Now on to my card! I used the Pattern of Friendship Stamp Set (an Online Exclusive), Florals in Bloom Designer Series Paper, Stylish Shapes Dies and the Eyelet 3D Embossing Folder to create my card today.


I started with a piece of Thick Basic cardstock for the base of my card (this cardstock can be found in the Online Exclusives part of the Stampin’ Up! store). I cut a piece of Peach Pie cardstock and set it aside.


I cut two pieces of Florals in Bloom Designer Series Paper (DSP) and two pieces of Basic White cardstock (you can find all the measurements I used below the Supply List). I embossed the two pieces of Basic White cardstock using the Eyelet 3D Embossing Folder and my Stampin’ Cut & Emboss Machine. Then, I arranged the DSP and Basic White cardstock on the Peach Pie cardstock. After I finished that, I adhered the Peach Pie cardstock to the front of the card.


I stamped the sentiment onto Basic White cardstock using the Pattern of Friendship stamp set in Summer Splash ink. I cut it out using the third largest circle in the Stylish Shapes Dies. I cut a bigger circle out of Summer Splash cardstock using the second largest circle in the Stylish Shapes Dies. I adhered the sentiment to the front of the Summer Splash circle, added Stampin’ Dimensionals to the back and adhered it to the card front.


Supply List
Below you’ll find all the Stampin’ Up! supplies I used for today’s card. If you need any stamping supplies, I’d love to be your demonstrator! You can place an order by clicking any of the images below to go to my Stampin’ Up! online store.
The Specialty Plate is used with 3D Embossing Folders and Hybrid Embossing Folders.
Bundle Alert: The Pattern of Friendship Bundle is available with a 10% discount rather than buying the products separately.

Measurements
- Thick Basic White cardstock: 8-1/2″ x 5-1/2″ scored at 4-1/4″
- Peach Pie cardstock: 4″ x 5-1/4″
- Florals in Bloom Designer Series Paper: (2) 3″ x 1-1/4″
- Basic White cardstock (embossed): (2) 1-3/4″ x 1-3/4″
- Basic White cardstock (sentiment): approximately 2-1/2″ x 2-1/2″
- Summer Splash cardstock (under sentiment): approximately 3″ x 3″
BACK-TO-SCHOOL SALES TAX HOLIDAY
The 2025 back-to-school sales tax holiday season begins this weekend and there are thirteen states and Puerto Rico offering a sales tax holiday for school supplies during the months of July and August. Products that are eligible according to the statute include “items normally used by students in a standard classroom for educational purposes.” To see the names of participating states, products exempted from tax, and sales tax holiday dates, click here.
Please note: you must place your order with Stampin’ Up! during the tax holiday period to receive these items tax-free (which is midnight on the first day to midnight on the last day of the tax holiday). Also, keep in mind that this is a state sales tax holiday; the state statute may not apply to county, city, and special jurisdiction taxes.
Please note that Georgia, Illinois, Louisiana, New Jersey, and Wisconsin have suspended the sales tax holiday this year.
Last Chance Products

Click here to go straight to the Last Chance Products page on the Stampin’ Up! site! Some products are discounted!
Two New Stampin’ Up! Kits
Click each graphic below for more information about the kit. These kits can be found in the Online Exclusives part of the Stampin’ Up! website.


Farmhouse Florals Paper Pumpkin Kit – Last Day to Order: August 10th
You can now order subscriptions and manage your Paper Pumpkin subscription on the Stampin’ Up! website! You can cancel your Paper Pumpkin subscription at any time. If you want to skip the next kit, you can do that! You also receive Stampin’ Rewards when you order a single kit or purchase a 3-month, 6-month or 12-month subscription to Paper Pumpkin. If you’d like to subscribe, please click the graphic below.

An additional coordinating add-on is available but only for Paper Pumpkin subscribers. Click the image below for more information.

Thanks for stopping by today! Enjoy your weekend!
by Tracy | Jul 30, 2025 | Thank You Card
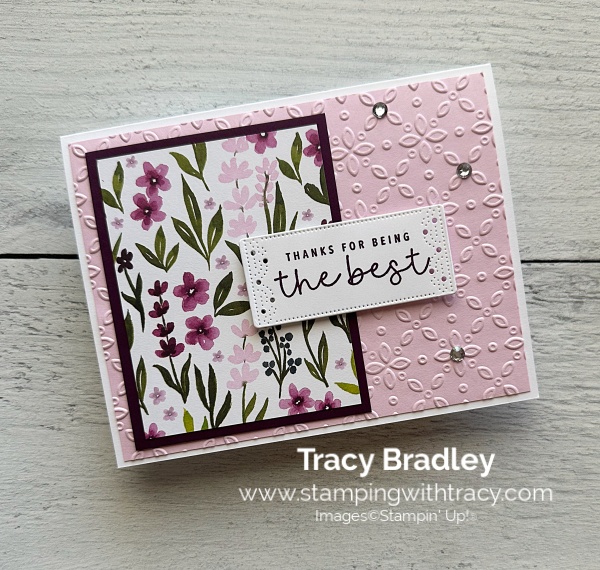
The card I’m sharing with you today was made using the same layout as Monday’s card. I used many of the same products that I used on Monday’s card, the only difference is I used Celebratory Sips Designer Series Paper. I also used the Pattern of Friendship Stamp Set, Sentimental Framing Dies, Eyelet 3D Embossing Folder, and Rhinestone Basic Jewels.


I started with a piece of Thick Basic White cardstock (an Online Exclusive) and then, embossed a piece of Bubble Bath cardstock using the Eyelet 3D Embossing Folder and my Stampin’ Cut & Emboss Machine. Next, I adhered the embossed cardstock to the front of the card.
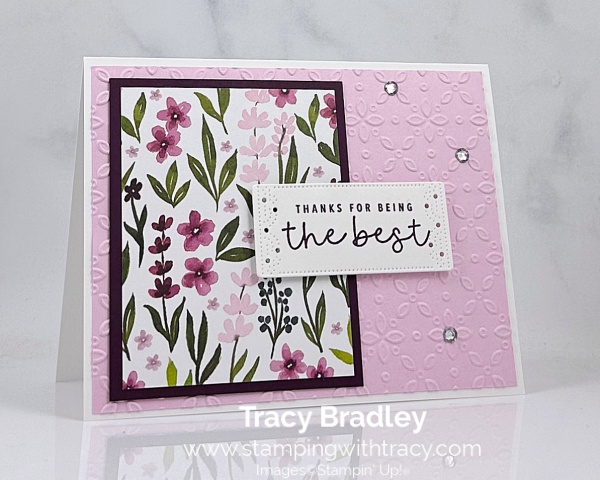

I layered a piece of Blackberry Bliss with Celebratory Sips Designer Series Paper and then adhered it to the front of the card.
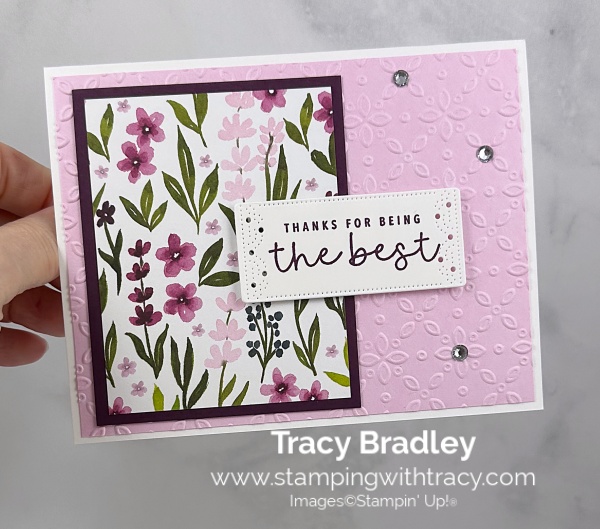


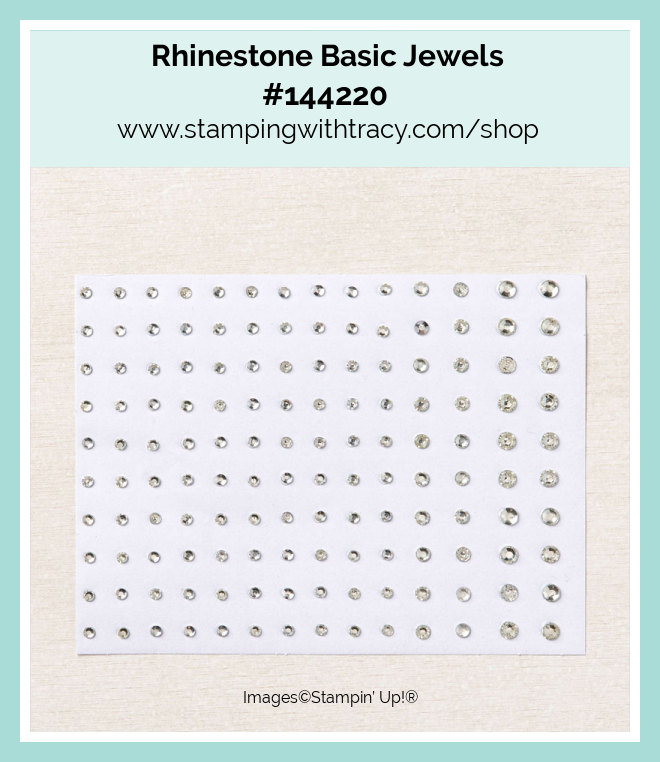
I stamped the sentiment onto a piece of Basic White cardstock using the Pattern of Friendship stamp set in Blackberry Bliss ink. Then, cut it out using the Sentimental Framing Dies. I added Stampin’ Dimensionals to the back (being careful not to place the Dimensionals on either end of the sentiment). I then, adhered the sentiment to the front of the card. To complete my card, I added three rhinestones in the center of the “flowers.”
Supply List
Below you’ll find all the Stampin’ Up! supplies I used for today’s card. If you need any stamping supplies, I’d love to be your demonstrator! You can place an order by clicking any of the images below to go to my Stampin’ Up! online store.
The Specialty Plate is used with 3D Embossing Folders and Hybrid Embossing Folders.
Bundle Alert: The Sentimental Framing Bundle is available with a 10% discount rather than buying the products separately.

Measurements
- Thick Basic White cardstock: 5-1/2″ x 8-1/2″
- Bubble Bath cardstock (embossed): 4″ x 5-1/4″
- Blackberry Bliss cardstock: 3″ x 3-3/4″
- Celebratory Sips Designer Series Paper: 2-3/4″ x 3-1/2″
- Basic White cardstock (sentiment): approximately 1-1/2″ x 2-3/4″
BACK-TO-SCHOOL SALES TAX HOLIDAY
The 2025 back-to-school sales tax holiday season begins this weekend and there are thirteen states and Puerto Rico offering a sales tax holiday for school supplies during the months of July and August. Products that are eligible according to the statute include “items normally used by students in a standard classroom for educational purposes.” To see the names of participating states, products exempted from tax, and sales tax holiday dates, click here.
Please note: you must place your order with Stampin’ Up! during the tax holiday period to receive these items tax-free (which is midnight on the first day to midnight on the last day of the tax holiday). Also, keep in mind that this is a state sales tax holiday; the state statute may not apply to county, city, and special jurisdiction taxes.
Please note that Georgia, Illinois, Louisiana, New Jersey, and Wisconsin have suspended the sales tax holiday this year.
Last Chance Products

Click here to go straight to the Last Chance Products page on the Stampin’ Up! site! Some products are discounted!
Two New Stampin’ Up! Kits
Click each graphic below for more information about the kit. These kits can be found in the Online Exclusives part of the Stampin’ Up! website.


Farmhouse Florals Paper Pumpkin Kit – Last Day to Order: August 10th
You can now order subscriptions and manage your Paper Pumpkin subscription on the Stampin’ Up! website! You can cancel your Paper Pumpkin subscription at any time. If you want to skip the next kit, you can do that! You also receive Stampin’ Rewards when you order a single kit or purchase a 3-month, 6-month or 12-month subscription to Paper Pumpkin. If you’d like to subscribe, please click the graphic below.

An additional coordinating add-on is available but only for Paper Pumpkin subscribers. Click the image below for more information.

Thanks for stopping by today!
by Tracy | Jul 28, 2025 | Thank You Card
The card I’m sharing with you today was made using the Pattern of Friendship Stamp Set (an Online Exclusive), Florals in Bloom Designer Series Paper, Sentimental Framing Dies (an Online Exclusive), Eyelet 3D Embossing Folder and Rhinestone Basic Jewels.


I started with a piece of Thick Basic White cardstock for the base of my card (an Online Exclusive). I cut a piece of Bubble Bath cardstock and embossed it using the Eyelet 3D Embossing Folder and my Stampin’ Cut & Emboss Machine. Next, I adhered it to the front of my card.


I layered a piece of Blackberry Bliss cardstock with Florals in Bloom Designer Series Paper and adhered it to the front of the card. I stamped the sentiment onto Basic White cardstock using the Pattern of Friendship stamp set in Blackberry Bliss ink. I cut it out using the Sentimental Framing Dies, added Stampin’ Dimensionals to the back and adhered it to the front of the card. I was careful at both ends to not add Stampin’ Dimensional at each end.


To complete my card, I added three large rhinestones in the center of the flowers.


Supply List
Below you’ll find all the Stampin’ Up! supplies I used for today’s card. If you need any stamping supplies, I’d love to be your demonstrator! You can place an order by clicking any of the images below to go to my Stampin’ Up! online store.
The Specialty Plate is used with 3D Embossing Folders and Hybrid Embossing Folders.
Bundle Alert: The Sentimental Framing Bundle is available with a 10% discount rather than buying the products separately.

Measurements
- Thick Basic White cardstock: 5-1/2″ x 8-1/2″
- Bubble Bath cardstock (embossed): 4″ x 5-1/4″
- Blackberry Bliss cardstock: 3″ x 3-3/4″
- Florals in Bloom Designer Series Paper: 2-3/4″ x 3-1/2″
- Basic White cardstock (sentiment): approximately 1-1/2″ x 2-3/4″
BACK-TO-SCHOOL SALES TAX HOLIDAY
The 2025 back-to-school sales tax holiday season begins this weekend and there are thirteen states and Puerto Rico offering a sales tax holiday for school supplies during the months of July and August. Products that are eligible according to the statute include “items normally used by students in a standard classroom for educational purposes.” To see the names of participating states, products exempted from tax, and sales tax holiday dates, click here.
Please note: you must place your order with Stampin’ Up! during the tax holiday period to receive these items tax-free (which is midnight on the first day to midnight on the last day of the tax holiday). Also, keep in mind that this is a state sales tax holiday; the state statute may not apply to county, city, and special jurisdiction taxes.
Please note that Georgia, Illinois, Louisiana, New Jersey, and Wisconsin have suspended the sales tax holiday this year.
Last Chance Products

Click here to go straight to the Last Chance Products page on the Stampin’ Up! site! Some products are discounted!
Two New Stampin’ Up! Kits
Click each graphic below for more information about the kit. These kits can be found in the Online Exclusives part of the Stampin’ Up! website.


Farmhouse Florals Paper Pumpkin Kit – Last Day to Order: August 10th
You can now order subscriptions and manage your Paper Pumpkin subscription on the Stampin’ Up! website! You can cancel your Paper Pumpkin subscription at any time. If you want to skip the next kit, you can do that! You also receive Stampin’ Rewards when you order a single kit or purchase a 3-month, 6-month or 12-month subscription to Paper Pumpkin. If you’d like to subscribe, please click the graphic below.

An additional coordinating add-on is available but only for Paper Pumpkin subscribers. Click the image below for more information.

Thanks for stopping by today!
by Tracy | Jul 25, 2025 | Thinking of You Card
This is the Last Day for Free Shipping on Orders $75 or More!

Promotion Details
- All order types qualify for this promotion.
- Free shipping is for three days only. Orders must be closed July 25.
- Free shipping automatically applies to your cart after the qualifying amount has been met, which is $75 (before tax).
- Coupon codes and Stampin’ Rewards will lower your order’s retail amount. Orders must meet the qualifying amount to be eligible for free shipping.
- The additional cost for expedited shipping is not covered by this promotion.
- Prepaid 3-, 6-, and 12-month Paper Pumpkin subscriptions and month-to-month subscriptions do not qualify for free shipping. Refills, past kits and add-ons do qualify toward free shipping, but you must be a subscriber to purchase. Subscriptions billed and shipped this month will be charged for the normal amount ($27.00 shipping included) + tax.
- Click the graphic above to get FREE SHIPPING on orders $75 or more!
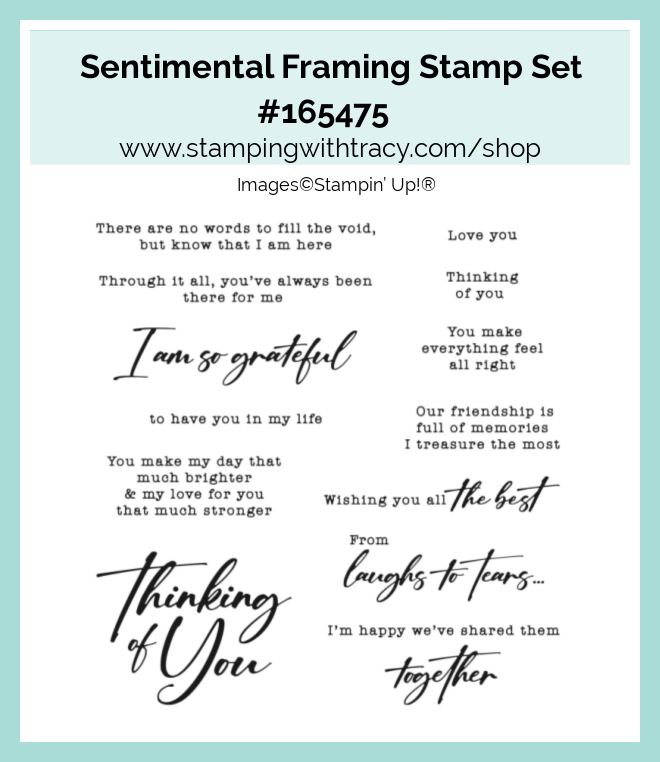
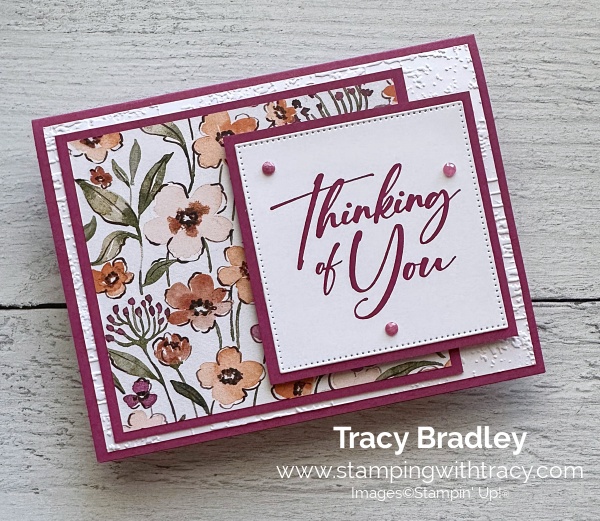
The card I’m sharing with you today was made using the Sentimental Framing Stamp Set, Floral Charm Designer Series Paper, Stylish Shapes Dies, Exposed Brick 3D Embossing Folder and Charming Shimmer Faceted Dots.
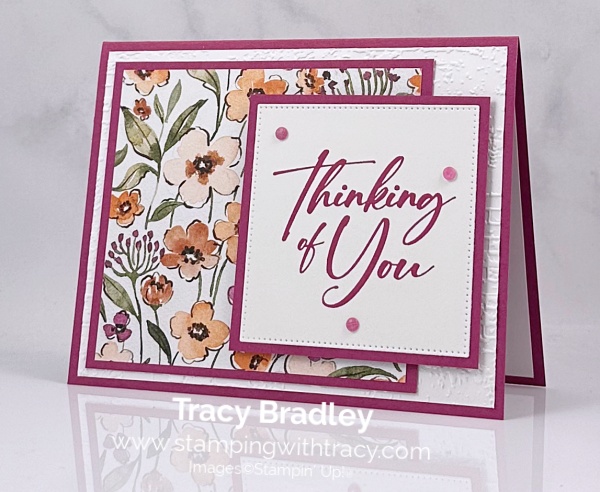
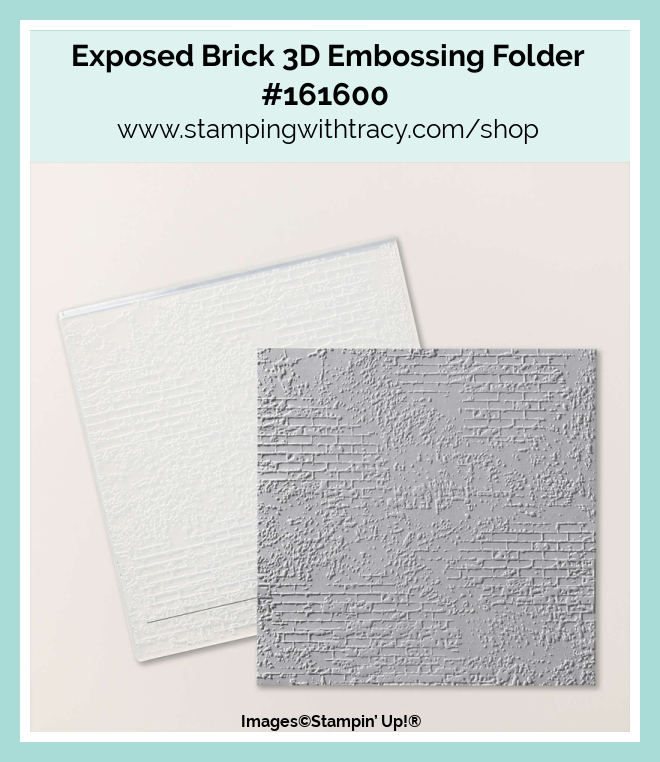
I started with a piece of Berry Burst cardstock for the base of my card. Then, I embossed a piece of Basic White cardstock using the Exposed Brick 3D Embossing Folder and my Stampin’ Cut & Emboss Machine. Next, I adhered the embossed Basic White cardstock to the front of the card.
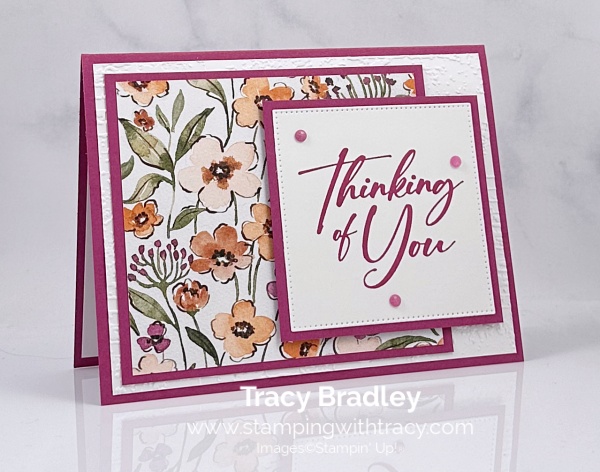

I layered a piece of Berry Burst cardstock with a piece of Floral Charm Designer Series Paper and adhered it to the front of the card. I used a piece of Basic White cardstock to cut a square using the Stylish Shapes Dies (I used the largest square in the set). I stamped the sentiment onto the Basic White square using the Sentimental Framing stamp set in Berry Burst ink.
I cut another piece of Berry Burst cardstock and adhered the sentiment to the front of it. I added Stampin’ Dimensionals to the back and adhered it to the front of the card.
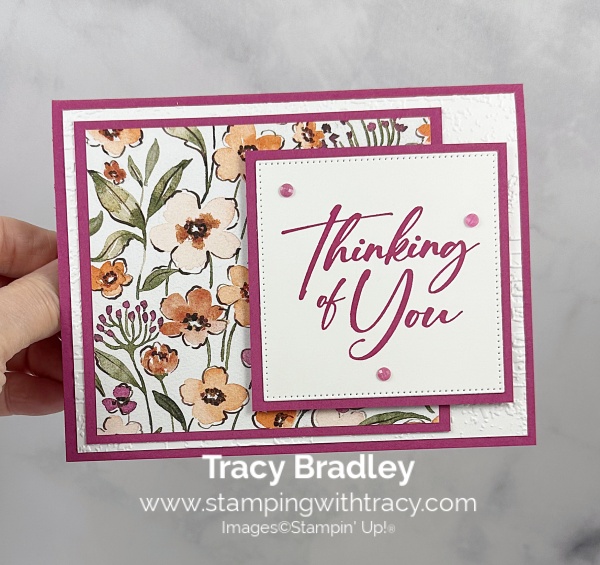

To complete my card, I added three Charming Shimmer Faceted Dots in Berry Burst around the sentiment and added a piece of Basic White cardstock to the inside of the card.

Supply List
Below you’ll find all the Stampin’ Up! supplies I used for today’s card. If you need any stamping supplies, I’d love to be your demonstrator! You can place an order by clicking any of the images below to go to my Stampin’ Up! online store.
The Specialty Plate is used with 3D Embossing Folders and Hybrid Embossing Folders.
Bundle Alert: The Sentimental Framing Bundle is available with a 10% discount rather than buying the products separately.

Measurements
- Berry Burst cardstock: 5-1/2″ x 8-1/2″ scored at 4-1/4″
- Berry Burst cardstock (under sentiment): 3″ x 3″
- Berry Burst cardstock: 4-1/4″ x 3-3/4″
- Basic White cardstock (sentiment): approximately 3-1/4″ x 3-1/4″
- Basic White cardstock (embossed & inside card): (2) 4″ x 5-1/4″
- Floral Charm Designer Series Paper: 4″ x 3-1/2″
BACK-TO-SCHOOL SALES TAX HOLIDAY
The 2025 back-to-school sales tax holiday season begins this weekend and there are thirteen states and Puerto Rico offering a sales tax holiday for school supplies during the months of July and August. Products that are eligible according to the statute include “items normally used by students in a standard classroom for educational purposes.” To see the names of participating states, products exempted from tax, and sales tax holiday dates, click here.
Please note: you must place your order with Stampin’ Up! during the tax holiday period to receive these items tax-free (which is midnight on the first day to midnight on the last day of the tax holiday). Also, keep in mind that this is a state sales tax holiday; the state statute may not apply to county, city, and special jurisdiction taxes.
Please note that Georgia, Illinois, Louisiana, New Jersey, and Wisconsin have suspended the sales tax holiday this year.
Last Chance Products

Click here to go straight to the Last Chance Products page on the Stampin’ Up! site! Some products are discounted!
Two New Stampin’ Up! Kits
Click each graphic below for more information about the kit. These kits can be found in the Online Exclusives part of the Stampin’ Up! website.


Farmhouse Florals Paper Pumpkin Kit – Last Day to Order: August 10th
You can now order subscriptions and manage your Paper Pumpkin subscription on the Stampin’ Up! website! You can cancel your Paper Pumpkin subscription at any time. If you want to skip the next kit, you can do that! You also receive Stampin’ Rewards when you order a single kit or purchase a 3-month, 6-month or 12-month subscription to Paper Pumpkin. If you’d like to subscribe, please click the graphic below.

An additional coordinating add-on is available but only for Paper Pumpkin subscribers. Click the image below for more information.

Thanks for stopping by today! Have a relaxing weekend!


