by Tracy | Mar 24, 2025 | Thank You Card
Before I share my cards with you today, if you are a current customer of mine, you will need to fill this form out, to receive a 2025-2026 Annual Catalog. I will be ordering the catalogs on March 30, 2025.

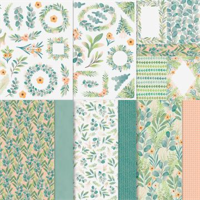
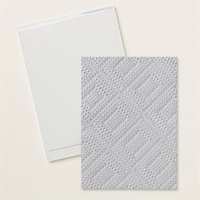
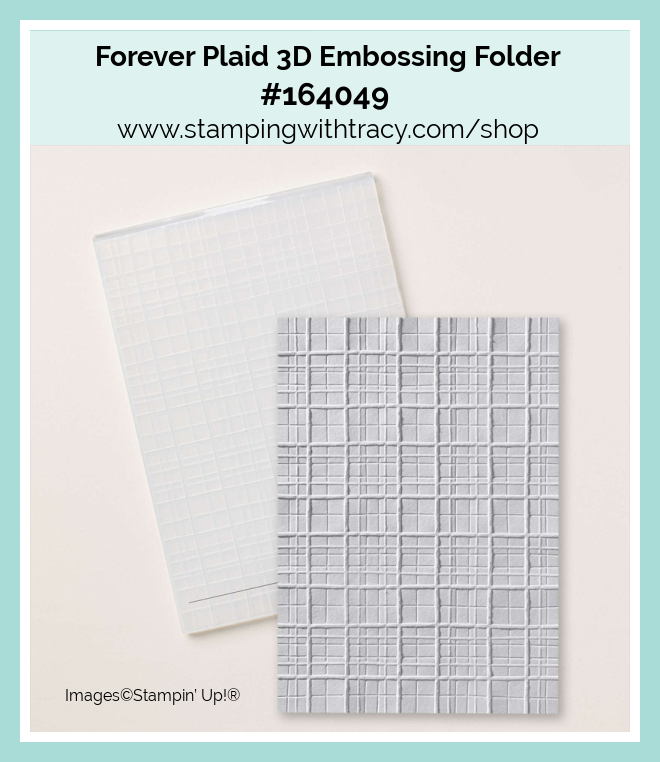
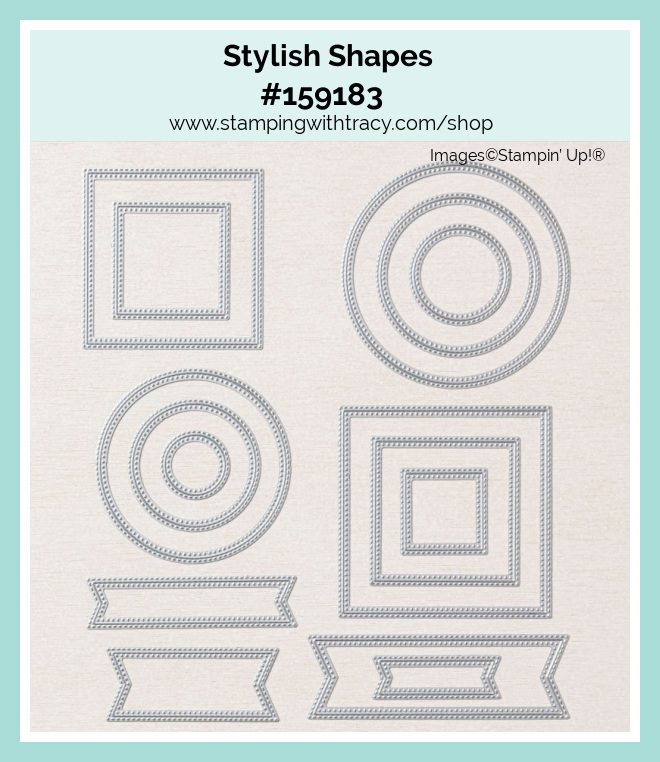
Now on to my cards for today! I’ve made six different cards using the same layout. You can see another version here. I used the Memorable Blooms stamp set for all of the cards as well as the Stylish Shapes Dies. I used different embossing folders and the colors I used were changed. For this first card, I used the Forever Plaid 3D Embossing Folder and Botanical Textures Designer Series Paper.


I started with Basic Black cardstock for the base of my card. Then, I embossed a piece of Basic White cardstock using the Forever Plaid 3D Embossing Folder and my Stampin’ Cut & Emboss Machine. Next, I adhered the embossed cardstock to the front of my card.


Next, I layered a piece of Botanical Textures DSP to a piece of Basic Black cardstock and adhered it to the front of the card.

Then, I stamped the sentiment onto a piece of Basic White cardstock using the Memorable Blooms stamp set and Memento Ink. I cut it out using the Stylish Shapes dies. I cut a larger circle (the next largest size) out of Basic Black cardstock. Then, I adhered the sentiment to the Basic Black circle, added Stampin’ Dimensionals to the back and adhered it to the card.
To complete my card, I added a piece of Basic White cardstock to the inside of the card.

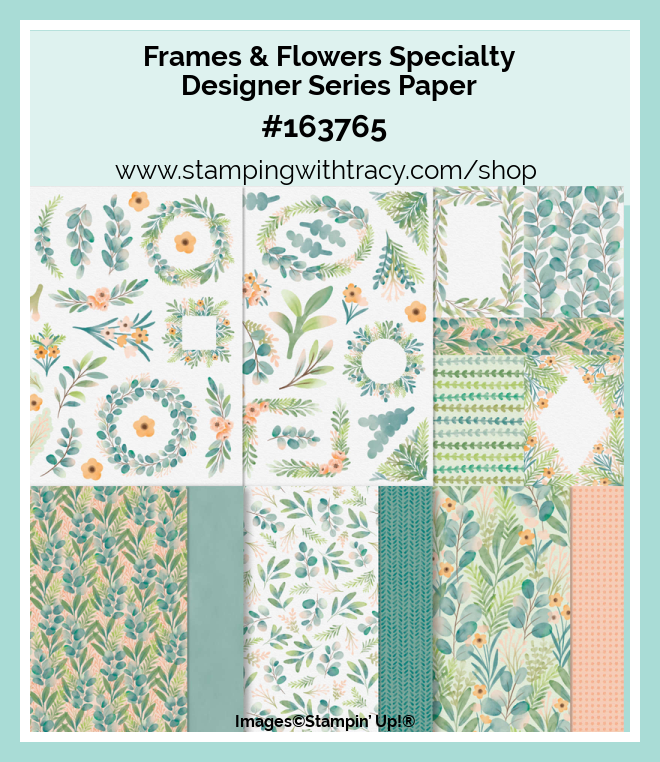
For this next card I used Frames & Flowers Specialty Designer Series Paper, Soft Waves 3D Embossing Folder and Pretty Peacock cardstock and Pretty Peacock ink.


For this next card I used Perennial Lavender Designer Series Paper, the Eyelet 3D Embossing Folder, and Highland Heather cardstock and ink.


For this next card, I used Floral Delight Designer Series Paper, the Fern 3D Embossing Folder and Pool Party cardstock and ink.


For these next two cards, I used Wildflower Birthday Specialty Designer Series Paper and the Forever Plaid 3D Embossing Folder.
For this first card, I used Blueberry Bushel cardstock and ink and for the embossed part, I used Very Vanilla cardstock, which I forgot to put in the supply list. For the second card, I used Pretty in Pink cardstock and ink.


Supply List
Below you’ll find all the Stampin’ Up! supplies I used for today’s card. If you need any stamping supplies, I’d love to be your demonstrator! You can place an order by clicking any of the images below to go to my Stampin’ Up! online store. The Specialty Plate is used with 3D Embossing Folders and Hybrid Embossing Folders.
I forgot to add Very Vanilla cardstock #101650 in to the supply list. So here’s a direct link to it.
I also forgot to add Basic White cardstock to the Supply List. Here’s a direct link to it.
Bundle Alert: The Memorable Blooms Bundle is available with a discount of 10%. It includes the Memorable Blooms stamp set and Memorable Blooms Dies.

Measurements
- Base of card: 5-1/2″ x 8-1/2″ score at 4-1/4″
- Same color as the base: 3″ x 3-3/4″
- Stylish Shapes die cut (same color as the base): approx. 2-1/2″ x 2-1/2″
- Basic White cardstock (embossed and inside card): (2) 4″ x 5-1/4″
- Basic White cardstock (sentiment): approx. 2″ x 2″
- Designer Series Paper: 2-3/4″ x 3-1/2″
Last Chance Products

Click here to go straight to the Last Chance Products page on the Stampin’ Up! site!
Two New Stampin’ Up! Kits
Click each graphic below for more information about the kit.


Inked Occasions Paper Pumpkin Kit
Did you know that Paper Pumpkin has moved to the Stampin’ Up! website? You can now order subscriptions and manage your subscription on the Stampin’ Up! website! If you’d like to subscribe, please click the graphic below.
If you have a current subscription to Paper Pumpkin, you will need to claim your subscription. You can follow written directions, here or you can watch a video, here.

An additional coordinating add-on is available but only for Paper Pumpkin subscribers. Click the image below for more information.

Thanks for stopping by today!
by Tracy | Mar 19, 2025 | Thank You Card
The card I’m sharing with you today was created using a new Online Exclusive, Lovely Garden Designer Series Paper (DSP). I also used Memorable Blooms stamp set, Stylish Shapes Dies and the Distressed Tile 3D Embossing Folder. You can see another version, of this card, here.


I started with a piece of Fresh Freesia cardstock for the base of my card. Then, I added a piece of Basic White cardstock to the inside and embossed another piece using the Distressed Tile 3D Embossing Folder and my Stampin’ Cut & Emboss Machine. Next, I adhered the embossed cardstock to the front of the card.

I cut another piece of Fresh Freesia cardstock and layered it with a piece of Lovely Garden DSP. Then, I adhered the piece to the front of the card.


I stamped onto a piece of Basic White cardstock using the Memorable Blooms stamp set in Fresh Freesia ink. Next, I cut the sentiment out using the Stylish Shapes Dies (the third smallest die). Then, I used the next largest size of the Stylish Shapes Dies and cut a circle out of Fresh Freesia cardstock. I adhered the sentiment to the Fresh Freesia cardstock, added Stampin’ Dimensionals to the back and adhered it to the front of the card.

Supply List
Below you’ll find all the Stampin’ Up! supplies I used for today’s card. If you need any stamping supplies, I’d love to be your demonstrator! You can place an order by clicking any of the images below to go to my Stampin’ Up! online store. The Specialty Plate is used with 3D Embossing Folders and Hybrid Embossing Folders.
Bundle Alert: The Memorable Blooms Bundle is available with a discount of 10%. It includes the Memorable Blooms Stamp Set and Memorable Blooms Dies.
Measurements
- Fresh Freesia cardstock (base): 5-1/2″ x 8-1/2″ score at 4-1/4″
- Fresh Freesia cardstock (rectangle): 3″ x 3-3/4″
- Fresh Freesia cardstock (circle): approximately 2-1/2″ x 2-1/2″
- Basic White cardstock (embossed & inside card): (2) 5-1/4″ x 4″
- Basic White cardstock (sentiment): approximately 2″ x 2″
- Lovely Garden Designer Series Paper: 2-3/4″ x 3-1/2″
Last Chance Products
Click here to go straight to the Last Chance Products page on the Stampin’ Up! site!
Two New Stampin’ Up! Kits
Click each graphic below for more information about the kit.
Inked Occasions Paper Pumpkin Kit
Did you know that Paper Pumpkin has moved to the Stampin’ Up! website? You can now order subscriptions and manage your subscription on the Stampin’ Up! website! If you’d like to subscribe, please click the graphic below.
If you have a current subscription to Paper Pumpkin, you will need to claim your subscription. You can follow written directions, here or you can watch a video, here.
An additional coordinating add-on is available but only for Paper Pumpkin subscribers. Click the image below for more information.
Thanks for stopping by today!
by Tracy | Mar 12, 2025 | Stampin' Blends
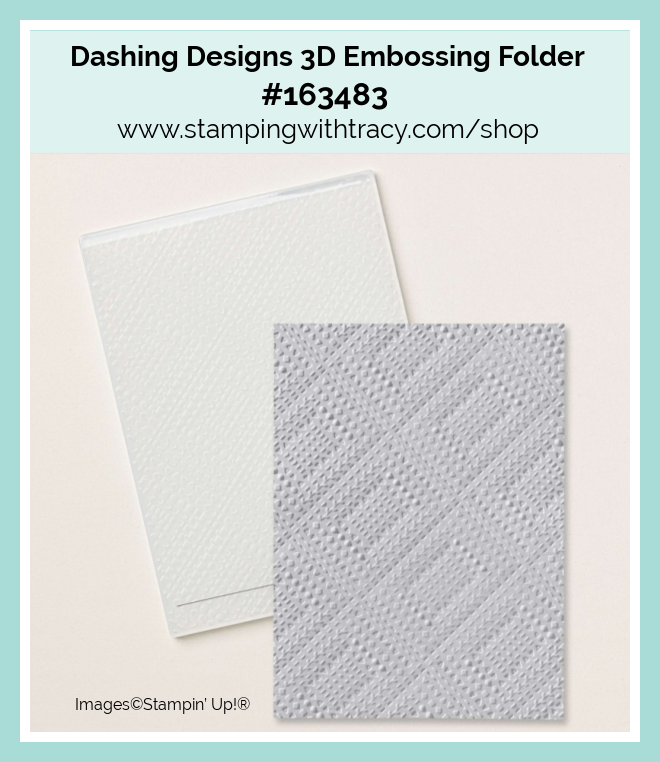
The card I’m sharing with you today was made using the Memorable Blooms Bundle, Perennial Postage Dies, Dashing Designs 3D Embossing Folder and Low Profile Dots.

I started with a piece of Thick Basic White cardstock for the base of my card (you can find all the measurements I used below the Supply List). Then, I cut two pieces of Poppy Parade cardstock and ran them both through the Dashing Designs 3D Embossing Folder. Next, I adhered the bigger one to the front of the card and the smaller piece to the “inside” of the card.

I stamped the flowers onto a piece of Basic White cardstock using the Memorable Blooms stamp set in Memento Ink. I colored the flowers and leaves using Poppy Parade & Granny Apple Green Stampin’ Blends. Then, I cut the flowers out using the Memorable Blooms Dies, added Stampin’ Dimensionals to the back and set it aside.


I used Basic White cardstock to cut one of the Perennial Postage Dies (the second largest one). Next, I added the sentiment down towards the bottom of the rectangle in Memento Ink using the Memorable Blooms Stamp Set. Then, I added Tear & Tape (or a strong adhesive) to the back (not the part that will hang over) and adhered it to the right side of the card. Next, I added the flowers to the front and then added three Low Profile Dots.


Supply List
Below you’ll find all the Stampin’ Up! supplies I used for today’s card. If you need any stamping supplies, I’d love to be your demonstrator! You can place an order by clicking any of the images below to go to my Stampin’ Up! online store. The Specialty Plate is used with 3D Embossing Folders and Hybrid Embossing Folders.
Measurements
- Thick Basic White cardstock: 7-1/2″ x 5-1/2″ score at 3-1/4″
- Basic White cardstock (Perennial Postage die cut): approximately 5″ x 3-3/4″
- Basic White cardstock (flowers): approximately 4″ x 3″
- Poppy Parade cardstock (left side): 5-1/4″ x 3″
- Poppy Parade cardstock (right side): 5-1/4″ x 3/4″
Last Chance Products
Click here to go straight to the Last Chance Products page on the Stampin’ Up! site!
Two New Stampin’ Up! Kits
Click each graphic below for more information about the kit.
Inked Occasions Paper Pumpkin Kit
Did you know that Paper Pumpkin has moved to the Stampin’ Up! website? You can now order subscriptions and manage your subscription on the Stampin’ Up! website! If you’d like to subscribe, please click the graphic below.
If you have a current subscription to Paper Pumpkin, you will need to claim your subscription. You can follow written directions, here or you can watch a video, here.
An additional coordinating add-on is available but only for Paper Pumpkin subscribers. Click the image below for more information.
Thanks for stopping by today!
by Tracy | Mar 10, 2025 | Stampin' Blends, You Are Awesome!
Before sharing my card with you today, I wanted to let you know that the Paper Pumpkin site will shut down today and tomorrow it will back up on the Stampin’ Up! website where you can access your subscription!
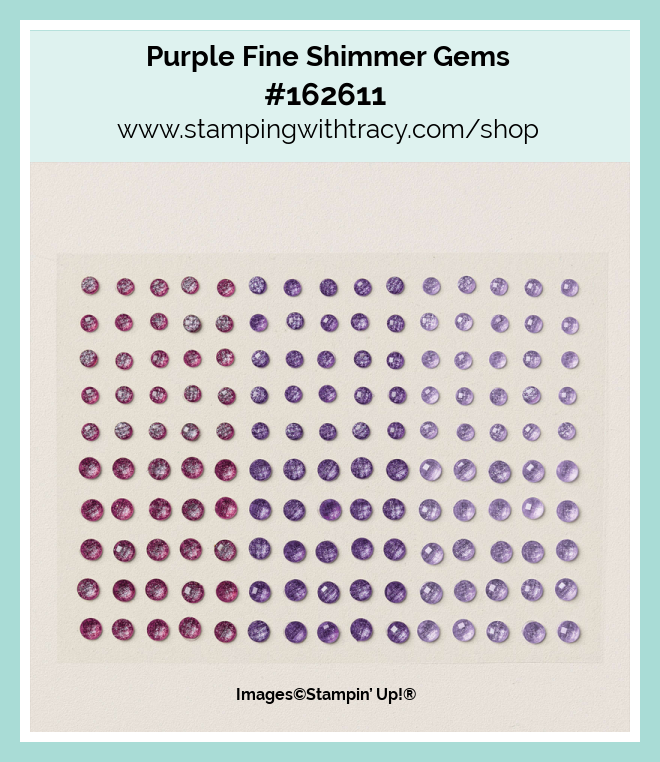
The card I’m sharing with you today was created using the Everyday Arches Dies, Memorable Blooms Bundle, the Soft Waves 3D Embossing Folder and Purple Fine Shimmer Gems.


I started with a piece of Granny Apple Green cardstock for the base of my card. Then, I embossed a piece of Basic White cardstock using the Soft Waves 3D Embossing Folder and my Stampin’ Cut & Emboss Machine. Next, I adhered it to the front of the card.

I cut out an arch using the Everyday Arches Dies out of Basic White cardstock and then adhered it to the front of the card. I stamped the flowers onto a piece of Basic White cardstock using Tuxedo Memento ink and the Memorable Blooms stamp set. I then cut it out using the Memorable Blooms Dies ( I usually cut it out last but I hate when I’ve colored the flowers and I mess up the cutting). I colored the flowers using Highland Heather and Granny Apple Green Stampin’ Blends. I added Stampin’ Dimensionals to the back and adhered it to the arch.

I stamped the sentiment onto Basic White cardstock using Highland Heather ink and the stamp set, Memorable Blooms. I then cut it out using the smallest die in the Everyday Arches Dies. I added Stampin’ Dimensionals to the back and adhered it down near the stem.
To complete my card, I added a piece of Basic White cardstock to the inside and added three larger Purple Fine Shimmer Gems to the arch.

Supply List
Below you’ll find all the Stampin’ Up! supplies I used for today’s card. If you need any stamping supplies, I’d love to be your demonstrator! You can place an order by clicking any of the images below to go to my Stampin’ Up! online store. The Specialty Plate is used with 3D Embossing Folders and Hybrid Embossing Folders.
Measurements
- Granny Apple Green cardstock: 11” x 4-1/4” scored at 5-1/2” OR 8-1/2” x 5-1/2” scored at 4-1/4” the only difference is how the card opens
- Basic White cardstock (embossed & inside): (2) 5-1/4″ x 4″
- Basic White cardstock (flowers): approximately 4″ x 3″
- Basic White cardstock (large arch): approximately 5-1/4″ x 3-1/2″
- Basic White cardstock (sentiment): approximately 2-3/4″ x 1-1/2″
Lovely Garden Card Sampler – the Last Day is Tomorrow!

My Lovely Garden Card Sampler is now available! When you use the special host code GUCCBTSX and your order is a minimum of $60 (before shipping/tax), I’ll send you two each of three cards. To create this card sampler, I used Lovely Garden Designer Series Paper and the stamp set, Pattern of Friendship.
Here’s What You’ll Receive:
- All the paper and embellishments needed to make six cards. Envelopes will also be provided. For this sampler you only need to provide a stamp set, ink and adhesive (see below for what you’ll need).
- A PDF Tutorial with instructions, pictures, cutting measurements and a complete supply list of all the products used.
- Earn at least one Bradley Point (earn ten Bradley Points and redeem them for free product) when your order is $50 or more.
- If your order is over $150, please do not use the host code or you won’t receive your Stampin’ Rewards. After you place your order, simply email me and let me know that you’d like the Lovely Garden Card Sampler (you only need to do this if your order is over $150). You can send me an email on the sidebar.
All the Other Important Information:
- Your Lovely Garden Card Sampler will be shipped first-class mail approximately March 21, 2025 and will be mailed to the address used on your online order.
- You’ll receive an email when I mail your Card Sampler and the PDF Tutorial will be included in that email.
- When using the Lovely Garden Card Sampler host code to place your order, you will not qualify for other current host code rewards.
- Per Stampin’ Up! policy, card samplers can only be mailed within the United States.
You’ll receive all the materials to make six cards. You’ll quickly have beautiful cards ready to be mailed out to someone special. If you can’t make the cards once they arrive, no worries, each card is labeled in its own clear envelope which makes it easy to come back to later. Once you’ve made all the cards in the Sampler, you’ll be able to easily replicate each card by following the easy to follow directions in the PDF (pictures are included as well).
The special Lovely Garden Card Sampler HOST CODE will close at the end of the day on March 11, 2025 and after that date, the Card Sampler will no longer be available.
Approximate ship date of the Card Sampler is March 21, 2025.

Click here to place an order
Supplies Needed To Create the Card Sampler
Listed below are the supplies you’ll need to complete the cards exactly as shown (or you can use what you already own). Simply click any of the products and you’ll be taken to my Stampin’ Up! online store. When placing your order, don’t forget to use the special Card Sampler Host Code (please do not use host code if your order is over $150 – see above).

Last Chance Products
Click here to go straight to the Last Chance Products page on the Stampin’ Up! site!
Two New Stampin’ Up! Kits
Click each graphic below for more information about the kit.
Paper Pumpkin Kit – Daisy Daydream
Today is the last day this kit will be available!

An additional coordinating add-on is available but only for Paper Pumpkin subscribers. Click the image below for more information.

Thanks for stopping by today!
by Tracy | Feb 4, 2025 | Card Sampler

My Wildflower Birthday Card Sampler is now available! When you use the host code KCK7G9A9 and your order is a minimum of $60 (before shipping/tax), I’ll send you two each of three cards. To create this card sampler, I used Wildflower Birthday Specialty Designer Series Paper, Darling Dinos stamp set and the Memorable Blooms stamp set.
Here’s What You’ll Receive:
- All the paper and embellishments needed to make six cards. Envelopes will also be provided. For this sampler you only need to provide a stamp set, ink and adhesive (see below for what you’ll need).
- A PDF Tutorial with instructions, pictures, cutting measurements and a complete supply list of all the products used.
- Earn at least one Bradley Point (earn ten Bradley Points and redeem them for free product) when your order is $50 or more.
- If your order is over $150, please do not use the host code or you won’t receive your Stampin’ Rewards. After you place your order, simply email me and let me know that you’d like the Wildflower Birthday Card Sampler (you only need to do this if your order is over $150). You can send me an email on the sidebar.
All the Other Important Information:
- Your Wildflower Birthday Card Sampler will be shipped first-class mail approximately February 20, 2025 and will be mailed to the address used on your online order.
- You’ll receive an email when I mail your Card Sampler and the PDF Tutorial will be included in that email.
- When using the Wildflower Birthday Card Sampler host code to place your order, you will not qualify for other current host code rewards.
- Per Stampin’ Up! policy, card samplers can only be mailed within the United States.
You’ll receive all the materials to make six cards. You’ll quickly have beautiful cards ready to be mailed out to someone special. If you can’t make the cards once they arrive, no worries, each card is labeled in its own clear envelope which makes it easy to come back to later. Once you’ve made all the cards in the Sampler, you’ll be able to easily replicate each card by following the easy to follow directions in the PDF (pictures are included as well).
The special Wildflower Birthday Card Sampler HOST CODE will close at the end of the day on February 10, 2025 and after that date, the Card Sampler will no longer be available.
Approximate ship date of the Card Sampler is February 20, 2025.

Click here to place an order
Supplies Needed To Create the Card Sampler
Listed below are the supplies you’ll need to complete the cards exactly as shown (or you can use what you already own). Simply click any of the products and you’ll be taken to my Stampin’ Up! online store. When placing your order, don’t forget to use the special Card Sampler Host Code (please do not use host code if your order is over $150 – see above).
Sale-a-Bration
Click the graphic below to see what free products you can earn, then scroll down and click the different categories. Sale-a-Bration ends on February 28th. Edited to Add: Catalog products have been added to the $60 category! You must use the special Sale-a- Bration product code to earn it free!

Here’s a list of ALL the items you can earn FREE in the $60 category!
Become a Demonstrator During Sale-a-Bration and Purchase the Starter Kit

Stampin’ Up! always has a really good join offer during Sale-a-Bration and this year is no different! You have two options this year:
Option #1:
- $125 worth of products for $99
- Two Free Marker Sets
- A Free Stamp Set – Handmade Designs Cling Stamp Set
- Free Shipping
- That’s a $216 value for $99
Option #2
- $125 worth of products for $99
- Plus and additional $30 to spend on Stampin’ Up! products
- Free Shipping
- That’s a $155 value for $99
You can join the Stampin’ Up! family of demonstrators! There’s no pressure at all to sell or hold workshops! You can join for the incredible value and for the fun! You’ll get an ongoing discount on all products and early access to all product launches! If you have more questions, you can look here, and if I don’t address your questions, just shoot me an email (look on the sidebar). If you’re ready to join the Stampin’ Up! family, you can click here.
Last Chance Products
Edited to Add: New items have been added to the Last Chance Products List!
Click here to go straight to the Last Chance Products page on the Stampin’ Up! site!
Two New Stampin’ Up! Kits
Click each graphic below for more information about the kit.


Paper Pumpkin Kit – Hello Spring

An additional coordinating add-on is available but only for Paper Pumpkin subscribers. Click the image below for more information.
Thanks for stopping by today!