I don’t usually post on Saturdays but I wanted to share my Valentine’s Day Matchbox video for the project I posted yesterday.
This matchbox is super easy to make. I used several new products from the Stampin’ Up! Mini Catalog and you can see these products in the video below. You’ll find the measurements right below the video as well as a supply list showing all the products I used to create my Valentine’s Day matchbox!
Have a great weekend!
Measurements for the Matchbox
Bottom of Box (Real Red cardstock): 5-1/4″ x 7″ Score at 1″ on all four sides
Top of Box (From My Heart Specialty Designer Series Paper): 5-1/8″ x 10″ Score at 2″, 3″, 6-1/4″, and 7-1/4″
Valentine’s Day will be here before we know it so today I have a project featuring CHOCOLATE ( I can’t imagine a world without chocolate)! I created a Valentine’s Day Matchbox which is an open box with a sleeve. Slide the box out to reveal delicious chocolate inside. I’ll be back tomorrow with a video showing how quickly you can make this box!
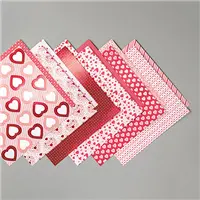
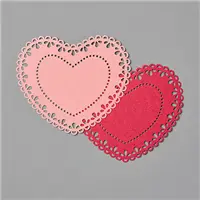
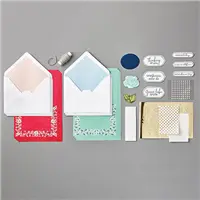
To create the sleeve, I used Stampin’ Up! From My Heart Designer Series Paper. What you can’t see in the photo is that inside each heart is a foil pink accent. So pretty! Our heart shaped doilies are perfect for this project because who doesn’t need more hearts? In the catalog they’re shown in Flirty Flamingo and Real Red but turn them over and you have another option, white!
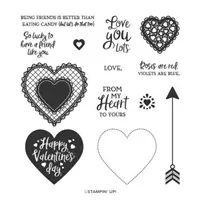
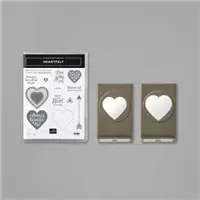
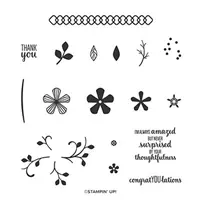
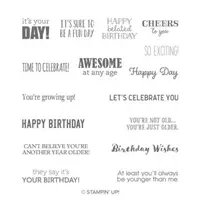
I stamped the sentiment using the stamp set Heartfelt and then punched it out with one of the heart punches in the Heart Punch Pack. You can purchase these two items separately but if you want them both, you’ll save 10% by purchasing the Heartfelt Bundle.
Measurements
Bottom of Box Using Real Red Cardstock: 5-1/4″ x 7″ Score at 1″ on all four sides
Top of Box Using From My Heart Designer Series Paper: 5-1/8″ x 10″ Score at 2″, 3″, 6-1/4″ & 7-1/4″
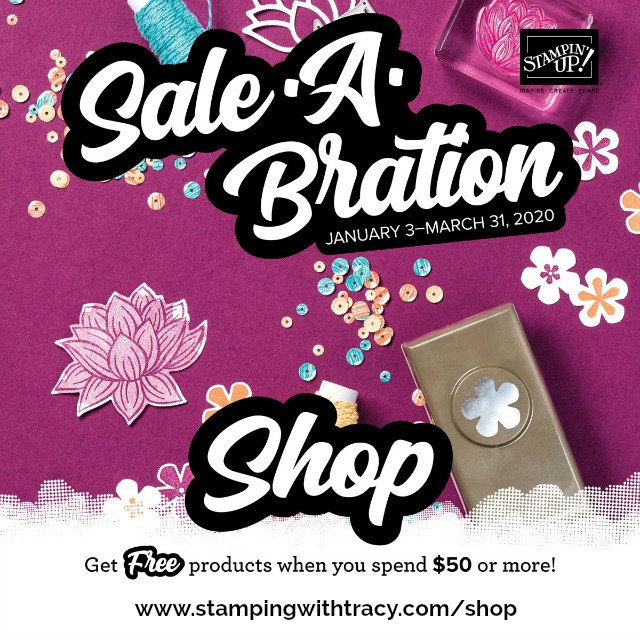
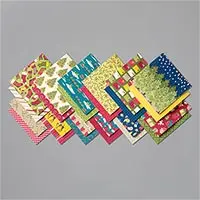
Sale-a-Bration is that wonderful time of year when you receive free gifts for every $50 purchase! When you place your online order, you’ll be prompted to enter a free gift for every $50 purchase you make. You can also earn three different gifts in the $100 category. There’s no limit to how many free gifts you can earn. Please note: All gifts are while supplies last!
Sale-a-Bration Free Gift Choices with a $50 Purchase
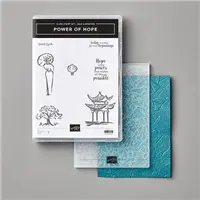
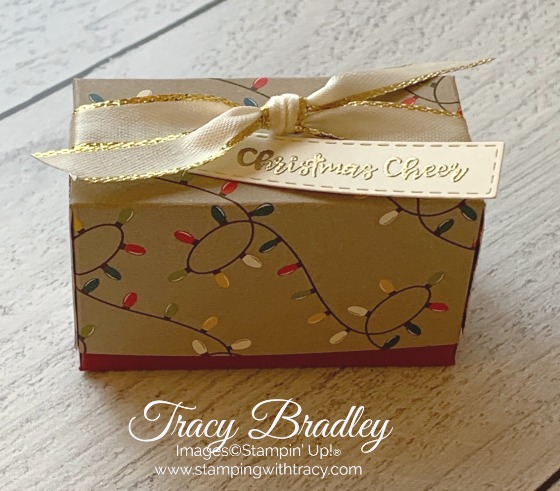
It’s time for the Glitter Queens Blog Hop! This month we’re bringing you ideas using Designer Series Paper. My project features Stampin’ Up! Night Before Christmas Designer Series Paper. This paper is on the retiring listso grab it while you can!
I used our Designer Series Paper to make a little box that will hold four Ghirardelli Mini Chocolates. The box is easy to make and I have a video showing just how quickly you can put them together.
Supply List
If you need any stamping supplies, I’d love to be your demonstrator! You can place an order by clicking any of the images below to go to the homepage of my Stampin’ Up! online store.If you have questions about products you’re considering purchasing or ones you’ve already purchased, I’m just an email away (click the Email Me button on the sidebar of my blog).
I’m last in the blog hop but if you haven’t gone all the way through you can start at the beginning over at Dawn Griffith’s blog. Click here to see Dawn’s beautiful project!
The Year-End Closeout is on! Many items from the Holiday Catalog are retiring and once they sell out, they’re gone! Click the image below to see what’s still available!
Some Holiday Catalog products are on sale as well as several Paper Pumpkin kits. Click the image below to see what’s available.
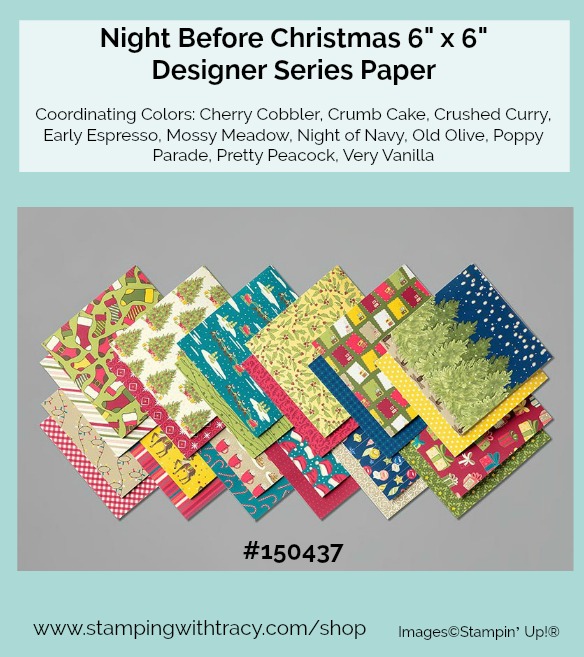
Today’s card features Night Before Christmas Designer Series Paper from the Holiday Catalog. This paper is part of the Year-End Closeout and is only available while supplies last. The designs in this pack of paper coordinate with Cherry Cobbler, Very Vanilla and Old Olive (three colors I used for today’s card) as well as Crumb Cake, Crushed Curry, Early Espresso, Mossy Meadow, Night of Navy, Poppy Parade, and Pretty Peacock.
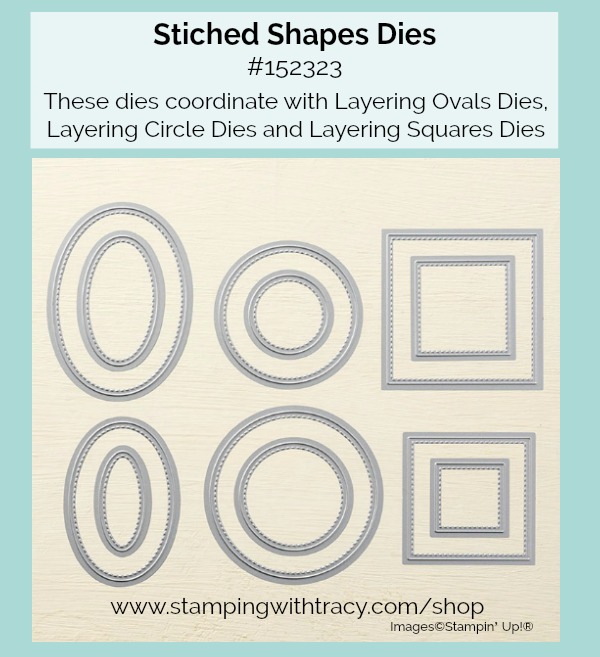
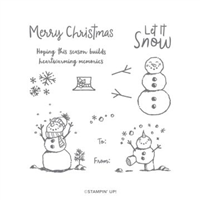
I used the stamp set, Itty Bitty Christmas, which includes 18 different stamps! The sentiment was stamped with Cherry Cobbler ink and cut out with the Stitched Shapes Dies. The Cherry Cobbler scalloped oval in Old Olive was cut out with the Layering Ovals Dies.
I also used the Stitched Shapes Dies to cut out the Designer Series Paper. The Old Olive scalloped square was cut out using the Layering Squares Dies. The Cherry Cobbler cardstock was embossed with the Hammered Metal 3D Embossing Folder (this item is not one of the retiring Holiday Catalog products).
Supply List
If you need any stamping supplies, I’d love to be your demonstrator! You can place an order by clicking any of the images below to go to the homepage of my Stampin’ Up! online store.If you have questions about products you’re considering purchasing or ones you’ve already purchased, I’m just an email away (click the Email Me button on the sidebar of my blog).
Today you’ll be able to access my Tuesday Tutorial. Yes, it’s Wednesday but with the release of the Year-End Closeoutlist yesterday and my December Online Card Class, I decided today would be a better day to share my free PDF tutorial.
At this time of year, it’s difficult to know from day to day what products will be available especially with our Year-End Closeout sale. Unfortunately the paper I used for today’s card, Wrapped in Plaid 6″ x 6″ Designer Series Paper, went into backorder status yesterday but the system was still letting customers add it to their order. This could have changed but you might still be able to add it to your order (more than likely you will receive it after the holidays). You can click here to see if it’s still available!
If you’d like to create today’s card but don’t have Wrapped in Plaid Designer Series Paper, simply use your favorite paper in place of it. You’ll find the free tutorial below with all the measurements.
I have several more samples to share. This first card was made with Shaded Spruce and Cherry Cobbler cardstock. The sentiment was stamped in Shaded Spruce ink.
This next card was made with Cherry Cobbler & Shaded Spruce cardstock. The sentiment was embossed with gold embossing powder, just like the card in the tutorial.
This last sample uses Cherry Cobbler & Shaded Spruce cardstock. I used Cherry Cobbler ink for the sentiment.
This month’s online card class features three cards and two of them are perfect for gift cards! The last day to sign up for my free December Online Card Class is this Saturday, December 7th. All of the information about the class can be found here.
Many items from the Holiday Catalog are retiring and only available while supplies last! Click here to see what’s being retired!
If you have any questions, please feel free to reach out to me!
I hope everyone from the U.S. had an enjoyable Thanksgiving yesterday!
It’s the biggest shopping day of the year! I bet some of you were out at the crack of dawn, if not earlier, grabbing some great deals. Personally, I get a little cranky with lots of crowds so I prefer to do my shopping sitting at home in front of my computer. Because it’s Black Friday, I have a special when you place a Stampin’ Up! order at my online store today.
Fine Details:
After you place your order, I’ll send an email to you to find out your choice(s) or you can immediately email me with what you’d like.
The host code UQK3VSNJ must be used when placing your order.
All orders will receive an extra card kit.
$50-$74.99 order will receive a free package of rhinestones (choose from Holiday, Noble Peacock, or Basic Jewels)
$75-$99.99 order will receive a free embossing folder (your choice)
$100 -$149.99 order will receive both the rhinestones & embossing folder
Orders over $150, do not use the Host Code so you’ll receive Stampin’ Rewards from Stampin’ Up! (free product) plus you’ll receive rhinestones and an embossing folder from me.
I’ll place the orders for the free gifts tomorrow. After I receive them from Stampin’ Up!, I’ll send them out to you (your free gifts should arrive in approximately two weeks).
Very important: If I don’t receive a response from you before 10:00 am (Pacific Time) on Saturday morning, November 30th, I reserve the right to choose your free gifts so I can finalize the order and the gifts will arrive in the time I stated above.
I embossed the sentiment with gold embossing powder and cut it out using my die-cutting machine and the Stitched Rectangle Dies. If you haven’t embossed before, it’s pretty easy. Here are the instructions:
Prepare your cardstock by rubbing the Embossing Buddy over the surface (this helps keep away stray particles of embossing powder). Stamp your sentiment or image using a Versamark pad. This is very sticky ink and your embossing powder will stick right to it. Sprinkle embossing powder over the stamped image. Shake off any excess. Before applying heat to your paper, heat the Heat Tool first so the paper won’t warp (about 10 seconds). Direct the heat over your image and watch the magic happen!
You’ll find all the products I used to create today’s card listed below. Simply click any of the images to place an order or for more information.