by Tracy | Dec 6, 2017 | Uncategorized

I was so excited when the Mini Pizza Boxes were introduced in the Holiday Catalog and even happier to find out this week that they are on the Carryover List which means that they will continue to be available, at least until May 31, 2018! These boxes are the perfect size for a small gift and they’re even food safe so a cookie would fit inside perfectly. And best of all, a gift card will fit inside!
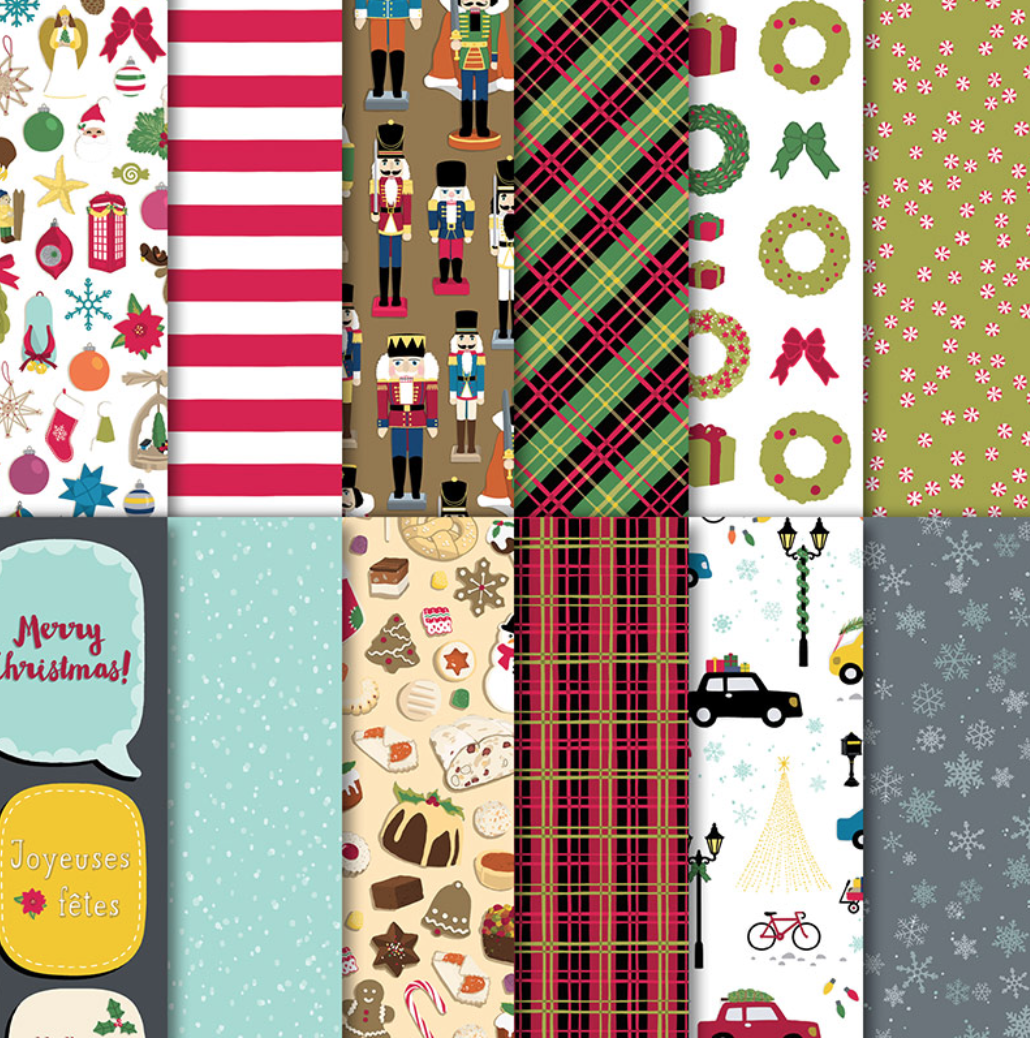
Unfortunately most of the products used on my box (Foil Snowflakes, Year of Cheer Speciality Designer Series Paper and Christmas Quilt Stamp Set) are currently on the Retiring List which means they won’t be available after January 2nd, if they last that long. Everything is WHILE SUPPLIES LAST except for the Christmas Quilt stamp set which will continue to be made until December 21st and then it will be while supplies last.
It’s very quick and easy to cover the pizza box. I used a 3-1/4″ x 3-1/4″ piece of Year of Cheer Designer Series Paper. After gluing that on, I added the Foil Snowflake. I embossed the sentiment using gold embossing powder and a stamp from the Christmas Quilt stamp set. The embossing adds such an elegance to the box. It was cut out with one of the ovals from the Stitched Shapes Framelits dies. Stampin’ Dimensionals are on the back of the sentiment and then attached to the snowflake. Easy but oh so pretty!

You’ll find all the products I used to create today’s project below. Just click on any of the products and you’ll head over to my Stampin’ Up! online store. 
Place any size order using using the Host Code QG26PZB7 and you’ll receive a kit to make all three of the cards below! Orders over $50 will also receive a package of pearls! If you’re ready to place an order, just click here! If you have any questions, please contact me! For more information about the kit and using the Host Code, click here.

Tracy’s Quick Links
To place an order, click here.
View the Stampin’ Up! Holiday Catalog, here.
Sign up for my newsletter here.
Join Paper Pumpkin here
To join Stampin’ Up!, click here.
by Tracy | Dec 5, 2017 | Uncategorized

The Stamparatus is one popular tool! During the first Stamparatus reservation window in November, the maximum number of reservations was reached in just 15 minutes! Wow!! Because so many people rushed to get in line to reserve one, Stampin’ Up! has made some adjustments to the reservation process and I couldn’t be happier with those changes.
The second reservation window opens TODAY, as previously announced, at 2:00 pm Mountain Time and will remain open until December 30; however, during this reservation period they will take as many orders as they receive and not close the window until December 30. So whether the total number of reservations is 100 or 100,000, the window will stay open! Yay!!!
- Beginning March 19, they will ship Stamparatuses in the order the reservations were received (first in, first out) and continue through the next few months and beyond as product arrives in the warehouse. Because shipment dates are based on manufacturing lead times, not all of the reservations made during the December 5–30 window will ship on March 19 (as was previously announced).
- In order to accommodate demand, limits have changed as follows: one reservation per customer and one per demonstrator.
- Because there will not be a maximum number of reservations for the second window, a third window will not be offered. This is your last chance to reserve a Stamparatus before it becomes available in the 2018-2019 annual catalog.
This process just RESERVES a Stamparatus. Although you need to enter your credit card information to reserve one, you are not being charged. Once the Stamparatus arrives in the warehouse, you will receive an email to close the order so that you can verify your credit card number and shipping address. Only then will you be charged.
I placed an order during the first reservation window and it was a super simple process.

- First, create a Stampin’ Up! online store account.
- Once the reservation window is open, beginning at 2:00 pm Mountain Time December 5 until the 30th, go here, and scroll down to The Stamparatus Is Here!
- Click Reserve Yours Now and you will be taken to the reservation page where you’ll first need to sign into your online account.
- Follow the steps below to reserve your Stamparatus.
Important Reminder: In order to make your reservation, you must be logged into your customer online store account.
More Information

Stamparatus Q & A


http://https://youtu.be/3teCr7Xo4G8
If you have ANY questions, please let me know!!!
by Tracy | Dec 4, 2017 | Uncategorized

Happy Monday! I hope you had an enjoyable weekend!
On Friday, during the Glitter Queens Blog Hop, I shared a gift card holder and today I have another one with just a few changes. If you’d like to see the one from Friday, along with pictures and measurements, you can read that post here.

This card is fun because the recipient doesn’t expect to open it up and find a gift card! I used Christmas Around the World Designer Series Paper, which happens to be on the retiring list so if you like it, grab it while it’s still available – it’s while supplies last! This particular pattern is very colorful and I think it would be great for a man or woman.

The snowman card has a ribbon enclosure but ooops, I forgot to add it before adding my panels so I did the next best thing and added some sparkly tinsel trim. The Mini Tinsel Trim Combo Pack is also on the retiring list AND on sale 20%! This really pretty trim would be great on a small packages under there tree! If you’d like more information about the tinsel trim, you can check it out here. The picture above shows the outside of the gift card. It isn’t necessary to add the middle panel but I like it because it gives the gift card holder a more finished look.
I used Real Red 12 x 12 cardstock for the base of the gift card. The Brights Best 12″ x 12″ Cardstock Pack includes 8 sheets of Real Red as well as Daffodil Delight and Bermuda Bay. You can make three gift card holders out of one sheet of 12″ x 12″ paper!
The sentiment on the outside is stamped in Real Red and is part of the set Snowflake Sentiments. This stamp set is not retiring (yay!) but the bundle IS. The bundle includes the Swirly Snowflakes Thinlits Dies and when you purchase both the stamp set (available in clear or wood) and the Thinlits, you save 10%. On the inside, I used a stamp from the set Tags and Trimmings (a retiring set) and stamped it using Memento Black Ink.

Don’t want to use an entire stamp? No problem! Just cover it up with Post It tape or a Post It, ink up the stamp, remove the paper and stamp! Easy peasy!

If you’d like to give this gift card holder a try, click here for all the measurements and pictures which will show youhow to make the part where the gift card sits.
Please note: When you click on the Mini Tinsel Trim Combo Pack, you’ll head over to my online store where you’ll see the sale price.
When placing your online order, use this month’s host code and I’ll send you all the supplies you need to create these three cards! Place a $50+ order and I’ll include a package of pearls. For all the details, click here!
by Tracy | Dec 2, 2017 | Uncategorized

The Stampin’ Up! Year-End Sale has begun! You’ll find discounted items as well as products retiring from the Holiday Catalog.
Year-End Sale Details
- The sale officially ends on January 2nd and after that date, all Holiday Catalog items will no longer be available.
- Stampin’ Up! will continue to produce retiring holiday stamp sets until December 21st. After that date, they will only be available while supplies last. Everything else is while supplies last so grab what you want early!
- Two items on the discounted list – Gold Stampin’ Glitter & 1/8″ Gold Ribbon – are simply on sale and will still be available at the regular price after January 2nd.
- All bundles in the Holiday Catalog are retiring although some of the actual products are not. The products will no longer be offered in a bundle after January 2, 2018. For more information, the key at the end of this PDF will explain it further. If you find it very confusing (and I would completely understand this), please contact me and I can tell you which products will no longer be available in a particular bundle.
- Discounted items may be added to the $99 Starter Kit, which is the best bundle of all. With the $99 Starter Kit, you pay just $99 but are able to order $125 worth of product from any of our current catalogs, with FREE shipping! Really! Plus, you get the perk that all demonstrators get, you can preorder items NOW from the Occasions Catalog that debuts in January 2018. For more information about the $99 Starter Kit, click here, and feel free to contact me with ANY questions!

Click HERE to see all of the discounted items in my online store.

Click HERE to see all the Retiring Items from the Holiday Catalog in my online store.
New Host Code
It’s a new month and that means a brand new host code! When you place an online order using the host code QG26PZB7 in December, you’ll receive three card kits from me. Bump your order up to $50 (before shipping/tax) and I’ll also send you a package of pearls (when a card looks a little plain, adding a few pearls makes all the difference!). If your order is $150 or more, please don’t use the host code. You’ll receive Stampin’ Rewards from Stampin’ Up! (free product, yay!) when you place your order. You’ll still receive your kits and pearls from me!
This month when you use the host code you’ll receive materials to make the three cards below. I’ll cut, score, emboss, die cut and punch everything. You will need to provide your own ink and adhesive. Please note: per Stampin’ Up! policy, I cannot send stamped images to you, so you’ll need to use what you already own or purchase any of the sets I’ve used.
There’s nothing like seeing products in person and with this month’s kits, you’ll get a chance to play with many Stampin’ Up! products as you assemble your cards.
Below you’ll find the ink, stamps and adhesive I used to complete my projects but feel free to use what you already own. Click on any of the products and you’ll be directed to my online store. If you’re ready to place an order, click here, and don’t forget to use the host code QG26PZB7
If you’ve never entered a host code online, it’s really easy! After entering the first item on your order, you are given the option to View the Shopping Bag. Click that option and the page shown below is what you’ll see. Double check that my name is in the upper right hand corner. If it is, add QG26PZB7 in the host code box and click apply! That’s it!
If you’d rather have me place your order for you, and you’re comfortable with giving me your credit card information, I’m happy to do that for you. Once the transaction is completed, your cc information will go through my shredder!

If you have any questions at all, don’t hesitate to contact me! Thank you for shopping with me! I appreciate every single order!
Tracy’s Quick Links
To place an order, click here.
View the Stampin’ Up! Holiday Catalog, here.
Sign up for my newsletter here.
Join Paper Pumpkin here
To join Stampin’ Up!, click here.
by Tracy | Nov 30, 2017 | Uncategorized
Welcome to the Glitter Queens Blog Hop! This month we’re focusing on one of my favorite things to make – gift card holders! I LOVE receiving gift cards and I enjoy giving them too so why not have a really cute way to “wrap it up.”
 I used the absolutely adorable stamp set Seasonal Chums (which includes a snowman, reindeer and pumpkin) and colored the snowman with my Stampin’ Blends. When you untie the beautiful Metallic- Edge Silver Ribbon, inside you’ll find the gift card and a spot to write a note to the lucky recipient.

Here’s what the back looks like. The ribbon is added before you add the panels, something I forgot to do on my second sample, and I’ll be sharing that one on Monday!

(more…)
by Tracy | Nov 30, 2017 | Uncategorized

Several weeks ago I participated in a card sketch challenge using the sketch below. If you’re having trouble coming up with an idea for a card, a sketch is a good way to go, You can change it up a bit as you can see I did on mine. I added a mat to the two top layers, changed the direction of the card and added an oval instead of a circle. This was my first time participating in a card sketch and I have to say, it was fun!

Although the dimensions are on the card sketch, I’ll include mine to reflect the changes I made.

Card Base: Basic Black: 11″ x 4-1/4″ scored at 5-1/4″
2nd Layer: Lemon Lime Twist 5-1/4″ x 4″
3rd Layer: Very Vanilla 5″ x 3-3/4″
4th & 5th Layers: Basic Black: 3-3/4″ x 1-3/4″ Painted Autumn Designer Series Paper: 1-1/2″ x 3-1/2″
Scrap of Basic Black for Scalloped Oval & Very Vanilla for Oval with sentiment
- Run the Very Vanilla cardstock through the Big Shot using the Layered Leaves embossing folder. Although this is a 3D Dynamic Embossing folder, I personally don’t spritz it with water, I just run it through the Big Shot.
- Stamp the sentiment using Memento Ink and cut it out with the Layering Ovals Framelits. The Scalloped Oval is from this same set.
- Finish the card by adding Glitter Enamel Dots.

If you’d like to purchase the products I used to make today’s card, they are listed below. Simply click on any of the items and you’ll head over to my Stampin’ Up! online store. If you have any questions, don’t hesitate to email me!
Upcoming Dates
December 1st: Year-End Sale begins!
December 5th: Second reservation window opens for the Stamparatus.
January 2, 2018: Last Day to order from the Holiday Catalog.
Tracy’s Quick Links
To place an order, click here.
View the Stampin’ Up! Holiday Catalog, here.
Sign up for my newsletter here.
Join Paper Pumpkin here
To join Stampin’ Up!, click here.
by Tracy | Nov 29, 2017 | Uncategorized

In just a few short days, the Stampin’ Up! Year-End Sale will begin! Starting on December 1st, this Friday, select retiring and surplus items will be on sale but only while supplies last. The sale will continue through January 2, 2018, but once items are gone, they’re gone! I’ll post more about the sale as information becomes available to me!

If you weren’t able to reserve a Stamparatus last month, a new reservation window will open next week on December 5th. Last month we were told ahead of time that only a limited number would be available for preorder and within 15 minutes, 27,000 had been spoken for. On December 5th, you’ll have a second chance to preorder this awesome tool. As of today, I haven’t heard the exact time when the reservation window will open but as soon as I have this information, I’ll let you know! If you’d like more details about the Stamparatus, you can click here!
If you have any questions about the sale or the Stamparatus, don’t hesitate to contact me!
Have a great day!
Tracy’s Quick Links
To place an order, click here.
View the Stampin’ Up! Holiday Catalog, here.
Sign up for my newsletter here.
Join Paper Pumpkin here
To join Stampin’ Up!, click here.
by Tracy | Nov 28, 2017 | Uncategorized

Happy Tuesday! I’m so glad that many of you were able to take advantage of the free shipping special from Stampin’ Up! yesterday!! Yay for free shipping!
Today I have another card using our Metallic Foil Snowflakes (they can found in the Holiday Catalog). Unfortunately my picture doesn’t do them justice. No matter how many different angles I tried, I couldn’t capture it! Hopefully the picture from Stampin’ Up! gives you a better idea how pretty these snowflakes are!

Basic Gray: 11″ x 4-1/4″ Scored at 5-1/2″
Whisper White: 5″ x 3-3/4″
Pool Party cardstock: 2-1/2″ x 4-1/4″
Christmas Around the World Designer Series Paper: 4″ x 2-1/4″
Punches: 1-3/4″ Circle & 2″ Circle

- Run the Whisper White through the Big Using the Softly Falling Embossing Folder.
- Glue the Designer Series Paper to the Pool Party piece and then attach Stampin’ Dimensionals to the back.
- Attach the snowflake to the DSP using Liquid Multipurpose glue.
- Emboss the sentiment onto Whisper White using Silver Embossing Powder. Be sure to first swipe the Embossing Buddy over your paper to help with static electricity.
- After adhering the sentiment to Pool Party, add Stampin’ Dimensionals to the back.
This is a card that you can quickly put together and looks so fancy with the embossing and foil snowflake.
A list of all the products I used can be found below. For easy shopping, just click on any item and you’ll head over to my Stampin’ Up! online store. If you have any questions, please don’t hesitate to ask! Have a great day!
Tracy’s Quick Links
To place an order, click here.
To join Stampin’ Up!, click here.
View the Stampin’ Up! Holiday Catalog, here.
Join Paper Pumpkin here
Sign up for my newsletter here.
by Tracy | Nov 27, 2017 | Uncategorized

It isn’t often that Stampin’ Up! offers free shipping but today is the day!!! Any time I can get free shipping, I’m all over it!
- You’ll receive free shipping on any size order.
- There’s no special code, just place your order and you’ll receive free shipping!
- Add items from the Annual Catalog, Holiday Catalog or Clearance Rack to your order.
- This offer is good right now and ends today at 11:59 pm Mountain Time
If you regularly order online, you know that free shipping is a biggie! Have there been times when you didn’t order because your order was small and you didn’t want to pay to pay shipping? No problem today! Had your eye on a Big Shot? This is the perfect time to purchase it! Get it for yourself and tell your significant other that they don’t have to shop for you, they just have to wrap it up!
Ready to place your order and receive FREE SHIPPING?
- Use the host code 3B3Z93NS for a free gift from me! (Don’t use the host code if your order is $150 or over because you’ll receive Stampin’ Rewards from Stampin Up! You’ll also receive my free gift!).
- Click here to see the Annual Catalog online (it’s a big catalog so give it a minute to load).
- Click here to see the Holiday Catalog online.
- Click here to see what’s available on the Clearance Rack.
- Click here to head on over to my Stampin’ Up! online store to start shopping!!!
- If you have any questions, please contact me!
Tracy’s Quick Links
To place an order, click here.
Sign up for my newsletter here.
To purchase Stampin’ Blends, click here!
View the Stampin’ Up! Holiday Catalog, here.
Join Paper Pumpkin here
Join Stampin’ Up! today!
by Tracy | Nov 24, 2017 | Uncategorized


It’s the biggest shopping day of the year! Personally I hate all the crowds and never step foot near a mall the day after Thanksgiving but today we have an 8 hour car ride ahead of us as we head back home after visiting family for the holiday. I can still do some online shopping in the car!!
I mentioned the other day that I pulled out my foil snowflakes and finally started creating with them. This time I combined the snowflake with paper from the Christmas Around the World Designer Series Paper. I’ve never made a Christmas card with Pool Party cardstock but I think the combination is really pretty!
Christmas Around the World DSP #144629
My sentiment is from the stamp set Tags & Trimmings which can be found in the Holiday Catalog and I embossed it using silver embossing powder. I cut it out using the Stitched Shapes Framelits and adhered it to the snowflake using Stampin’ Dimensionals. I used the gorgeous 3/8″ Metallic Edge Ribbon underneath the snowflake (this ribbon is also available with a gold edge). I’ve listed all of the products I used to make today’s card below. Have a great day! If you’re shopping, I hope you mark a lot of names off your list!

Tracy’s Ordering Special

Place a minimum $35 order and I’ll send you a combo pack (light and dark of one color) of Stampin’ Blends (or choose two individual markers). Once I receive notification of your order, I’ll contact you for your color choice(s). Please be sure to use the Host Code 3B3Z93NS when placing your order!! On the 27th I will order all of the markers and once I receive them from Stampin’ Up!, I’ll send yours right off to you!!! Don’t use this code if your order is $150 or more as you’ll receive Stampin’ Rewards from Stampin’ Up! You’ll still receive your gift from me!
Click on any of these products and you’ll head over to my Stampin’ Up! online store!
by Tracy | Nov 23, 2017 | Uncategorized

If you live in the United States, Happy Thanksgiving! It’s a day to reflect on all that we’re thankful for (and eat delicious turkey)!
If you are in a shopping mood today, the Online Extravaganza is still going strong!

For easy ordering, click each product to be directed to my Stampin’ Up! online store and/or to see the sale price. Click HERE for the Online Extravaganza PDF with lists all oft he discounted prices.
Tracy’s Ordering Special
Place a minimum $35 order and I’ll send you a combo pack (light and dark of one color) of Stampin’ Blends (or choose two individual markers). Once I receive notification of your order, I’ll contact you for your color choice(s). Please be sure to use the Host Code 3B3Z93NS when placing your order!! On the 27th I will order all of the markers and once I receive them from Stampin’ Up!, I’ll send yours right off to you!!! Please do NOT use the Host Code if your order is $150 or more! You’ll receive Stampin’ Rewards (free product) from Stampin’ Up! as well as my free gift!
by Tracy | Nov 22, 2017 | Uncategorized

Last week over on my Facebook page I gave away of package of our beautiful foil snowflakes. I pulled mine out and started creating!
The foil snowflakes and Year of Cheer Speciality Paper make it so easy to make a pretty card! Both of these products are part of the Year of Cheer Suite and if you’d like to see all of the gorgeous products in this suite, check out the video below. (more…)


 Gusseted Cellophane Bags")


