by Tracy | Jun 20, 2025 | Thinking of You Card
The card I’m sharing with you today was made using the Beautiful Motifs Dies, the Right Words Stamp Set, Nested Essentials Dies, Plaster Painting 3D Embossing Folder and Low Profile Dots.


I started with a piece of Thick Basic White cardstock for the base of my card. I embossed a piece of Basic White cardstock using the Plaster Painting 3D Embossing Folder and my Stampin’ Cut & Emboss Machine. I adhered the embossed cardstock to the front of my card.


I cut a piece of Garden Green cardstock and two pieces of Granny Apple Green cardstock. I adhered an adhesive sheet to the back of all three pieces and then ran them through my Stampin’ Cut & Emboss Machine using one of the dies in the Beautiful Motifs Dies. I adhered the Granny Apple Green fronds to the front, first and then I adhered the Garden Green one in the middle.


I stamped sentiment onto Basic White cardstock using the Right Words stamp set in Garden Green ink. I cut the sentiment out using Nested Essentials Dies, added Stampin’ Dimensionals to the back and adhered it to the front of the card.
To complete my card, I added three Low Profile Dots to the front of the card.


Supply List
Below you’ll find all the Stampin’ Up! supplies I used for today’s card. If you need any stamping supplies, I’d love to be your demonstrator! You can place an order by clicking any of the images below to go to my Stampin’ Up! online store.
The Specialty Plate is used with 3D Embossing Folders and Hybrid Embossing Folders.
Bundle Alert: The Beautiful Motifs Bundle is available with a 10% discount rather than buying the products separately.

Measurements
- Thick Basic White cardstock: 4-1’4″ x 11″
- Basic White cardstock (embossed): 4″ x 5-1/4″
- Basic White cardstock (sentiment): approximately 4″ x 1-3/4″
- Garden Green cardstock (fern): approximately 2-1/2″ x 4-1/2
- Granny Apple Green cardstock (fern): (2) approximately 2-1/2″ x 4-1/2″
Month by Month Album Retreat 2025 Kit
Calling all scrapbookers! Simply purchase the Month by Month Album Retreat 2025 Kit, and you can attend the event Stampin’ Up! is putting on. This item is only while supplies last!
- Who: Crafters who love to scrapbook!
- When: July 16–18, 2025, 2:00–10:30 p.m. (MT)
- Where: Private Facebook Group
- Registration: There is no registration for this event! By purchasing the Month by Month Album Retreat 2025 Kit, you’ll get access to an exclusive Facebook group where the live event will stream.
- Price of Month by Month Album Retreat 2025 kit: $250
- Language of Event: This event will be presented in English only.
- After the Event: You can access the recorded event videos on the Virtual Album Retreat Facebook group page.


All Suites & Suite Products, Buy One, Get One 50% Off – Ends June 30th

- All available suites and suite products from the 2025–2026 Annual Catalog and Online Exclusives are buy one, get one 50% off.
- When you shop the sale, the 50% off discount will apply to the lower-priced item (for example, if you buy a suite collection and a stamp set from a suite, the suite would be full price, and the stamp set would be 50% off).
- Suite collections are available if all items are in stock; if all items are not in stock, you can still shop the available suite products.
- You don’t have to buy a suite and suite products all from the same suite collection for the discount to apply. You can buy any suite products from any suite.
- The discount will appear in your cart once you’ve added two items within the sale parameters to your cart.
- Products are available only while supplies last.
Last Chance Products

Click here to go straight to the Last Chance Products page on the Stampin’ Up! site!
Two New Stampin’ Up! Kits
Click each graphic below for more information about the kit. These kits can be found in the Online Exclusives part of the Stampin’ Up! website.


Sweeter With You Paper Pumpkin Kit
You can now order subscriptions and manage your Paper Pumpkin subscription on the Stampin’ Up! website! You can cancel your Paper Pumpkin subscription at any time. If you want to skip the next kit, you can do that! You also receive Stampin’ Rewards when you order a single kit or purchase a 3-month, 6-month or 12-month subscription to Paper Pumpkin. If you’d like to subscribe, please click the graphic below.

An additional coordinating add-on is available but only for Paper Pumpkin subscribers. Click the image below for more information.

Thanks for stopping by today! Enjoy your weekend!
by Tracy | Apr 17, 2025 | Kindness Card
The card I’m sharing with you today was made predominantly with Online Exclusives. I used the Mixed Labels Bundle, Mixed Media Florals Designer Series Paper, Plaster Painting 3D Embossing Folder, and Ombre Matte Decorative Dots, which are on the Last Chance List and this is the only product that isn’t an Online Exclusive.
If the links don’t work, click them again. I always check my links and I had to click some of them several times.


I started off with a piece of Calypso Coral cardstock for the base of my card. Then, I embossed a piece of Basic White cardstock using the Plaster Painting 3D Embossing Folder and my Stampin’ Cut & Embossing Machine. Next, I adhered it to the base of my card.


I then layered another piece of Calypso Coral cardstock with the Mixed Media Florals Designer Series Paper. I adhered this piece to the front of the card.

I stamped the sentiment onto a piece of Basic White cardstock using Calypso Coral ink and the stamp set, Mixed Labels. I cut it out using the Mixed Labels Dies. On the back, I added two rows of Stampin’ Dimensionals, on the right side only, and adhered it to the panel of cardstock/DSP.
To complete my card, I added a piece of Basic White cardstock to the inside and added three large Ombre Matte Decorative Dots in Calypso Coral to the front of the card. These Ombre Matte Decorative Dots are available while supplies last!


Supply List
Below you’ll find all the Stampin’ Up! supplies I used for today’s card. If you need any stamping supplies, I’d love to be your demonstrator! You can place an order by clicking any of the images below to go to my Stampin’ Up! online store. The Specialty Plate is used with 3D Embossing Folders and Hybrid Embossing Folders.
Measurements
- Calypso Coral cardstock: 11″ x 4-1/4″ score at 5-1/2″
- Calypso Coral cardstock: 4″ x 3-1/2″
- Basic White cardstock (embossed and inside card): (2) 5-1/4″ x 4″
- Basic White cardstock (sentiment): approximately 3″ x 2″
- Mixed Media Florals Designer Series Paper: 3-3/4″ x 3-1/4″
Last Chance Products
Click here to go straight to the Last Chance Products page on the Stampin’ Up! site!
Three New Stampin’ Up! Kits
Click each graphic below for more information about the kit.


Mountain Majesties Paper Pumpkin Kit
Did you know that Paper Pumpkin has moved to the Stampin’ Up! website? You can now order subscriptions and manage your subscription on the Stampin’ Up! website! If you’d like to subscribe, please click the graphic below.

An additional coordinating add-on is available but only for Paper Pumpkin subscribers. Click the image below for more information.

Thanks for stopping by today!
by Tracy | Mar 14, 2025 | Hello Card
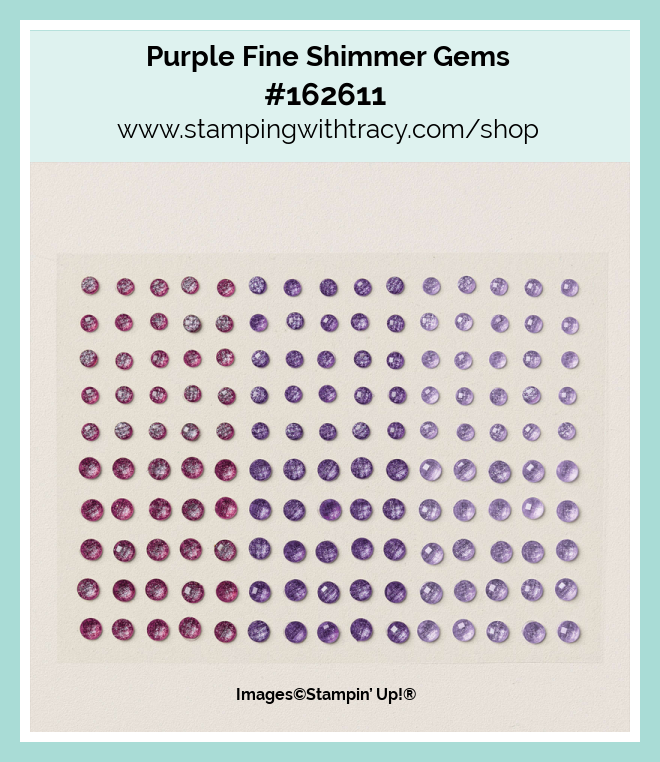
The card I’m sharing with you today was made using Mixed Florals Bundle, Beautiful Butterflies stamp set, Perennial Postage Dies, Plaster Painting 3D Embossing Folder and Purple Fine Shimmer Gems.


I started with a piece of Thick Basic White cardstock for the base of my card. Then, I embossed a piece of Highland Heather cardstock using the Plaster Painting 3D Embossing Folder and my Stampin’ Cut & Emboss Machine. Next, I adhered the embossed cardstock to the front of the card.

I die cut a piece of Basic White cardstock using the Perennial Postage Dies using the largest die in the set. I then adhered it to the front of the card. I stamped the flowers using the Mixed Florals Stamp Set in Memento Ink and then cut them out using the Mixed Florals Dies.
Next, I colored the flowers (using Highland Heather Stampin’ Blends), the leaves (using Granny Apple Green Stampin’ Blends) and the smaller flowers (using Boho Blue Stampin’ Blends). I added Stampin’ Dimensionals to the the back and adhered it to the front of the card.


I stamped the sentiment on Basic White cardstock using the Beautiful Butterflies Stamp Set and Highland Heather ink. I cut it out using the second smallest die in the Perennial Postage Dies. I added Stampin’ Dimensionals to just the top of the sentiment and adhered it to the flowers.
To complete my card, I added three large Purple Fine Shimmer Gems to the front of the card.


Supply List
Below you’ll find all the Stampin’ Up! supplies I used for today’s card. If you need any stamping supplies, I’d love to be your demonstrator! You can place an order by clicking any of the images below to go to my Stampin’ Up! online store. The Specialty Plate is used with 3D Embossing Folders and Hybrid Embossing Folders.
Measurements
- Thick Basic White cardstock: 4-1/4″ x 11 score at 5-1/2″
- Highland Heather cardstock: 4″ x 5-1/4″
- Basic White cardstock (tulips): approx. 3-3/4″ x 5-1/4″
- Basic White cardstock (Perennial Postage die cut): approx. 4-1/4″ x 5-1/2″
- Basic White cardstock (sentiment): approx. 1-1/4″ x 2-1/4″
Last Chance Products
Click here to go straight to the Last Chance Products page on the Stampin’ Up! site!
Two New Stampin’ Up! Kits
Click each graphic below for more information about the kit.


Inked Occasions Paper Pumpkin Kit
Did you know that Paper Pumpkin has moved to the Stampin’ Up! website? You can now order subscriptions and manage your subscription on the Stampin’ Up! website! If you’d like to subscribe, please click the graphic below.
If you have a current subscription to Paper Pumpkin, you will need to claim your subscription. You can follow written directions, here or you can watch a video, here.

An additional coordinating add-on is available but only for Paper Pumpkin subscribers. Click the image below for more information.
Thanks for stopping by today!
by Tracy | Mar 5, 2025 | Card Sampler, Stampin' Up! Card Kit, Thank You Card
Important
Before I share my card with you today, I want my customers to see this! The Annual Catalogs are a big expense for me but I love to send complimentary copies to my current customers (I don’t want to presume if you want the catalog). If you are a current customer of mine, you can click the graphic below to get the form to fill out to request an Annual Catalog or you can click here! Edited to add: I’m sorry many of you had problems opening the form. I think it’s fixed now! I’m so sorry for the confusion!

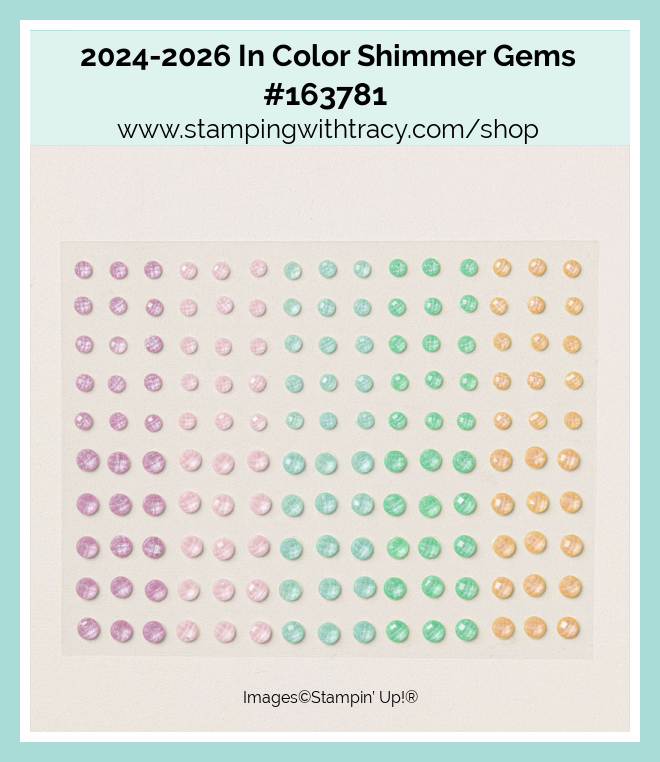
To create today’s card, I used the Textured Notes Bundle, Pretty Petals stamp set, Pretty Petals Dies (the Pretty Petals products are a Last Chance product and both are on sale), Plaster Painting 3D Embossing Folder and 2024-2026 In Color Shimmer Gems.


I started with a piece of Petunia Pop cardstock for the base of my card. Then, I embossed a piece of Basic White cardstock using the Plaster Painting 3D Embossing Folder and my Stampin’ Cut & Emboss Machine. Next, I adhered the embossed cardstock to the front of the card.


I used Shy Shamrock cardstock to cut a rectangle using the Textured Notes Dies. Then, I cut a smaller rectangle out of Basic White cardstock. Then, I stamped the leaves onto the Basic White rectangle using Shy Shamrock ink and the Pretty Petals stamp set. Next, I stamped the flowers onto Basic White cardstock using Petunia Pop ink and the Pretty Petals stamp set. Then, I cut them out using the Pretty Petals Dies. I used Mini Glue Dots to adhere the flowers to the greenery.

I stamped the sentiment onto Basic White cardstock in Petunia Pop ink using the Textured Notes Stamp Set. Then, I cut the sentiment out using the Textured Notes Dies, added Stampin’ Dimensionals to the back and adhered it to the front of the card.
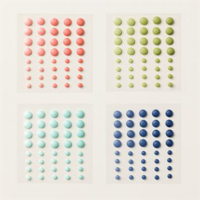
To complete my card, I added a piece of Basic White cardstock to the inside and added three Shy Shamrock Shimmer Gems to the white rectangle.

Supply List
Below you’ll find all the Stampin’ Up! supplies I used for today’s card. If you need any stamping supplies, I’d love to be your demonstrator! You can place an order by clicking any of the images below to go to my Stampin’ Up! online store. The Specialty Plate is used with 3D Embossing Folders and Hybrid Embossing Folders.
Sale: $9.00
Price: $18.00
Sale: $10.00
Price: $25.00
Measurements
- Petunia Pop cardstock: 11” x 4-1/4” scored at 5-1/2” OR 8-1/2” x 5-1/2” scored at 4-1/4” the only difference is how the card opens
- Basic White cardstock (embossed and inside card: (2) 5-1/4″ x 4″
- Basic White cardstock (rectangle): approximately 4-3/4″ x 3-1/4″
- Basic White cardstock (sentiment): scrap
- Shy Shamrock (rectangle): approximately 5-1/4″ x 3-3/4″
Lovely Garden Card Sampler

My Lovely Garden Card Sampler is now available! When you use the special host code GUCCBTSX and your order is a minimum of $60 (before shipping/tax), I’ll send you two each of three cards. To create this card sampler, I used Lovely Garden Designer Series Paper and the stamp set, Pattern of Friendship.
Here’s What You’ll Receive:
- All the paper and embellishments needed to make six cards. Envelopes will also be provided. For this sampler you only need to provide a stamp set, ink and adhesive (see below for what you’ll need).
- A PDF Tutorial with instructions, pictures, cutting measurements and a complete supply list of all the products used.
- Earn at least one Bradley Point (earn ten Bradley Points and redeem them for free product) when your order is $50 or more.
- If your order is over $150, please do not use the host code or you won’t receive your Stampin’ Rewards. After you place your order, simply email me and let me know that you’d like the Lovely Garden Card Sampler (you only need to do this if your order is over $150). You can send me an email on the sidebar.
All the Other Important Information:
- Your Lovely Garden Card Sampler will be shipped first-class mail approximately March 21, 2025 and will be mailed to the address used on your online order.
- You’ll receive an email when I mail your Card Sampler and the PDF Tutorial will be included in that email.
- When using the Lovely Garden Card Sampler host code to place your order, you will not qualify for other current host code rewards.
- Per Stampin’ Up! policy, card samplers can only be mailed within the United States.
You’ll receive all the materials to make six cards. You’ll quickly have beautiful cards ready to be mailed out to someone special. If you can’t make the cards once they arrive, no worries, each card is labeled in its own clear envelope which makes it easy to come back to later. Once you’ve made all the cards in the Sampler, you’ll be able to easily replicate each card by following the easy to follow directions in the PDF (pictures are included as well).
The special Lovely Garden Card Sampler HOST CODE will close at the end of the day on March 11, 2025 and after that date, the Card Sampler will no longer be available.
Approximate ship date of the Card Sampler is March 21, 2025.

Click here to place an order
Supplies Needed To Create the Card Sampler
Listed below are the supplies you’ll need to complete the cards exactly as shown (or you can use what you already own). Simply click any of the products and you’ll be taken to my Stampin’ Up! online store. When placing your order, don’t forget to use the special Card Sampler Host Code (please do not use host code if your order is over $150 – see above).

Last Chance Products
Click here to go straight to the Last Chance Products page on the Stampin’ Up! site!
Two New Stampin’ Up! Kits
Click each graphic below for more information about the kit.
Paper Pumpkin Kit – Daisy Daydream

An additional coordinating add-on is available but only for Paper Pumpkin subscribers. Click the image below for more information.

Thanks for stopping by today!