Beautiful new products from the Christmastime is Here Suite will be available for purchase starting on Friday, November 1st! But before I share that information, I want to let you know, Stampin’ Up! is having a 24-Hour Sale on select stamp sets on October 23, 2019! Wondering if a stamp set you’ve had your eye on is included in the sale? Click here for a three page PDF flyer with all the details! This sale is only for 24 hours so be sure to shop early on October 23rd!
Christmastime Is Here
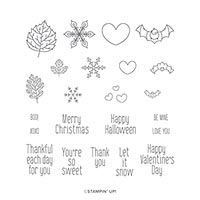
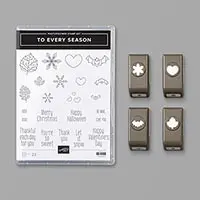
The Christmastime Is Here suite of products will be available to purchase on November 1st. This exclusive, limited-time collection of festive, floral coordinating products has everything you need to share love, joy, and creativity this holiday season.
If you’d like to get this beautiful product suite early, join now and you can add any of these items to your Starter Kit!!
Below you’ll find all the new products coming your way on November 1st (while supplies last)! For a full size PDF flyer showing all these products along with the item numbers and prices, please click here. (The Designer Series Paper is very pretty in person and several of the designs have gold accents).
The beautiful card below (created by Stampin’ Up! concept artists) shows the suite in action!
Starter Kit
Did you know the Stampin’ Up! Starter Kit is just $99? When you purchase the kit, you then choose $125 worth of Stampin’ Up! product that YOU want from any current catalog. Plus, any product from the Christmastime Is Here suite can also be chosen as part of your Starter Kit.
Stampin’ Up! has just released a brand new Paper Trimmer to demonstrators (it’s unknown when it will be made available to customers) and you can also add this new trimmer to your Starter Kit (don’t you love the preorder perks??!!).
If you’d like more information about the Starter Kit, please click here for some answers to frequently asked questions. If you don’t see an answer to your question, don’t hesitate to contact me!
Tracy’s Card Kits
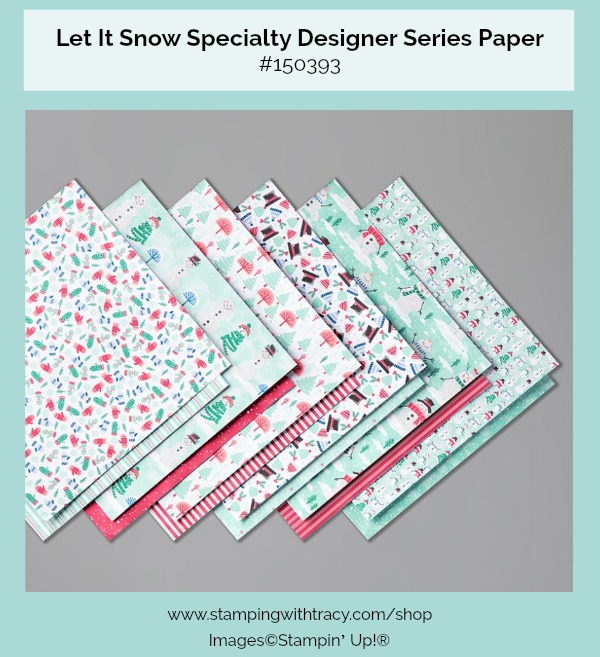
Every order placed at my Stampin’ Up! online store receives at least one card kit as well as a PDF Tutorial which includes pictures, directions, measurements and a supply list. All of the paper is cut, scored, embossed and die cut for you! The paper in your card kit may differ from the card above, but all of the kits are made with Let It Snow Designer Series Paper. To complete your card exactly as shown, you’ll need Real Red ink, the stamp set Birds of a Feather, adhesive and Stampin’ Dimensionals
Use the host codeG9KEYSSJwhen placing your order and you’ll receive an extra kit! When you use the code, I’m alerted that you’d like the extra card kit.
If your order is $150 or more, please do NOT use the host code so that you’ll receive Stampin’ Rewards (free product). If your order is $150 or more, please email me after you’ve placed your order, letting me know you’d like the extra kit.
If you aren’t sure how to use a host code, clickhere.
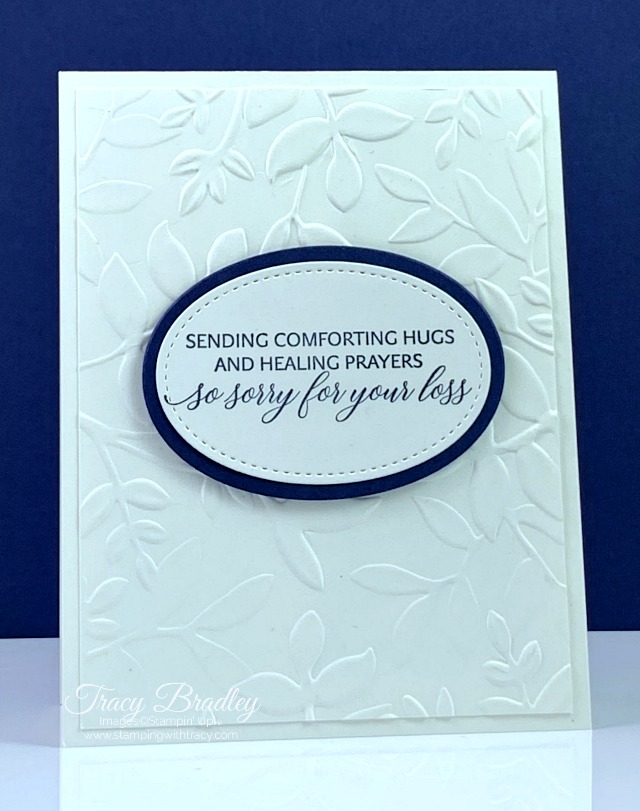
Condolence cards are the most difficult cards to make but I recently needed one to send to my cousin’s wife. Matthew passed away several weeks ago and he was only 48 years old. Far too young to leave us.
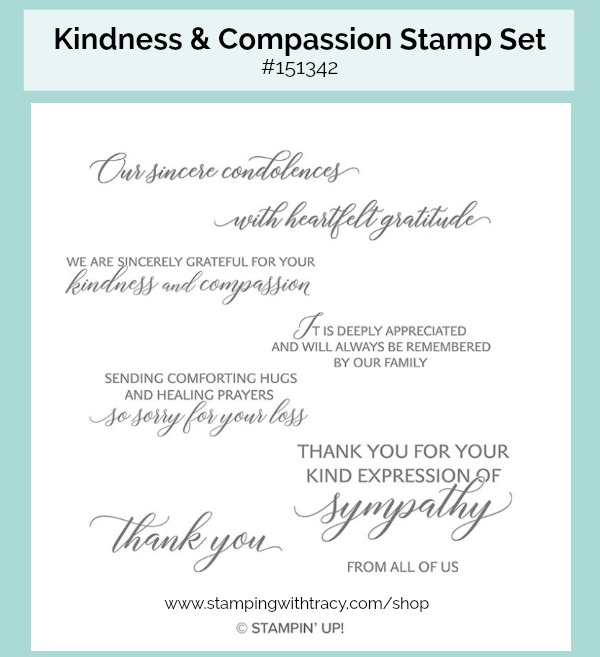
I love everything about the Kindness & Compassion stamp set. It’s always difficult finding the right words to say to someone who’s experiencing extreme grief and convey that you care. This set has a variety of beautiful sentiments written in a beautiful font. Plus it includes “thank you.”
I used a base of Thick Whisper White with another layer of Whisper White, embossed with the Layered Leaves 3D Embossing Folder. The sentiment was stamped in Night of Navy and cut out using the Stitched Shapes Dies. The larger Night of Navy oval underneath it was cut out using the Layering Ovals Dies.
If you’d like to make today’s card, you can find all the measurements below the Supply List.
Supply List
If you need any stamping supplies, I’d love to be your demonstrator! You can place an order by clicking any of the images below to go to the homepage of my Stampin’ Up! online store.If you have questions about products you’re considering purchasing or ones you’ve already purchased, I’m just an email away (click the Email Me button on the sidebar of my blog).
Thick Whisper White cardstock: 11″ x 4-1/4″ scored at 5-1/2″ OR 8-1/2″ x 5-1/2″ scored at 4-1/4″
Whisper White cardstock: 5-1/4″ x 4″
Whisper White cardstock: scrap for sentiment
Night of Navy cardstock: scrap for oval
The fun fold card, below, is one of the card kits I’m currently sending out when an order is placed at my Stampin’ Up! online store.You’ll also receive a PDF Tutorial that includes directions, measurements, pictures and a supply list. Click hereto read about the other perks I offer when you shop with me!
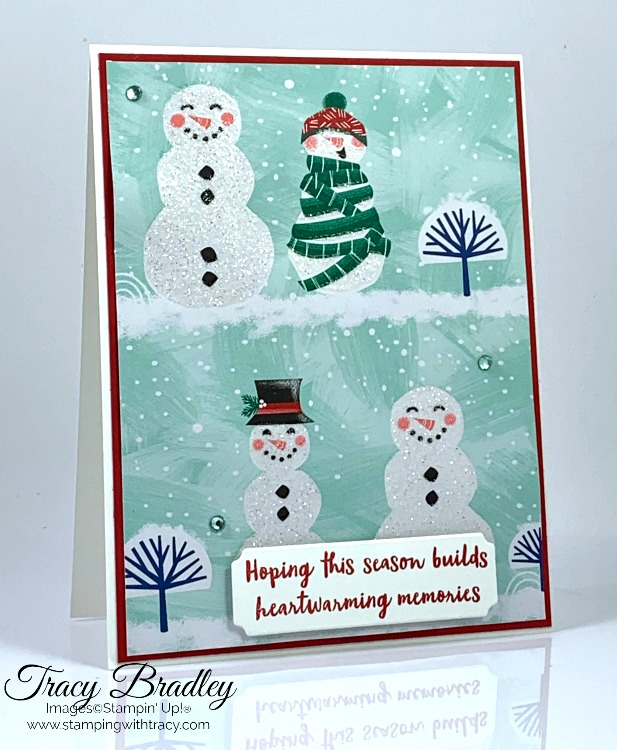
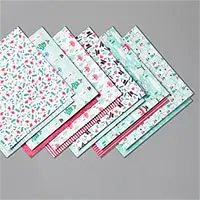
Oh my gosh, how cute are these snowmen from Let It Snow Specialty Designer Series Paper? When photographing the card, I hoped I could capture the beautiful sparkle on all the snowmen. Funny thing is, when I saw this paper in the catalog, I didn’t initially buy it. It didn’t jump out at me as something I had to have. But then someone I know mentioned how cute it was so I purchased it and I was absolutely NOT disappointed! If you’d like to see in more detail, all the designs in this package of paper, go to my Stampin’ Up! online store, here. Click the “+” on the image of the paper to make the photo larger. Then, you’ll see arrows and you’ll be able to scroll through all the designs.
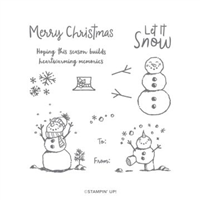
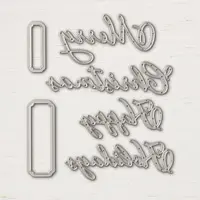
The base of my card is Thick Whisper White. When the base of my card is white, I always use our Thick Whisper White rather than our regular Whisper White. The next layer is our Real Red cardstock. The sentiment is from the stamp set Snowman Season and was also stamped in Real Red ink and cut out using the Merry Christmas Dies. It’s a super simple card to make and super cute with all the sparkly snowmen!
If you’d like to recreate this card, you can find all the measurements below the Supply List.
Supply List
If you need any stamping supplies, I’d love to be your demonstrator! You can place an order by clicking any of the images below to go to the homepage of my Stampin’ Up! online store.If you have questions about products you’re considering purchasing or ones you’ve already purchased, I’m just an email away (click the Email Me button on the sidebar of my blog).
Let It Snow Speciality Designer Series Paper: 5″ x 3-3/4″
Whisper White cardstock: scrap for sentiment
Use the host code G9KEYSSJ when placing your online order and I’ll send you at least two of my card kits (the fun fold card below is one of the cards you might receive)!
Click here to place an order at my Stampin’ Up! online store!
Today’s fun fold card is one of my current card kits! Every order placed at my Stampin’ Up! online store receives at least one card kit as well as a PDF Tutorial which includespictures, directions, measurements and a supply list. All of the paper is cut, scored, embossed and die cut for you! The paper in your card kit may differ from the card above, but all of the kits are made with Let It Snow Designer Series Paper. To complete your card exactly as shown, you’ll need Real Red ink, the stamp set Birds of a Feather, adhesive and Stampin’ Dimensionals
Use the host code G9KEYSSJ when placing your order and you’ll receive an extra kit! If your order is $150 or more, please do NOT use the host code so that you’ll receive Stampin’ Rewards (free product). After you’ve placed your order, please email me letting me know you’d like the extra kit.
If you aren’t sure how to use a host code, clickhere.
Sign up by November 10 to receive the November Paper Pumpkin kit. Everything you’ll need to create 24 holiday-themed gift tags of 4 various sizes and designs will be included! The colors used in this kit are Early Espresso, Pool Party, Poppy Parade, and Shaded Spruce.
Click herefor more information or to sign up! If you have questions, please contact me!
Today I have another FREE tutorial for you. I used Stampin’ Up! Let It Snow Designer Series Paper along with the stamp set Christmas Gleaming to create the card in the tutorial. To access your free tutorial which includes directions, photos, a supply list and measurements, click below.
Today’s the last day to sign up for my Online Card Class. Simply place a minimum $50 order at my Stampin’ Up! online store using the host code EPZEKZXJ and I’ll send you 6 card kits which will include all the paper and embellishments you’ll need. You’ll need to supply your own ink, adhesive and stamp set. For all the details, click here!
On a side note, yesterday my daughter and son-in-law had to say goodbye to their precious dog, Jake. Losing an animal is never easy because they are our family. I cried a bucketload of tears yesterday. One day Jake was doing fine and the next, he was gone. He was the most gentle animal and full of so much love. Here’s a picture of Jake and my youngest grandson about a month ago. Go hug your furry loved ones and let them know how much they mean to you.
Last week was not my best week for blogging! I did write a blog post for Wednesday which announced my Online Card Class but it didn’t go out to all my subscribers until Thursday due to a problem with the program that sends out the emails. I was able to figure out pretty quickly what the problem was able to fix it. Then I was planning for another post on Friday only to find out that I couldn’t access all my photos because I had upgraded the operating systems on both my Mac desktop and laptop computer and it took quite some time to catalog thousands of pictures (yikes)!! What can you do when technology fails you? Not much!!
Today was supposed to be the last day to order my October Online Card Class, but because it was delayed a day, I’m extending it until tomorrow. All the other deadlines will stay the same but you’ll have until tomorrow to place a $50 or more order using the host code EPZEKZXJ to receive my FREE online card class. For more details, please click here.
You can now sign up for the November Paper Pumpkin kit! This kit will include 24 holiday-themed gift tags of 4 various sizes and designs. Every Paper Pumpkin kit includes everything you’ll need to create the crafty goodness inside! Plus you’ll be able to access a video showing how to put the cards or in this case, gift tags, together. If you decide you love the kits, do nothing and you’ll keep receiving Paper Pumpkin. You can cancel at any time or even skip a shipment!
The colors in the November kit are: Early Espresso, Pool Party, Poppy Parade, and Shaded Spruce.
My October Online Card Class is now available but only for a limited time! This month I designed three cards using the stamp set, Snowman Season. When you place a minimum $50 order at my Stampin’ Up! online storeAND use my special host codeEPZEKZXJ, you’ll receive all the paper and embellishments needed to create six cards, two of each design. My October Online Card Class is only available until October 14, 2019.
Here’s how you can earn my FREE October Online Card Class:
Place a minimum $50 order (before tax/shipping) at my Stampin’ Up! online store.
Use my special October Online Card Class Host Code when placing your order: EPZEKZXJ
Place your order on or before Monday, October 14, 2019.
If your order reaches $150 or more, please do not use the host code so you can receive Stampin’ Rewards (free product directly from Stampin’ Up!). Once you place your order, simply drop me an email letting me know that you’d like the Online Card Class.
Here’s What You’ll Receive:
All the paper and embellishments needed to make 6 cards (2 each of three designs). The paper will be cut, scored, punched, embossed and die cut for you! You’ll need to supply your own adhesive, ink and stamp set (per Stampin’ Up! I cannot send stamped images). Envelopes will also be provided for each card.
A FREE video explaining how to make each card along with some tips and tricks.
A FREE PDF Tutorial with instructions, pictures, cutting measurements and a complete supply list of all the products used. Keep the instructions in a binder so you can refer to them over and over again!
All the Other Important Stuff
Your kits will ship first-class mail no later than Monday, October 21, 2019 and will be mailed to the address used on your online order.
On Monday, October 21st, you’ll receive an email from me that will include your PDF Tutorial and the link for the video.
When using the October Online Card Class Host Code to place your order, you will not qualify for my regular Customer Rewards Card Kits.
Per Stampin’ Up! policy, kits can only be mailed within the United States.
The special October Online Card Class HOST CODE will close at the end of the day on October 14th and after that date, the class will no longer be available!
Expected ship date of the kits is October 21, 2019.
After the deadline of October 14th, I will order all of the product I need to make the kits. It will take me about one week to order, cut, assemble and ship the kits.
If you aren’t sure how to use a host code, click here!
Listed below are the supplies, not included in your kit, that you’ll need to complete the cards (or you can substitute any of these products with what you already own). Click any of the products below and you’ll be taken to my online store. When placing your order, don’t forget to use the special October Online Card Class Host Code to receive your free card kit, PDF tutorial, and video link.
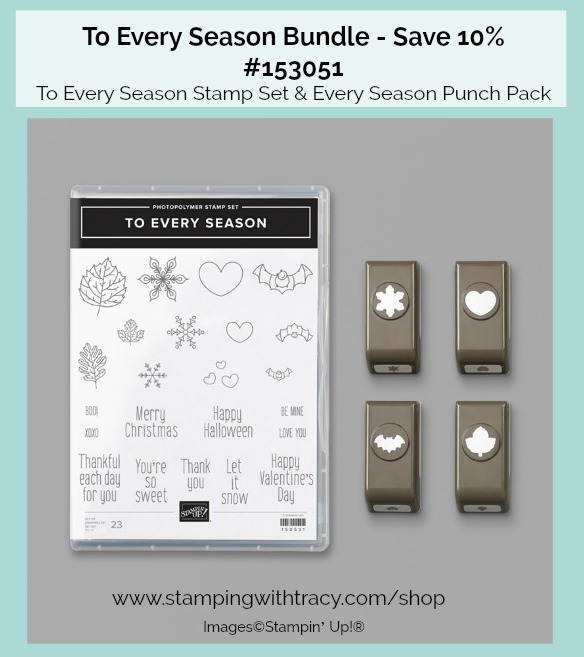
Bundle Alert: If you are interested in purchasing both the stamp set, Snowman Season and the coordinating Snowman Builder Punch, be sure to use the item #152337 and you’ll save 10%. If you purchase them separately, you won’t save 10%. Click here to see the Snowman Season Bundle. Please note: I will be punching the snowman and hat for you using the Snowman Builder Punch, but you’ll need to stamp onto that small area. If you have the punch, it will be much easier.
It’s Tuesday and time for a free tutorial! This week’s tutorial is for the card I posted yesterday. It’s a design you can use over and over again. Simply change up the Designer Series Paper and cardstock and you’ll have a different look. If you missed yesterday’s post, you can see it here. You can access your free tutorial below.
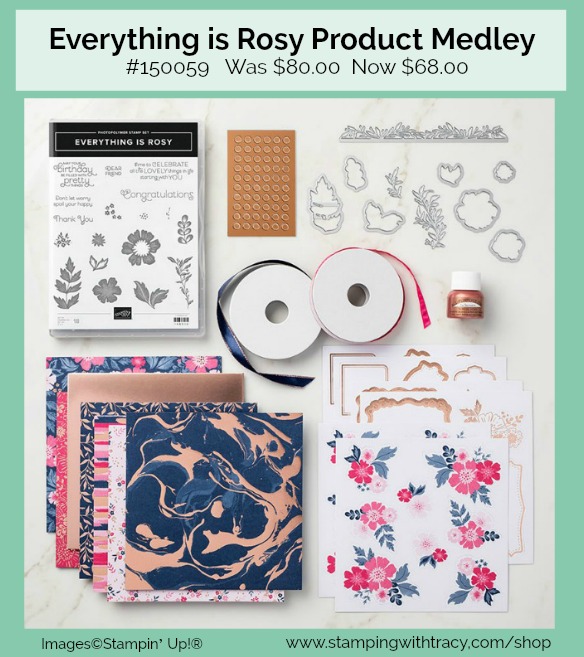
The Everything is Rosy Product Medley was offered during the month of May. Stampin’ Up! has enough remaining inventory to offer it once again but at a 15% savings. It includes a stamp set, dies, ribbon, Designer Series Paper and more! You can find it on the Clearance Rack and it’s only available while supplies last!
Only two more days left to purchase the October Paper Pumpkin. Try it for a month and if you don’t like it, you can cancel or even skip a month. The October and November kits coordinate but can stand alone. Lots of holiday fun! Click here to order or for more information.
Today I have an easy card featuring Wrapped in Plaid Designer Series Paper from the Holiday Catalog but first, I have a winner to announce! On Friday I offered Blog Candy (a make n take packet) for the project I shared. Thanks so much to everyone who left a comment! The random name drawn was Lesa! Congratulations, Lesa!!!! (I will contact Lesa but if I don’t hear back from her within 24 hours, I will draw another name on Tuesday).
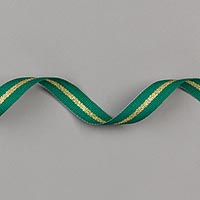
I combined several new products from the Holiday Catalog to create today’s card. The base of the card is Real Red. The next layer is also Real Red and I placed it inside the Hammered Metal embossing folder using my die-cutting machine. Then I added a piece of Wrapped in Plaid Designer Series Paper on the lower half of the Real Red. Before adhering it to the base, I wrapped the elegant Shaded Spruce/Gold 3/8″ Ribbon around the cardstock/Designer Series Paper and tied a bow. Stampin’ Dimensionals were added to the back before adhering it to the base.
For the sentiment, I used the stamp set Perfectly Plaid and stamped it in Shaded Spruce onto Whisper White cardstock. It was cut out using the Merry Christmas Dies. All the products I used can be found in the supply list below!
If you need any stamping supplies, I’d love to be your demonstrator! You can place an order by clicking any of the images below to go to the homepage of my Stampin’ Up! online store.If you have questions about products you’re considering purchasing or ones you’ve already purchased, I’m just an email away (click the Email Me button on the sidebar of my blog).
It’s time for the Glitter Queens Blog Hop and this month we’re sharing treat holders!
My treat holder fits a pack of gum, perfectly! This is a project I’ve shared before but when you use brand new paper (I used Monster Bash Designer Series Paper), it becomes new again! Three months ago I joined Weight Watchers so I knew my treat holder couldn’t have chocolate in it (I LOVE chocolate) so I opted for a delicious pack of gum!
This little treat holder couldn’t be easier to make! You’ll need to do a little scoring and a little cutting and that’s it. It comes together really quickly! I don’t have a new video today creating my project using Monster Bash Designer Series Paper but I do have a video I made last year that will demonstrate how to make the holder and all the measurements (please note: the Designer Series Paper and stamp set used in the video are no longer available). You can find the video farther down in this post.
I used Basic Black and Pumpkin Pie cardstock to create the holder. A strong adhesive is needed to assemble the box so I used Tear & Tape. There’s a little flap on the front of the box that is held closed with Glittered Organdy Ribbon. The sentiment sits on Silver Glimmer Paper and both were cut out using our Layering Circle Dies. Sometimes it can be tricky getting things to stick to glimmer paper so I used Multipurpose Liquid Glue. To attach the glimmer paper and sentiment to the box, I added more liquid glue to the upper half of the circle. Our Every Season Punch Pack has a cute little bat that I cut out using Basic Black cardstock and adhered with a glue dot (you could use the glue again but the dot fits perfectly). I used Snail adhesive to attach the Monster Mash Designer Series Paper to the holder but again, you could use liquid glue.
This is the gum I used!
Blog Candy
Leave a comment today to be entered to win my blog candy! I’ll send one person all the paper and embellishments needed to create today’s project (you’ll need to supply your own stamp set, ink and adhesive). I’m sorry but I can only send to a U.S.A. address but all comments are welcome! The winner will be announced on Monday right here on my blog. If your name is drawn, you’ll be asked to email me your address. If I don’t receive a reply within 24 hours, I’ll draw an alternate winner who will be announced on Tuesday.
Ready for more treat ideas? Dee Slater is next in the lineup! Click here to head over to her blog!
If you need any stamping supplies, I’d love to be your demonstrator! You can place an order by clicking any of the images below to go to the homepage of my Stampin’ Up! online store.If you have questions about products you’re considering purchasing or ones you’ve already purchased, I’m just an email away (click the Email Me button on the sidebar of my blog).
Here’s the video from last year that will walk you through the steps to make the holder.
Place an order at my Stampin’ Up! online storeand I’ll send you at least one of my card kits which will include all the paper and embellishments needed to create a beautiful card. You’ll also receive a PDF Tutorial with pictures, directions, measurements and a supply list. The paper in your card kit may differ from the card below, but all of the kits are made with Perennial Essence Designer Series Paper (the cards with this design will be available until October 6th).
Use the host code VHD7EB7A when placing your order and you’ll receive an extra kit! This offer is available until October 6, 2019.
If you aren’t sure how to use a host code, click here.
To complete the card below, exactly as shown, you’ll need to supply your own adhesive, Blueberry Bushel ink and the stamp set, Bloom & Grow.
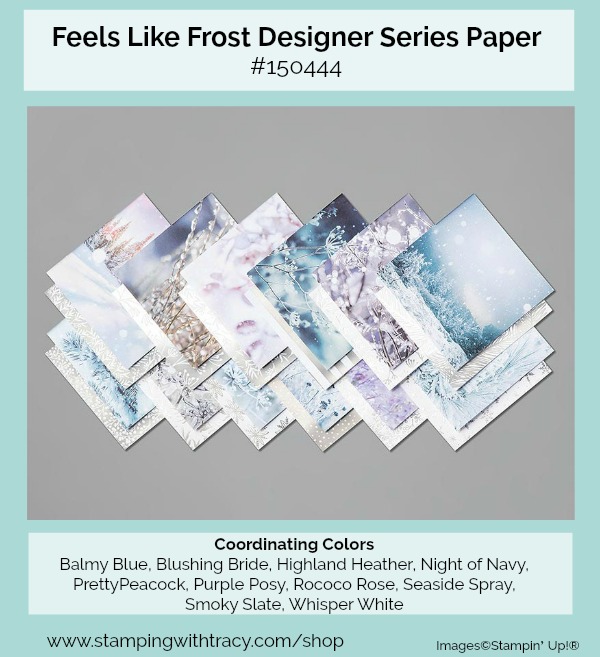
Today’s card features Feels Like Frost Designer Series Paper and Rococo Rose cardstock. Because this paper is so stunning, you don’t need much to create a quick and easy card!
As of today, Feels Like Frost is currently on backorder but should be arriving in the warehouse next week. It can still be added to your order and will ship when it’s back in stock.
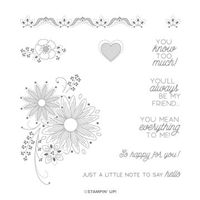
I love the sentiment which is from the stamp set A Little Lace. I stamped it onto Whisper White cardstock using Rococo Rose ink. I used Stampin’ Dimensionals to pop the sentiment up which I think makes all the difference!
All the supplies I used to create today’s card can be found below, as well as the measurements.
Supply List
If you need any stamping supplies, I’d love to be your demonstrator! You can place an order by clicking any of the images below to go to the homepage of my Stampin’ Up! online store.If you have questions about products you’re considering purchasing or ones you’ve already purchased, I’m just an email away (click the Email Me button on the sidebar of my blog).
Feels Like Frost Designer Series Paper: 5″ x 3-3/4″
Tracy’s Card Kits
Place an order at my Stampin’ Up! online storeand I’ll send you at least one of my card kits which will include all the paper and embellishments needed to create a beautiful card. You’ll also receive a PDF Tutorial with pictures, directions, measurements and a supply list. The paper in your card kit may differ from the card above, but all of the kits are made with Perennial Essence Designer Series Paper (the cards with this design will be available until October 6th).
Use the host code VHD7EB7Awhen placing your order and you’ll receive an extra kit! This offer is available until October 6, 2019.
If you aren’t sure how to use a host code, click here.
To complete the card above, exactly as shown, you’ll need to supply your own adhesive, Balmy Blue ink and the stamp set, Bloom & Grow.