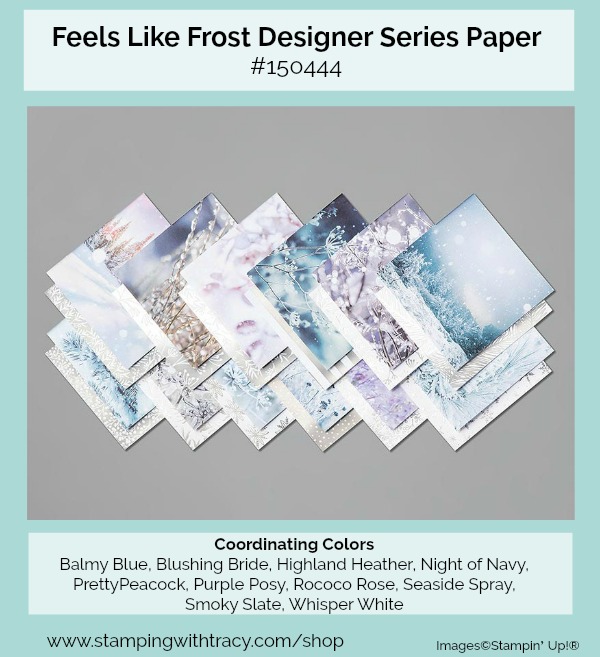
Today’s card uses another design from our Feels Like Frost Designer Series Paper. I think everyone loves it because it’s currently on backorder but should be back in stock next week. You can still add it your order and when it’s back in stock, it will ship separately.
When using this paper for the first time, my goal was to see what I could make with it that wasn’t about the holidays. If you missed my other cards using this paper, you can see them here,here and here.
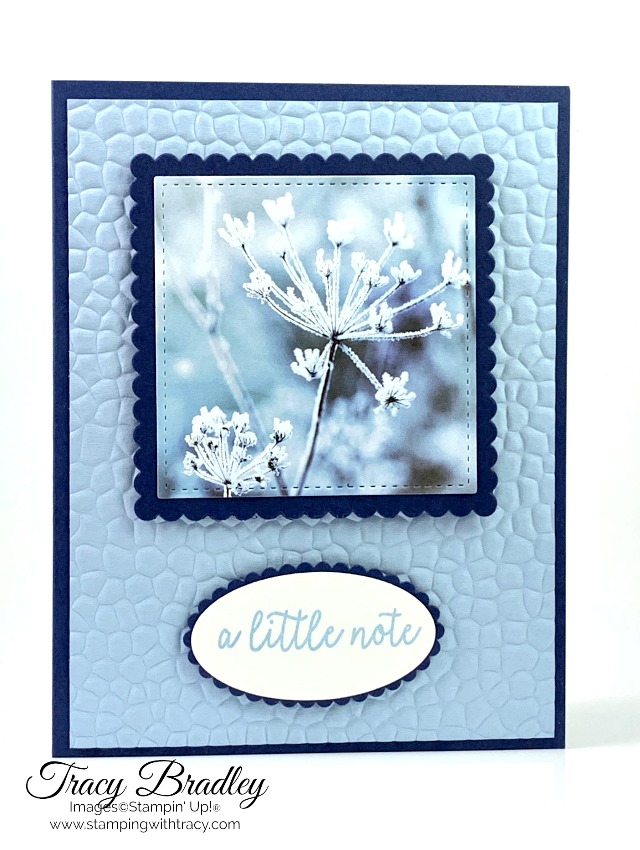
The base of my card is Night of Navy and I combined it with Seaside Spray, one of our new In Colors this year. I used our Hammered Metal Embossing Folder to create the texture on the Seaside Spray cardstock. The Feels Like Frost Designer Series Paper was cut out using our Stitched Shapes Dies. The Night of Navy scalloped square was created using our Layering Squares Dies. These two sets of dies coordinate perfectly together! The sentiment was stamped in Seaside Spray onto Whisper White cardstock and cut out with the Layering Ovals Dies. The Night of Navy scalloped oval was also cut out using these dies.
All the products I used can be found in the Supply List below.
Supply List
If you need any stamping supplies, I’d love to be your demonstrator! You can place an order by clicking any of the images below to go to the homepage of my Stampin’ Up! online store.If you have questions about products you’re considering purchasing or ones you’ve already purchased, I’m just an email away (click the Email Me button on the sidebar of my blog).
It’s Tuesday which means I have a free tutorial for you! I chose a card I shared last week that uses our beautiful Feels Like Frost Designer Series Paperfrom the Holiday Catalog. If you missed that post, you can see it here. You can access your free tutorial below!
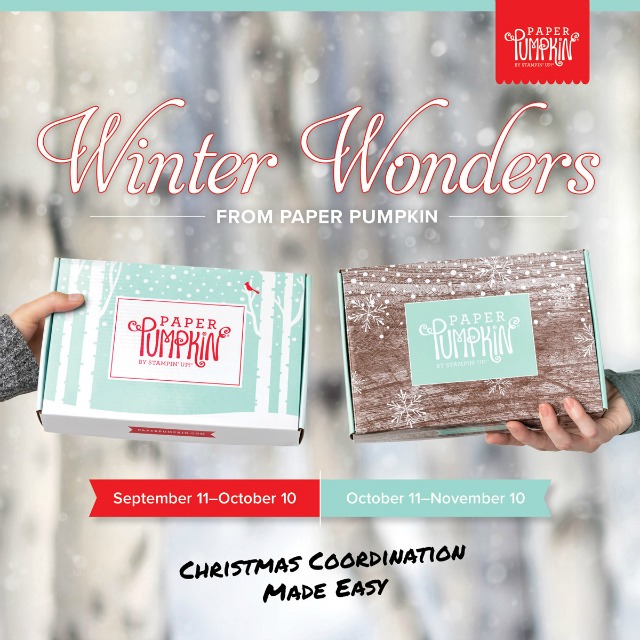
October 10th is the last day to sign up to receive the next Paper Pumpkin kit! To sign up or for more information, click here!
I have a very quick and easy card today! This is another card where the Designer Series Paper does all the work! I used Feels Like Frost Designer Series Paperalong with Seaside Spray and Night of Navy cardstock.
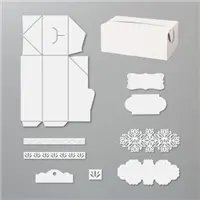
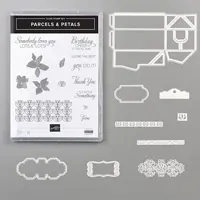
I used the stamp set, Parcels & Petals, and cut the sentiment out using the Perfect Parcels Dies. If you purchase both the stamp set and dies using the special bundleitem number 151107, you’ll save 10%!
If you’d like the measurements for today’s card, you can find them farther down in the post.
If you need any stamping supplies, I’d love to be your demonstrator! You can place an order by clicking any of the images below to go to the homepage of my Stampin’ Up! online store.If you have questions about products you’re considering purchasing or ones you’ve already purchased, I’m just an email away (click the Email Me button on the sidebar of my blog).
Place an order at my Stampin’ Up! online storeand I’ll send you at least one of my card kits which will include all the paper and embellishments needed to create a beautiful card. You’ll also receive a PDF Tutorial with pictures, directions, measurements and a supply list. The paper in your card kit may differ from the card above, but all of the kits are made with Perennial Essence Designer Series Paper (the cards with this design will be available until October 6th).
Use the host code VHD7EB7Awhen placing your order and you’ll receive an extra kit! This offer is available until October 6, 2019.
If you aren’t sure how to use a host code, click here.
To complete the card above, exactly as shown, you’ll need to supply your own adhesive, Blueberry Bushel ink and the stamp set, Bloom & Grow.
Due to quality issues, Purple Posy has not been available since the Annual Catalog debuted. Due to a supplier problem, three embossing folders haven’t been available as well but you can purchase all these products today!
These products are now available:
Purple Posy stamp pad
Purple Posy Ink Refill
In Color 2019-2021 Classic Stampin’ Pads
Tufted 3D Embossing Folder
Corrugated 3D Embossing Folder
Layered Leaves Embossing Folder
Click any of the images below and you’ll be taken right to my Stampin’ Up! online store.
Yesterday I shared a card using Feels Like Frost Designer Series Paper (you can see it here). This gorgeous paper comes in 6″ x 6″ sheets and after making yesterday’s card, I had a strip of paper left over and used it to make today’s card!
I used Purple Posy cardstock for the base of my card. The next layer is Whisper White that was embossed with the Subtle embossing folder. This step is optional but I personally like the added texture. The sentiment is from the stamp set, Very Versailles. It was inked up with Gorgeous Grape and then cut out with the Stitched Shapes Dies. The Purple Posy layer below it was made using the Layering Ovals Dies. All the supplies I used are listed below in the Supply List and below that, you’ll find the measurements.
Have a great weekend!
Supply List
If you need any stamping supplies, I’d love to be your demonstrator! You can place an order by clicking any of the images below to go to the homepage of my Stampin’ Up! online store.If you have questions about products you’re considering purchasing or ones you’ve already purchased, I’m just an email away (click the Email Me button on the sidebar of my blog).
Feels Like Frost Designer Series Paper: 4-7/8″ x 2-1/4″
Purple Posy cardstock: 11″ x 4-1/4″
Purple Posy cardstock: 5-1/4″ x 2-5/8″
Purple Posy cardstock: scrap for layer under sentiment
Whisper White cardstock: 5-1/4″ x 4″
Whisper White cardstock: scrap for sentiment
Tracy’s Card Kits
Place an order at myStampin’ Up! online storeand I’ll send you at least one of my card kits which will include all the paper and embellishments needed to create a beautiful card. You’ll also receive a PDF Tutorial with pictures, directions, measurements and a supply list. The paper in your card kit may differ from the card above, but all of the kits are made with Perennial Essence Designer Series Paper (the cards with this design will be available until October 6th).
Use the host code VHD7EB7A when placing your order and you’ll receive an extra kit! This offer is available until October 6, 2019.
If you aren’t sure how to use a host code, clickhere.
To complete the card above, exactly as shown, you’ll need to supply your own adhesive, Gorgeous Grape ink and the stamp set, Bloom & Grow.
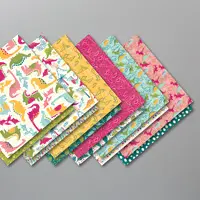
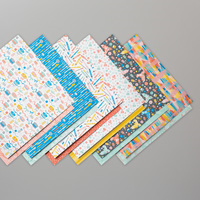
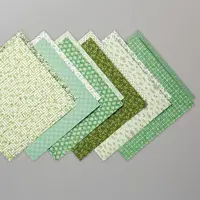
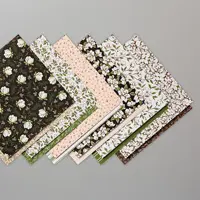
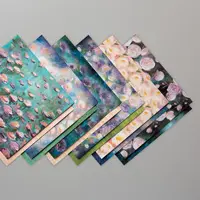
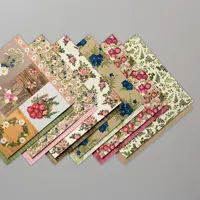
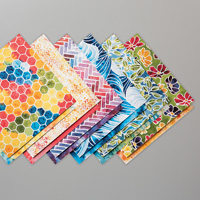
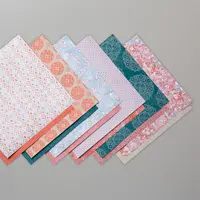
When you purchase three packages of any of the papers below, you’ll get the fourth one absolutely free! When placing your order, add the three packages you’d like and then the system will prompt you to enter your FREE fourth package! Click here for more information! Clicking on the images below will give you more information about each package of paper.
When I first saw Feels Like Frost Designer Series Paperin the catalog, I knew I’d be ordering it but when it arrived and I opened the package . . . WOW . . . this paper is gorgeous! It’s 6″ x 6 and comes with 48 sheets with 4 each of 12 double-sided designs. It features photographic imagery on one side and a silver foil design on the other side. It really is so pretty!!
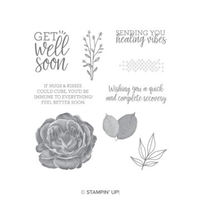
Feels Like Frost is also very versatile! I wanted my first cards using this paper to show that it can be used for more than holiday cards. I combined today’s card with Purple Posy and Gorgeous Grape cardstock and the stamp set, Healing Hugs. For someone who loves purple (me, me!!) this card is sure to be loved.
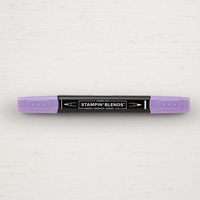
I wanted Highland Heather rhinestones so I took our Basic Rhinestones and colored them with a Dark Highland Heather Stampin’ Blend. Perfectly coordinated! Our Noble Peacock Rhinestones include Gorgeous Grape but using my Stampin’ Blend gave me a lighter shade.
I also wanted the sentiment to pop on the Gorgeous Grape so I heat embossed it with white embossing powder. It was cut out using the Pretty Label Punch.
All of the supplies I used for today’s card can be found below. To place an order, or for more information, click any of the images below to go to the homepage of my Stampin’ Up! online store.If you have questions about products you’re considering purchasing or ones you’ve already purchased, I’m just an email away (click the Email Me button on the sidebar of my blog).
Place an order at my Stampin’ Up! online storeand I’ll send you at least one of my card kits which will include all the paper and embellishments needed to create a beautiful card. You’ll also receive a PDF Tutorial with pictures, directions, measurements and a supply list. The paper in your card kit may differ from the card above, but all of the kits are made with Perennial Essence Designer Series Paper (the cards with this design will be available until October 6th).
Use the host code VHD7EB7A when placing your order and you’ll receive an extra kit! This offer is available until October 6, 2019.
If you aren’t sure how to use a host code, click here.
To complete the card above, exactly as shown, you’ll need to supply your own adhesive, Flirty Flamingo ink and the stamp set, Bloom & Grow.
The October and November Paper Pumpkin kits coordinate! Sign up by October 10th to receive the October kit which will include 10 cards and envelopes. Both the October and November kits will include these coordinating colors: Early Espresso, Pool Party, Poppy Parade and Shaded Spruce. These two kits coordinate but each kit is all-inclusive and can stand alone. (The November kit will include 24 holiday themed gift tags of 4 various sizes and designs). Sign up here to receive the October Paper Pumpkin Kit (the November kit will be available next month).
If you have any questions, don’t hesitate to contact me!
Today’s card might look familiar. I made a very similar card a few weeks ago but made several changes to this “updated” one.
Here’s the first one I made. If you want to check it out, here’s the link to that post.
What are the differences between the two? First, I changed the measurements, just slightly so that less white would show between the panels (I’ve listed the measurements farther down in the post). Today’s card uses the Hammered Metal embossing folder rather than the Mosaic embossing folder. Instead of using the Gathered Leaves Dies, I used our Leaf Punch and embossed them with the Hammered Metal folder. The sentiment was cut out with the Stitched Shapes Dies and layered on a Merry Merlot oval using the Layering Ovals Dies.
Both cards have a cute little bow, made with our Linen Thread. The bows were adhered using just a dot of our Multipurpose Glue. A little of that glue goes a long, long way!
Try taking a card you’ve made before and change it up a bit!
If you need any stamping supplies, I’d love to be your demonstrator! You can place an order by clicking any of the images below to go to the homepage of my Stampin’ Up! online store.If you have questions about products you’re considering purchasing or ones you’ve already purchased, I’m just an email away (click the Email Me button on the sidebar of my blog).
Pear Pizzazz cardstock: 2-5/8″ x 1-3/8″ and scraps for leaves
Come to Gather Designer Series Paper: 3-1/2″ x 2-5/8″
Merry Merlot: scrap for oval
Whisper White: scrap for sentiment
Tracy’s Card Kits
Place an order at my Stampin’ Up! online storeand I’ll send you at least one of my card kits which will include all the paper and embellishments needed to create a beautiful card. You’ll also receive a PDF Tutorial with pictures, directions, measurements and a supply list. The paper in your card kit may differ from the card above, but all of the kits are made with Perennial Essence Designer Series Paper (the cards with this design will be available until October 6th).
Use the host code VHD7EB7A when placing your order and you’ll receive an extra kit! This offer is available until October 6, 2019.
If you aren’t sure how to use a host code, click here.
To complete the card above, exactly as shown, you’ll need to supply your own adhesive, Gorgeous Grape ink and the stamp set, Bloom & Grow.
There are only a few days left to purchase three select packages of Designer Series Paper and get the fourth one free! There are some beautiful papers available! Click here for all the details!
It’s Tuesday and time for another free tutorial! The card I chose to feature is the one I posted yesterday. If you missed that post, you can see it here.
To access your free tutorial, simply click the image below! Happy Cardmaking!
Tracy’s Card Kits
Place an order at my Stampin’ Up! online storeand I’ll send you at least one of my card kits which will include all the paper and embellishments needed to create a beautiful card. You’ll also receive a PDF Tutorial with pictures, directions, measurements and a supply list. The paper in your card kit may differ from the card above, but all of the kits are made with Perennial Essence Designer Series Paper (the cards with this design will be available until October 6th).
Use the host code VHD7EB7A when placing your order and you’ll receive an extra kit! This offer is available until October 6, 2019.
If you aren’t sure how to use a host code, click here.
To complete the card above, exactly as shown, you’ll need to supply your own adhesive, Blueberry Bushel ink and the stamp set, Bloom & Grow.
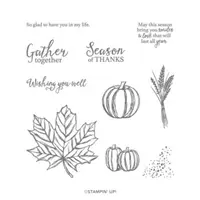
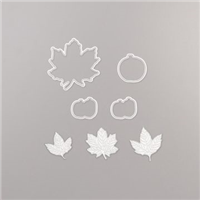
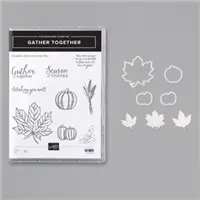
Today I have a card featuring several products from the Come to Gather Suite: Gathered Leaves Dies, Gather Together stamp set and Come to Gather Designer Series Paper. To see all the products in this suite, click here.
Wow, I really love the Gathered Leaves Dies! As I mentioned last week, to really make the leaves POP, I spritzed the cardstock with a small amount of water before cutting the leaves out. It really makes a big difference when you do this step!
This Designer Series Paper coordinates beautifully with Pretty Peacock and Mint Macaron cardstock. I used these two color for the leaves as well as the base and first layer of the card. My sentiment was stamped with Pretty Peacock ink and cut out with the Stitched Nested Labels Dies. The Holiday Rhinestone Basic Jewels add the finishing touch. If you’d like to make today’s card, you’ll find the measurements below the supply list.
Supply List
If you need any stamping supplies, I’d love to be your demonstrator! You can place an order by clicking any of the images below to go to the homepage of my Stampin’ Up! online store.If you have questions about products you’re considering purchasing or ones you’ve already purchased, I’m just an email away (click the Email Me button on the sidebar of my blog).
Come to Gather Designer Series Paper: 4-3/4″ x 3-1/2″
Whisper White: scrap for sentiment
Tracy’s Card Kits
Place an order at my Stampin’ Up! online storeand I’ll send you at least one of my card kits which will include all the paper and embellishments needed to create a beautiful card. You’ll also receive a PDF Tutorial with pictures, directions, measurements and a supply list. The paper in your card kit may differ from the card above, but all of the kits are made with Perennial Essence Designer Series Paper (the cards with this design will be available until October 6th).
Use the host code VHD7EB7A when placing your order and you’ll receive an extra kit!
This offer is available until October 6, 2019.
If you aren’t sure how to use a host code, clickhere.
To complete the card above, exactly as shown, you’ll need to supply your own adhesive, Blueberry Bushel ink and the stamp set, Bloom & Grow.
The October and November Paper Pumpkin kits coordinate! Sign up by October 10th to receive the October kit which will include 10 cards and envelopes. Both the October and November kits will include these coordinating colors: Early Espresso, Pool Party, Poppy Parade and Shaded Spruce.
These two kits coordinate but each kit is all-inclusive and can stand alone. (The November kit will include 24 holiday themed gift tags of 4 various sizes and designs). Sign up here to receive the October Paper Pumpkin Kit (the November kit will be available next month).
If you have any questions, don’t hesitate to contact me!
I had such a positive response to my card using the Baby Wipe Technique that I decided to make another one! If you missed yesterday’s post using this technique, which also includes a video, click here.
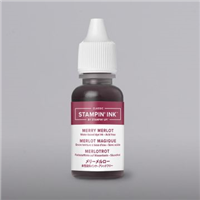
To create the leaves on today’s card I used two ink refill colors, Merry Merlot and Crushed Curry along with the stamp set, Colorful Seasons. This technique uses several folded baby wipes with drops of your favorite ink which then becomes your stamp pad. It’s really fun and once you get started, you can’t stop!
After making the first card, above, I decided to make another one while my “stamp pad” was juicy. The second one is more muted but still so pretty!
I used the stamp set, Free as a Bird, for the sentiment with Merry Merlot ink. I wanted a small sentiment because I didn’t want to cover the beautiful leaves! The sentiment on the first card was placed up near the top to cover a leaf that didn’t get completed stamped. I didn’t want to waste my masterpiece so did the next best thing – I covered it up!
Here’s a side by side comparison of the two cards.
I hope you give this technique a try!
Supply List
If you need any stamping supplies, I’d love to be your demonstrator! You can place an order by clicking any of the images below to go to the homepage of my Stampin’ Up! online store.If you have questions about products you’re considering purchasing or ones you’ve already purchased, I’m just an email away (click the Email Me button on the sidebar of my blog).
Place an order at my Stampin’ Up! online storeand I’ll send you at least one of my card kits which will include all the paper and embellishments needed to create a beautiful card. You’ll also receive a PDF Tutorial with pictures, directions, measurements and a supply list. The paper in your card kit may differ from the card above, but all of the kits are made with Perennial Essence Designer Series Paper (the cards with this design will be available until October 6th).
Use the host code VHD7EB7A when placing your order and you’ll receive an extra kit! This offer is available until October 6, 2019.
If you aren’t sure how to use a host code, click here.
To complete the card above, exactly as shown, you’ll need to supply your own adhesive, Flirty Flamingo ink and the stamp set, Bloom & Grow.
The October and November Paper Pumpkin kits coordinate! Sign up by October 10th to receive the October kit which will include 10 cards and envelopes. Both the October and November kits will include these coordinating colors: Early Espresso, Pool Party, Poppy Parade and Shaded Spruce. These two kits coordinate but each kit is all-inclusive and can stand alone. (The November kit will include 24 holiday themed gift tags of 4 various sizes and designs). Sign up here to receive the October Paper Pumpkin Kit (the November kit will be available next month).
If you have any questions, don’t hesitate to contact me!
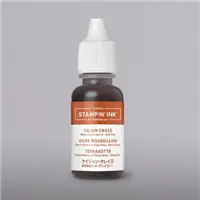
Today’s card was made using the Baby Wipe Technique (I also have a video). This technique is super easy and lots of fun! You’ll need baby wipes and our ink refills (I also refer to them as reinkers in the video). I used Pumpkin Pie, Cajun Craze and Crushed Curry.
The leaf stamp is from Colorful Seasons and because I needed a small sentiment, I used the To Every Season stamp set. The base of the card is Pumpkin Pie with another layer of Cajun Craze.
To cut out the sentiment, I used these punches (click the images in the supply list below for more information about the punches):
Sentiment: 1″ Circle Punch
Pumpkin Pie layer: 1-1/8″ Scallop Circle Punch
Cajun Craze layer: 1-3/8″ Scallop Circle Punch
Give this technique a try! I think you’ll really enjoy it!
Supply List
If you need any stamping supplies, I’d love to be your demonstrator! You can place an order by clicking any of the images below to go to the homepage of my Stampin’ Up! online store.If you have questions about products you’re considering purchasing or ones you’ve already purchased, I’m just an email away (click the Email Me button on the sidebar of my blog).
Place an order at my Stampin’ Up! online storeand I’ll send you at least one of my card kits which will include all the paper and embellishments needed to create a beautiful card. You’ll also receive a PDF Tutorial with pictures, directions, measurements and a supply list. The paper in your card kit may differ from the card above, but all of the kits are made with Perennial Essence Designer Series Paper (the cards with this design will be available until October 6th).
Use the host code VHD7EB7A when placing your order and you’ll receive an extra kit! This offer is available until October 6, 2019.
If you aren’t sure how to use a host code, click here.
To complete the card above, exactly as shown, you’ll need to supply your own adhesive, Balmy Blue ink and the stamp set, Bloom & Grow.
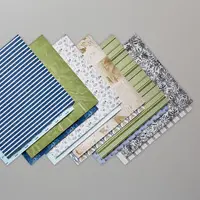
If you follow my blog, you already know I love our Perennial Essence Designer Series Paper. Truly, this paper is gorgeous and I can’t stop creating with it. Perennial Essence Designer Series Paper, along with nine other papers, is part of the Buy 3, Get 1 Free promotion currently going on. Choose three packages of paper and then you’ll be prompted to enter your FREE fourth package! I’ve listed all the papers included in the sale, below. Simply click any of the images to get a closer look! This sale ends on September 30, 2019.
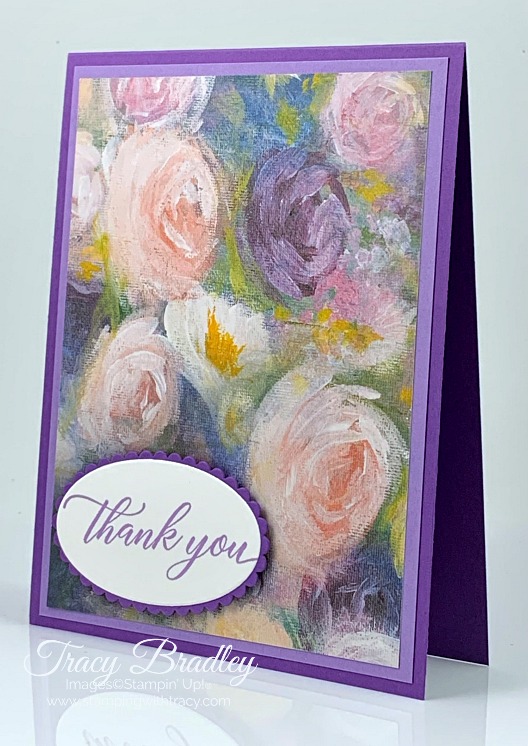
Today’s card fits into the quick and easy category. I used a base of Gorgeous Grape cardstock and paired it with Highland Heather. I used the stamp set, Kindness & Compassion along with Highland Heather ink for the sentiment and cut it out using the Layering Ovals Dies. Definitely an easy card to make and when you use beautiful paper, it doesn’t take much to create a beautiful card. I’ve included the measurements I used if you’d like to recreate today’s card!
Measurements
Gorgeous Grape cardstock: 11″ x 4-1/4 Score at 5-1/2″ and fold in half
Highland Heather cardstock: 5-1/4″ x 4″
Perennial Essence Designer Series Paper: 5″ x 3-3/4″
Gorgeous Grape cardstock: scrap for oval under sentiment
Whisper White cardstock: scrap for the sentiment
Supply List
If you need any stamping supplies, I’d love to be your demonstrator! You can place an order by clicking any of the images below to go to the homepage of my Stampin’ Up! online store.If you have questions about products you’re considering purchasing or ones you’ve already purchased, I’m just an email away (click the Email Me button on the sidebar of my blog).
Place an order at my Stampin’ Up! online store and I’ll send you at least one of my card kits which will include all the paper and embellishments needed to create a beautiful card. You’ll also receive a PDF Tutorial with pictures, directions, measurements and a supply list. The paper in your card kit may differ from the card above, but all of the kits are made with Perennial Essence Designer Series Paper.
Use the host code VHD7EB7A when placing your order and you’ll receive an extra kit! This offer is available until October 6, 2019.
If you aren’t sure how to use a host code, click here.
To complete the card above, exactly as shown, you’ll need to supply your own adhesive, Blueberry Bushel ink and the stamp set, Bloom & Grow.