by Tracy | Jan 23, 2023 | Uncategorized
Before sharing my card with you today, I want to let you know that today’s the last day my Country Floral Card Sampler will be available. Read below for all the details.

Place a minimum $50 order (before tax/shipping) at my Stampin’ Up! Online Store using my special host code VXFBRDDS and I’ll send you my Country Floral Card Sampler. You’ll also receive at least one Sale-a-Bration gift directly from Stampin’ Up!
You’ll receive six card kits (two cards each of three different designs) and everything will be cut, scored, and die cut for you! You’ll quickly have six cards ready to mail or give to someone special. You’ll need to supply your own stamp set, adhesive and ink. For more details and the supplies you’ll need, please click HERE.
Don’t forget to use the host code when placing your order so I’ll know you want this sampler. When you use the host code, it allows me to continue to offer my Samplers for the low cost of free! EXCEPTION: if your order is $150 or more do not use the host code so you can receive Stampin’ Rewards directly from Stampin’ Up!. Contact me after you’ve placed the order to let me know that you’d like the Sampler – you only need to contact me if your order is $150 or more.
Orders must be placed by today, January 23, 2022 and the Card Samplers will be mailed approximately February 2, 2023.


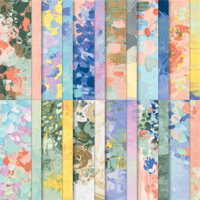
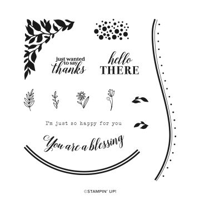
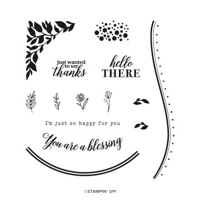
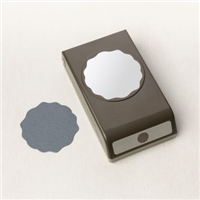
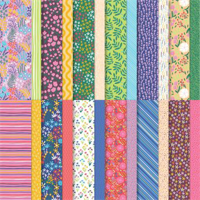
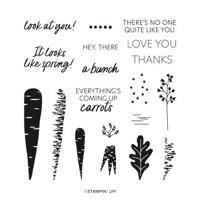
Today’s card was created using Fancy Flora 6″ x 6″ Designer Series Paper, Around the Bend stamp set and the Decorative Circle Punch, (which is currently on the Low Inventory List).
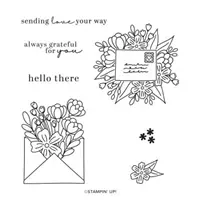
Before going any further, I want to make you aware that Stampin’ Up! has released six stamp sets and/or bundles in the Mini Catalog that come in a choice of photopolymer or cling rubber. The stamp sets/bundles are:
- Around the Bend pg. 35
- Lighting the Way pg. 18
- Fragrant Flowers pg. 21
- Silly Goose pg. 27
- Happy Labels pg. 53
With each of these stamp sets, I will be linking up the picture of the stamp set/bundle in photopolymer but in my Supply List, I’ll list both options.


I started with a piece of Highland Heather cardstock and scored it in two places (you can see the measurements below the Supply List). After burnishing my score lines, I cut two pieces of Fancy Flora Designer Series Paper and adhered them both to the front of the card.


I stamped the sentiment onto a piece of Basic White cardstock in Gorgeous Grape ink and cut it out using the Stylish Shapes Dies. Then I used the Decorative Circle Punch to cut the shape out of Highland Heather cardstock and adhered the sentiment to the front. On the back of the Highland Heather circle, I added two rows of Stampin’ Dimensionals to the right side only and then adhered it to the left flap.


To complete my card, I added a piece of Basic White cardstock to the inside of the card and added five Opaque Adhesive Backed Gems to the front of the card.

Supply List
Below you’ll find all the Stampin’ Up! supplies I used for today’s card. If you need any stamping supplies, I’d love to be your demonstrator! You can place an order by clicking any of the images below to go to my Stampin’ Up! online store.
Measurements
- Highland Heather cardstock: 8-1/2″ x 5-1/2″ score at 2-3/4″ & 7″
- Highland Heather cardstock: scrap
- Fancy Flora Designer Series Paper: 5-1/4″ x 2-1/2″
- Fancy Flora Designer Series Paper: 5-1/4″ x 1-1/4″
- Basic White cardstock (sentiment): approx. 2-1/4″ x 2-1/4″
- Basic White cardstock (inside): 5-1/4″ x 4″

Click here to see the FREE gifts you can earn with a $50 purchase
Click here to see the FREE gifts you can earn with a $100 purchase
Starter Kit Special

Click here for more information about the Starter Kit
Sunshine & Smiles Paper Pumpkin Kit

- This kit includes:
- Everything you need to create 9 cards—3 each of 3 designs—and 9 coordinating envelopes.
- A sweet springtime photopolymer stamp set.
- A Mango Melody Stampin’ Spot
- A fun peek-through window scene on each card!
- Cute precut critters and labels, fun raindrop embellishments, and more!
- Finished card size: 5-1/2″ x 4-1/4″
- Coordinating Stampin’ Up! colors: Balmy Blue, Cajun Craze, Coastal Cabana, Daffodil Delight, Flirty Flamingo, Mango Melody, Old Olive, Shaded Spruce
- This kit perfectly coordinates with the Rain or Shine Suite Collection (item number: 160556).
Order must be placed by February 10, 2023
You can cancel at any time or even skip a month
Click here to order!
An add On for the Sunshine & Smiles Paper Pumpkin Kit is the Sunshine & Smiles Dies. Must be an active Paper Pumpkin subscriber to purchase the dies. Click here for more information about the Sunshine & Smiles Dies.

Thanks for stopping by today!
by Tracy | Jan 20, 2023 | Uncategorized
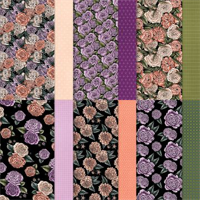
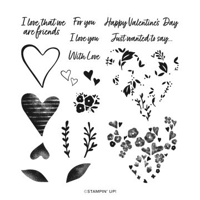
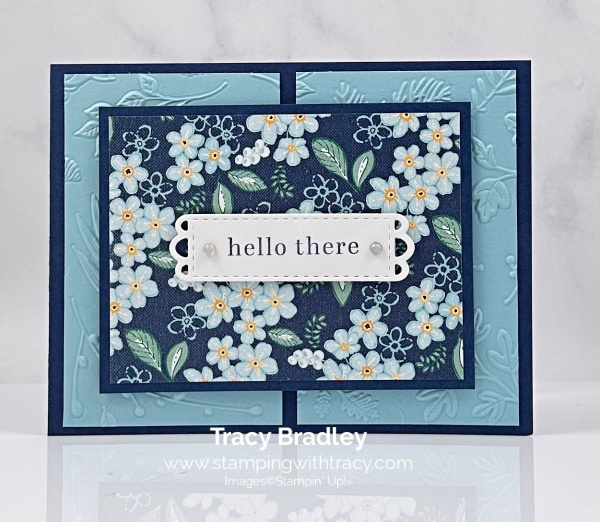
The card I’m sharing with you today is another version of the card I shared yesterday. I used Stampin’ Up! Regency Park 6″ x 6″ Designer Series Paper and the stamp set, Full of Love. You can see the other version of today’s card, here.


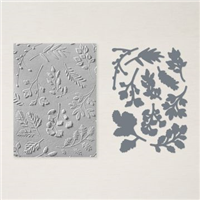
I started with a piece of Night of Navy cardstock and then embossed two pieces of Balmy Blue cardstock using the Twigs & Sprigs Embossing Folder and the Stampin’ Cut & Emboss Machine. After adhering these pieces to the front of the card, I layered a piece of Night of Navy cardstock and Regency Park Designer Series Paper. I added Stampin’ Dimensionals to the back and adhered it to the front of the card.
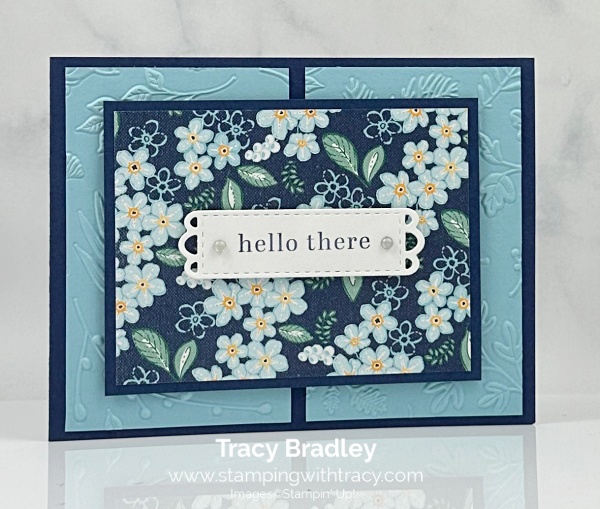

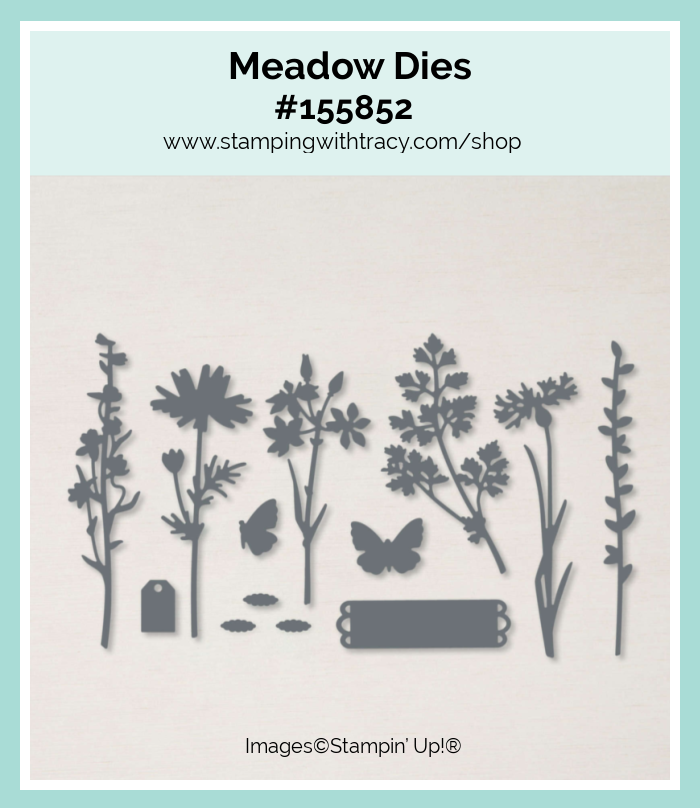
I stamped the sentiment in Night of Navy ink using the stamp set, Full of Love. I then cut the sentiment out using the Meadow Dies. I added Stampin’ Dimensionals to the back and adhered it to the front of the card.


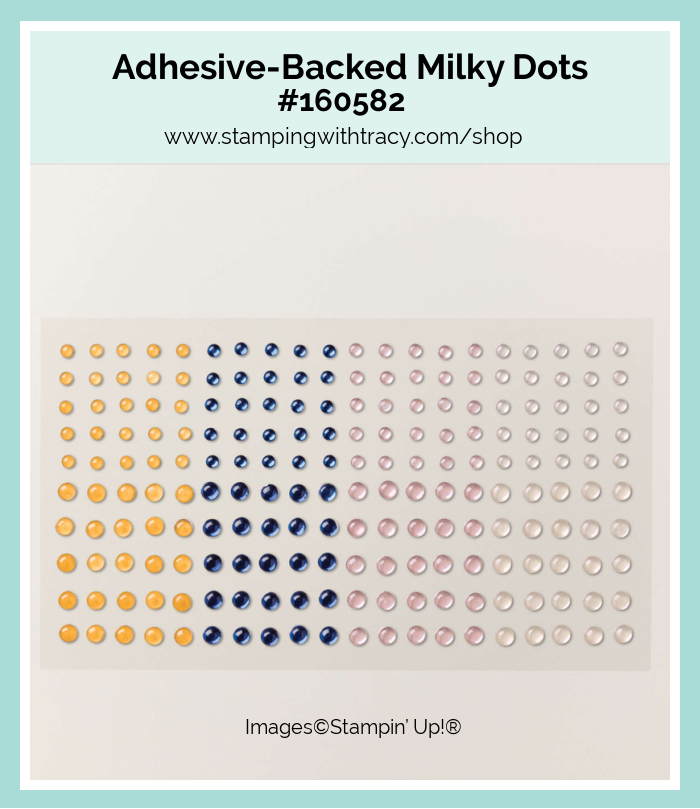
To complete my card, I added a piece of Basic White cardstock to the inside and added two Adhesive-Backed Milky Dots to each side of the sentiment.
Supply List
Below you’ll find all the Stampin’ Up! supplies I used for today’s card. If you need any stamping supplies, I’d love to be your demonstrator! You can place an order by clicking any of the images below to go to my Stampin’ Up! online store.
Measurements
- Night of Navy cardstock: 11″ x 4-1/4″ score at 5-1/2″
- Night of Navy cardstock: 4-1/4″ x 3-1/4″
- Balmy Blue cardstock: (2) 4″ x 2-1/2″
- Regency Park 6″ x 6″ Designer Series Paper: 4″ x 3″
- Basic White cardstock: 5-1/4″ x 4″
- Basic White cardstock (sentiment): approx. 3-1/4″ x 1-1/4″
Country Floral Card Sampler
Place a minimum $50 order (before tax/shipping) at my Stampin’ Up! Online Store using my special host code VXFBRDDS and I’ll send you my Country Floral Card Sampler. You’ll also receive at least one Sale-a-Bration gift directly from Stampin’ Up!
You’ll receive six card kits (two cards each of three different designs) and everything will be cut, scored, and die cut for you! You’ll quickly have six cards ready to mail or give to someone special. You’ll need to supply your own stamp set, adhesive and ink. For more details and the supplies you’ll need, please click HERE.
Don’t forget to use the host code when placing your order so I’ll know you want this sampler. When you use the host code, it allows me to continue to offer my Samplers for the low cost of free! EXCEPTION: if your order is $150 or more do not use the host code so you can receive Stampin’ Rewards directly from Stampin’ Up!. Contact me after you’ve placed the order to let me know that you’d like the Sampler – you only need to contact me if your order is $150 or more.
Orders must be placed by January 23, 2022 and the Card Samplers will be mailed approximately February 2, 2023.
Sale-a-bration 2023
Click here to see the FREE gifts you can earn with a $50 purchase
Click here to see the FREE gifts you can earn with a $100 purchase
Sunshine & Smiles Paper Pumpkin Kit
This kit includes:
- Everything you need to create 9 cards—3 each of 3 designs—and 9 coordinating envelopes.
- A sweet springtime photopolymer stamp set.
- A Mango Melody Stampin’ Spot
- A fun peek-through window scene on each card!
- Cute precut critters and labels, fun raindrop embellishments, and more!
- Finished card size: 5-1/2″ x 4-1/4″
- Coordinating Stampin’ Up! colors: Balmy Blue, Cajun Craze, Coastal Cabana, Daffodil Delight, Flirty Flamingo, Mango Melody, Old Olive, Shaded Spruce
- This kit perfectly coordinates with the Rain or Shine Suite Collection (item number: 160556).
Order must be placed by February 10, 2023
You can cancel at any time or even skip a month
Click here to order!
An add On for the Sunshine & Smiles Paper Pumpkin Kit is the Sunshine & Smiles Dies. Must be an active Paper Pumpkin subscriber to purchase the dies. Click here for more information about the Sunshine & Smiles Dies.
Thanks for stopping by today! Enjoy your weekend!
by Tracy | Jan 19, 2023 | Uncategorized
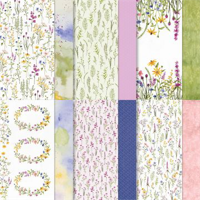
The card I’m sharing with you today was created using the Stampin’ Up! stamp set, Full of Love, and Favored Flowers Designer Series Paper. This paper is free with a $50 purchase during Sale-a-Bration. I absolutely LOVE this paper.


I started with a base of Basic Black cardstock (you can find the measurements I used below the Supply List). Then, I cut two pieces of Fresh Freesia cardstock and placed them inside the Twigs & Sprigs Embossing Folder and ran them through my Stampin’ Cut & Emboss Machine. After adhering them to the base of the card, I cut a piece of Basic Black cardstock and Favored Flowers Designer Series Paper. I layered the two pieces together, added Stampin’ Dimensionals to the back and adhered it to the front of the card.

I stamped the sentiment onto a piece of Basic White cardstock using the stamp set, Full of Love, and Memento ink. I cut the sentiment out using the Meadow Dies. I added Stampin’ Dimensionals to the back and adhered it to the center of the card.
I added a piece of Basic White cardstock to the inside of the card and then added two Opaque Adhesive-Backed Gems to each side of the sentiment.

Supply List
Below you’ll find all the Stampin’ Up! supplies I used for today’s card. If you need any stamping supplies, I’d love to be your demonstrator! You can place an order by clicking any of the images below to go to my Stampin’ Up! online store.
Measurements
- Basic Black cardstock: 11″ x 4-1/4″ score at 5-1/2″
- Basic Black cardstock: 4-1/4″ x 3-1/4″
- Fresh Freesia cardstock: (2) 4″ x 2-1/2″
- Favored Flowers Designer Series Paper: 4″ x 3″
- Basic White cardstock: 5-1/4″ x 4″
- Basic White cardstock (sentiment): approx. 3-1/4″ x 1-1/4″
Country Floral Card Sampler
Place a minimum $50 order (before tax/shipping) at my Stampin’ Up! Online Store using my special host code VXFBRDDS and I’ll send you my Country Floral Card Sampler. You’ll also receive at least one Sale-a-Bration gift directly from Stampin’ Up!
You’ll receive six card kits (two cards each of three different designs) and everything will be cut, scored, and die cut for you! You’ll quickly have six cards ready to mail or give to someone special. You’ll need to supply your own stamp set, adhesive and ink. For more details and the supplies you’ll need, please click HERE.
Don’t forget to use the host code when placing your order so I’ll know you want this sampler. When you use the host code, it allows me to continue to offer my Samplers for the low cost of free! EXCEPTION: if your order is $150 or more do not use the host code so you can receive Stampin’ Rewards directly from Stampin’ Up!. Contact me after you’ve placed the order to let me know that you’d like the Sampler – you only need to contact me if your order is $150 or more.
Orders must be placed by January 23, 2022 and the Card Samplers will be mailed approximately February 2, 2023.
Sale-a-bration 2023
Click here to see the FREE gifts you can earn with a $50 purchase
Click here to see the FREE gifts you can earn with a $100 purchase
Sunshine & Smiles Paper Pumpkin Kit
This kit includes:
- Everything you need to create 9 cards—3 each of 3 designs—and 9 coordinating envelopes.
- A sweet springtime photopolymer stamp set.
- A Mango Melody Stampin’ Spot
- A fun peek-through window scene on each card!
- Cute precut critters and labels, fun raindrop embellishments, and more!
- Finished card size: 5-1/2″ x 4-1/4″
- Coordinating Stampin’ Up! colors: Balmy Blue, Cajun Craze, Coastal Cabana, Daffodil Delight, Flirty Flamingo, Mango Melody, Old Olive, Shaded Spruce
- This kit perfectly coordinates with the Rain or Shine Suite Collection (item number: 160556).
Order must be placed by February 10, 2023
You can cancel at any time or even skip a month
Click here to order!
An add On for the Sunshine & Smiles Paper Pumpkin Kit is the Sunshine & Smiles Dies. Must be an active Paper Pumpkin subscriber to purchase the dies. Click here for more information about the Sunshine & Smiles Dies.
Thank you for stopping by today!
by Tracy | Jan 17, 2023 | Uncategorized
Today’s card features Stampin’ Up! Flowers & More Designer Series Paper. This is a HOST only product that you can choose from when you pick your Stampin’ Rewards when your order reaches $150 or more.
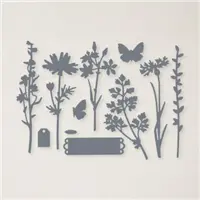
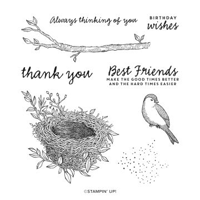
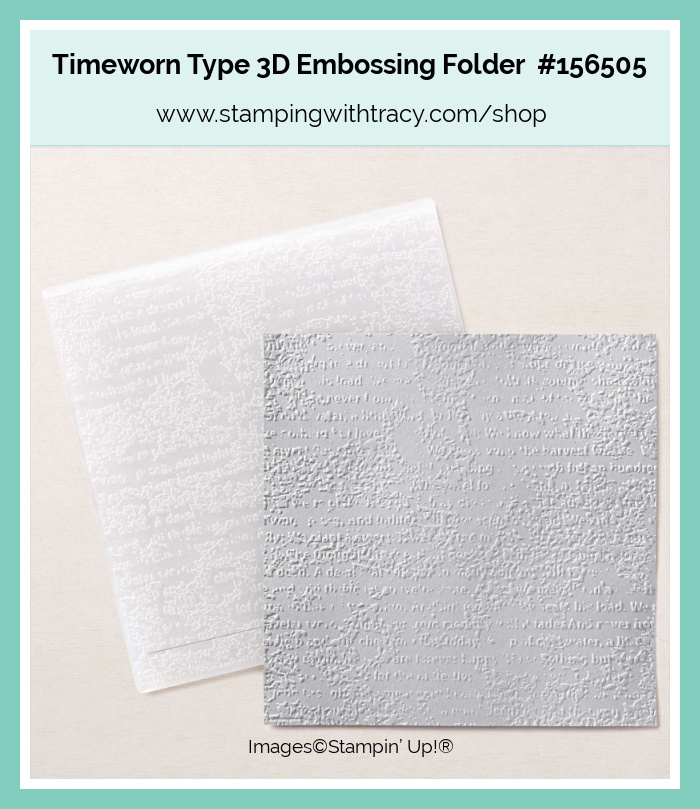
I also used the Timeworn Type 3D Embossing Folder and the Nested Friends stamp set. I shared several other versions of this card that you can see here using Dandy Designs Designer Series Paper.


I started with a piece of Tahitian Tide cardstock for the base of my card. Then, I added a layer of Basic White cardstock that I embossed using the Timeworn Type 3D Embossing Folder. I cut another piece of Tahitian Tide cardstock and layered it with a piece of Flowers & More Designer Series Paper. I added Stampin’ Dimensionals to the back and adhered it to the card front.

I stamped the sentiment onto a piece of Basic White cardstock using Tahitian Tide ink and the stamp set, Nested Friends. I cut it out using the Stitched Rectangle Dies and cut a larger rectangle, using these same dies, out of Tahitian Tide cardstock and adhered the sentiment to it. On the back, I added Stampin’ Dimensionals to the right side and down the center, only, and placed it on the the Designer Series Paper.


To complete my card, I added a piece of Basic White cardstock to the inside of the card and added three Iridescent Pearls below the sentiment.


Supply List
Below you’ll find all the Stampin’ Up! supplies I used for today’s card. If you need any stamping supplies, I’d love to be your demonstrator! You can place an order by clicking any of the images below to go to my Stampin’ Up! online store.
The Specialty Plate is used with 3D Embossing Folders.
Bundle Alert: The Nested Friends Bundle includes the Nested Friends stamp set and the Nested Friends Dies. You always save 10% when you purchase a bundle.
Measurements
- Tahitian Tide cardstock: 11″ x 4-1/4″ score at 5-1/2″
- Tahitian Tide cardstock: 4″ x 3-1/2″
- Tahitian Tide cardstock (rectangle): approx. 3-1/4″ x 1-7/8″
- Basic White cardstock: (2) 5-1/4″ x 4″
- Basic White cardstock (sentiment): approx. 3″ x 1-3/4″
- Flowers & More Designer Series Paper: 3-3/4″ x 3-1/4″
Country Floral Card Sampler
Place a minimum $50 order (before tax/shipping) at my Stampin’ Up! Online Store using my special host code VXFBRDDS and I’ll send you my Country Floral Card Sampler. You’ll also receive at least one Sale-a-Bration gift directly from Stampin’ Up!
You’ll receive six card kits (two cards each of three different designs) and everything will be cut, scored, and die cut for you! You’ll quickly have six cards ready to mail or give to someone special. You’ll need to supply your own stamp set, adhesive and ink. For more details and the supplies you’ll need, please click HERE.
Don’t forget to use the host code when placing your order so I’ll know you want this sampler. When you use the host code, it allows me to continue to offer my Samplers for the low cost of free! EXCEPTION: if your order is $150 or more do not use the host code so you can receive Stampin’ Rewards directly from Stampin’ Up!. Contact me after you’ve placed the order to let me know that you’d like the Sampler – you only need to contact me if your order is $150 or more.
Orders must be placed by January 23, 2022 and the Card Samplers will be mailed approximately February 2, 2023.
Click here to place an order
Earn free product with every $50 or $100 purchase (before tax and shipping). If you purchase a $100 in product, you can choose two $50 items or one $100 item. If your purchase is $150, you can purchase three $50 items or one $50 item and one $100 item. There’s no limit to how many free items you can earn!
Click here to see the FREE gifts you can earn with a $50 order
Click here to see the FREE gifts you can earn with a $100 order
Thanks for stopping by today!
by Tracy | Jan 16, 2023 | Card Sampler
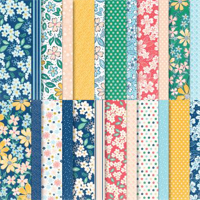
My Country Floral Card Sampler is now available but only for a limited time!
Place a minimum $50 order using my special host code and my gift to you will be my Country Floral Card Sampler. Read on for all the details.
You’ll receive all the materials to make six cards (two of each design) and each one is packaged separately. You’ll quickly have a card that’s ready to be mailed out to someone special. Once you’ve made all the cards in the Sampler, you’ll be able to easily replicate each card by following the easy to follow directions in the PDF (pictures are included as well).
Here’s how you can earn it FREE!
- Place a minimum $50 order (before tax/shipping) at my Stampin’ Up! online store.
- Use my special Country Floral Card Sampler Host Code when placing your order (see below) BUT if your order reaches $150 or more, please DO NOT use the host code so you can receive Stampin’ Rewards (free product directly from Stampin’ Up!). Once you place your order, simply drop me an email (only necessary if your order is over $150) letting me know that you’d like the Country Floral Card Sampler.
- Place your order on or before January 23, 2023.
Here’s What You’ll Receive:
- All the paper and embellishments needed to make six cards (two each of three different designs). The paper will be cut, scored, and die cut for you! Envelopes will also be provided. You’ll need to supply your own adhesive, ink and stamp set.
- A PDF Tutorial with instructions, pictures, cutting measurements and a complete supply list of all the products used.
- Earn at least one Bradley Point (earn ten Bradley Points and redeem them for free product).
- Earn at least one Sale-a-Bration gift directly from Stampin’ Up!
All the Other Important Information:
- Your Country Floral Card Sampler will ship first-class mail approximately February 2, 2023 and will be mailed to the address used on your online order.
- You’ll receive an email when I mail your Card Sampler and the PDF Tutorial will be included in that email.
- When using the Country Floral Card Sampler Host Code to place your order, you will not qualify for other current host code rewards.
- Per Stampin’ Up! policy, Card Samplers can only be mailed within the United States.
The special Country Floral Card Sampler HOST CODE will close on January 23, 2022 and after that date, the Card Sampler will no longer be available.
Approximate ship date of the Card Sampler is February 2, 2023.
Click here to place an order
Supplies Needed To Create the Card Sampler
Listed below are the supplies you’ll need to complete the cards exactly as shown (or you can use what you already own). Simply click any of the products and you’ll be taken to my Stampin’ Up! online store. When placing your order, don’t forget to use the special Card Sampler Host Code (please do not use host code if your order is over $150 – see above).
Bundle Alert: The Country Bouquet Bundle #160383 includes the Country Bouquet Stamp Set and the Country Bouquet Punch. You always save 10% when you purchase a bundle.
Click here to place an order
If you aren’t sure how to use a host code, click here!
Earn free product with every $50 or $100 purchase (before tax and shipping). If you purchase a $100 in product, you can choose two $50 items or one $100 item. If your purchase is $150, you can purchase three $50 items or one $50 item and one $100 item. There’s no limit to how many free items you can earn!
Choices with a $50 Purchase
Choices with a $100 Purchase
An add On for the Sunshine & Smiles Paper Pumpkin Kit is the Sunshine & Smiles Dies. Must be an active Paper Pumpkin subscriber to purchase the dies. Click here for more information!
Thanks for stopping by today!
by Tracy | Jan 13, 2023 | Uncategorized
I have one more pocket card for you today using Favored Flowers Designer Series Paper. It’s really hard to stop making these cards with paper that’s so pretty!! You can see the other pocket cards I created here and here. Favored Flowers Designer Series Paper is free with a $50 purchase during Sale-a-Bration!

I started with a piece of Basic Black cardstock and scored the paper in two places to make a flap and pocket (you can find the measurements I used below the Supply List). I added Tear & Tape on the sides of the smaller scored section and folded up to make my pocket. I placed a piece of Basic White cardstock in the pocket.

Next, I cut two pieces of Favored Flowers Designer Series Paper to the pocket and another one to the front of the card. I stamped the sentiment onto Basic White cardstock using the stamp set, Kind & Sincere, and Memento Ink. I cut it out using the Stitched Rectangle Dies. I cut a larger piece of Basic Black cardstock and adhered the sentiment to it. I then added Stampin’ Dimensionals just at the top of the sentiment and adhered it to the top flap.


To complete my card, I added three Iridescent Rhinestones Basic Jewels below the sentiment.

Supply List
Below you’ll find all the Stampin’ Up! supplies I used for today’s card. If you need any stamping supplies, I’d love to be your demonstrator! You can place an order by clicking any of the images below to go to my Stampin’ Up! online store.
Measurements
- Basic Black cardstock: 8-1/2″ x 5-1/2″ score at 2-3/4″ and 6-3/4″
- Basic Black cardstock: 3-1/2″ x 1-1/2″
- Basic White cardstock (sentiment): approx. 3-3/4″ x 1-3/4″
- Basic White cardstock (piece in pocket): 4-3/4″ x 3-1/2″
- Favored Flowers Designer Series Paper: 5-1/4″ x 2-1/2″
- Favored Flowers Designer Series Paper: 5-1/4″ x 1″
Sunshine & Smiles Paper Pumpkin Kit
This kit includes:
- Everything you need to create 9 cards—3 each of 3 designs—and 9 coordinating envelopes.
- A sweet springtime photopolymer stamp set.
- A Mango Melody Stampin’ Spot
- A fun peek-through window scene on each card!
- Cute precut critters and labels, fun raindrop embellishments, and more!
- Finished card size: 5-1/2″ x 4-1/4″
- Coordinating Stampin’ Up! colors: Balmy Blue, Cajun Craze, Coastal Cabana, Daffodil Delight, Flirty Flamingo, Mango Melody, Old Olive, Shaded Spruce
- This kit perfectly coordinates with the Rain or Shine Suite Collection (item number: 160556)
Order must be placed by February 10, 2023
You can cancel at any time or even skip a month
Click here to order!
Sunshine & Smiles Dies (available while supplies last)
$6.00
This add-on includes:
- One coordinating frog-shaped die: 1-1/8″ x 7/8″
- One coordinating flower bouquet die: 1-1/8″ x 7/8″
Earn FREE product with every $50 or $100 Purchase
Choices with a $50 Purchase
Choices with a $100 Purchase
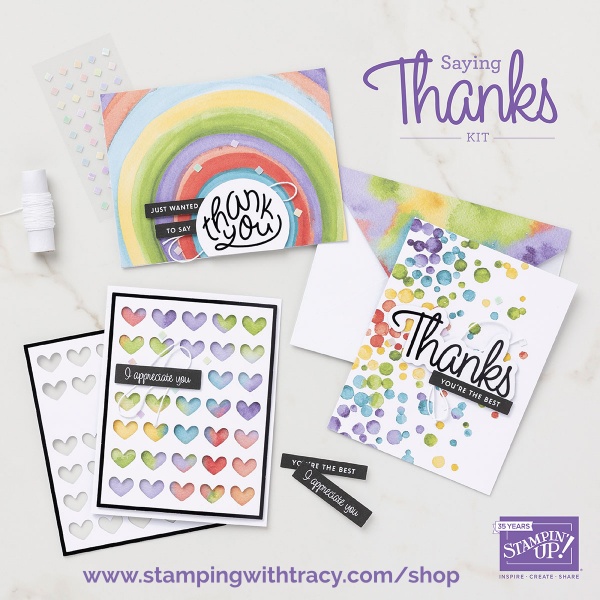
Saying Thanks Kit
This kit includes:
- Enough supplies to create 9 cards—3 each of 3 designs—and 9 coordinating envelopes.
- Printed die-cut words, precut pieces, and enough adhesive to complete projects.
- White baker’s twine and iridescent diamond sequins.
- Finished card size: 5-1/2″ x 4-1/4″
- Coordinating colors: Basic Black, Daffodil Delight, Gorgeous Grape, Granny Apple Green, Poppy Parade, Tahitian Tide
Click here to order the Saying Thanks Kit

Thanks for stopping by today! Enjoy your weekend!
by Tracy | Jan 11, 2023 | Uncategorized
Today I have two cards to share with you and both were made using Stampin’ Up! Dainty Flowers Designer Series Paper. You can earn this paper, FREE, with a $50 purchase during Sale-a-Bration. Several days ago I shared this same style of card using Favored Flowers Designer Series Paper, another Sale-a- Bration FREE product with a $50 purchase, and you can see that card here.


I started with a piece of Fresh Freesia cardstock, scored it in two places to create a flap and a pocket (you can find the measurements I used below the Supply List). I added Tear & Tape to the sides of the small section and folded it up to create my pocket.
I cut two pieces of Dainty Flowers Designer Series Paper and attached one piece to the pocket and one to the upper flap.

I cut a piece of Basic White cardstock that I inserted in the pocket. I stamped the sentiment using the stamp set, Kind & Sincere, in Rich Razzleberry ink onto Basic White cardstock and cut it out using the Stitched Rectangle Dies. I cut a piece of Fresh Freesia cardstock, a little bit bigger than the sentiment, and adhered the sentiment to the front. I added Stampin’ Dimensionals to the top part only and adhered it to the top flap.
To complete my card, I added three Opaque Adhesive-Backed Gems below the sentiment.
Here’s another version of the card using the same design of Dainty Flowers Designer Series Paper but I used Rich Razzlebery cardstock and Rich Razzleberry ink.

Supply List
Below you’ll find all the Stampin’ Up! supplies I used for today’s card. If you need any stamping supplies, I’d love to be your demonstrator! You can place an order by clicking any of the images below to go to my Stampin’ Up! online store.
Measurements
- Fresh Freesia or Rich Razzleberry cardstock: 8-1/2″ x 5-1/2″ score at 2-3/4″ and 6-3/4″
- Fresh Freesia or Rich Razzleberry cardstock: 3-1/2″ x 1-1/2″
- Dainty Flowers Designer Series Paper: 5-1/4″ x 1″
- Dainty Flowers Designer Series Paper:5-1/4″ x 2-1/2″
- Basic White cardstock (in pocket): 4-3/4″ x 3-1/2″
- Basic White cardstock (sentiment): approx. 3-3/4″ x 1-3/4″
Choose a free Sale-a-Bration product with every $50 or $100 you spend (before tax and shipping).
These are the products you can choose from for every $50 you spend:
These are the products you can choose from for every $100 you spend:

Starter Kit Special
During Sale-a-Bration, there are three options to purchase the Starter Kit but with each one, you’ll be able to choose $50 more in product than the standard Starter Kit offer! It’s a great time to purchase the Starter Kit!
Here are the three options during Sale-a-Bration when you purchase the Starter Kit:
- Option 1: The exclusive Boho Blue Mini Machine ($63 value) + your choice of $175 of Stampin’ Up! products for only $129.
- Option 2: The original white Mini Machine ($63 value) + your choice of $175 of Stampin’ Up! products for only $129.
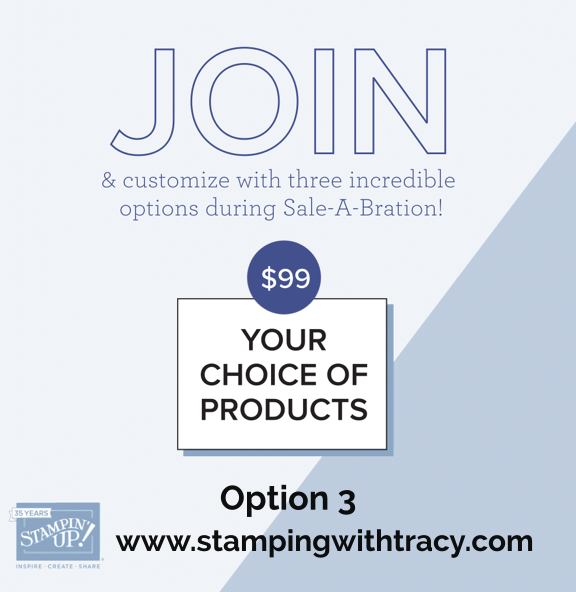
- Option 3: Your choice of $175 of Stampin’ Up! products for only $99.
*That’s $50 more product than the standard Starter Kit offer!
The Starter Kit is for anyone that loves Stampin’ Up! product!
If you have any questions, please don’t hesitate to contact me!
For more information about the Starter Kit, click here.
Click here if you’re ready to purchase the Starter Kit!


Thanks for stopping by today! Enjoy your day!
by Tracy | Jan 10, 2023 | Card Sampler

Today’s the last day you can place a minimum $50 order using my special host code and earn my Something Fancy Card Sampler, absolutely FREE. Read on for all the details.
You’ll receive all the materials to make six cards (two of each design) and each one is packaged separately. You’ll quickly have a card that’s ready to be mailed out to someone special. Once you’ve made all the cards in the Sampler, you’ll be able to easily replicate each card by following the easy to follow directions in the PDF (pictures are included as well).
Here’s how you can earn it FREE!
- Place a minimum $50 order (before tax/shipping) at my Stampin’ Up! online store.
- Use my special Something Fancy Card Sampler Host Code when placing your order (see below) BUT if your order reaches $150 or more, please DO NOT use the host code so you can receive Stampin’ Rewards (free product directly from Stampin’ Up!). Once you place your order, simply drop me an email (only necessary if your order is over $150) letting me know that you’d like the Something Fancy Card Sampler.
- Place your order on or before January 10, 2023.

Here’s What You’ll Receive:
All the paper and embellishments needed to make six cards (two each of three different designs). The paper will be cut, scored, and die cut for you! Envelopes will also be provided. You’ll need to supply your own adhesive, ink and stamp set.
- A PDF Tutorial with instructions, pictures, cutting measurements and a complete supply list of all the products used.
- Earn at least one Bradley Point (earn ten Bradley Points and redeem them for free product).
- Earn at least one Sale-a-Bration gift directly from Stampin’ Up!
All the Other Important Information:
- Your Something Fancy Card Sampler will ship first-class mail approximately January 20, 2023 and will be mailed to the address used on your online order.
- You’ll receive an email when I mail your Card Sampler and the PDF Tutorial will be included in that email.
- When using the Something Fancy Card Sampler Host Code to place your order, you will not qualify for other current host code rewards.
- Per Stampin’ Up! policy, Card Samplers can only be mailed within the United States.
The special Something Fancy Card Sampler HOST CODE will close today, January 10, 2022 and after today, the Card Sampler will no longer be available.
Approximate ship date of the Card Sampler is January 20, 2023.
Click here to place an order
Supplies Needed To Create the Card Sampler
Listed below are the supplies you’ll need to complete the cards exactly as shown (or you can use what you already own). Simply click any of the products and you’ll be taken to my Stampin’ Up! online store. When placing your order, don’t forget to use the special Card Sampler Host Code (please do not use host code if your order is over $150 – see above).
Bundle Alert: The Something Fancy Bundle #160425, includes the Something Fancy Stamp Set and the Something Fancy Dies. You always save 10% when you purchase a bundle.
Click here to place an order
If you aren’t sure how to use a host code, click here!
Click here to see the FREE gifts you can earn with a $50 order
Click here to see the FREE gifts you can earn with a $100 order
Saying Thanks Kit
This kit includes:
- Enough supplies to create 9 cards—3 each of 3 designs—and 9 coordinating envelopes.
- Printed die-cut words, precut pieces, and enough adhesive to complete projects.
- White baker’s twine and iridescent diamond sequins.
- Finished card size: 5-1/2″ x 4-1/4″
- Coordinating colors: Basic Black, Daffodil Delight, Gorgeous Grape, Granny Apple Green, Poppy Parade, Tahitian Tide
Click HERE to order the Saying Thanks Kit
Thanks for stopping by today!
by Tracy | Jan 9, 2023 | Uncategorized
Today’s card was created using Favored Flowers Designer Series Paper, a Sale-a-Bration gift you can earn FREE with a $50 order. I also used the new stamp set, Kind & Sincere.

I started with a piece of Fresh Freesia cardstock for the base of my card. I scored it in two places to create a pocket and a flap (you can find the measurements I used below the Supply List). I used Tear & Tape adhesive on the sides of the smaller section to create my pocket.

Then, I cut two pieces of Favored Flowers Designer Series Paper and adhered one to the top of the card and the other on the bottom section where the pocket is. I cut a piece of Basic White cardstock and inserted it in the pocket.

On a piece of Basic White cardstock, I stamped the sentiment in Fresh Freesia ink using the stamp set, Kind & Sincere, and cut it out using the Stitched Rectangle Dies. I cut a piece of Fresh Freesia cardstock, a little bit larger than the sentiment, and then adhered the sentiment to the front. On the back, I added Stampin’ Dimensionals just at the top and adhered it to the top flap. To complete my card, I added three Adhesive Backed Milky Dots below the sentiment.

Supply List
Below you’ll find all the Stampin’ Up! supplies I used for today’s card. If you need any stamping supplies, I’d love to be your demonstrator! You can place an order by clicking any of the images below to go to my Stampin’ Up! online store.
Measurements
- Fresh Freesia cardstock: 8-1/2″ x 5-1/2″ score at 2-3/4″ & 6-3/4″
- Fresh Freesia cardstock: 3-1/2″ x 1-1/2″
- Favored Flowers Designer Series Paper: 5-1/4″ x 1″
- Favored Flowers Designer Series Paper: 5-1/4″ x 2-1/2″
- Basic White cardstock (for pocket): 4-3/4″ x 3-1/2″
- Basic White (sentiment): approx. 3-3/4″ x 1-3/4″
Something Fancy Card Sampler
Place a minimum $50 order (before tax/shipping) at my Stampin’ Up! Online Store using my special host code 3Z2A792U and I’ll send you my Something Fancy Card Sampler. You’ll also receive at least one Sale-a-Bration gift directly from Stampin’ Up!
You’ll receive six card kits (two cards each of three different designs) and everything will be cut, scored, and die cut for you! You’ll quickly have six cards ready to mail or give to someone special. You’ll need to supply your own stamp set, adhesive and ink. For more details and the supplies you’ll need, please click HERE.
Don’t forget to use the host code when placing your order so I’ll know you want this sampler. When you use the host code, it allows me to continue to offer my Samplers for the low cost of free! EXCEPTION: if your order is $150 or more do not use the host code so you can receive Stampin’ Rewards directly from Stampin’ Up!. Contact me after you’ve placed the order to let me know that you’d like the Sampler – you only need to contact me if your order is $150 or more.
Orders must be placed by tomorrow, January 10, 2022 and the Card Samplers will be mailed approximately January 20, 2023.
Saying Thanks Kit
This kit includes:
- Enough supplies to create 9 cards—3 each of 3 designs—and 9 coordinating envelopes.
- Printed die-cut words, precut pieces, and enough adhesive to complete projects.
- White baker’s twine and iridescent diamond sequins.
- Finished card size: 5-1/2″ x 4-1/4″
- Coordinating colors: Basic Black, Daffodil Delight, Gorgeous Grape, Granny Apple Green, Poppy Parade, Tahitian Tide
Click here to purchase the Saying Thanks Kit
Click here to see the FREE gifts you can earn with a $50 order
Click here to see the FREE gifts you can earn with a $100 order
Starter Kit Options During Sale-a-Bration
Stampin’ Up! usually offers a great Starter Kit promotion during Sale-a-Bration and this year is no different (you can earn $50 more in product).
Normally the Starter Kit is $99 and you get to choose $125 in Stampin’ Up! product but during Saleabration, you’ll choose $175 in product. Or if you’d like to add the exclusive Boho Blue Mini Stampin’ Cut & Emboss Machine (or the white machine), you’ll pay $129 and also receive $175 in product.
- Option 1: The exclusive Boho Blue Mini Stampin’ Cut & Emboss Machine ($63 value) + your choice of $175 of Stampin’ Up! products for $129
- Option 2: The original white Mini Machine ($63 value) + your choice of $175 of Stampin’ Up! products for $129
- Option 3: Your choice of $175 USD of Stampin’ Up! products for $99
Click here to purchase the Starter Kit
If you have questions, please contact me!
Thanks for stopping by today!
by Tracy | Jan 6, 2023 | Uncategorized
The card I’m sharing today was made using a new Stampin’ Up! stamp set from the January – June Mini Catalog called Best Day. This was a stamp set that jumped out at me and I had to get it. I also used Dandy Designs Designer Series Paper which can be chosen as a free gift when you purchase $100 in Stampin’ Up! product. This is a huge package of paper with 48 sheets!


I started with a piece of Fresh Freesia cardstock for the base of my card. Then I added a layer of Basic White cardstock, Fresh Freesia cardstock and Dandy Designs Designer Series Paper. I added Stampin’ Dimensionals to the back and adhered it to the card base.

I stamped the kitty in Memento ink onto a piece of Basic White cardstock and then colored it using these Stampin’ Blends:
- Light & Dark Gray Granite
- Dark Fresh Freesia
- Dark Petal Pink
- Light Daffodil Delight

I cut the kitty out using the Stylish Shapes Dies and then added Stampin’ Dimensionals to the back and adhered it to the front of the card. I stamped the sentiment in Memento Ink using the Best Day stamp set and adhered it underneath the kitty. I added five rhinestones to the front (three small and two big) to the Dandy Designs Designer Series Paper. To complete my card, I added a piece of Basic White cardstock to the inside.

Supply List
Below you’ll find all the Stampin’ Up! supplies I used for today’s card. If you need any stamping supplies, I’d love to be your demonstrator! You can place an order by clicking any of the images below to go to my Stampin’ Up! online store.
**** PLEASE NOTE: There’s a glitch in the program I’m using to list the products I used to make my card. Dandy Designs is not coming up FREE in the table below but if you click it, you’ll be taken to the Stampin’ Up! website where you’ll see that it is FREE with a $100 purchase. ****
Measurements
- Fresh Freesia cardstock: 11″ x 4-1/4″ score at 5-1/2″
- Fresh Freesia cardstock: 4-3/4″ x 3-1/2″
- Basic White cardstock: 5″ x 3-3/4″
- Basic White cardstock (inside): 5-1/4″ x 4″
- Basic White cardstock (large circle): approx. 3-1/2″ x 3-1/2″
- Basic White cardstock (small circle): approx. 2-1/4″ x 2-1/4″
- Dandy Designs Designer Series Paper: 4-1/2″ x 3-1/4″
Something Fancy Card Sampler
Place a minimum $50 order (before tax/shipping) at my Stampin’ Up! Online Store using my special host code 3Z2A792U and I’ll send you my Something Fancy Card Sampler. You’ll also receive at least one Sale-a-Bration gift directly from Stampin’ Up!
You’ll receive six card kits (two cards each of three different designs) and everything will be cut, scored, and die cut for you! You’ll quickly have six cards ready to mail or give to someone special. You’ll need to supply your own stamp set, adhesive and ink. For more details and the supplies you’ll need, please click HERE.
Don’t forget to use the host code when placing your order so I’ll know you want this sampler. When you use the host code, it allows me to continue to offer my Samplers for the low cost of free! EXCEPTION: if your order is $150 or more do not use the host code so you can receive Stampin’ Rewards directly from Stampin’ Up!. Contact me after you’ve placed the order to let me know that you’d like the Sampler – you only need to contact me if your order is $150 or more.
Orders must be placed by January 10, 2022 and the Card Samplers will be mailed approximately January 20, 2023.
Click here to place an order
Click here to see the FREE gifts you can earn with a $50 order
Click here to see the FREE gifts you can earn with a $100 order
There’s no limit to how many gifts you can earn!
Saying Thanks Kit
This kit includes:
- Enough supplies to create 9 cards—3 each of 3 designs—and 9 coordinating envelopes.
- Printed die-cut words, precut pieces, and enough adhesive to complete projects.
- White baker’s twine and iridescent diamond sequins.
- Finished card size: 5-1/2″ x 4-1/4″ (14 x 10.8 cm).
- Coordinating colors: Basic Black, Daffodil Delight, Gorgeous Grape, Granny Apple Green, Poppy Parade, Tahitian Tide
- Click here to purchase the Saying Thanks Kit
Thanks for stopping by today! Have a wonderful weekend!
by Tracy | Jan 5, 2023 | Uncategorized
Yay! The day has finally arrived! You can now order from the new January – April Mini Catalog. Plus you can also earn free product during Sale-a-Bration which also starts today! See what’s new in the Mini Catalog, HERE.

During Sale-a-Bration, you can earn free gifts with every $50 or $100 order!
Click here to see what you can earn with a $50 order!
Click here to see what you can earn with a $100 order!
Sale-a-Bration Starter Kit Promotion
Sale-a-Bration is a great time to purchase the Stampin’ Up! Starter Kit! Who’s the Starter Kit for? Absolutely everyone! If you’d like to get a discount on all your Stampin’ Up! purchases, the Starter Kit is for you! If you’d like to start a business, the Starter Kit is also for you. I’ve mentioned this before, but when I bought the Starter Kit, I was only interested in the discount because who doesn’t want a discount on the products they love?
Stampin’ Up! usually offers a great Starter Kit promotion during Sale-a-Bration and this year is no different (you can earn $50 more in product).
Normally the Starter Kit is $99 and you get to choose $125 in Stampin’ Up! product but during Saleabration, you’ll choose $175 in product. Or if you’d like to add the exclusive Boho Blue Mini Stampin’ Cut & Emboss Machine (or the white machine), you’ll pay $129 and also receive $175 in product.
- Option 1: The exclusive Boho Blue Mini Stampin’ Cut & Emboss Machine ($63 value) + your choice of $175 of Stampin’ Up! products for $129
- Option 2: The original white Mini Machine ($63 value) + your choice of $175 of Stampin’ Up! products for $129
- Option 3: Your choice of $175 USD of Stampin’ Up! products for $99
Click HERE to purchase the Starter Kit!
If you have any questions, please contact me and ask away!
Something Fancy Card Sampler
Place a minimum $50 order (before tax/shipping) at my Stampin’ Up! Online Store using my special host code 3Z2A792U and I’ll send you my Something Fancy Card Sampler.
You’ll receive six card kits (two cards each of three different designs) and everything will be cut, scored, and die cut for you! You’ll quickly have six cards ready to mail or give to someone special. You’ll need to supply your own stamp set, adhesive and ink. For more details and the supplies you’ll need, please click HERE.
Don’t forget to use the host code when placing your order so I’ll know you want this sampler. When you use the host code, it allows me to continue to offer my Samplers for the low cost of free! EXCEPTION: if your order is $150 or more do not use the host code so you can receive Stampin’ Rewards directly from Stampin’ Up!. Contact me after you’ve placed the order to let me know that you’d like the Sampler – you only need to contact me if your order is $150 or more.
Orders must be placed by January 10, 2022 and the Card Samplers will be mailed approximately January 20, 2023.
Saying Thanks Kit Now Available
This kit includes:
- Enough supplies to create 9 cards—3 each of 3 designs—and 9 coordinating envelopes.
- Printed die-cut words, precut pieces, and enough adhesive to complete projects.
- White baker’s twine and iridescent diamond sequins.
- Finished card size: 5-1/2″ x 4-1/4″ (14 x 10.8 cm).
- Coordinating colors: Basic Black, Daffodil Delight, Gorgeous Grape, Granny Apple Green, Poppy Parade, Tahitian Tide.
Click here to purchase the Saying Thanks Kit
Thanks so much for stopping by today!
by Tracy | Jan 4, 2023 | Uncategorized
Thank you for visiting my blog today. I’ve been sick since the day after Christmas so my blog posts have been a bit sporadic.
As you may know, the January – April Mini Catalog 2023 will go live tomorrow and Sale-a- Bration (free product for every $50 or $100 purchase) also begins!! If you’re a customer of mine, you should have already received your Mini Catalog and Sale-a-Bration brochure, but if you didn’t, please let me know.
Today I’m releasing my newest Card Sampler (just in time for the release of the new Mini Catalog) which features Regency Park Designer Series Paper and the stamp set, Something Fancy. I also have some information about our newest card kit collection further down in my post.
Place a minimum $50 order using my special host code and my gift to you will be my Something Fancy Card Sampler. Read on for all the details.
You’ll receive all the materials to make six cards (two of each design) and each one is packaged separately. You’ll quickly have a card that’s ready to be mailed out to someone special. Once you’ve made all the cards in the Sampler, you’ll be able to easily replicate each card by following the easy to follow directions in the PDF (pictures are included as well).
Here’s how you can earn it FREE!
- Place a minimum $50 order (before tax/shipping) at my Stampin’ Up! online store.
- Use my special Something Fancy Card Sampler Host Code when placing your order (see below) BUT if your order reaches $150 or more, please DO NOT use the host code so you can receive Stampin’ Rewards (free product directly from Stampin’ Up!). Once you place your order, simply drop me an email (only necessary if your order is over $150) letting me know that you’d like the Something Fancy Card Sampler.
- Place your order on or before January 10, 2023.
Here’s What You’ll Receive:
- All the paper and embellishments needed to make six cards (two each of three different designs). The paper will be cut, scored, and die cut for you! Envelopes will also be provided. You’ll need to supply your own adhesive, ink and stamp set.
- A PDF Tutorial with instructions, pictures, cutting measurements and a complete supply list of all the products used.
- Earn at least one Bradley Point (earn ten Bradley Points and redeem them for free product)..
All the Other Important Information:
- Your Something Fancy Card Sampler will ship first-class mail approximately January 20, 2023 and will be mailed to the address used on your online order.
- You’ll receive an email when I mail your Card Sampler and the PDF Tutorial will be included in that email.
- When using the Something Fancy Card Sampler Host Code to place your order, you will not qualify for other current host code rewards.
- Per Stampin’ Up! policy, Card Samplers can only be mailed within the United States.
The special Something Fancy Card Sampler HOST CODE will close on January 10, 2022 and after that date, the Card Sampler will no longer be available.
Approximate ship date of the Card Sampler is January 20, 2023.
Click here to place an order
Supplies Needed To Create the Card Sampler
Listed below are the supplies you’ll need to complete the cards exactly as shown (or you can use what you already own). Simply click any of the products and you’ll be taken to my Stampin’ Up! online store. When placing your order, don’t forget to use the special Card Sampler Host Code (please do not use host code if your order is over $150 – see above).
You will also need the Something Fancy stamp set #160416, to complete the cards exactly as shown. This stamp set will be available on January 5th.
If you aren’t sure how to use a host code, click here!
Saying Thanks Kit
The Saying Thanks Kit will be available starting January 5th. Usually once a kit sells out it’s gone but you can always check the Kits Collection page by clicking here to see what’s available.
This kit includes:
- Enough supplies to create 9 cards—3 each of 3 designs—and 9 coordinating envelopes.
- Printed die-cut words, precut pieces, and enough adhesive to complete projects.
- White baker’s twine and iridescent diamond sequins.
- Finished card size: 5-1/2″ x 4-1/4″
- Coordinating colors: Basic Black, Daffodil Delight, Gorgeous Grape, Granny Apple Green, Poppy Parade, Tahitian Tide.

Today’s the last day to purchase retiring products from the Stampin’ Up! Mini Catalog 2022.
Click here to see what’s still available!
Today is the last day Fitting Florets Designer Series Paper will be available. Click here to see it over at my online store.

Thanks for stopping by today!